The Power Query Editor in Power BI is a strong tool for transforming data. It helps you clean and manipulate data right within Microsoft Power BI.
In this tutorial, I will explain how to create table in power query, including:
- How to use the blank query to create a new table in power query
- Add a column in the power query editor
Power Query Create Table
To create a table in power query, follow the steps below:
1. Open Power BI Desktop, then under the Home tab, click Transform data.

2. In the Power Query Editor, Under the Home tab, click Enter Data.

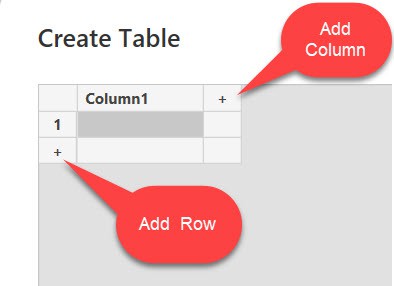
3. Then the below Create Table dialog box will appear. We use the ‘+‘ symbols to add new columns and rows.
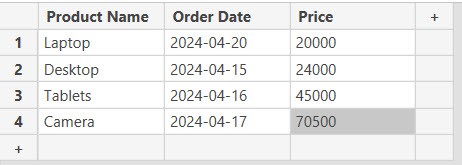
4. We can add data to the table by typing it into the grid.
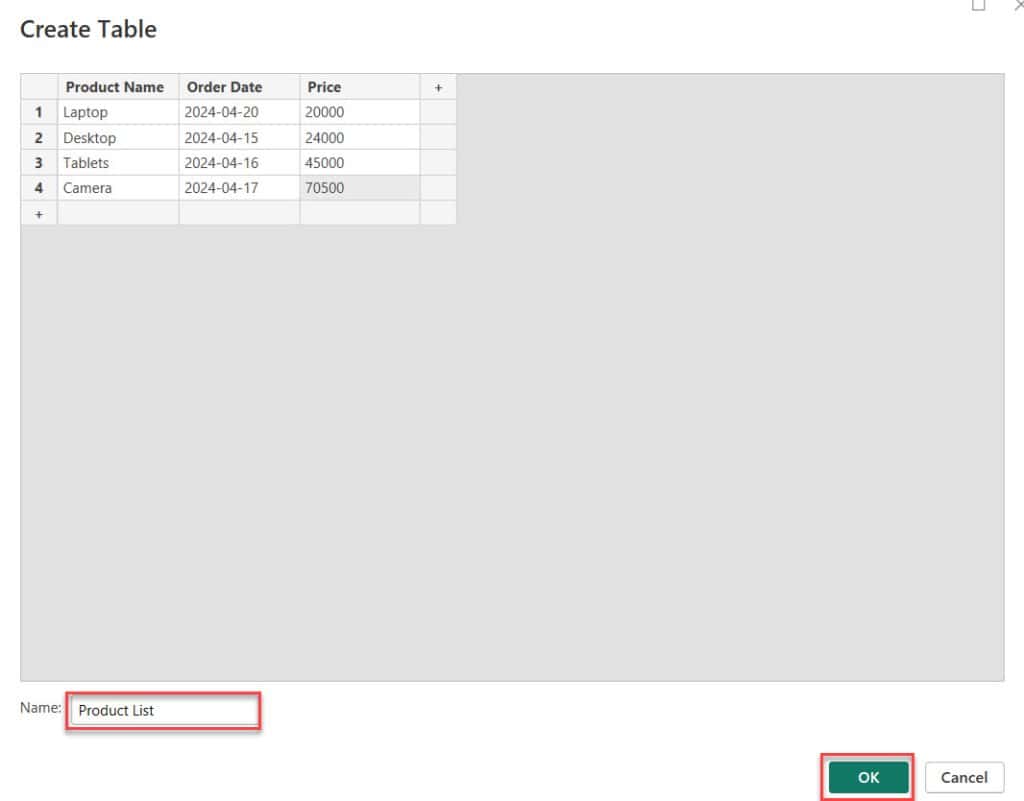
5. Now, our table is created. Then, specify the table name under the Name field and Click Load.
6. Now, you can see the table get created directly inside the Power query editor.
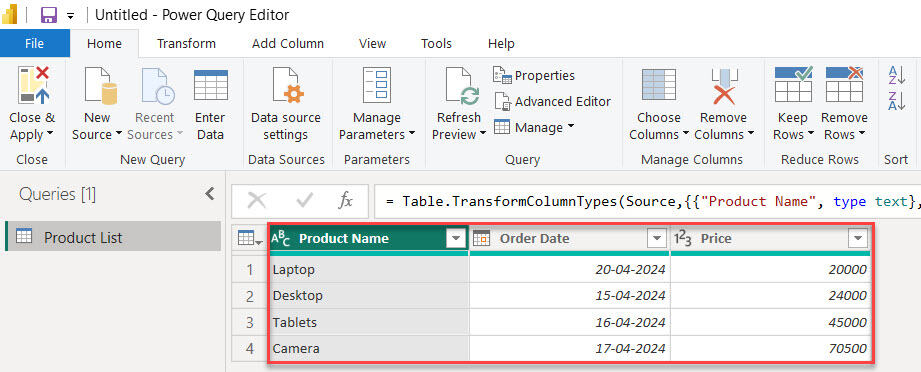
This way, you can create a table in the Power Query editor.
How to Create New table in Power Query
Here, we will see how to use the blank query to create a new table in Microsoft Power BI.
The Blank query option in the Power Query Editor provides a blank space where you can write new queries from scratch to create a new table or perform other operations.
Syntax:
 #table(
    {
      "First Column Name",
      "Second Column Name"
    },
    {
      {
        First Row First column Value,First Row Second column Value
      },
      {
        Second Row First column Value,Second Row Second column Value
      }
    }
  )
Now follow the below steps:
1. Open Power BI Desktop, then under the Home tab, click Transform data.

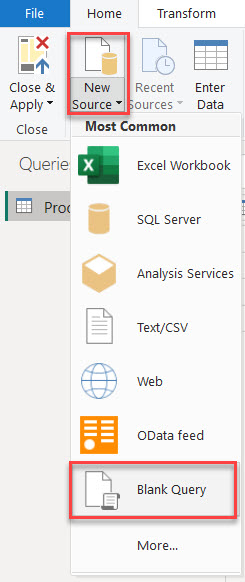
2. In Power Query Editor, click on the New source and select Blank Query.
3. In the Froumal bar, put the below expression.
= #table({"Name","Department"},{{"Alex","IT"},{"John","Finance"},{"Ruby","IT"}})Where:
- Name = First Column Name
- Department = Second Column Name
- Alex, John, Ruby = First column Values
- IT, Finance, IT = Second column Value

4. Then, you can see a table created in the Power query editor.

This way, you can create a table using power query m.
Power BI how to use Power query to add a column
Let’s learn how to put in a new column from a table we already have using Power Query Editor.
I hope you created a table like a screenshot:

Now Follow the below steps to add a column:
1. Under the Home tab, click Transform data.

2. In Power Query Editor, go to Add column-> select Column From Example-> From selection from the ribbon.
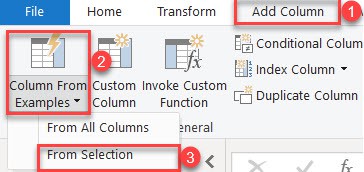
3. Now rename Column 1 to the name of the column and provide a value from the selected column.
In my case, I give the name of the column “Salary” and values 20000,25000,30000. Then click on OK. Check the screenshot below.

4. Then, you see the salary column added in the Power Query Editor.

This way, you can use a Power query to add the column in Power BI.
Also, you may like:
- Power Query Add Column If Statement
- Power Query Date Functions
- Duplicate multiple columns using Power Query
- Power Query Add Column
- How to merge columns in Power Query
- Power BI IF Date
- Power BI Power Query Examples
Conclusion
In this tutorial, we explored how to create a table in Power Query editor, how to utilize blank queries to start new tables, and how to add columns within the editor.
I am Bijay a Microsoft MVP (10 times – My MVP Profile) in SharePoint and have more than 17 years of expertise in SharePoint Online Office 365, SharePoint subscription edition, and SharePoint 2019/2016/2013. Currently working in my own venture TSInfo Technologies a SharePoint development, consulting, and training company. I also run the popular SharePoint website EnjoySharePoint.com