This Power BI tutorial will discuss different approaches to exporting data from Power BI to Excel.
I recently worked on a Power BI report where I needed to export Power BI data to Excel. I was able to accomplish this task with just three clicks.
This tutorial will explore Power BI export to Excel, how to enable export options in Power BI Desktop, how to export to Excel in Power BI Desktop, and how to export to Excel in Power BI service.
Also, we will discuss how to export data with the current layout, summarized data, and underlying data in the Power BI service.
Power BI Export to Excel
Exporting to Excel from Power BI means taking the data and visuals you’ve created in Power BI and saving them into an Excel file. It lets you have a copy of your Power BI data in a familiar format that is easily editable in Excel. You can further analyze or manipulate the data using Excel’s features.
The image below depicts the Power BI data after it has been exported to Excel.

How to Enable Export Options in Power BI Desktop
You must enable the export option presented in the Power BI Desktop to use the Power BI Export to Excel. To enable the export option, follow the below steps.
1. Open Power BI Desktop. Then click on the File tab.

2. After that, click on Options and settings -> click Options.
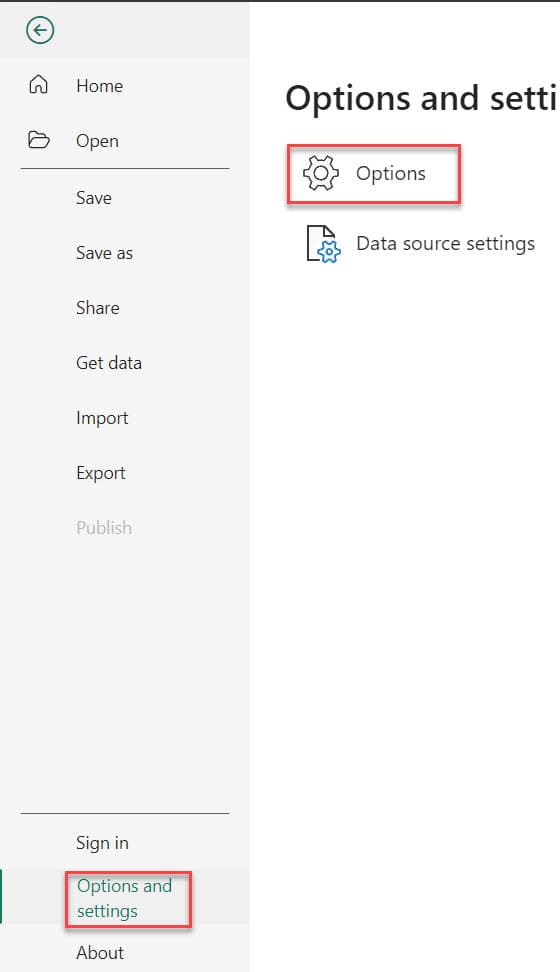
3. Select the Report settings which is present under the CURRENT FILE.
Once you select the “Report settings” option, you’ll find three choices under the “Export data.” Then, choose Allow end-users to export summarized data from the Power BI service or Power BI Report Server. Then click OK. Check the screenshot below.
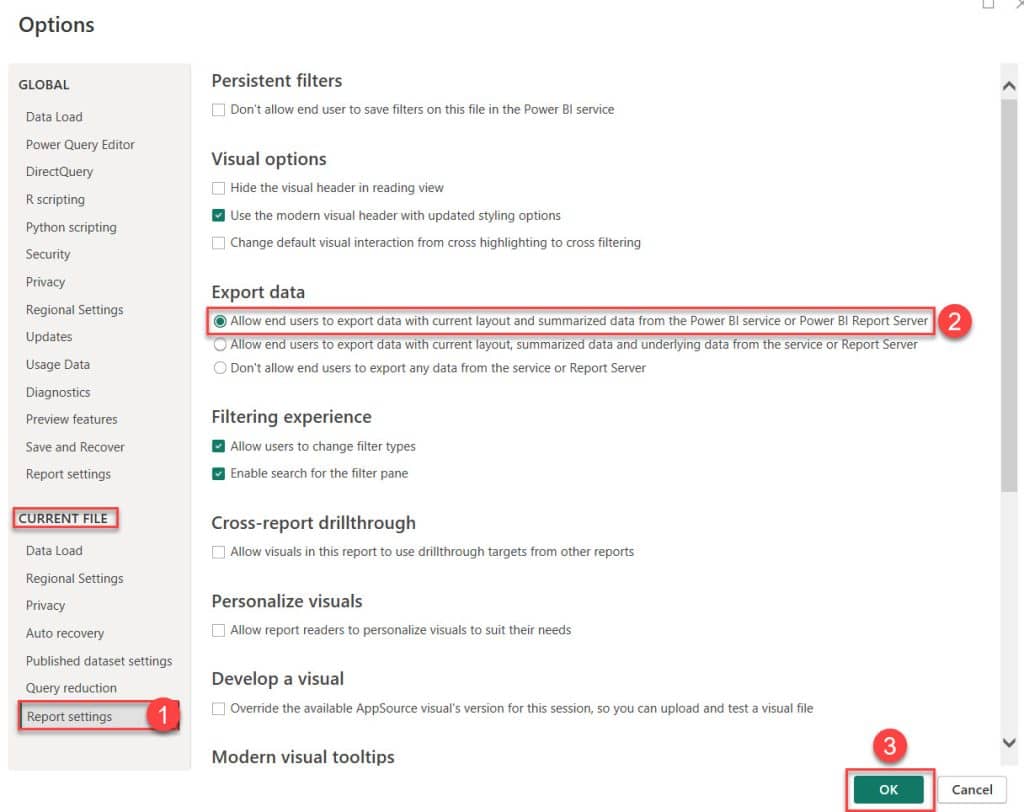
This way, you can enable export options in Power BI Desktop.
How to Export Power BI to Excel?
Now, let’s go through the steps to export Power BI Desktop data to Excel, one by one.
NOTE:
Before exporting Power BI to Excel, it’s essential to create a report in Power BI. If you’re new to Power BI, consider reading a detailed guide on how to create a report in Power BI Desktop?
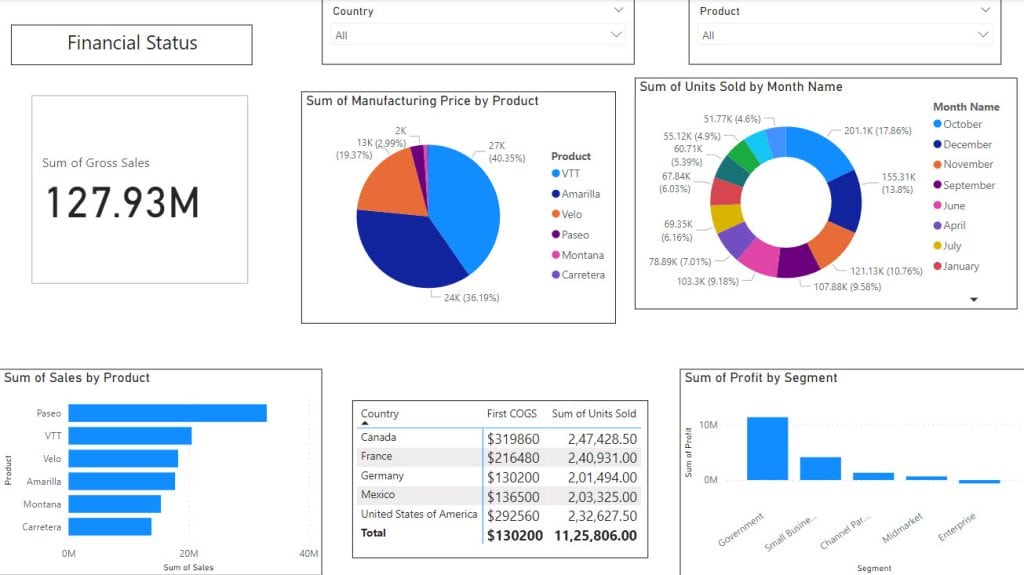
Here is the report I’m using for this example. I highly recommend creating a report before proceeding further. Check the screenshot below:
Follow the below steps to export Power BI Desktop to Excel:
1. Open the Power BI report you created before in Power BI Desktop.
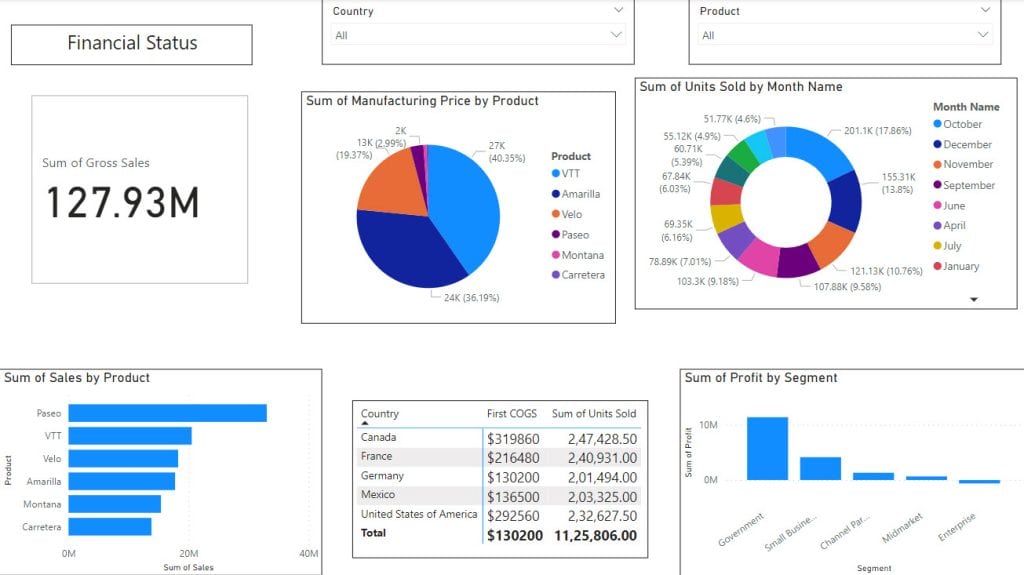
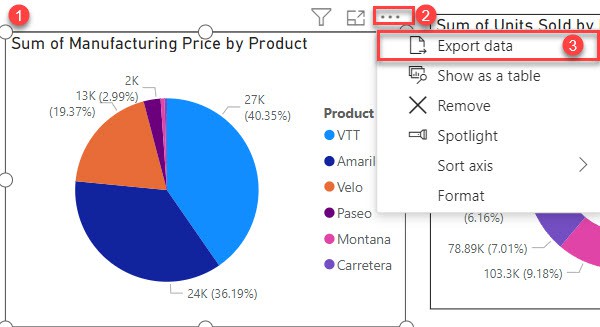
2. Click on the visual you want to export(In my case, a pie chart). Then, you can see the three dots (…), which are present at the top right corner of the visual. Select Export data.
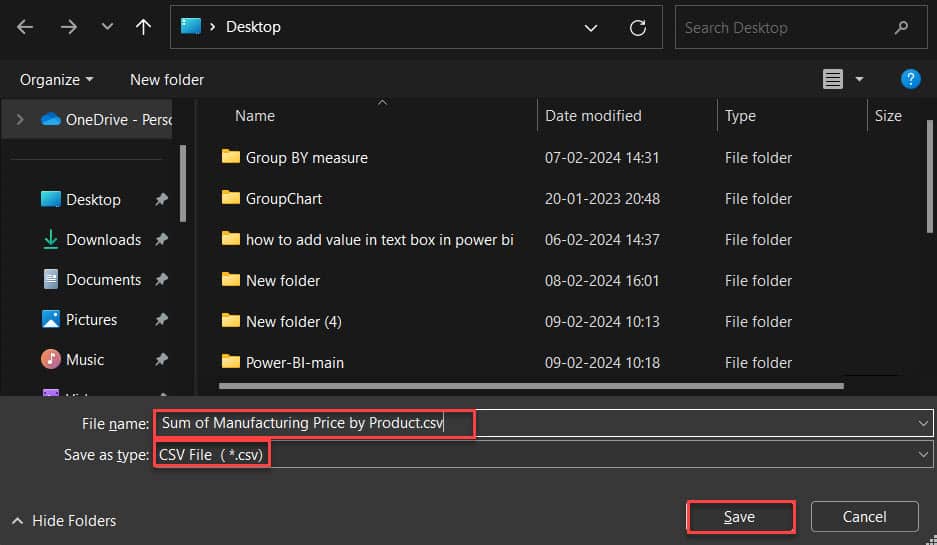
3. Then choose the location where you want to save the Excel file and Select the Excel File type as CSV. Then click on Save.
4. Afterward, when you open the Excel file on your desktop, you can see the data, similar to the screenshot below.
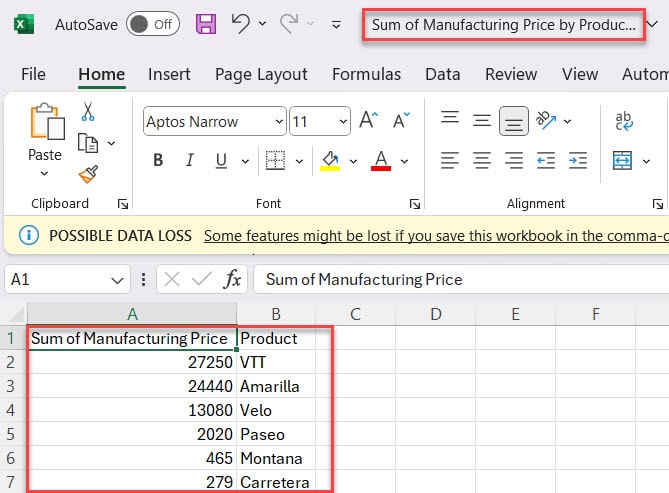
This way, you can export Power BI to Excel.
Example-2 (Power BI Export Table to Excel):
1. In the Power BI Desktop, select the table visual. Then, you can see the three dots (…), which are present at the top right corner of the visual. Select Export data.
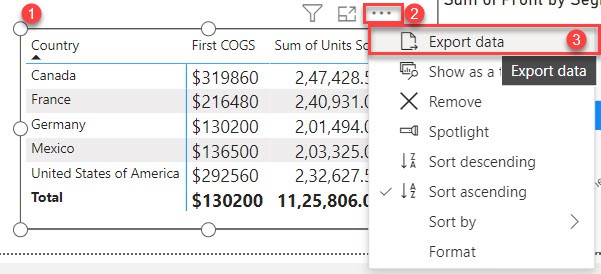
2. Next, select the location where you want to save the Excel file, choose the Excel file type as CSV, and then click on “Save.” Then, open the Excel file on your desktop. You can see the same as the Power BI table visual.
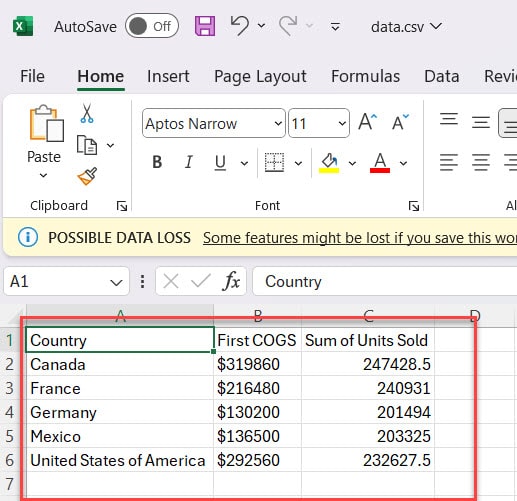
You can easily export the Power BI table to Excel using these steps.
Export Data from Power BI Dashboard
Now, let’s look at how to export data from the Power BI service to Excel.
1. Navigate to the specific dashboard containing the visual you wish to export. In my case, matrix visual. Check in the screenshot below.
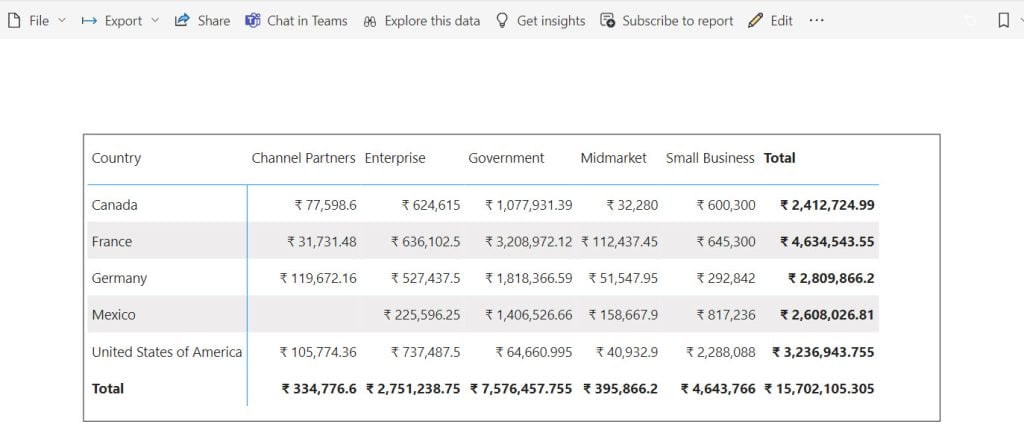
2. Select your visual and click on the three dots (…) present at the top right corner of the visual. Then select the Export data option.

3. When you select the Export data option, the window below will appear where you choose which data format to export: Data with the current layout, Summarized data, or Underlying data.
- Data with current layout = It means exporting the data in the same layout as you see it in the Power BI report or dashboard, but without any icons, colors, or other formatting you’ve added.
- Summarized data = It means exporting the summarized data used to create your Power BI visual.
- Underlying data = It means exporting the raw data used to calculate the data in your visual.
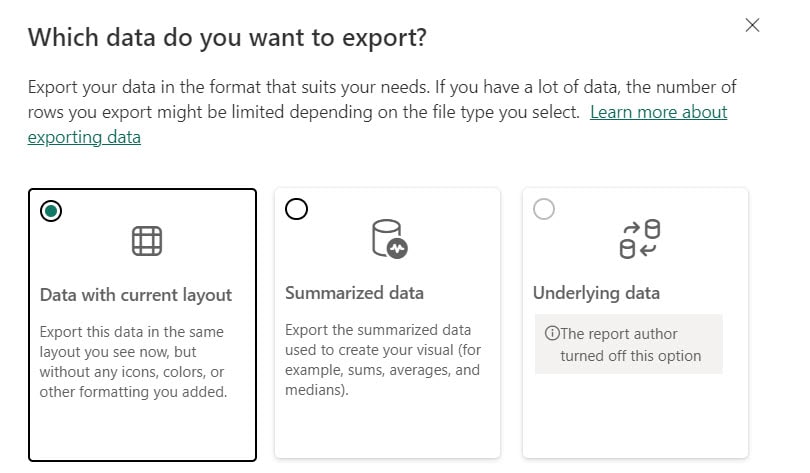
Now we see one by one how to export into Excel.
Export Data from Power BI Service to Excel with the Current Layout
Now, we see how to export data from the current layout of the Power BI service to Excel.
1. Select your visual and click on the three dots (…) present at the top right corner of the visual. Then select the Export data option.

2. Next, select Data with current layout. Then click the Export button.
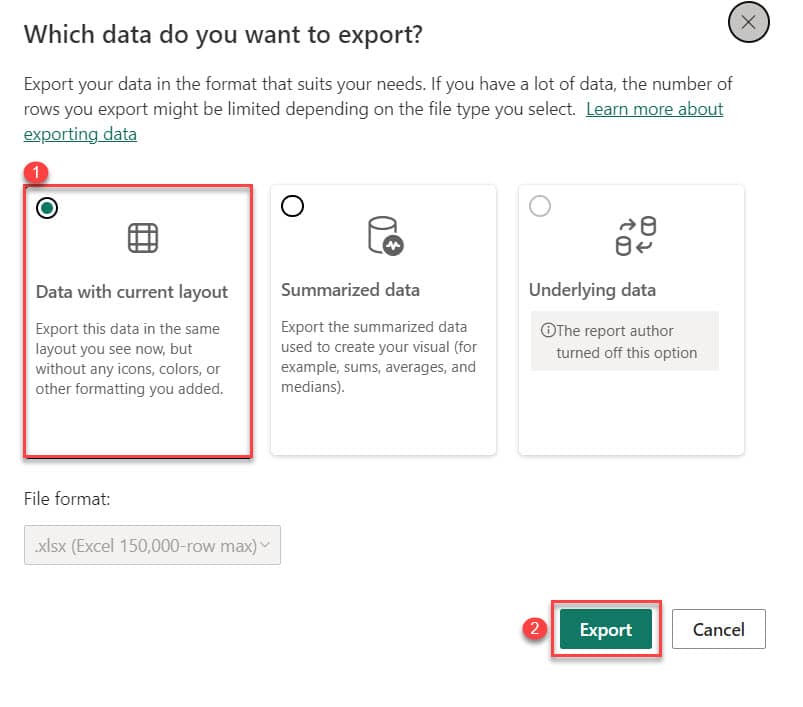
3. The .xlsx file is downloaded to the local system. Then, open it in Excel.
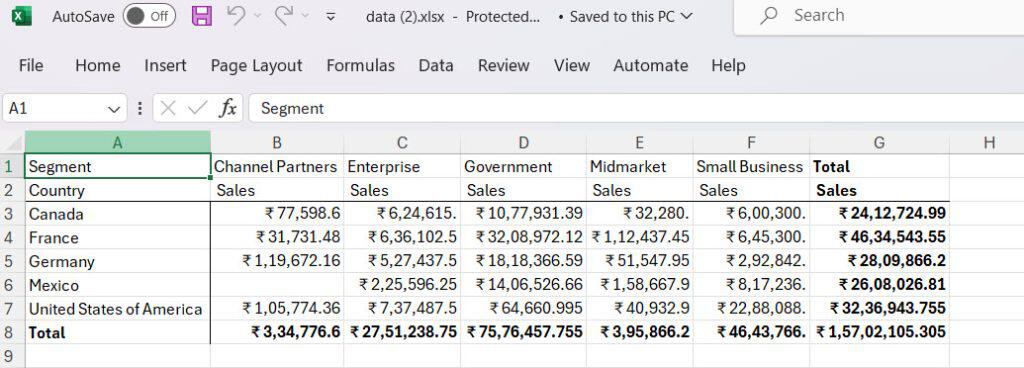
Follow the above steps to export data from the Power BI service to Excel with the current layout.
Export Power BI Service to Excel with Summarized Data
Now, we explore how to export summarized data from the Power BI service to Excel.
1. Select your visual and click on the three dots (…) present at the top right corner of the visual. Then select the Export data option.

2. Next, select Summarized data and select File format as .xlsx. You can choose the .csv file format if you want an Excel file. Then click the Export button.
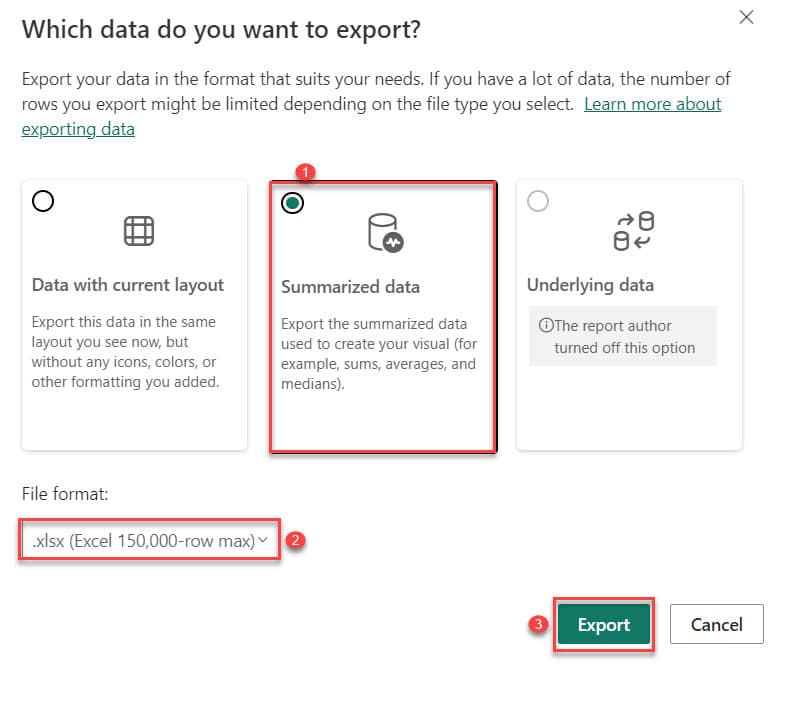
3. The Excel file is downloaded to the local system. Then, open it in Excel.
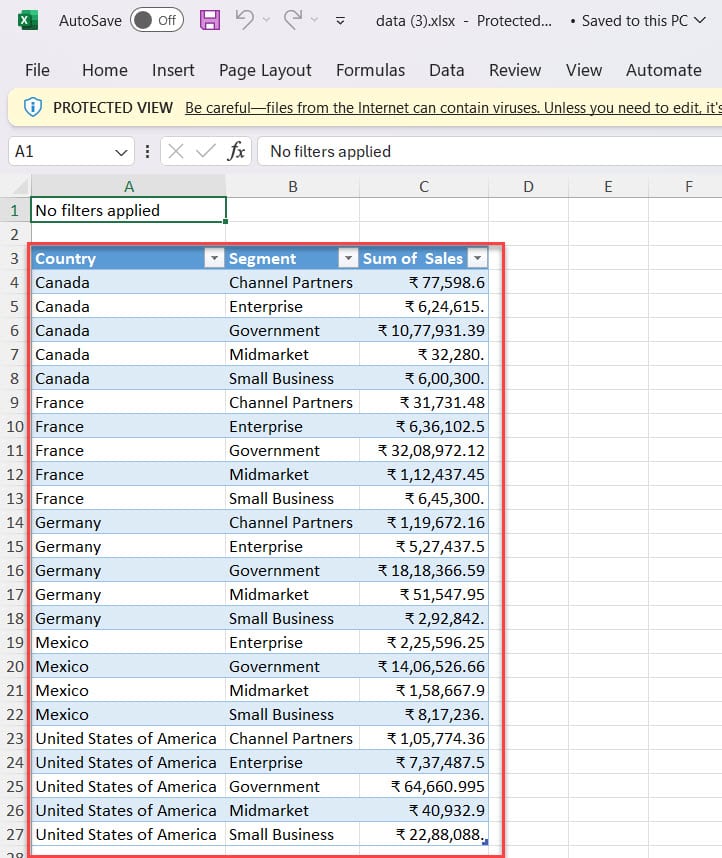
This way, you can export summarized data from the Power BI Dashboard to Excel.
How to Export Underlying Data in Power BI Service to Excel
Here, we see how to easily export underlying data in Power BI service to Excel.
Select the visual -> click the three dots (…) -> select the Export data. After that, if you face an error like “The report author turned off this option.” Check the screenshot below.
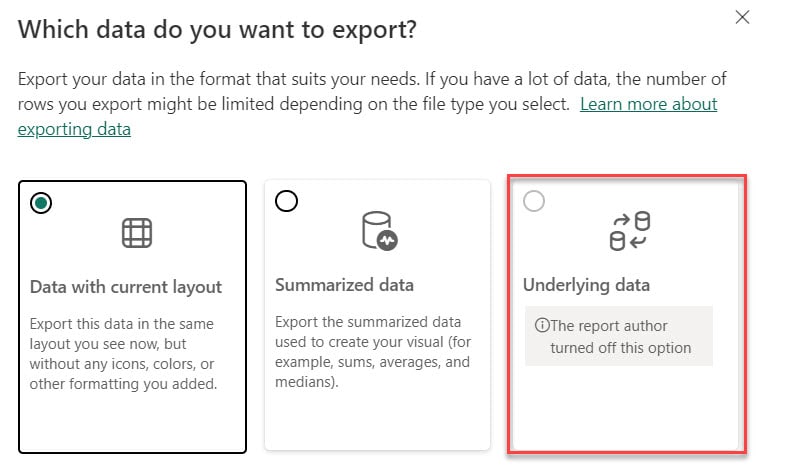
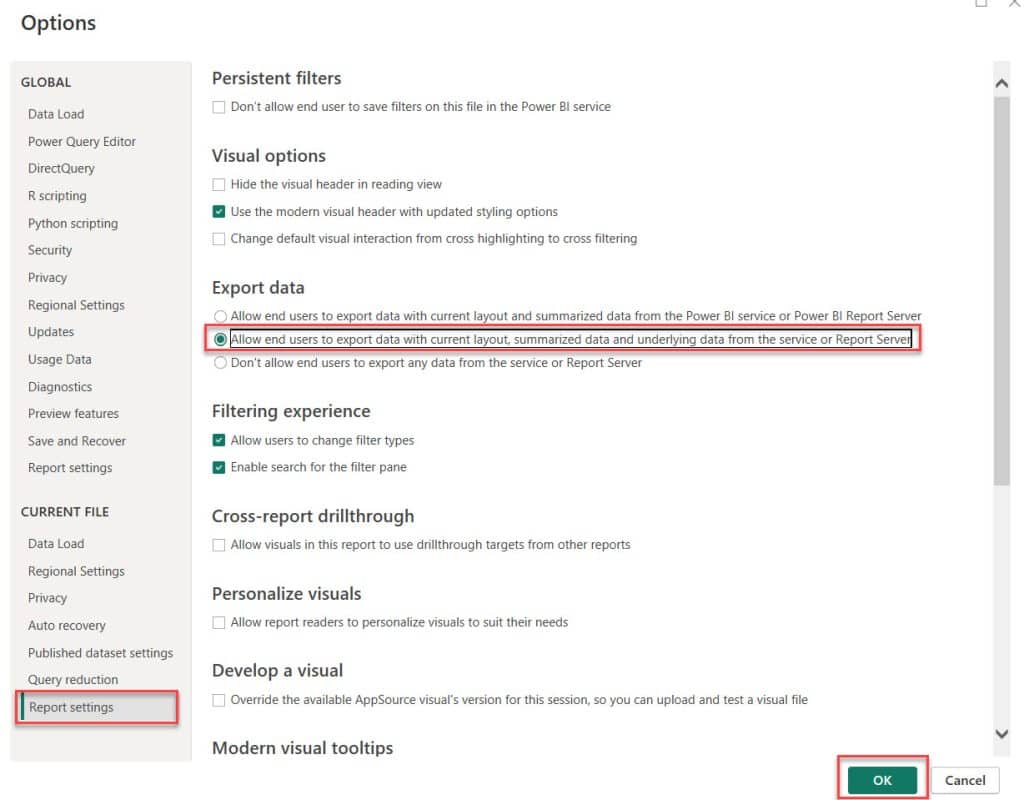
To solve this error in the Power BI Desktop, go to the Report setting and select Allow end users to export data with current layout, summarized data, and underlying data from the service or Report Server under the Export data. Then click OK.
After that, republish your report or visual.

1. Go to the Power BI service and open the report you publish above. Then Select the visual -> click the three dots (…) -> select the Export data.

2. Next, select Underlying data. Then click the Export button.
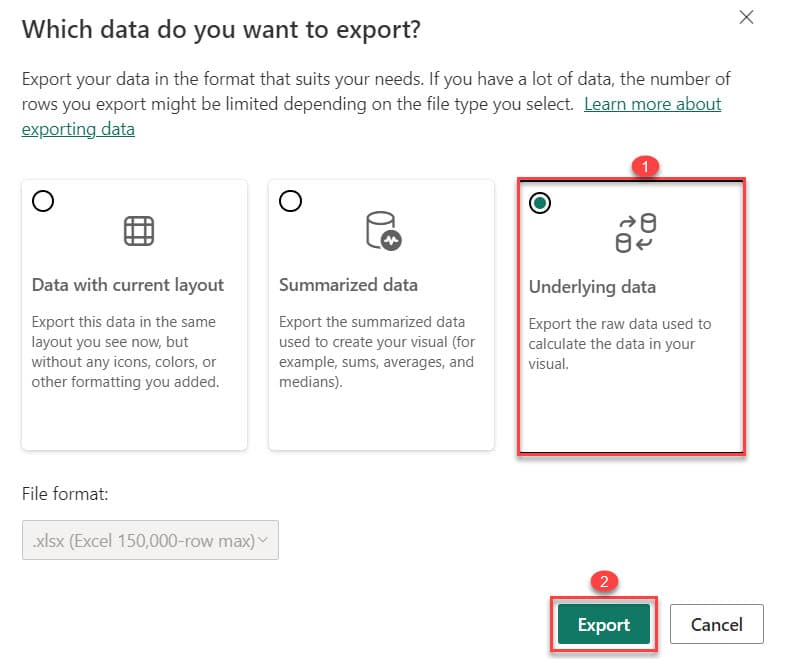
3. The Excel file is downloaded to the local system. Then, open it in Excel. You can see the raw data in the Excel file.
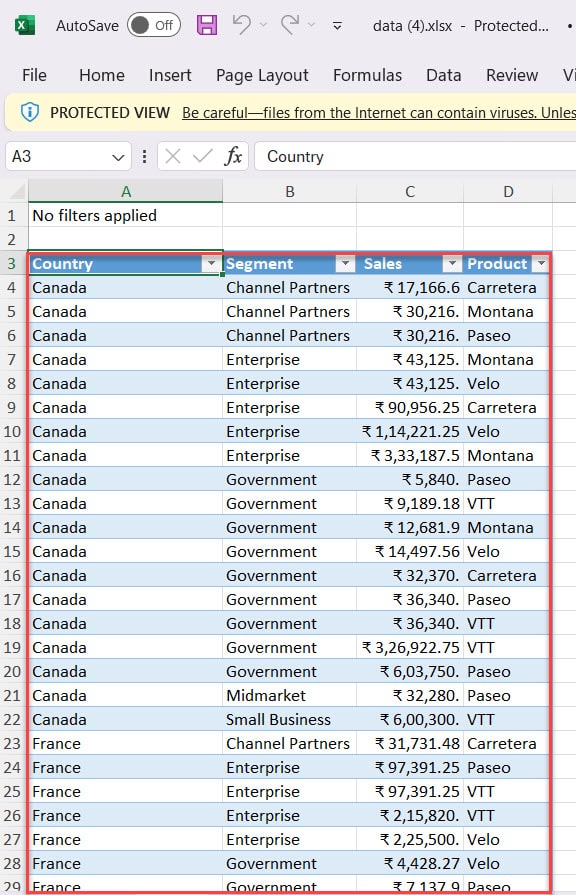
You can export underlying data in Power BI service to Excel using this method.
Power BI Export to Excel Limitations
- You need permission when you try to export underlying data.
- Power BI allows a maximum of 30,000 rows for CSV and 150,000 for Excel to be exported.
- Conditional formatting rules applied in Power BI may not transfer to Excel.
- When you enable the Show items with no data option, the Underlying data will not work during Exporting.
- Calculated fields or measures created in Power BI might not export with the same functionality to Excel.
- You can not export more than one visual at a time.
Conclusion
I hope you understand how to export data into Excel in both Power BI Desktop and Power BI Service.
This tutorial taught us Power BI export to Excel, how to enable export options in Power BI Desktop, how to export to Excel in Power BI Desktop, and how to export to Excel in Power BI service.
Additionally, we covered how to export data with the current layout, summarized data, and underlying data in the Power BI service.
You may also like:
- How to Change Data Type in Power BI?
- Power BI Conditional Formatting Based On Field Value
- Convert Date to Text in Power BI
- Power BI Conditional Formatting Positive and Negative Numbers
Hello Everyone!! I am Bhawana a SharePoint MVP and having about 10+ years of SharePoint experience as well as in .Net technologies. I have worked in all the versions of SharePoint from wss to Office 365. I have good exposure in Customization and Migration using Nintex, Metalogix tools. Now exploring more in SharePoint 2016 🙂 Hope here I can contribute and share my knowledge to the fullest. As I believe “There is no wealth like knowledge and no poverty like ignorance”