Are you considering setting up a free trial for SharePoint Online so you can investigate the platform and learn more? This post on the SharePoint Online trial is updated recently.
To evaluate if SharePoint Online is a suitable fit for your company, creating a trial can be a wonderful way to test out its capabilities.
There are two different approaches to trying out SharePoint Online like as:
- Microsoft 365 Business Premium Plan
- Join the Microsoft 365 Developer Program
In order to design and test applications in a sandbox setting, Microsoft provides developers with a free trial. You may establish a practice by following the instructions in this blog post, and it will also show you some of the features you can use. Let’s start now!
Benefits of using Microsoft 365 Business Premium
This Microsoft 365 Business Premium package offers certain additional advantages over the other business plans. like as:
- With 1 TB of OneDrive cloud storage for each user, you can manage your files from anywhere.
- Connecting securely to your data and supporting the safe and current operation of iOS, Android, Windows, and macOS devices.
- The most recent versions of Word, Excel, PowerPoint, and other programs should always be used.
- Use Microsoft Teams, Exchange, and Outlook to communicate with clients and coworkers.
- To prevent data from being mistakenly shared, restrict access to sensitive information using encryption.
SharePoint Trial From Microsoft 365 Business Premium Plan
Because of Microsoft’s upgrade, none of the Microsoft 365 Enterprise plans can offer a free trial of SharePoint, thus I’ve decided to go with a Microsoft 365 Business plan instead.
Using one of the Microsoft 365 business plans i.e. Microsoft 365 Business Premium is the first way to access the SharePoint Online trial. Follow the instructions below:
Step – 1: (Get Microsoft 365 Business Premium Plan)
- Open Microsoft 365 Plans.
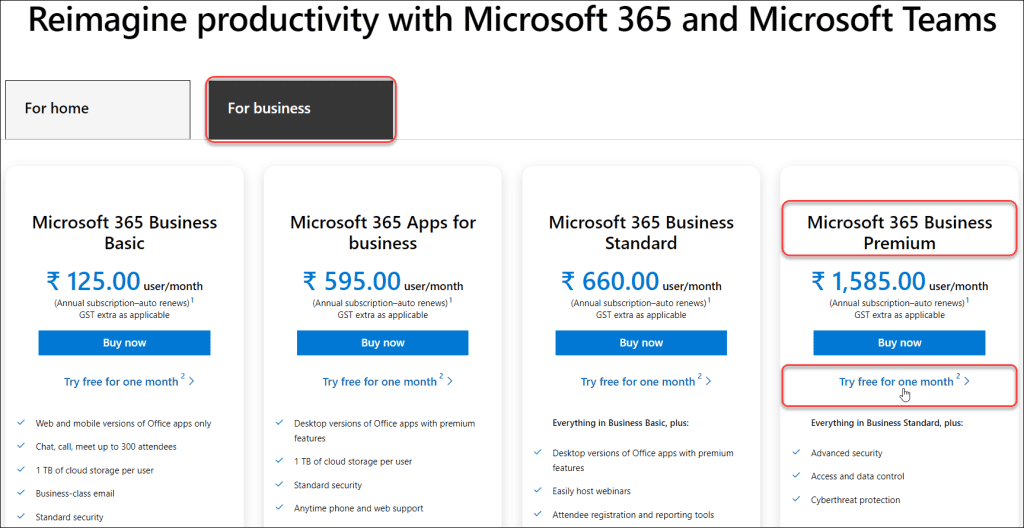
- There are two types of Microsoft 365 plans. Such as: For home and For business. Click on For business.
- Under For business plan, you can see four different types of plans:
- Microsoft 365 Business Basic
- Microsoft 365 Apps for business
- Microsoft 365 Business Standard
- Microsoft 365 Business Premium
- Select Try free for one month2 under the Microsoft 365 Business Premium. Because it offers a lot of services (including SharePoint) compared to other Microsoft 365 plans.
Step – 2: (Provide your Work or School Email Address)
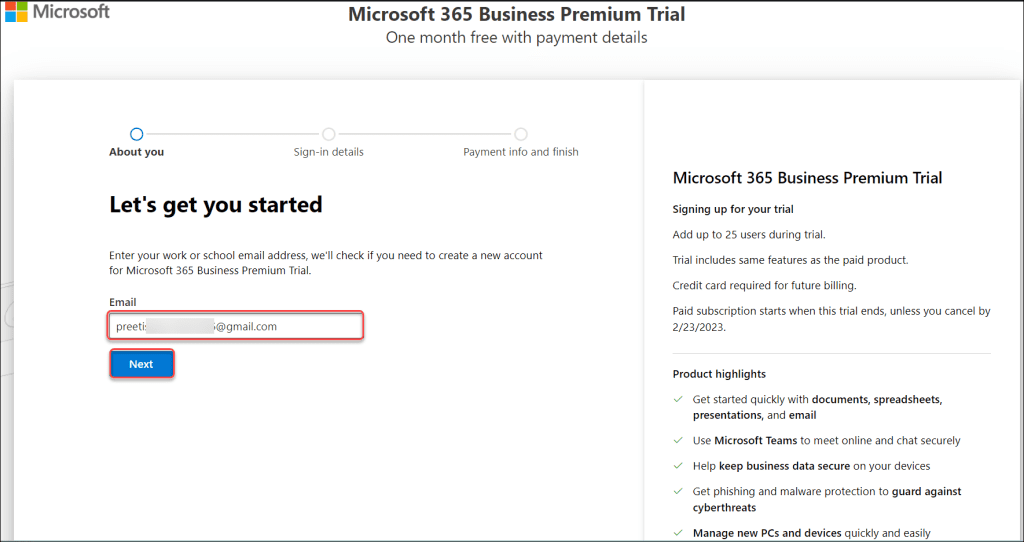
- It will then direct you to the startup page where you must provide your work or school email address.
- They will check to see if you require a new account in order to access the Microsoft 365 Business Premium Trial after you provide your email. Click Next.
- Moreover, on the right side of the page, you can see all the plan benefits and product highlights as shown below.
Step – 3: (Set up your account)
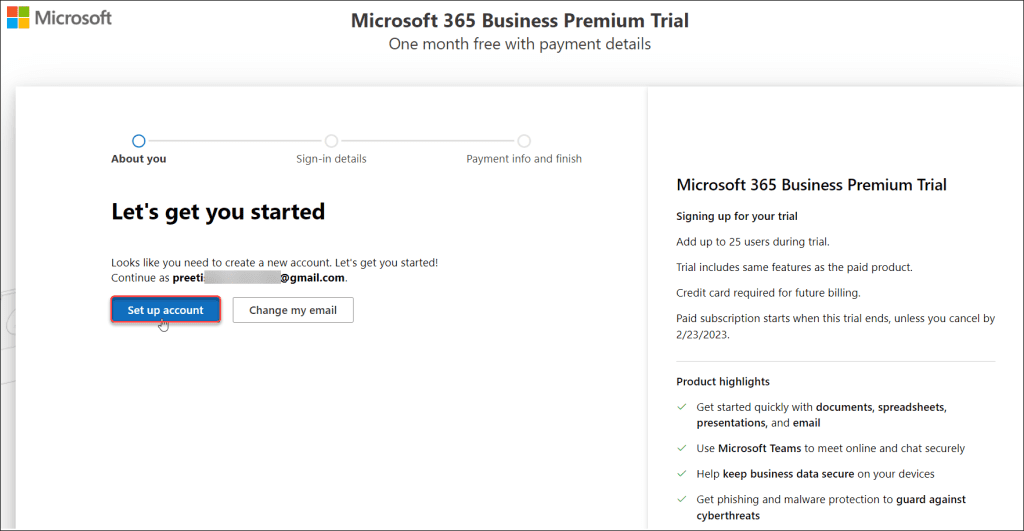
- It will then reroute to the setup page, where you can set up your account by making a new one. Click on Set up account.
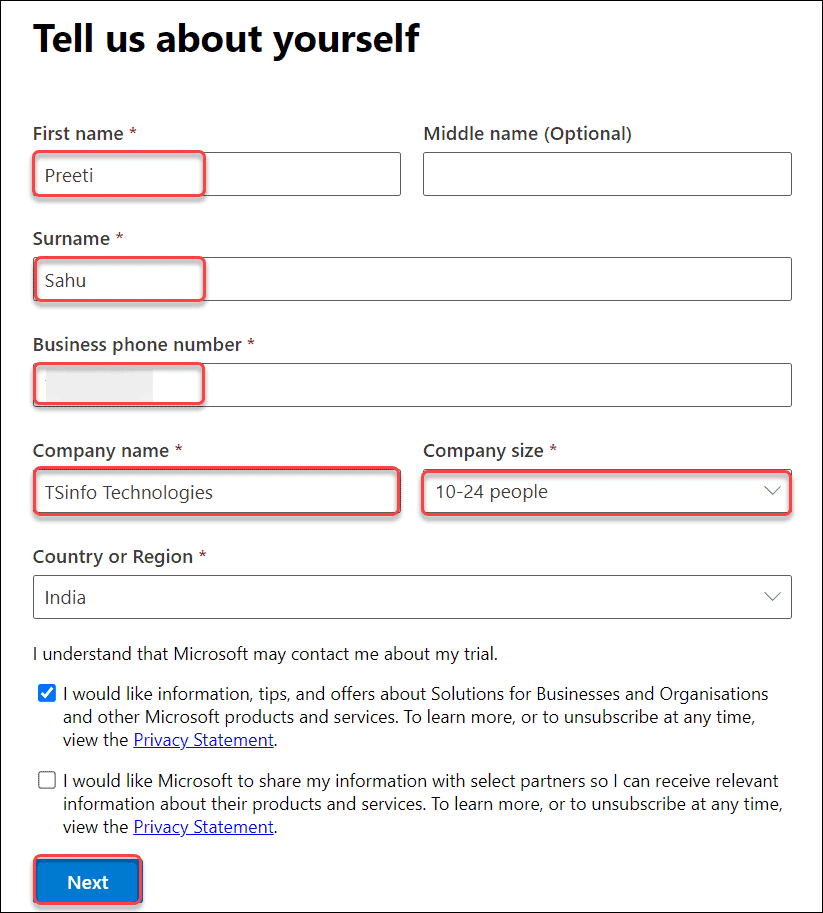
- Microsoft will attempt to learn more about your organization, size, and nation in the following phase.
- Give information about your First name, Middle name, Surname, Business phone number, Company name, Company size, and Country or Region.
- Finally, choose the Microsoft agreement as per your need and then click on Next.
NOTE:
Be sure to include an accessible and active Business phone number.
Step – 4: (Tell us about yourself)
- Another crucial step that must be taken before moving on is self-verification. It is important to provide a valid mobile number because of this.
- Verify one of the two possibilities below: Text me or Call me. Select any one of these options. Tap on Send verification code.
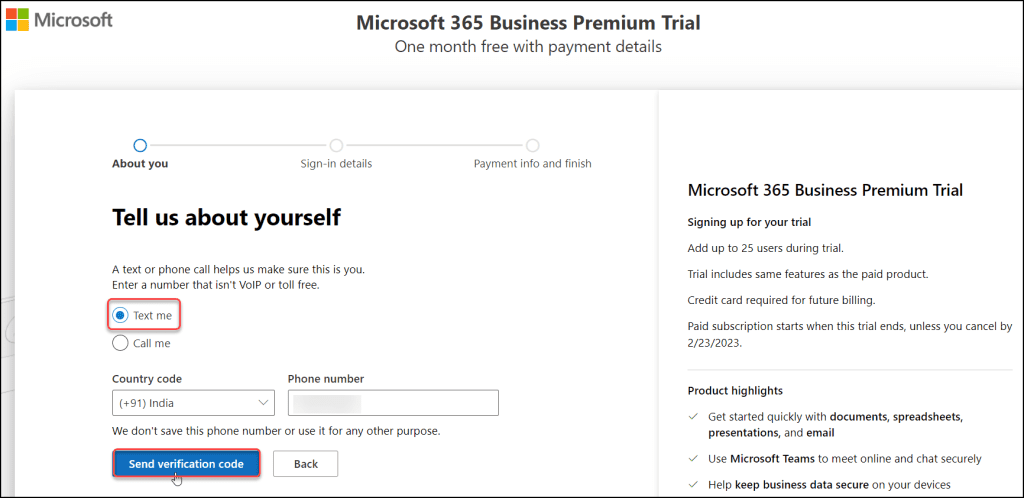
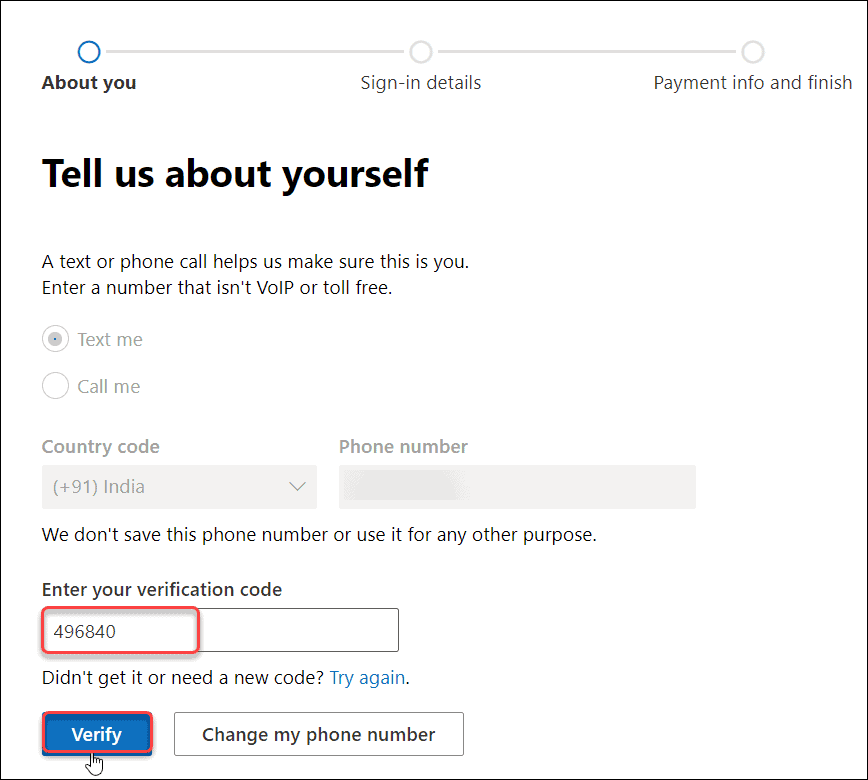
- Here, I’ve used the text method to confirm that a code would be sent to your mobile number. Enter the verification code and click on Verify.
Step – 5: (How you’ll sign in)
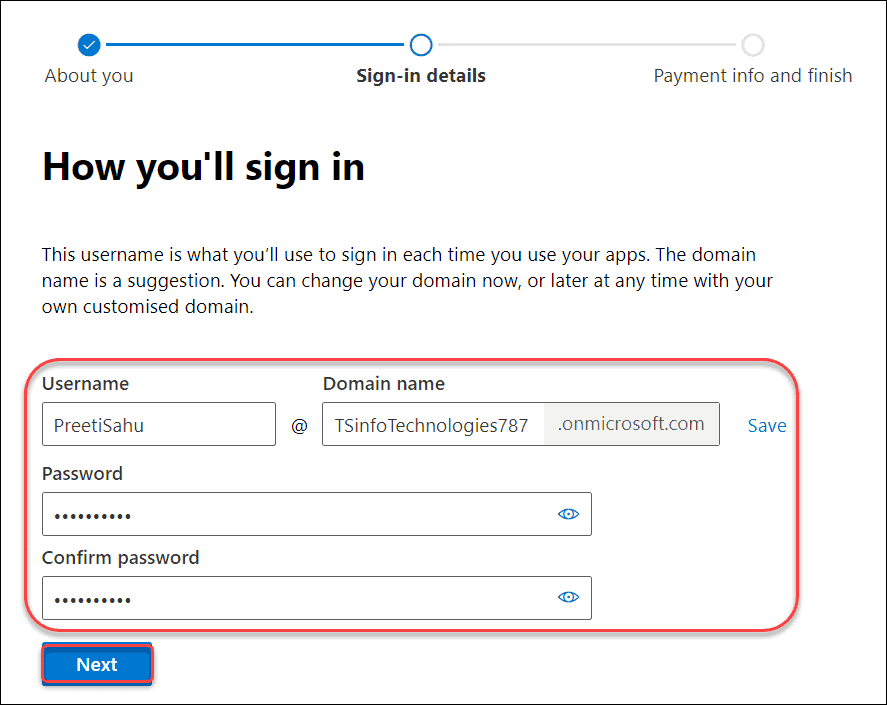
- This step is essential for your company. Your company’s name should be entered here. By default, the user name will display with the Domain name: PreetiSahu@TSinfoTechnologies787.onmicrosoft.com
- The domain name is only a suggestion. With a custom domain, you have the flexibility to alter it at any time.
- Enter the password you want to use and then confirm it. Click on Next.
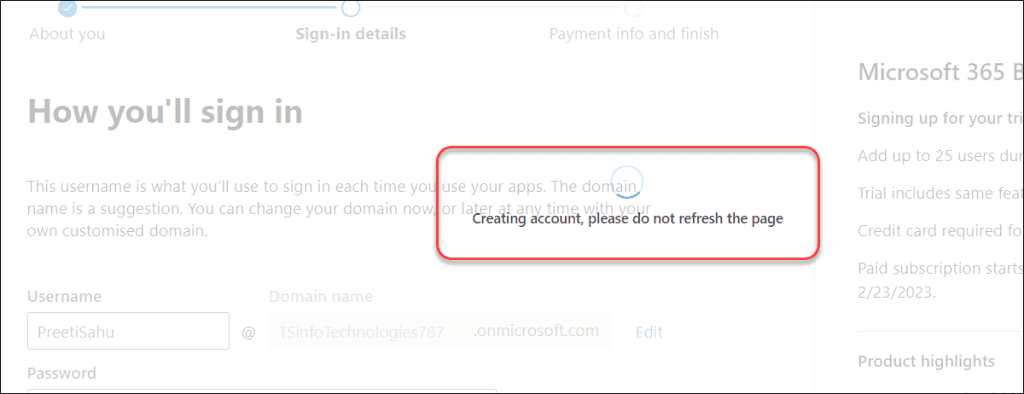
- The account will now be created. You will receive a warning not to reload the page until you create an account.
Step – 6: (Quantity and payment)
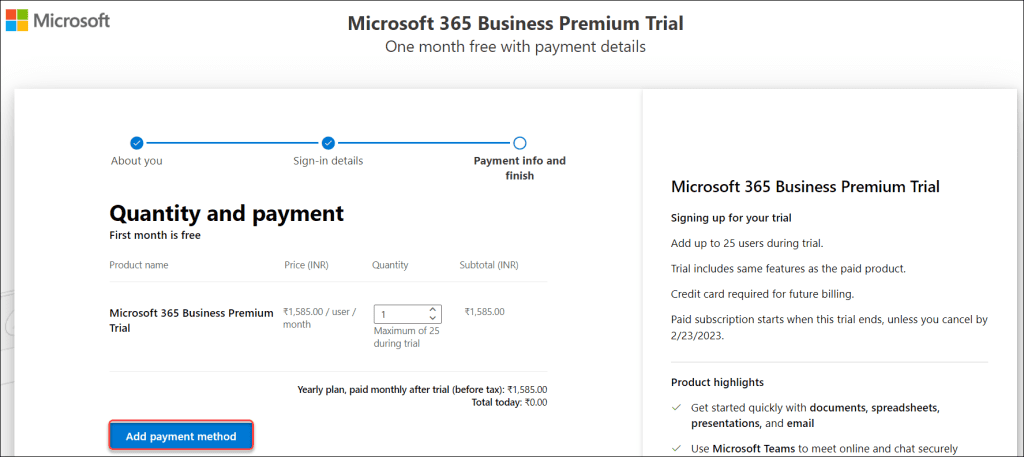
- The last step requires you to add a payment method in order to receive the SharePoint free trial of one month.
- On the Quantity and payment page, select the quantity and click on the Add payment method.
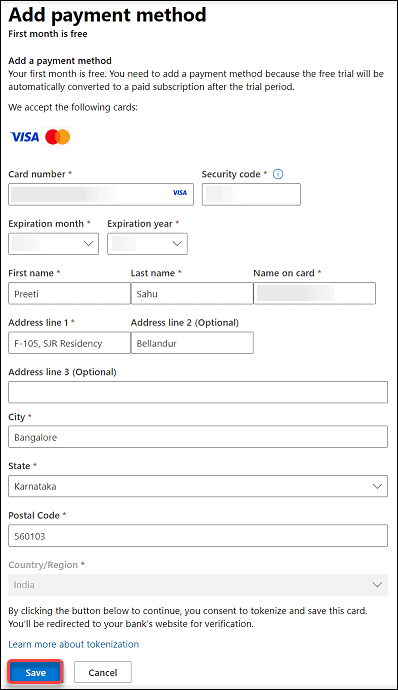
- On the next payment method page, enter all the card details like Card number, Security code, Expiration month, Expiration year, etc. Finally, click on Save.
Step – 7: (Review and confirm)
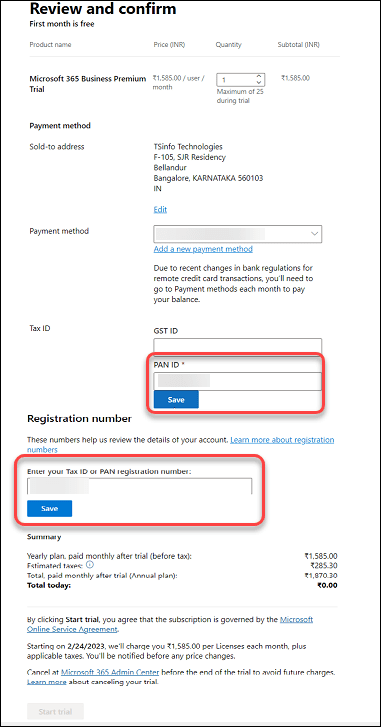
- The Review and Confirm page will then be redirected, and you will be prompted for your Tax ID there (either it should be a GST ID or PAN ID). However, PAN ID is required here.
- Both in the Tax ID area and beneath the PAN Registration number, enter your PAN ID. In the Registration and Tax ID fields, click Save.
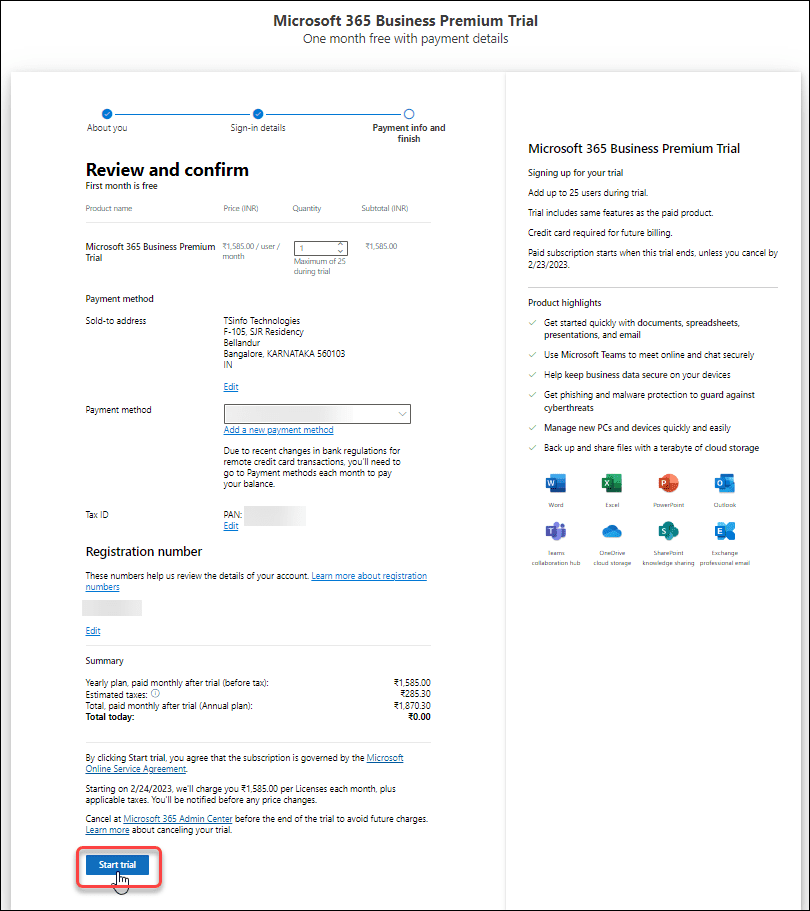
- You can see that the Start trial button will be active once you save this info. Click on Start trial.
Step – 8: (Start using Microsoft 365 Business Premium Trial)
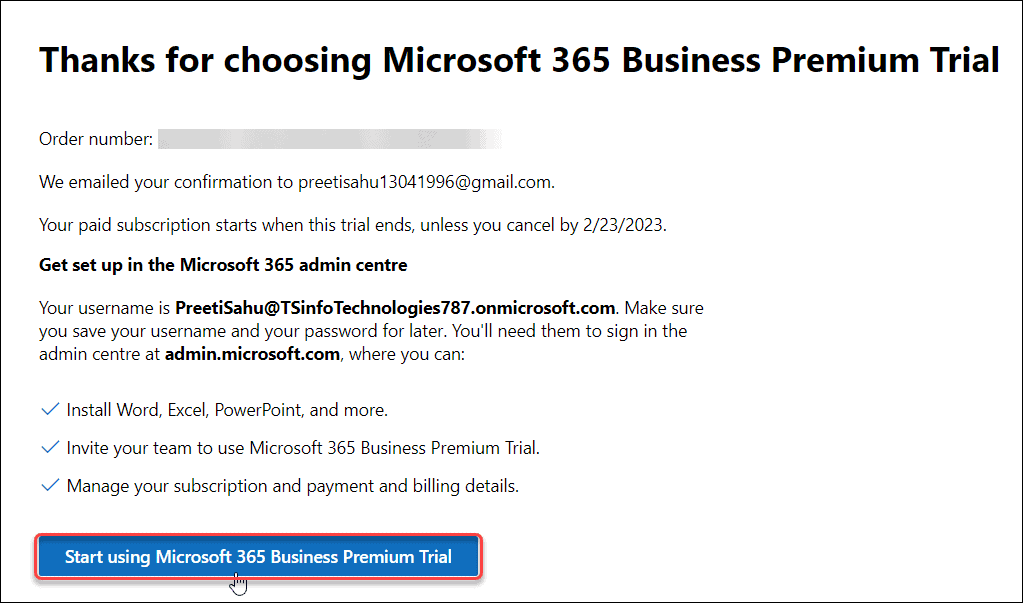
- The following screen will then show to thank you for selecting the Microsoft 365 Business Premium Trial. Additionally, it offers some suggestions for how you might use it to your advantage.
- Click on Start using Microsoft 365 Business Premium Trial.
Step – 9: (Microsoft 365 Sign-in)
- On the next Microsoft Sign-in screen, enter your valid credentials (Username & Password) and then click on Sign in.
- If you want to stay signed in, then click on Yes.

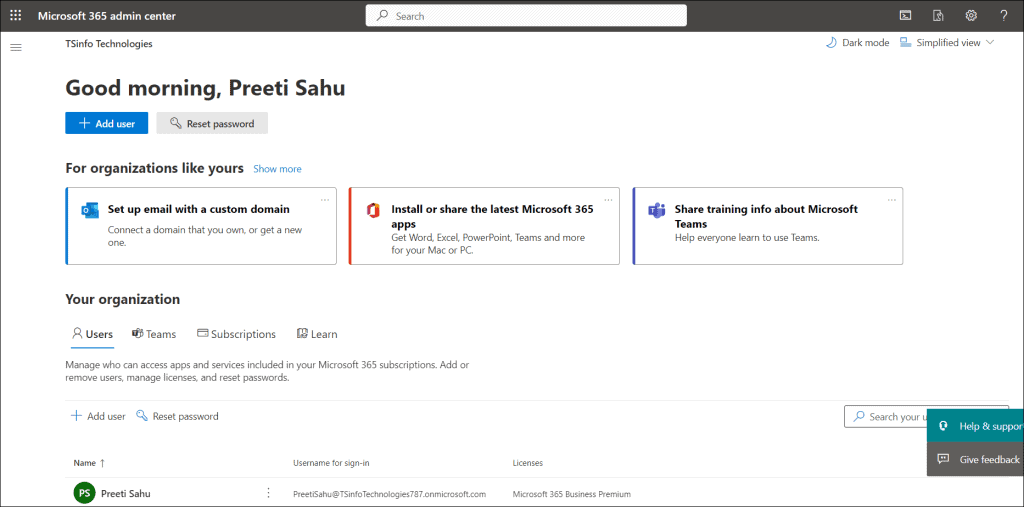
- Once everything is done, you can see the Microsoft 365 admin center as shown below. Here, you can carry out any tasks for your business, including:
- By clicking the + Add user button over here, you can add a new user if you wish to.
- Use the Reset password option if you want to change the password for your account.
- A custom domain can be set up for email.
- The most recent Microsoft 365 apps, among many others, can be installed or shared.
Step – 10: (Access Microsoft 365 or SharePoint Online)
- Click on any of the URLs listed below at any time to access your Microsoft 365 tenant. You can sign in to Microsoft 365 using any of the following URLs.
https://admin.microsoft.com/
or
https://portal.office.com/
or
https://office.com/- When you click one of the URLs below, you will be prompted to enter the Microsoft credential (your tenant admin credentials) you have created. If you have already signed in, it won’t ask you for your credentials.
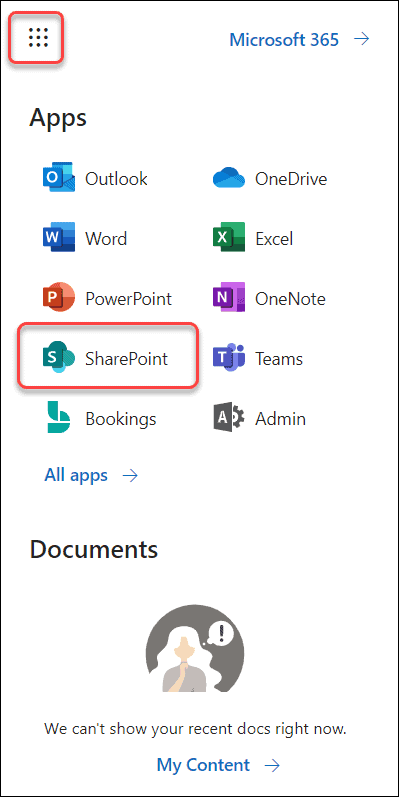
- To access your SharePoint Online, select SharePoint from the App Launcher as seen below:
- You can also use the following URL to access your SharePoint Online Admin Center page.
https://<Your tenant name>-admin.sharepoint.com/

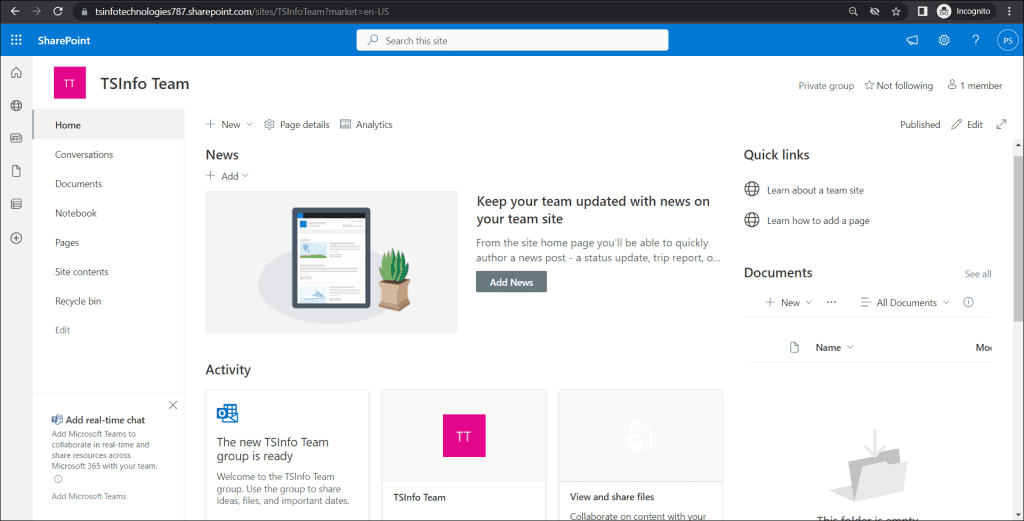
Example: https://tsinfotechnologies787-admin.sharepoint.com/- You can use the following URL to access the SharePoint Homepage of your organization:
https://<Your tenant name>.sharepoint.com/

Example: https://tsinfotechnologies787.sharepoint.com/
See how the SharePoint Home page appears in the screenshot below.
The above steps explain how to get the SharePoint free trial from Microsoft 365 Business Premium Plan. Next, we will see how to Cancel Microsoft 365 Business Subscription in the future.
How to Cancel Microsoft 365 Business Subscription
If, after 30 days, you decide you do not want to keep your Microsoft 365 Business membership, you can cancel it using the Microsoft 365 Admin portal.
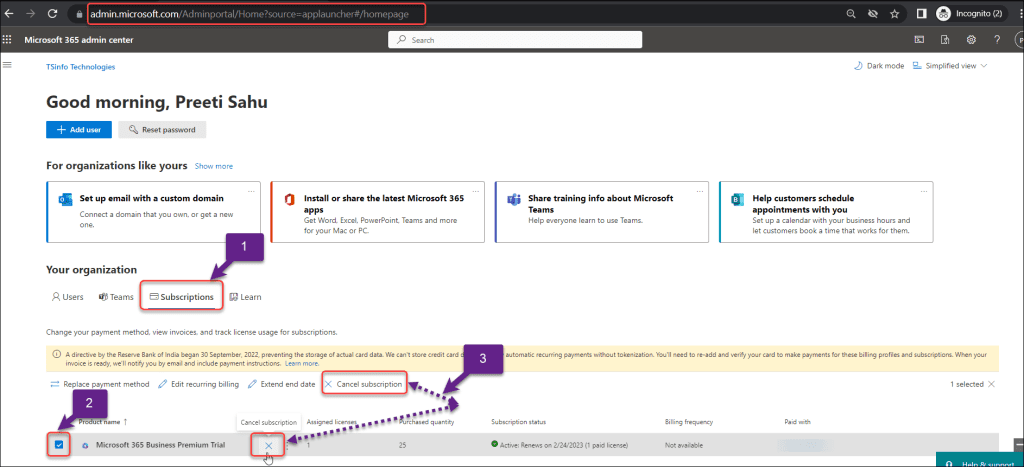
- Go to Microsoft 365 Admin center (App Launcher -> Admin).
- Select the Subscriptions tab under Your organization section.
- Select Microsoft 365 Business Premium Trial -> Click on Cancel subscription. Also, you can direct click on the Cancel icon.
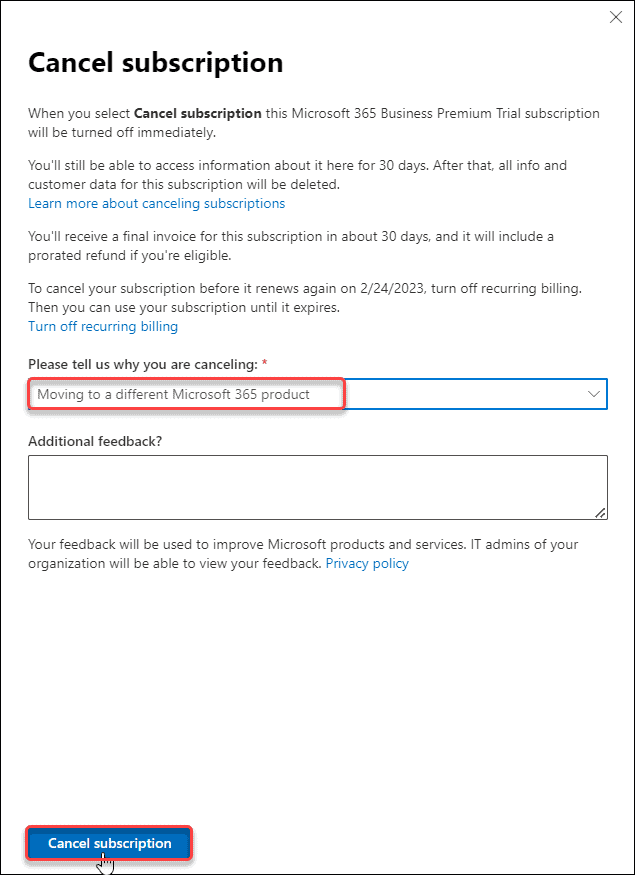
- The Cancel subscription pane will then open and prompt you to choose your cancellation reason and provide any additional input. Click on Cancel subscription.
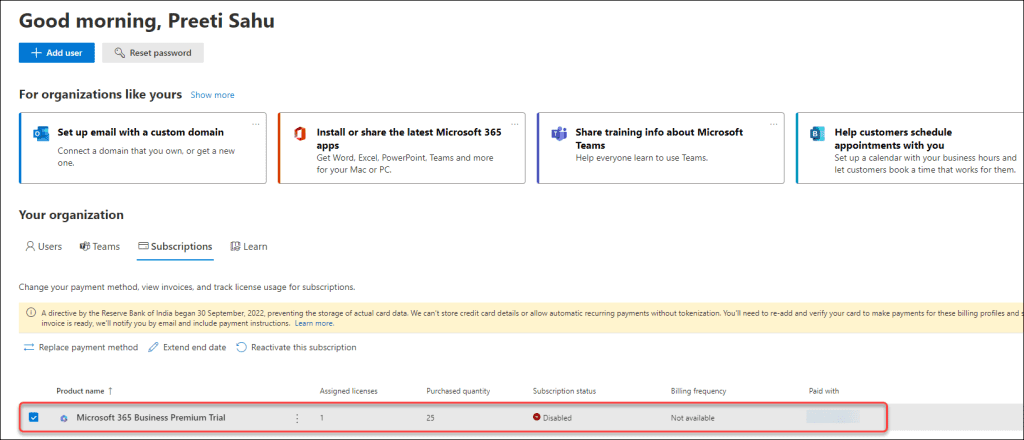
- Once the subscription has been canceled, you can see that its status has changed to Disabled, as shown below.
This is how to cancel Microsoft 365 Business Subscription from the Microsoft 365 Admin Center.
Furthermore, you may like some more Microsoft 365 and SharePoint tutorials:
- Microsoft 365 change organization name
- How to enable script editor web part in SharePoint Online
- your organization needs more information to keep your account secure office 365
- How to Set Office 365 Password Policy
- How to set up self-service password reset in Office 365
- How to add a new user and assign a license in Office 365
I hope that this post will make it easier for you to sign up for a Microsoft 365 or SharePoint trial using a business plan.
Additionally, We learned what are the benefits of using the Microsoft 365 Business Premium plan, how to sign up for a free Microsoft 365 account, and how we can access SharePoint Online.
Moreover, we saw how to cancel Microsoft 365 Business Subscription from Microsoft 365 Admin Center.
I am Bijay a Microsoft MVP (10 times – My MVP Profile) in SharePoint and have more than 17 years of expertise in SharePoint Online Office 365, SharePoint subscription edition, and SharePoint 2019/2016/2013. Currently working in my own venture TSInfo Technologies a SharePoint development, consulting, and training company. I also run the popular SharePoint website EnjoySharePoint.com