Do you know about the Power Apps data table default select row? I will show you here how to set the default selected row in a Power Apps data table.
Here, we will discuss how to deselect the Power Apps data table default row and set the Power Apps data table default selected row using text input.
Also, we will see how to set a Power Apps data table default selected row using the SharePoint list.
Power Apps Data Table Default Select Row
Recently, I got an opportunity to work with the Power Apps data table default select row with different scenarios. Such as:
Scenario-1: How to Unselect the Power Apps data table default row
Whenever the user adds a data table in the Power Apps and adds items from different data sources [SharePoint, Excel, Collection, etc…] by default, the data table selects only the first row or record as in the screenshot below.

Now, I would like to Unselect this default data table row in the Power Apps app when the screen loads the first time. Have a look at the below screenshot for the output.

To work around this, follow the below-mentioned steps. Such as:
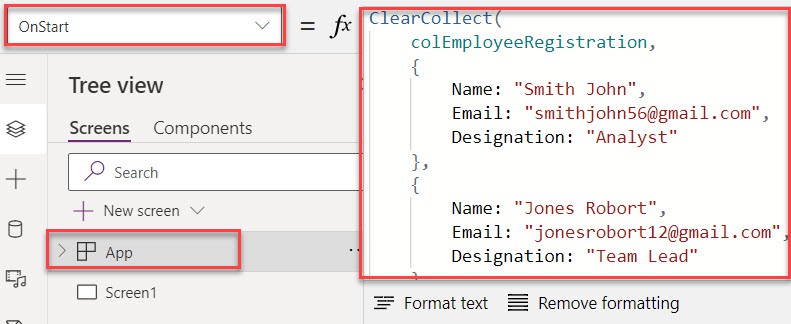
1. Create a Blank canvas app -> Select the App object [From the left navigation] and set its OnStart property to the code below.
OnStart = ClearCollect(
    colEmployeeRegistration,
    {
        Name: "Smith John",
        Email: "smithjohn56@gmail.com",
        Designation: "Analyst"
    },
    {
        Name: "Jones Robort",
        Email: "jonesrobort12@gmail.com",
        Designation: "Team Lead"
    },
    {
        Name: "Reema Sean",
        Email: "reemasean142@gmail.com",
        Designation: "Manager"
    },
    {
        Name: "David Jones",
        Email: "davidjones89@gmail.com",
        Designation: "Analyst"
    }
)
Where,
- colEmployeeRegistration = Power Apps Collection Name
- Name, Email, Designation = Collection headers/columns
- “Smith John”, “smithjohn56@gmail.com”, “Analyst” = Collection rows/records
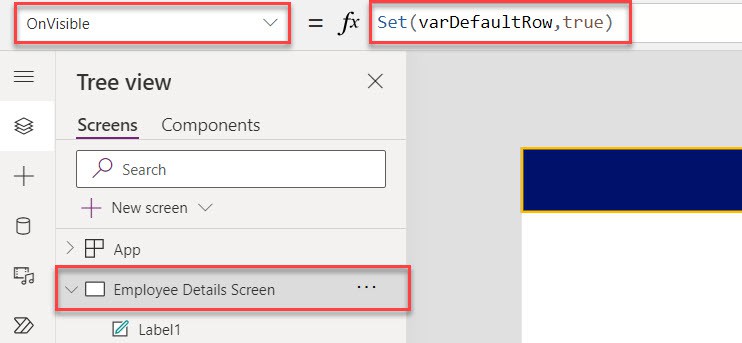
2. Select the Power Apps Screen and set its OnVisible property as:
OnVisible = Set(varDefaultRow,true)Where,
- Set() = We can use this Set() function to create a global variable
- varDefaultRow = Global variable name
3. Then, insert a Data table and set its Items property -> To display the data table records, click on the Edit filed, and add the respective fields as per needs like below.
Items = colEmployeeRegistration
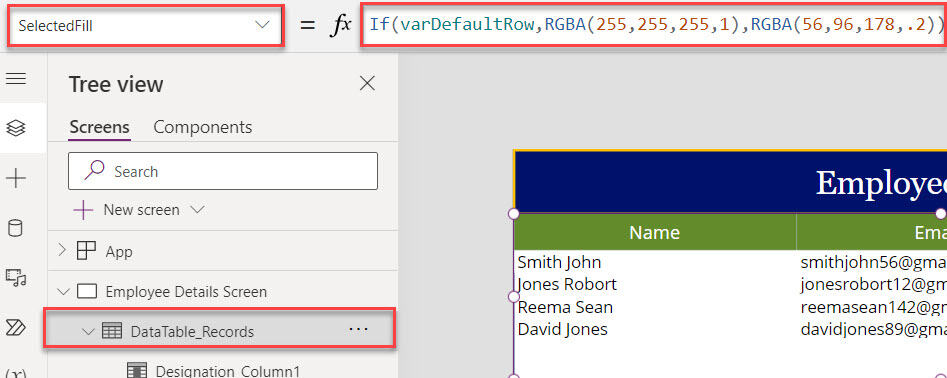
4. Next, select the Data table and set its SelectedFill property as:
SelectedFill = If(
    varDefaultRow,
    RGBA(
        255,
        255,
        255,
        1
    ),
    RGBA(
        56,
        96,
        178,
        .2
    )
)
Where,
- If() = This function helps to evaluate the unrelated condition
- varDefaultRow = Global variable name
5. In the last, select each column of the data table and set its OnSelect property to the code below.
OnSelect = Set(varDefaultRow,false)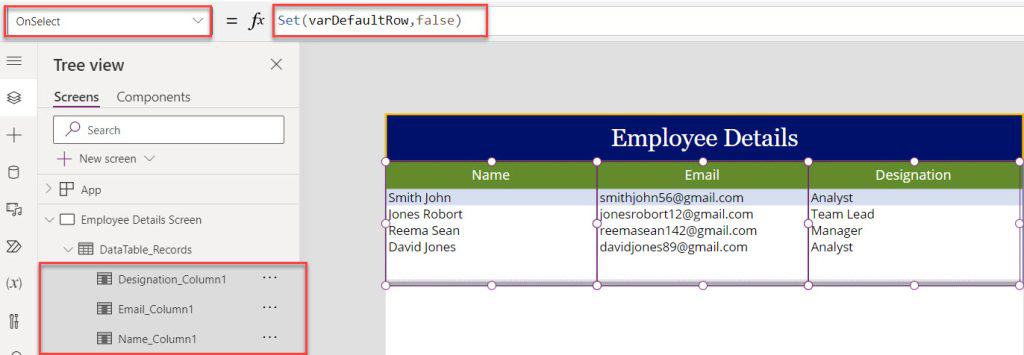
6. Once your app is ready, Save, Publish, Reload, and Preview the app. When the user opens the app, the data table will appear without the default selected row.

Scenario-2: Set default selected value from Power Apps data table as blank
In Power Apps, there is a Text input control and a Data table control [It retrieves records from collection]. When a user selects any row in the data table, then that specific item is populated in the text input field as in the screenshot below.

Also, when I opened the app every time, the data table default selected value appeared in the text input control. In this case, I would like to set the input field as blank every time I open the app.

To do so, follow the below steps.
1. Select the Power Apps Screen -> Set its OnVisible property to the code below.
OnVisible = UpdateContext({SetBlank: true})Where,
- UpdateContext() = This function is used to create the context or local variable
- SetBlank = Specify the variable name
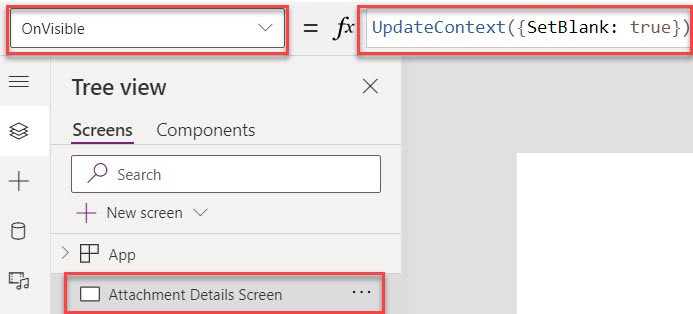
2. Next, select the OnSelect property of each column of the Data table and apply the below formula:
OnSelect = UpdateContext({SetBlank: false})
3. At last, select the Text input control and apply the below code on its Default property as:
Default = If(
    SetBlank,
    "",
     DataTable_Records.Selected.Title
)
Where,
- DataTable_Records = Data table control name
- Title = This is the SharePoint Column name. Whatever you specify the column name, that value will display in the Text input control

4. Save, Publish, and Close the app. When you reopen the app again, you can see the text input control has been empty even if the data table has the default selected value as shown below.
This way, we can work with the PowerApps data table default select row.

Scenario-3: Set Power Apps data table default selected row using SharePoint list
Now, we will see how to set a default selected item in a Power Apps data table. I have a SharePoint Online list, i.e., [Project Tracker] and this list contains the below fields.
| Column Name | Data Type |
| Project Name | Default single line of text |
| Description | Multiple lines of text |
| Project Status | Choice |
| Start Date | Date and time |
| End Date | Date and time |
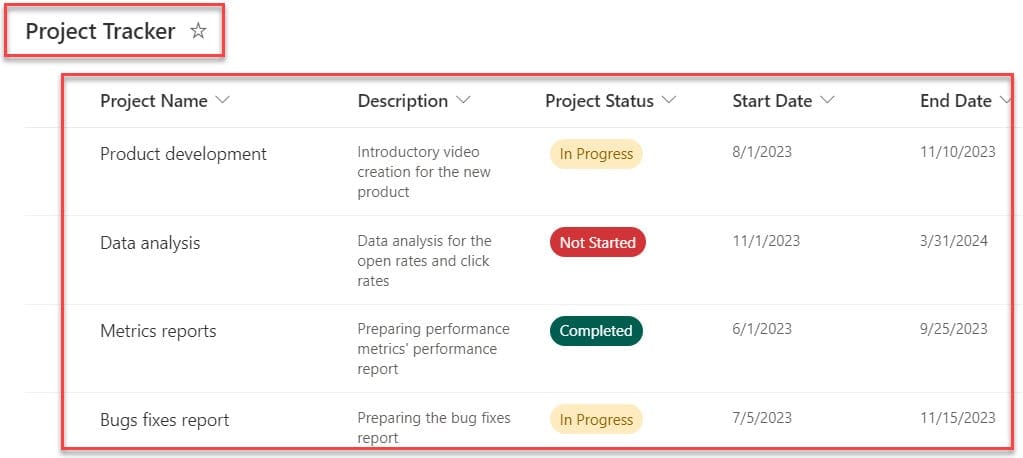
Now, I would like to display these list records on the Data table, and Now, I want to set its Default value as a “Completed” item row only. But, unfortunately, there is no default property in the data table. To overcome this issue, you can use the blank vertical gallery [It will act as a data table] instead of a data table.
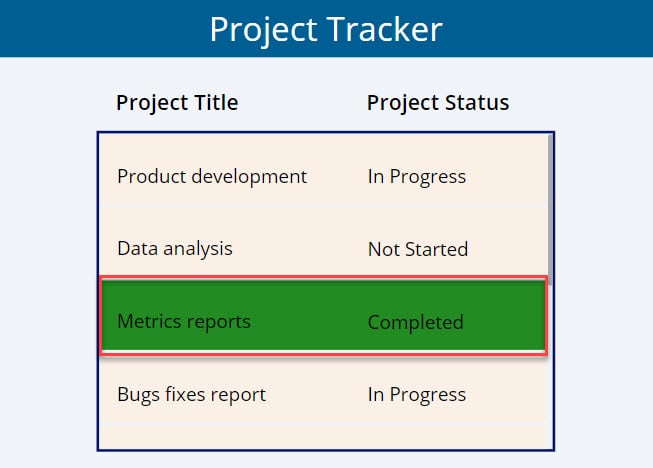
So when the user opens the app, he/she can always view the gallery will appear with the default value “Completed”. Also, the default value will appear with a different highlighted color, as shown below.
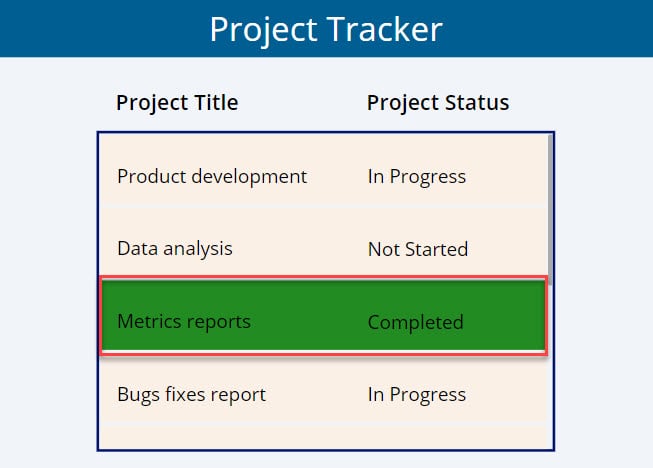
To achieve it, follow the below steps.
1. On the Power Apps screen -> Insert a Blank vertical gallery and set its Items property as:
Items = 'Project Tracker'Where,
- ‘Project Tracker’ = SharePoint Online List

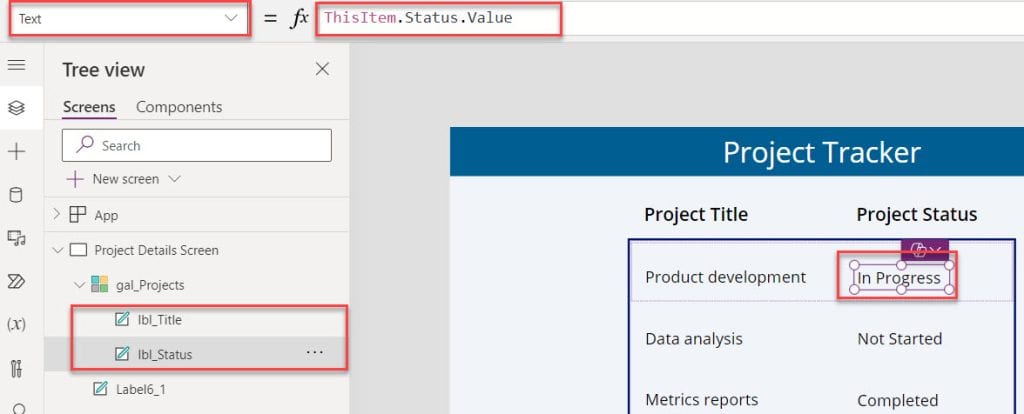
2. Also, to display the SharePoint choice field [Status] items in the gallery, insert a Text label inside the gallery control and set its Text property as:
Items = ThisItem.Status.ValueWhere,
- Status = SharePoint list choice field
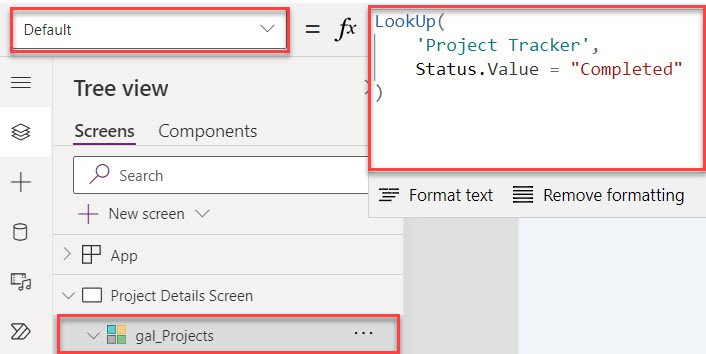
3. Next, select the Gallery control and set its Default property to the below code:
Default = LookUp(
    'Project Tracker',
    Status.Value = "Completed"
)
Where,
- LookUp() = This function is used to find a single record that matches one or more criteria
- Status.Value = “Completed” = This condition evaluates rows in the specified input
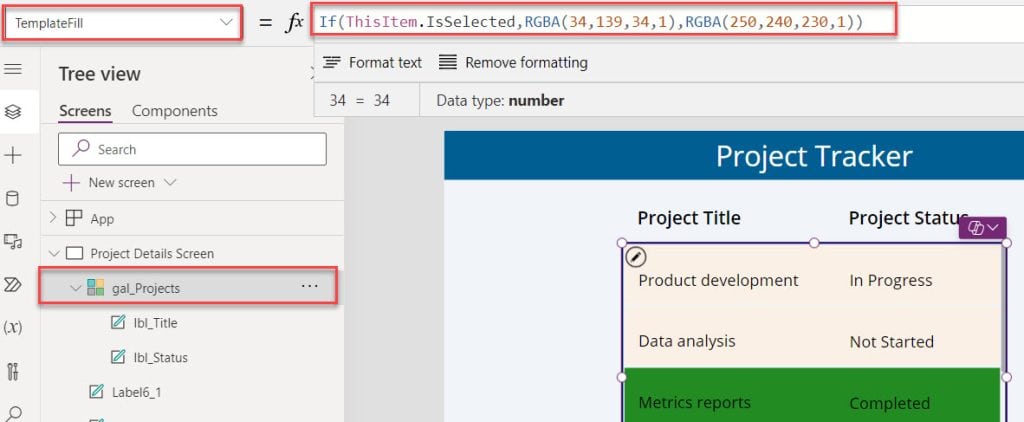
4. At last, select the TemplateFill property of the gallery control and apply the below code:
TemplateFill =  If(
    ThisItem.IsSelected,
    RGBA(
        34,
        139,                          //Color Code Of "Color.ForestGreen"
        34,
        1
    ),
    RGBA(
        250,
        240,                         //Color Code Of "Color.Linen"
        230,
        1
    )
)
5. Save, Publish, and Close the app to view the result. When you reopen the app again, you will see the gallery appear with the default value “Completed” as in the screenshot below.
Conclusion
I have explained all about the Power Apps data table default select row with different scenarios. Now, I hope if you get any similar requirements to the Power Apps data table select the default row, you can do it using the above examples.
You may also like:
- Hide a Column in Power Apps Data Table
- How to Make Power Apps Data Table Empty?
- Delete Rows in Power Apps Data Table
- Export Data from Data Table to Excel in Power Apps
I am Bijay a Microsoft MVP (10 times – My MVP Profile) in SharePoint and have more than 17 years of expertise in SharePoint Online Office 365, SharePoint subscription edition, and SharePoint 2019/2016/2013. Currently working in my own venture TSInfo Technologies a SharePoint development, consulting, and training company. I also run the popular SharePoint website EnjoySharePoint.com