Recently, I was trying to send an email to the client using Power Automate flow. In the mail, I need to provide this @mention. In this article, I will explain how to send an email with @mention in Power Automate.
Send an Email with @mention in Power Automate
I have a SharePoint list named Project Details. Here, I want to send emails to project-assigned people whose status is In Progress by mentioning the project head’s name in the mail.
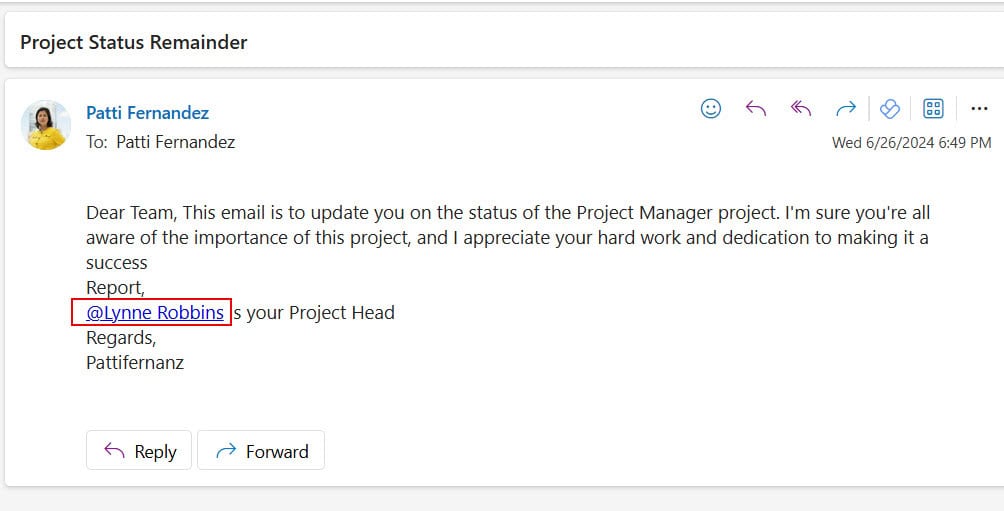
Look at the image below. The mail has the @project head name. When they click on it, their account will be opened in Outlook.
Here is the Project Details SharePoint list.
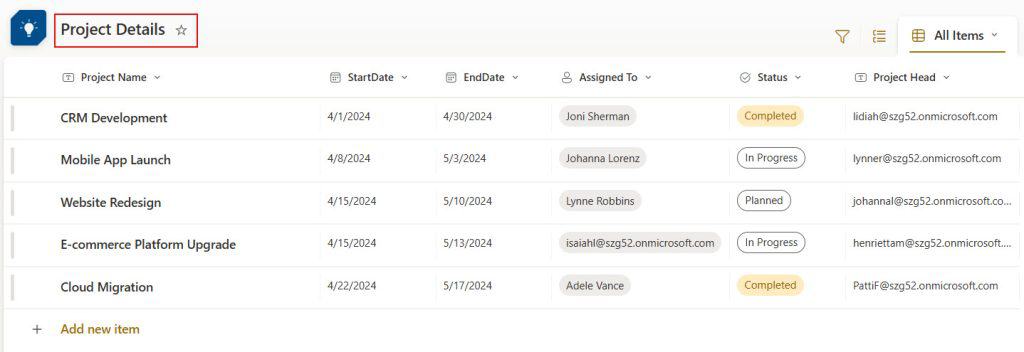
The above list has the following columns.
| Column Name | Data Type |
|---|---|
| Project Name | Title(Single line of text) |
| StartDate | Date and Time |
| EndDate | Date and Time |
| Assigned To | Person or Group |
| Status | Choice(Planned,In Progress,Completed) |
| Project Head | Single line of text |
Here, I need to email the people assigned to the project daily until they complete the project.
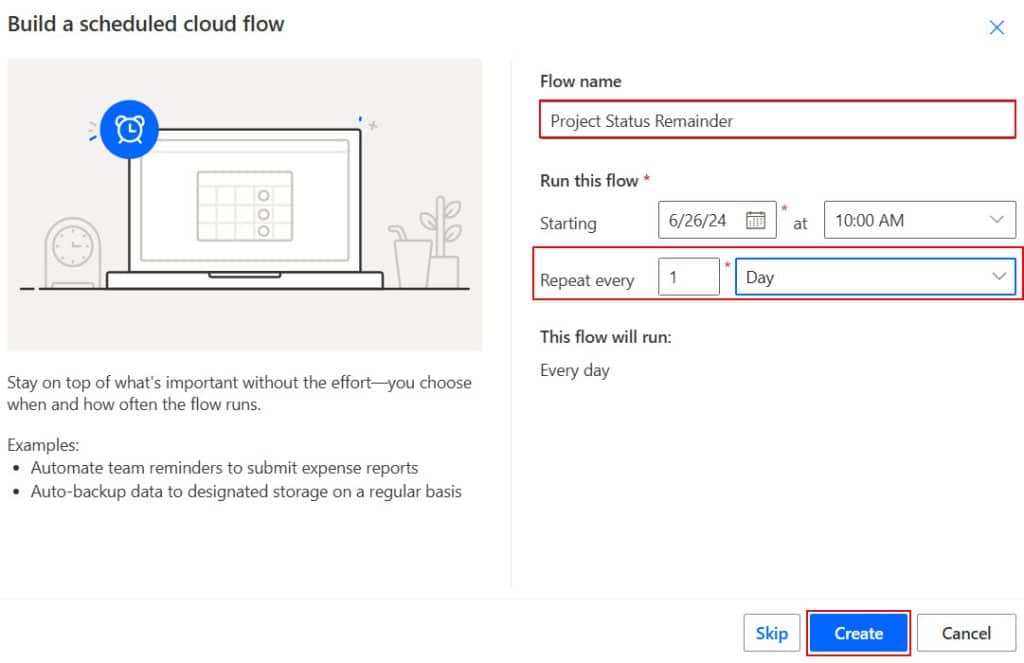
1. Open Power Automate -> Click on +Create -> Select Scheduled cloud flow. Then, Provide the following details and click on Create.
- Flow name
- Repeat every: It takes two values
- Frequency: I need to send emails every. So, I took 1.
- From the drop-down, select Day.
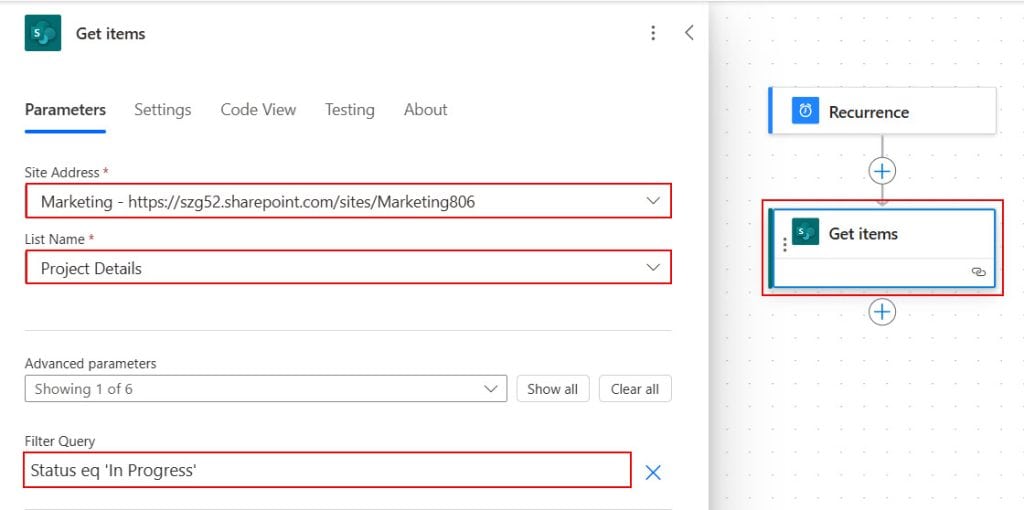
2. Once it is created. Add Get items action and provide the details like,
- Site Address
- List Name
- Filter Query
In the Filter Query, provide the query below.
Status eq 'In Progress'Here, Status is the internal column name, and eq is equal to. ‘In Progress’, which is the status column value.
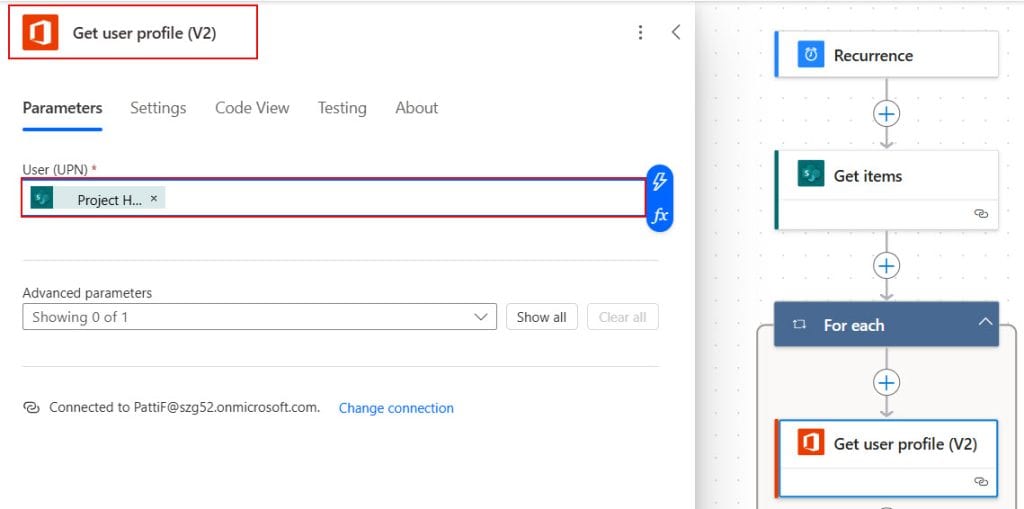
3. Now add the Get user profile(V2) action. Dynamically provide the Project Head column name to the User(UPN).
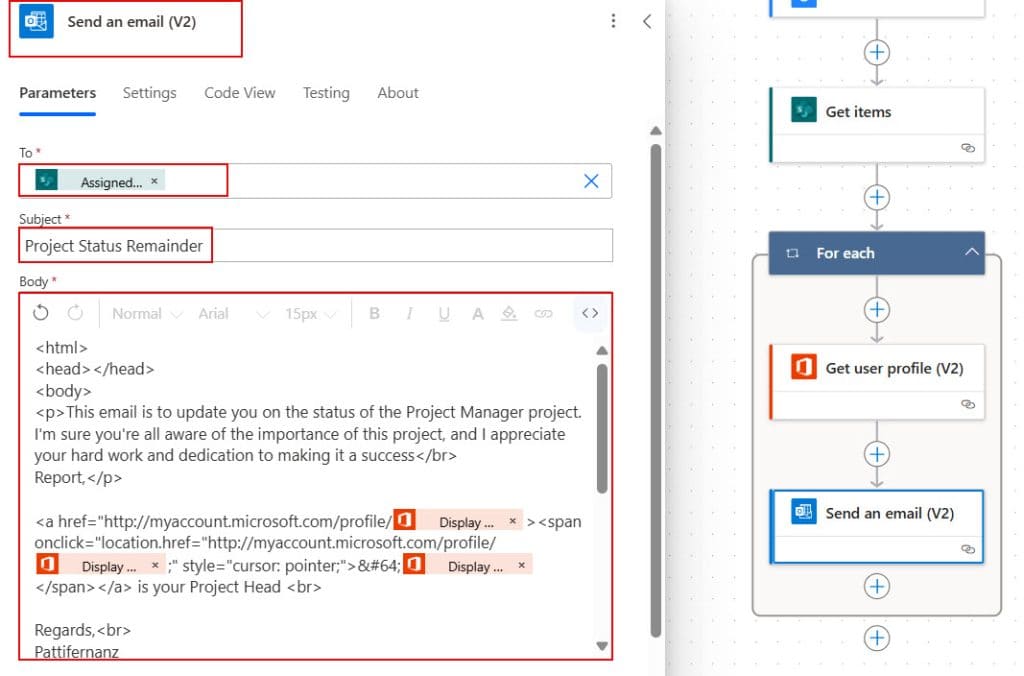
4. After this, add the Send an email (V2) action. Then, provide the parameter values as shown below.
- To: Provide Assigned to Email dynamically.
- Subject: Purpose of the mail.
- Body: Copy the code below for the body.
Note:
Change the DisplayName in the code to the dynamical DisplayName of the Get user Profile(V2) action.
<html>
<head></head>
<body>
<p>This email is to update you on the status of the Project Manager project. I'm sure you're all aware of the importance of this project, and I appreciate your hard work and dedication to making it a success</br>
Report,</p>
<a href="http://myaccount.microsoft.com/profile/Display Name><span onclick="location.href="http://myaccount.microsoft.com/profile/Display Name;" style="cursor: pointer;">@Display Name</span></a> is your Project Head <br>
Regards,<br>
Pattifernanz
</body>
</html>In the above code, the anchor<a> and span<span> tags are crucial in representing @mentioning in the email. And @ will display the @ symbol in email.
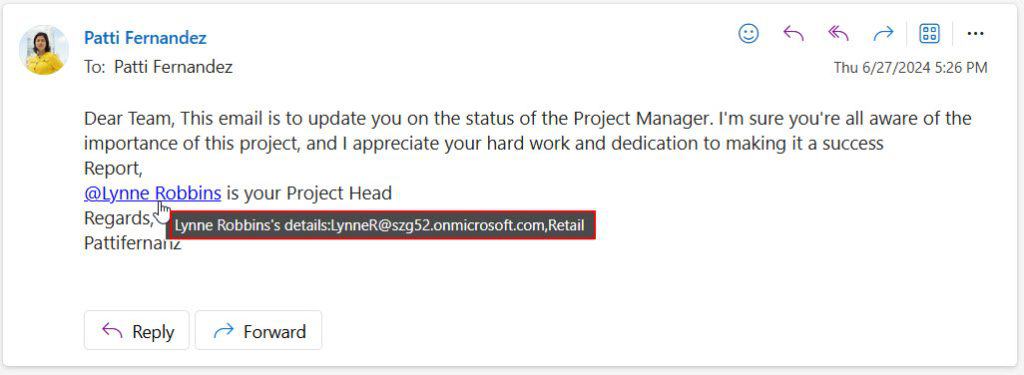
5. Now Save the flow and Test it. Then, the email will be sent as in the image below. Here, you can see the @Project head name. When we click on the name, it will display his details in Outlook.

6. If you want to see the details of the project head while hovering over his name, like in the below, follow the next step.
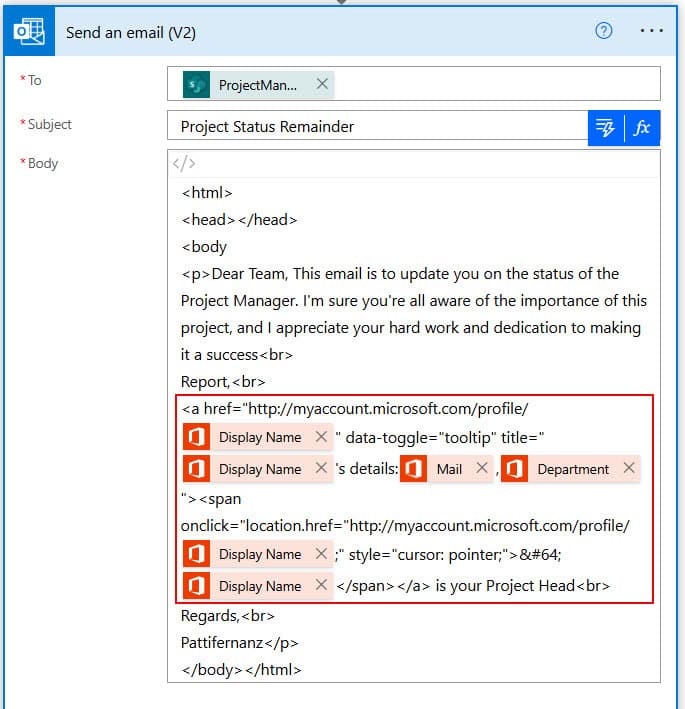
7. Provide the code below in the email body. Replace the bold text in the code with dynamic values.
<html>
<head></head>
<body>
<p>This email is to update you on the status of the Project Manager project. I'm sure you're all aware of the importance of this project, and I appreciate your hard work and dedication to making it a success</br>
Report,</p>
<a href="http://myaccount.microsoft.com/profile/Display Name" data-toggle="tooltip" title="Display Name's details:Mail,Department"><span onclick="location.href="http://myaccount.microsoft.com/profile/Display Name;" style="cursor: pointer;">@Display Name</span></a> is your Project Head <br>
Regards,<br>
Pattifernanz
</body>
</html>To get the details while hovering. We must add the data-toggle attribute and the value “tooltip” in the anchor tag<a>. Along with this, the title attribute. Here, you can provide the Mail, department, Job tile, etc., dynamically according to your needs.
In this way, you can add mentions while sending emails through Power Automate.
I hope you found this helpful article. Here, I have clearly explained how to send an email with @mentions through Power Automate. You can take this article as a reference if you are searching for this requirement.
You may also like the following tutorials:
- Get SharePoint Document Library Folder Path in Power Automate
- How to send email from excel using Power automate?
- How to Send Email From Power Apps?
- Send an Email with Attachments from Local Folder using Power Automate
- How to Send an Email with Attachments in Power Automate?
I am Bijay a Microsoft MVP (10 times – My MVP Profile) in SharePoint and have more than 17 years of expertise in SharePoint Online Office 365, SharePoint subscription edition, and SharePoint 2019/2016/2013. Currently working in my own venture TSInfo Technologies a SharePoint development, consulting, and training company. I also run the popular SharePoint website EnjoySharePoint.com