Do you know how to save an Excel file to SharePoint? Follow this SharePoint Online tutorial to learn how to save an Excel file to SharePoint.
Here, we will see how to export Excel directly into a SharePoint list and export the Excel file to SharePoint using the “Save As” option.
We will also cover how to upload an Excel file into the SharePoint document library.
How to Save Excel File to SharePoint
Here, we will discuss how to save Excel file to SharePoint using different ways. Such as:
- Export Excel Directly into a SharePoint List
- How to Save Excel File to SharePoint Using the “Save As” Option
- Working with Upload an Excel File into the SharePoint Document Library
Export Excel Directly into a SharePoint List
Let’s take a simple scenario: I already have an Excel Sheet named “Customer Details,” and this table contains the below fields.
| Column Name | Data Type |
| Customer ID | Text |
| Customer Name | Text |
| Gender | Text |
| Hyperlink | |
| Country and Area Code | Number |
| Phone Number | Number |
| Address | Text |

Now, I would like to add this Excel file directly to the SharePoint Online list as in the screenshot below.

To work around this, follow the below-mentioned steps. Such as:
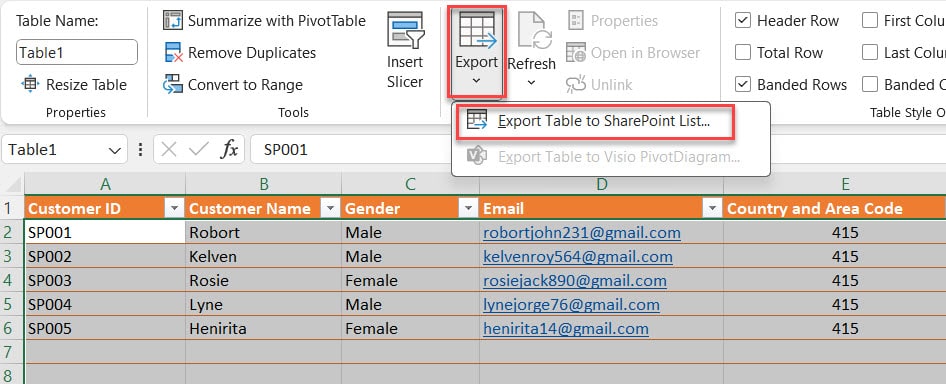
1. Open the Excel file -> Select the Data table -> Choose an Export option, and select the “Export Table to SharePoint List” as shown below.
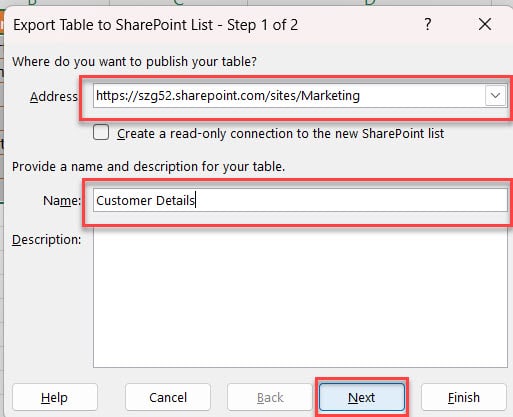
2. In the next step, it will ask you to provide the respective “SharePoint Site URL Address” and provide the “Name of the list“. Once it is done, click on the Next button like below.
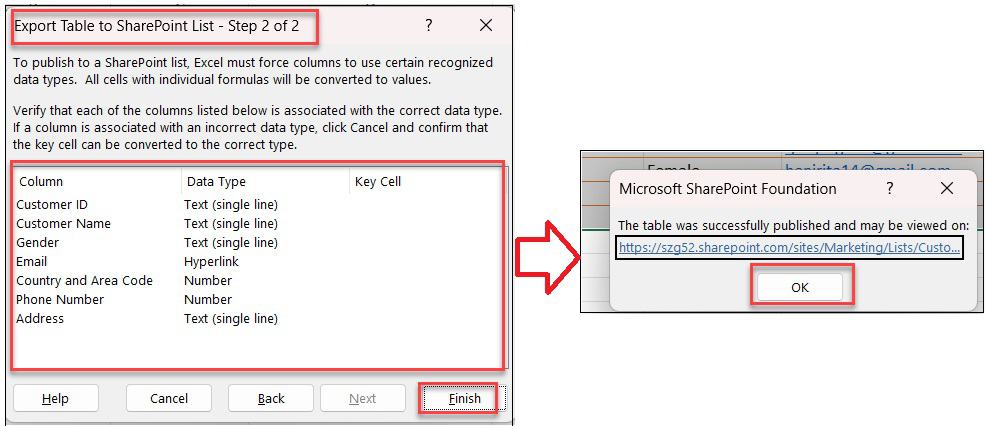
3. In the next step, you will get the names of the columns and respective data types. Then, click on the Finish button.
4. Once you click on the Finish button, it will provide the confirmation window [The table was successfully published…], and click on the Ok button.
Refer to the below screenshot:
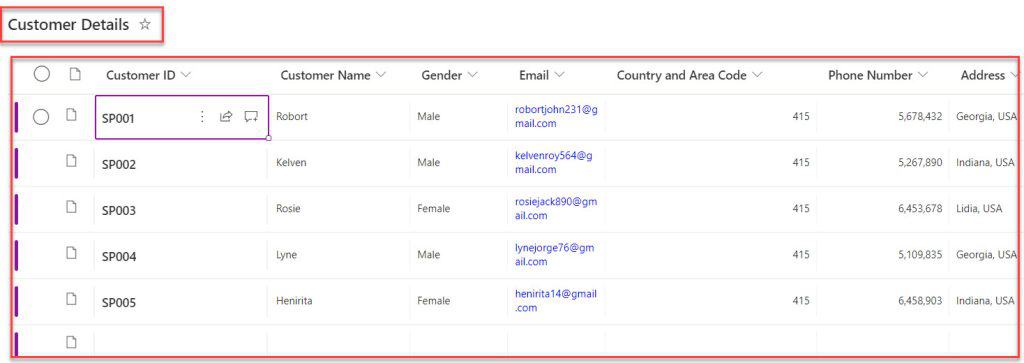
5. Now, go to your SharePoint site, where you will get the created SharePoint list [Customer Details] as shown below.
6. Also, you can add a new record in the Excel table, it will be saved in the SharePoint list as well.

This is how to work with exporting Excel directly into a SharePoint list.
How to Save Excel File to SharePoint Using “Save As” Option
Next, I will show you how to save an Excel file to SharePoint using the “Save As” option with a simple example.
Example:
I will also take the above Excel table [Customer Details] for this example. Now, I want to save the Excel file into the SharePoint document library using the “Save As” option, as in the screenshot below.

To achieve it, follow the below steps.
1. Select the Excel table and click on the Save As option -> Select your respective SharePoint site like below.
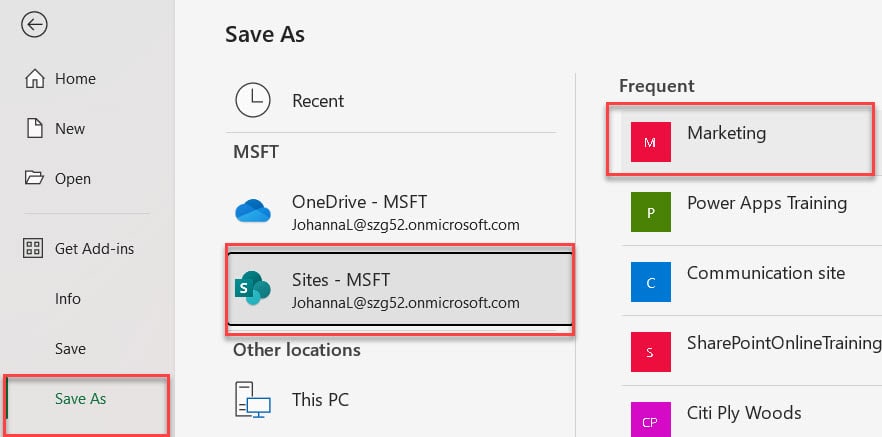
2. Once you select your site, it will ask you to provide the file name and select the respective document where you want to export, as shown below.
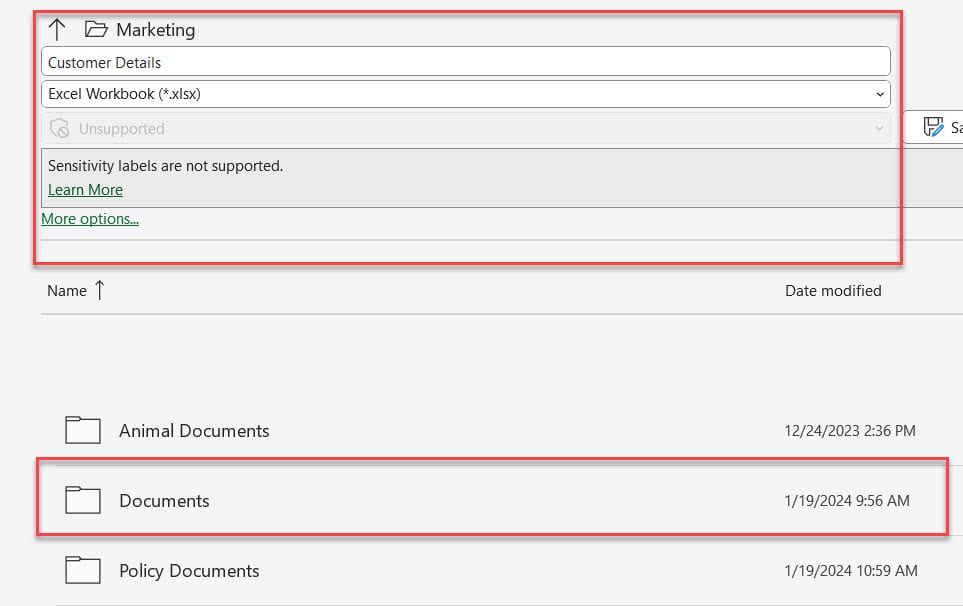
3. Once your Excel file is explored, you can also create a New folder [Provide Name -> Click on Ok button] like below.

4. Now, go to the respective SharePoint document library and select the specific folder [Customer Details] to get the Excel file as in the screenshot below.

This is how to save an Excel file to SharePoint using the “Save As” option.
Upload an Excel File into the SharePoint Document Library
In the last, we will discuss how to upload an Excel into the SharePoint document library with a simple scenario:
Scenario:
I have an Excel Sheet [Customer Details] that is saved on my local device. Now, I would like to add this Excel file to my SharePoint document library.
Refer to the below screenshot:

To do so, follow the below steps.
1. Open your SharePoint document library -> Expand the Upload tab and Select the Files option.
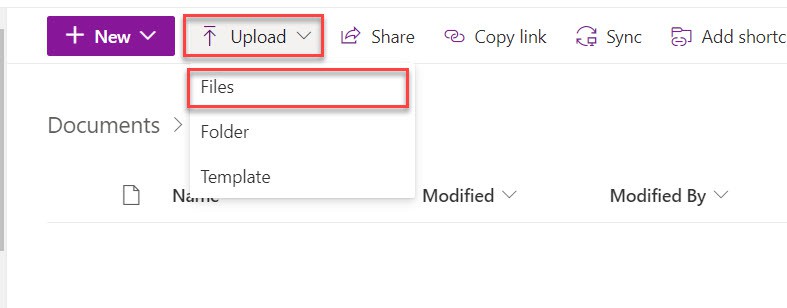
2. Next, it will be redirected to the local device to select the specific Excel file. Then, click on the Open button like below.
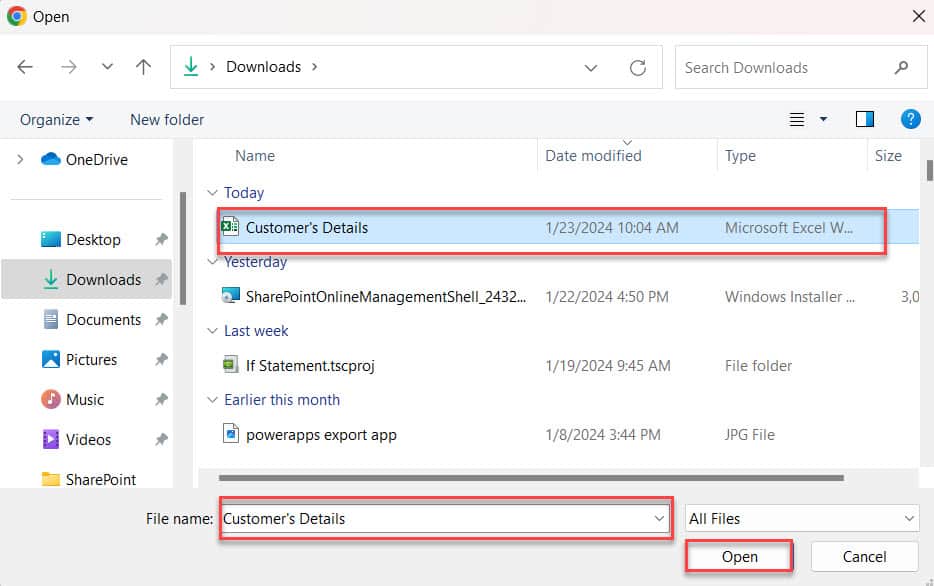
3. Finally, it will take a few seconds to retrieve the Excel into the SharePoint document library as in the screenshot below.

This is how to work with the upload an Excel into the SharePoint document library.
Conclusion
Exporting an Excel directly into a SharePoint list option allows you to save the Excel file to the respective SharePoint list.
This SharePoint Online tutorial explained in detail how to save Excel file to SharePoint. Including:
- Export Excel Directly into a SharePoint List
- How to Save Excel File to SharePoint Using the “Save As” Option
- Working with Upload an Excel File into the SharePoint Document Library
You may also like:
- How To Add A Calendar In SharePoint?
- SharePoint Left Navigation Menu Customization
- How to Disable a Microsoft 365 Account?
- SharePoint Calendar Color Code
Hello Everyone!! I am Bhawana a SharePoint MVP and having about 10+ years of SharePoint experience as well as in .Net technologies. I have worked in all the versions of SharePoint from wss to Office 365. I have good exposure in Customization and Migration using Nintex, Metalogix tools. Now exploring more in SharePoint 2016 🙂 Hope here I can contribute and share my knowledge to the fullest. As I believe “There is no wealth like knowledge and no poverty like ignorance”
In the first section, fifth bullet, doesn’t work if you copy the URL from the address bar. It says, “Excel cannot open that location. Please try another location.” However, if you go to the parent folder in SharePoint, and copy the link to the folder you want to put it in, it will take that.