You can only use the SharePoint framework to do custom development for a modern SharePoint Online site.
To develop using the SPFx framework, you must first set up the environment. This includes installing all the necessary tools, such as a code editor, Node.js, Gulp, Yeoman, and the Yeoman SharePoint generator.
I will also show you how to develop your first spfx client-side web part using the SharePoint Framework. Finally, I will tell you how to deploy an SPFx web part to a SharePoint site and add it to a SharePoint site page.
What is the SharePoint Framework (SPFx)?
The SharePoint Framework (SPFx) is a development model for building and customizing user interfaces in SharePoint. It allows developers to create web parts, extensions, custom pages, team tabs, and web components for use in SharePoint sites.
SPFx uses modern web technologies like TypeScript, React, and Node.js, enabling developers to create responsive and dynamic user experiences. It’s designed to work seamlessly with various Microsoft 365 applications and SharePoint Online.
SPFx Development Environment Set up
The SPFx environment setup is a one-time activity you need to do before developing any SPFx components.
First, we must install all the necessary tools for developing an SPFx project.
Install a code editor
You need a code editor to write your SPFx code. You can install any code editor or IDE that supports client-side development, like:
I highly recommend downloading Visual Studio Code because it’s free, cross-platform, and highly customizable.
Install Node.js
We download Node.js because it provides the JavaScript runtime environment necessary to run tools and scripts for developing SharePoint Framework (SPFx) projects. Node.js also includes npm (Node Package Manager), which is used to install and manage dependencies for your SPFx project.
Recommended Version: The LTS (Long Term Support) version of Node.js 18v is recommended for SPFx development. You must always follow the Microsoft SPFx setup guide to know which version of Node.js is supported for SPFx.
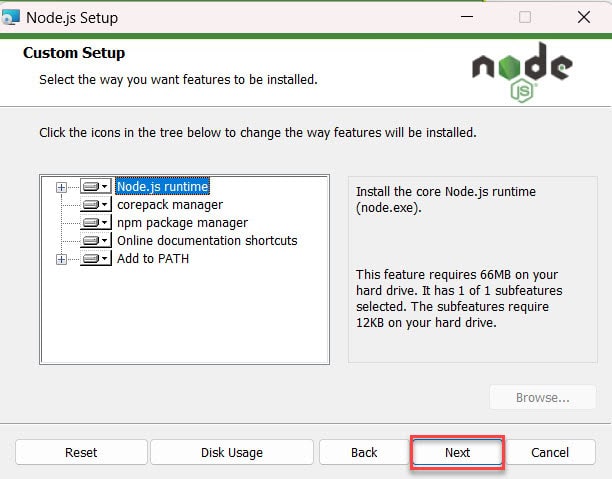
1. Installing Node.js is straightforward. Just double-click on the setup file. Then click the Next button.
2. Accept the license agreement, choose your download location, and click ‘Next.’ Do not change any settings and click ‘Next‘ again.
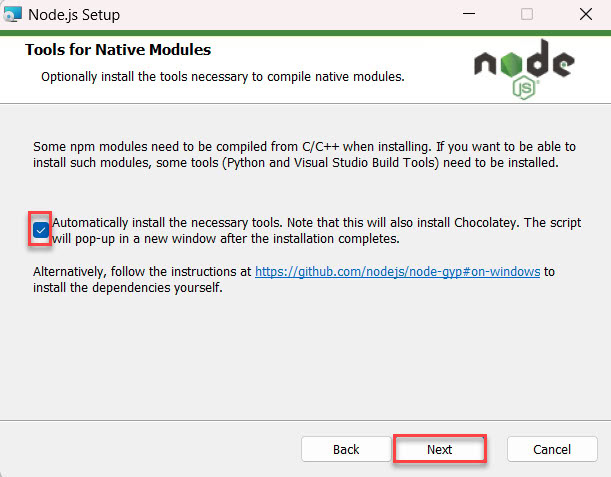
3. Then check the automatically install the necessary tools check box and click Next.
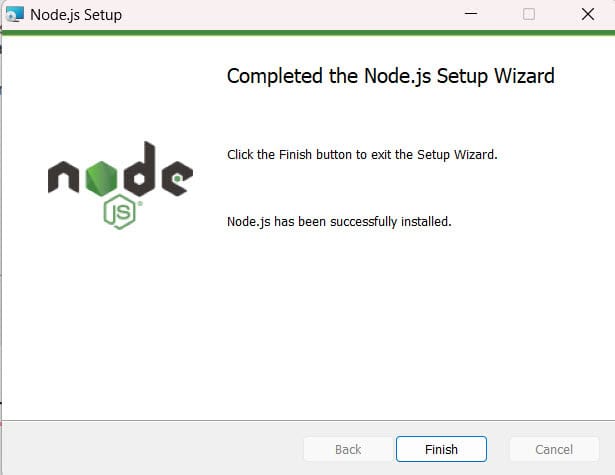
4. Click on the ‘Install‘ button. After some time, the ‘Successfully Installed’ page will appear. Then, click ‘Finish.’
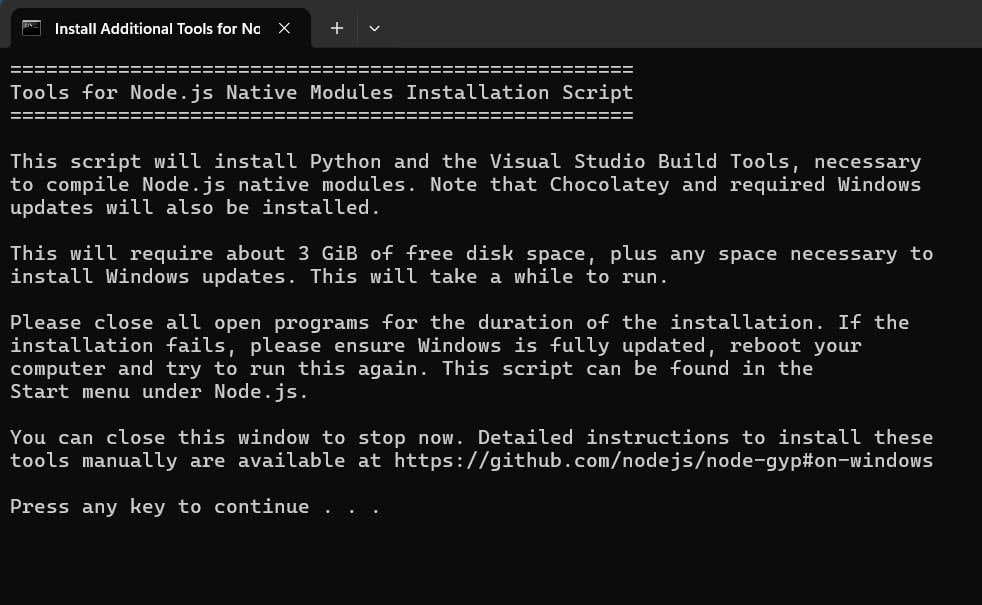
5. After that, the Node.js command prompt will automatically open to download the additional tools here; you can press any key to start downloading.
6. After completing the download, open the Node.js command prompt and check the node version using the below command.
node -v
or
node --version
It will show the node version as V18…

Install development toolchain prerequisites
Open the Node.js command prompt in admin mode, then install the below tools.
Install Gulp
Then, we installed Gulp because it is a task runner that helps automate and manage repetitive development tasks in SPFx projects.
Enter the following command in the Node.js command prompt to install the Gulp:
npm install gulp-cli --global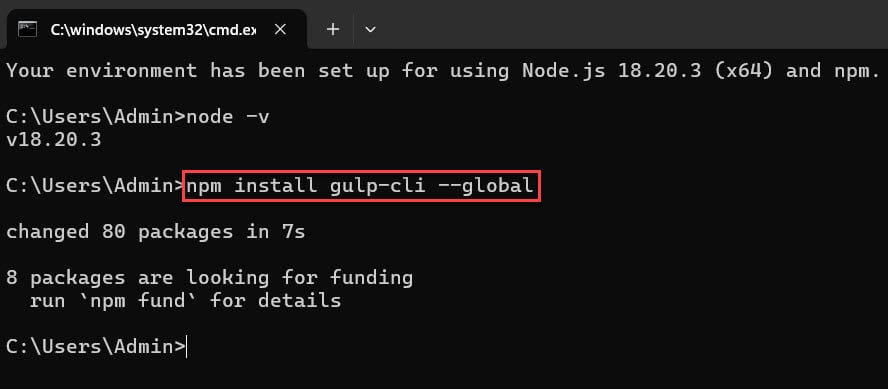
Install Yeoman
Then, we installed Yeoman because it helps generate the project structure and boilerplate code needed for SPFx development.
Enter the following command to install Yeoman:
npm install yo --global
Install Yeoman SharePoint generator
Now, let’s install the Yeoman SharePoint generator. This tool helps create a SharePoint client-side solution project with the correct toolchain and project structure.
To install the SharePoint Framework Yeoman generator globally, use the following command:
npm install @microsoft/generator-sharepoint --global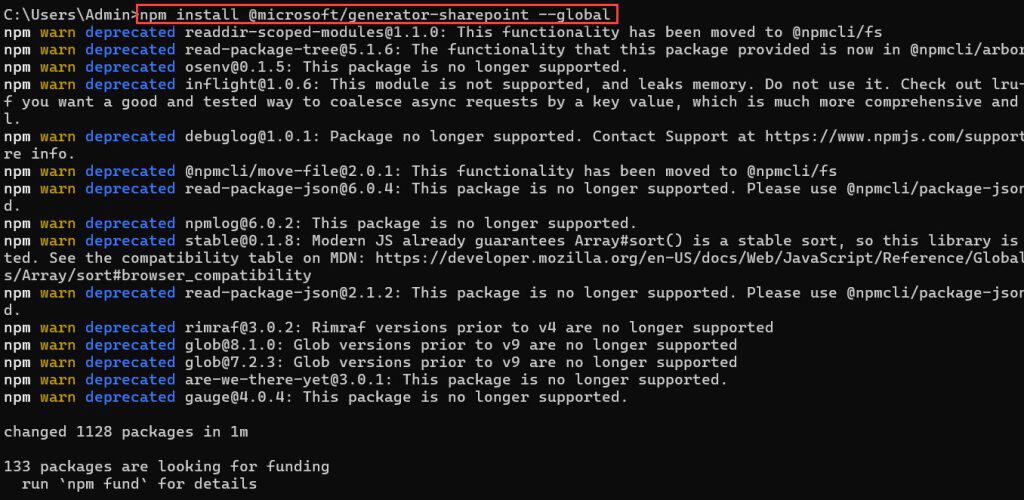
Alternatively, you can also run all the above commands in a single line
npm install gulp-cli yo @microsoft/generator-sharepoint --globalThen, one more important step is pending before the setup is completed.
We need to run the below command ONLY ONCE after you create your first project in the project’s root folder.
gulp trust-dev-certSo, let us create an SPFx client-side web part.
Create a New Client Side Web Part Project
Now follow the below steps to create a new web part project:
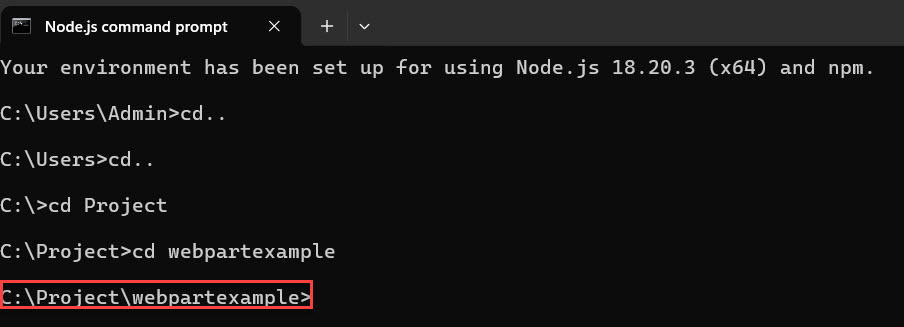
Open the Node.js command prompt and create a folder by using the below command:
- cd.. = This moves you up one directory.
- md foldername = This creates a new folder named “foldername.”
- dir = This shows you a list of files and folders in the current directory.
- cd foldername = This moves you into the newly created folder.
I hope you create a folder using the command prompt.
To create a new web part project, run the Yeoman SharePoint Generator from within the new folder using the following command:
yo @microsoft/sharepointThe above command will create the SharePoint client-side solution project structure. You will see a welcome message with a question like this:
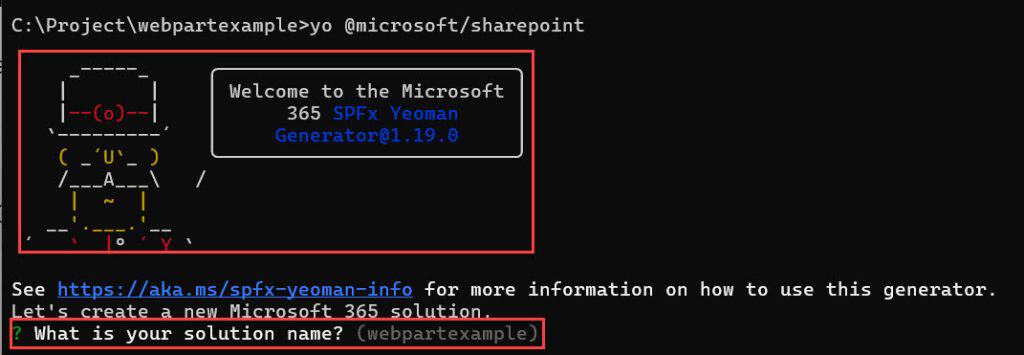
For all questions, accept the default options except for the following questions:
- What is the solution name?NewWebPart
- Which type of client-side component to create?: WebPart
- What is your Web part name?: NewWebPart
- Which template would you like to use?: No framework

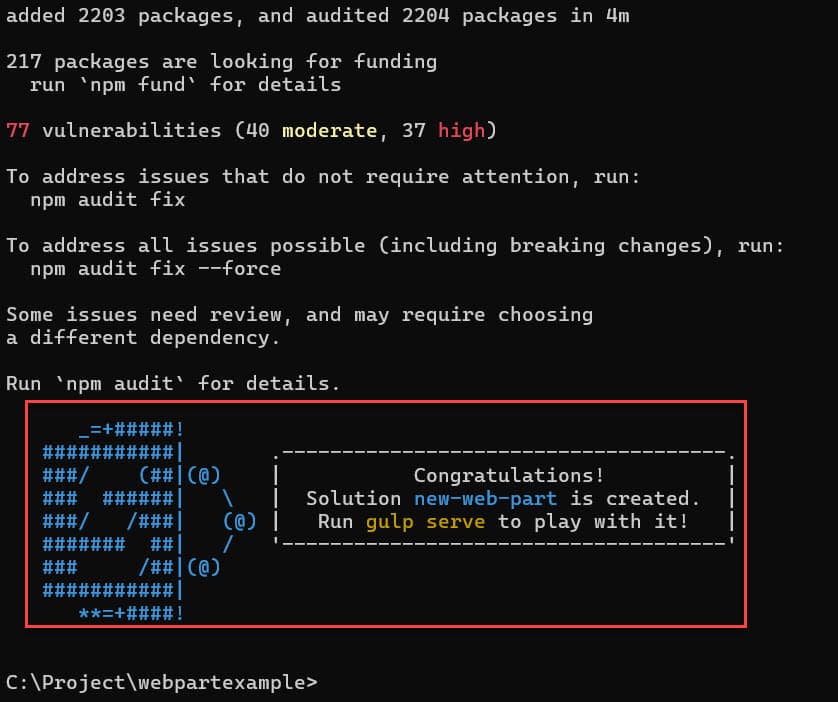
Now, it will create and import all the files into the folder we created. Setting up the SharePoint Framework client web part will take some time. It will look like this:
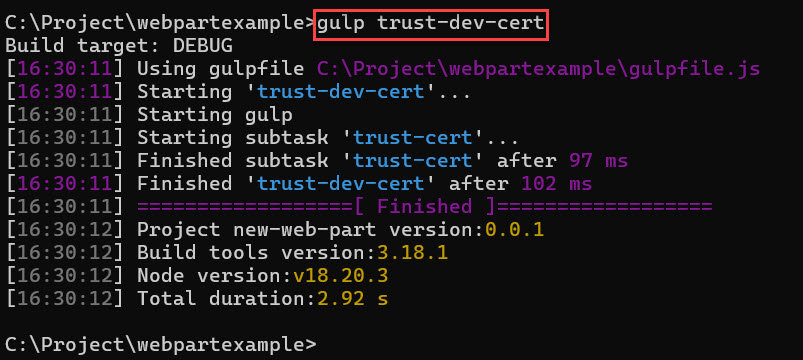
If the first time you are developing the client-side web part in spfx, then run the below command once.
gulp trust-dev-certNote: You do not need to run the command for all the web parts; it needs to be executed just once.
Start the local web server & launch the hosted workbench
Then, to run the web part in your local host, put the below command:
gulp serve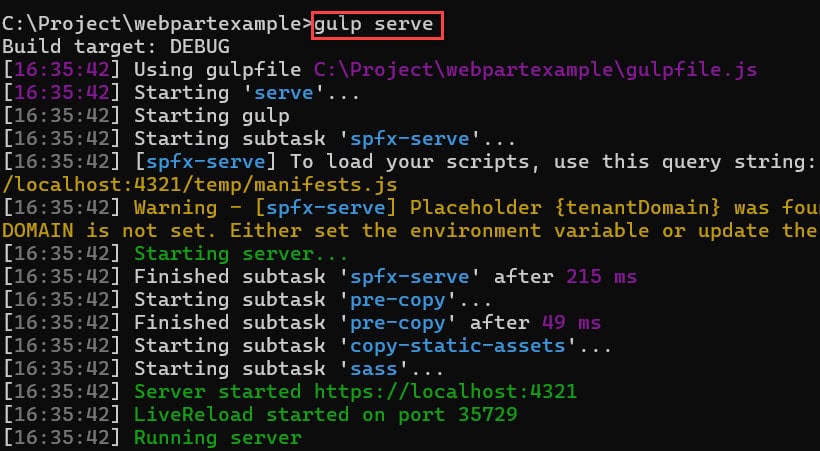
This command runs gulp tasks to create and start a local web server hosting endpoints at localhost:4321 and localhost:5432. It will then open your default browser and load the hosted workbench to preview web parts from your local dev environment.
Here, we need to give our SharePoint tenant name.
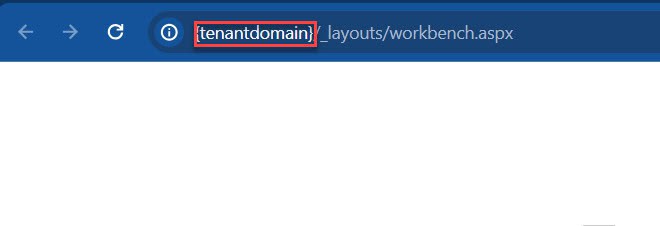
The SharePoint Workbench is a developer design surface that allows us to quickly preview and test web parts without deploying them to SharePoint.

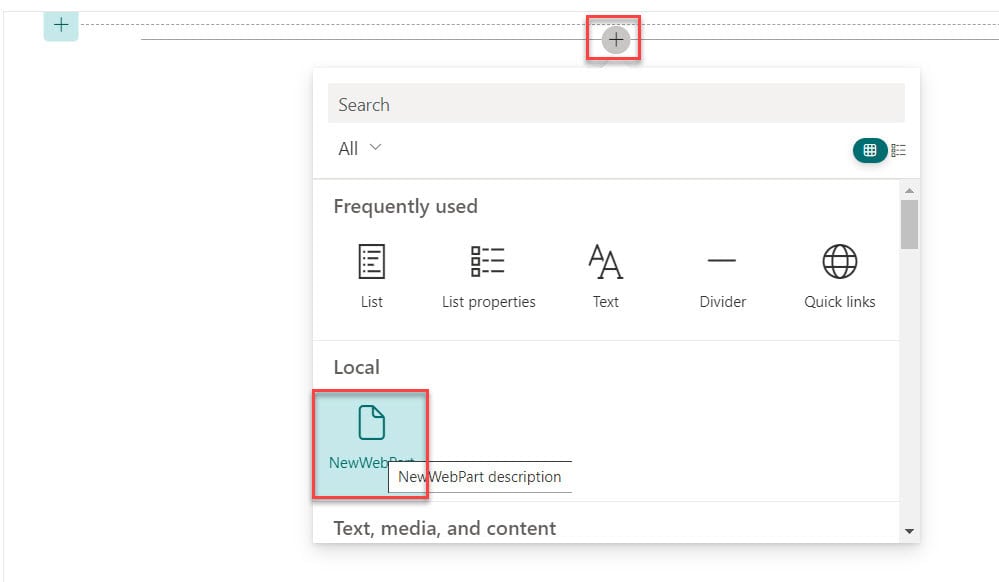
To add the newly created web part, select the add icon. This opens the toolbox, where you can see the list of web parts available to add. Now, select the NewWebPart.
Then it will look like the below screenshot.
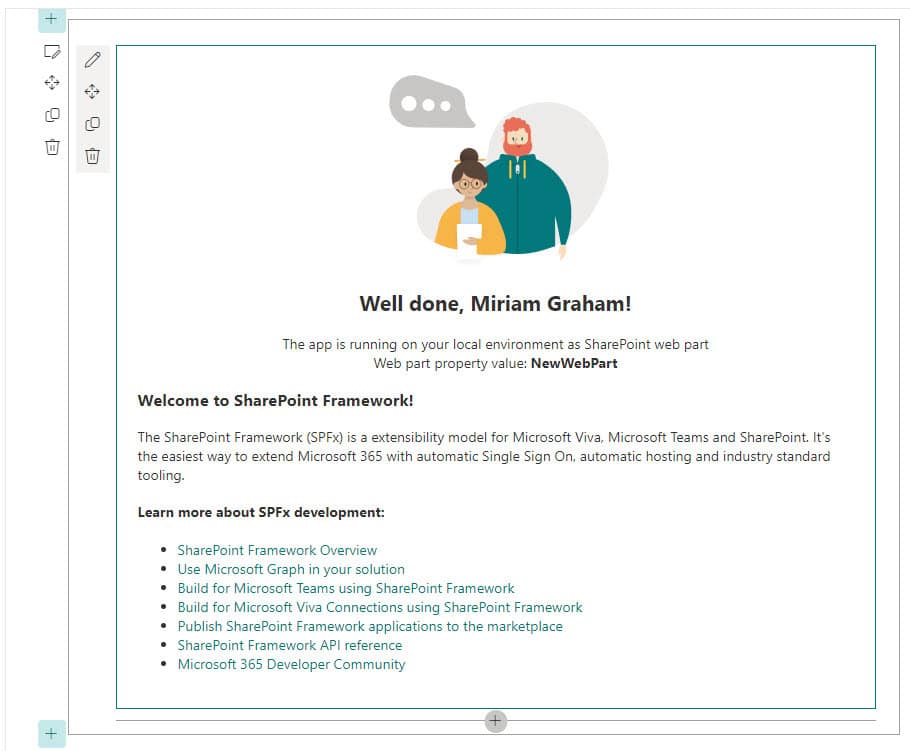
At this point, we successfully created the web part using SPFx.
Click the pencil icon, then modify the text in the ‘Description’ text box on the right side. Notice how the text in the web part changes as you type.

In the Node.js command prompt, click ctrl + c to stop the local web server by terminating the process.
Then it will look like this:

Enter the following command to open the web part project in VS Code (or use your favorite editor):
code .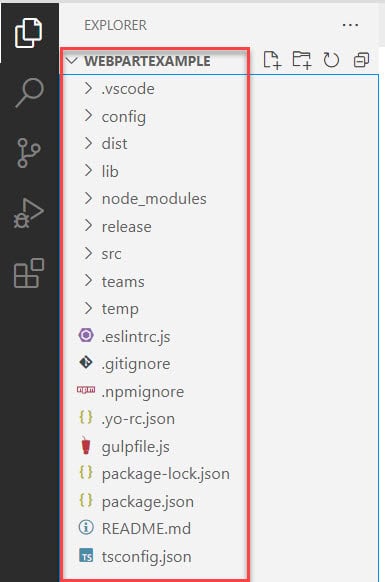
Deploy our SPFx Web Part to a SharePoint Online Site
Next, you can deploy the web part into a SharePoint Online site.
Package the web part
Now, in the code editor, open the terminal and run the following command:
gulp bundleThen, enter the below command to package the web part that we created :
gulp package-solutionThis command creates a package where our web part store we need to put in the SharePoint site app catalog.
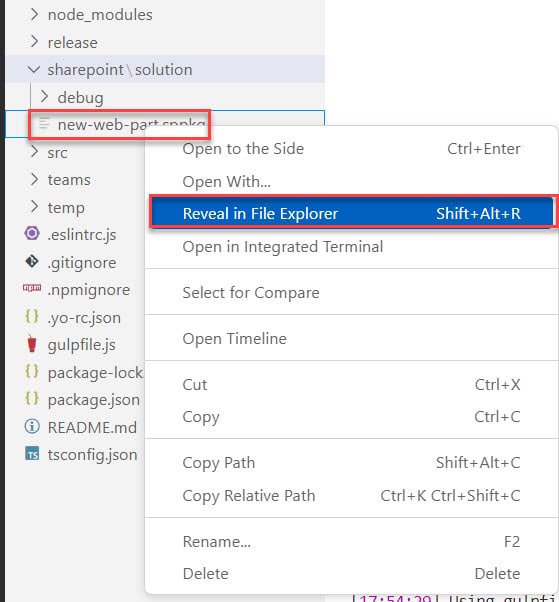
To see this file, go to sharepoint/solution/new-web-part.sppkg in the VS Code.
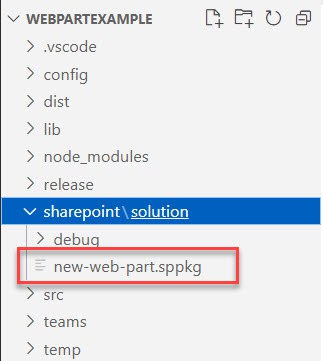
To view the file in File Explorer, right-click the file and select ‘Reveal in File Explorer.’
Deploy the Web Part Package to the Site Collection App Catalog
Here, I want to deploy the web part in the Site Collection App Catalog, not the Tenant App Catalog.
Note: If you want to deploy the SPFx web part to the organizational app catalog, you can upload it to the organization’s app catalog site.
1. To enable the Site Collection App Catalog, use the following PowerShell script:
Connect-SPOService -Url https://<tenant>-admin.sharepoint.com/ -Credential MiriamG@<tenant>.onmicrosoft.com
$site = Get-SPOSite https://<tenant>.sharepoint.com/sites/SPFx

Add-SPOSiteCollectionAppCatalog -Site $site
If you want to disable the Site Collection App Catalog, use the script below:
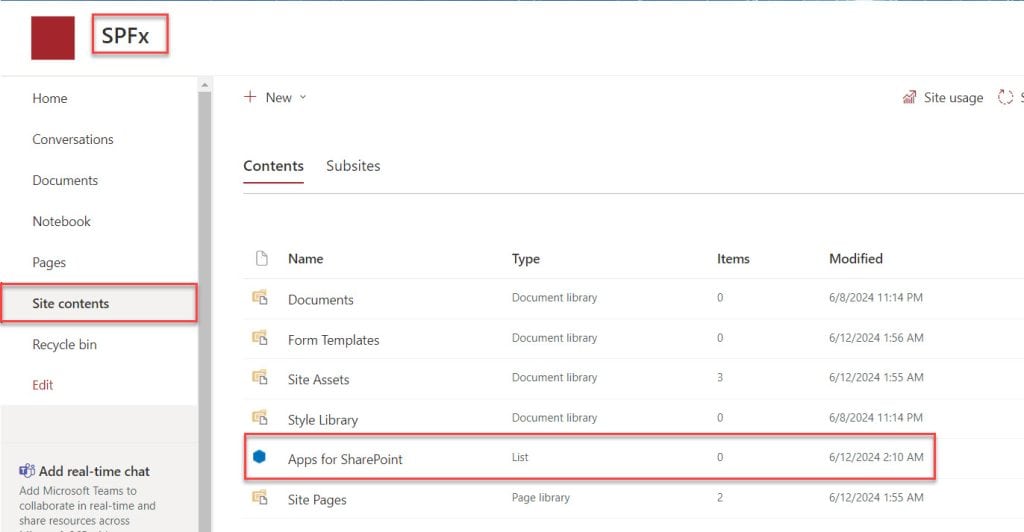
Remove-SPOSiteCollectionAppCatalog -Site $site2. When you navigate to the Site contents where you enabled the Site Collection App Catalog, you’ll see a new list called “Apps for SharePoint.” Here, you need to deploy your web part package.
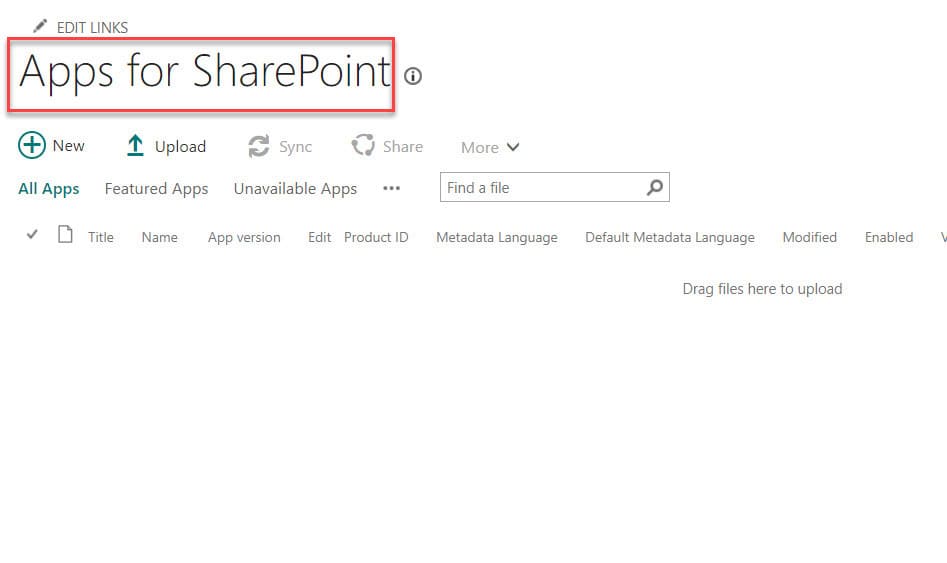
3. Open the Apps for SharePoint list and upload or drag and drop the .sppkg file.
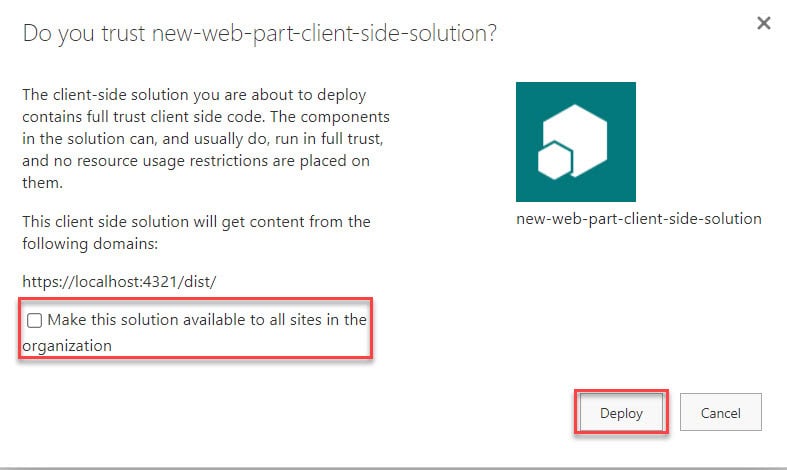
4. Then, a popup window will open, where you need to click “Deploy.” You can check the checkbox to show the web part to all sites in the organization.
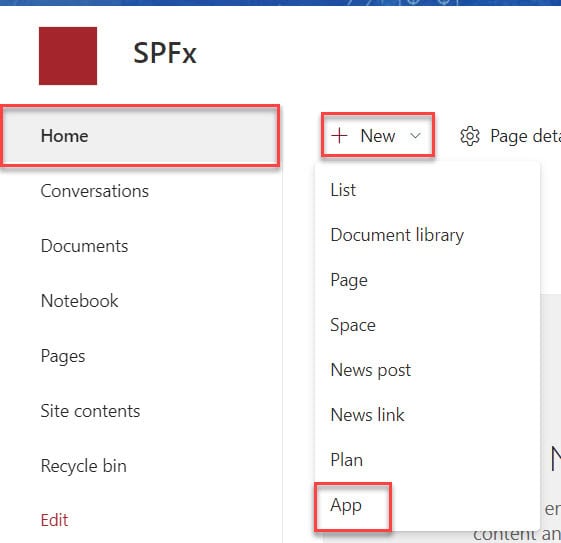
5. Go to the Home page, click +New, then select App.
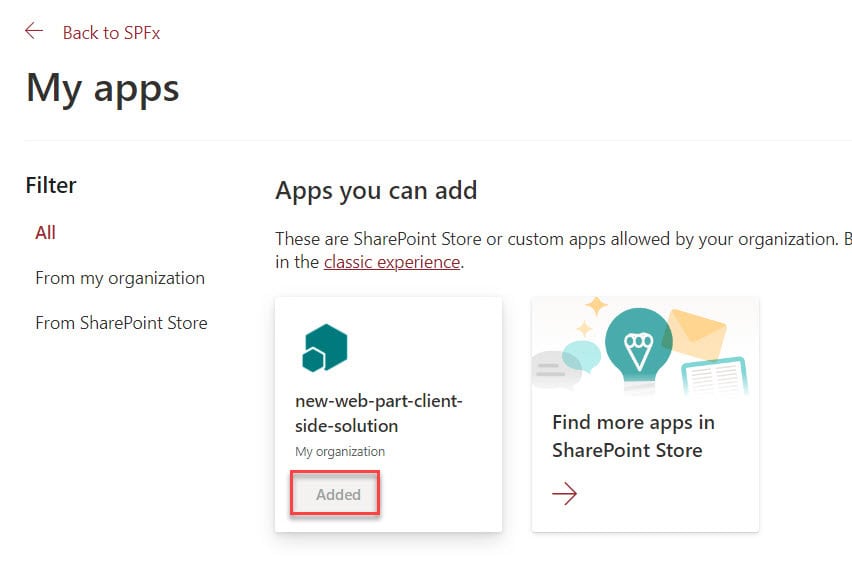
6. To add the SharePoint Framework client web part to the SharePoint site, click the “Add” button.
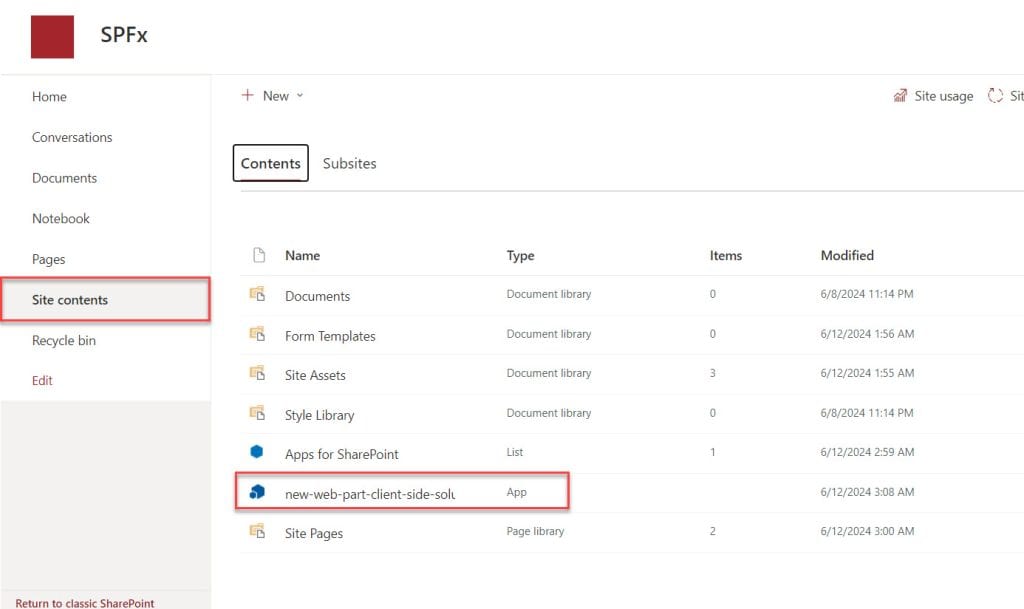
7. When you revisit the Site Contents, you’ll find the web part app listed there.
Add the Web Part to the Modern SharePoint Page
1. Navigate to your site where the solution was installed. Edit the page, open the web part picker, and select our web part.
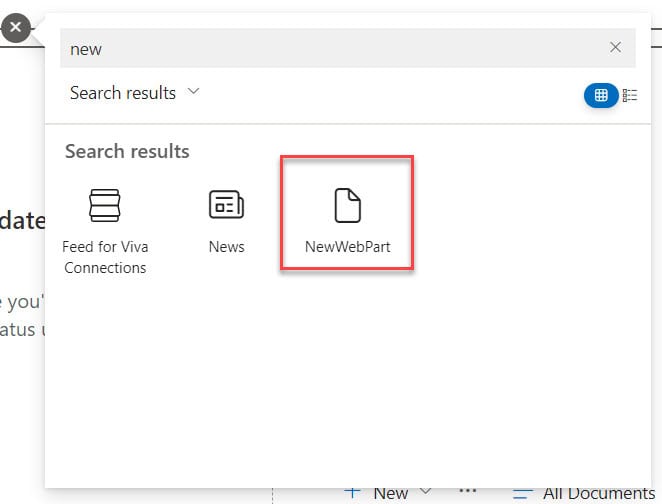
2. Click on the web part to add it to the SharePoint Online modern page.
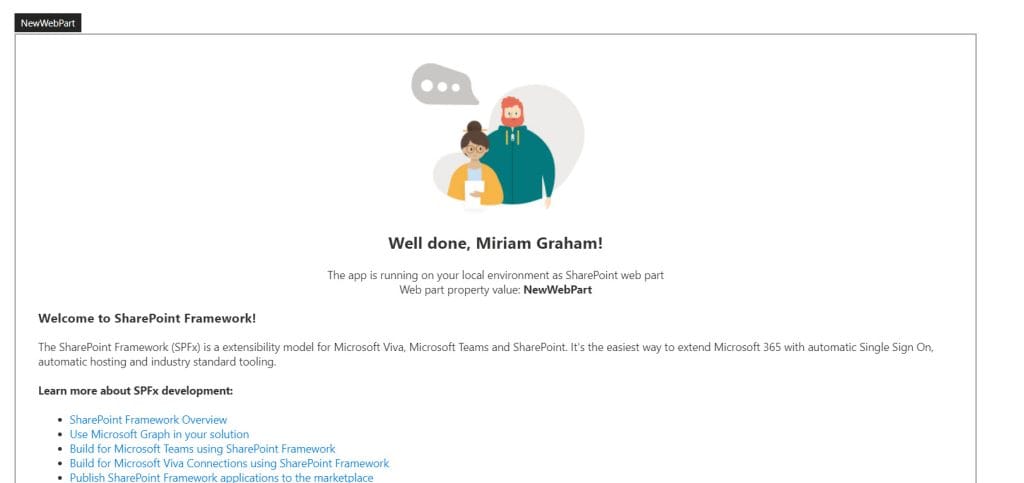
This is how to set up your development environment for the SharePoint framework. I have shown you all the steps with screenshots. I have also shown how to create your first SharePoint client-side web part using SPFx.
Finally, I explained how to deploy a client-side web part to a SharePoint site app catalog and then add the web part to a site page.
You may like the following SPFx tutorials:
- SPFx Upload File to SharePoint Document Library With Metadata
- How to use SPFx preconfiguredentries with examples
- Create SPFx Web Part with jQuery Accordion
- Display SharePoint list items using SPFx
I am Bijay a Microsoft MVP (10 times – My MVP Profile) in SharePoint and have more than 17 years of expertise in SharePoint Online Office 365, SharePoint subscription edition, and SharePoint 2019/2016/2013. Currently working in my own venture TSInfo Technologies a SharePoint development, consulting, and training company. I also run the popular SharePoint website EnjoySharePoint.com
I have created spfx environment in my laptop and now shareing complete complete code files through one drive to my colleague. Now please tell me how to setup environment with existing code in my colleague’s laptop
I have followed all the steps and it is working fine but after adding the webpart on sharepoint page, I am getting
Something went wrong
If the problem persists, contact the site administrator and give them the information in Technical Details.
TECHNICAL DETAILS
ERROR:
Script error for: 5e53f0dc-de0c-4224-aeb0-f27fe39e7654_0.0.1/NewWebPartWebPartStrings
http://requirejs.org/docs/errors.html#scripterror
CALL STACK:
Error: Script error for: 5e53f0dc-de0c-4224-aeb0-f27fe39e7654_0.0.1/NewWebPartWebPartStrings
http://requirejs.org/docs/errors.html#scripterror
at B (eval at e (https://res-1.cdn.office.net/files/sp-client/sp-pages-assembly_en-us_76321800eff580162db09111ef3c3533.js:198:10299), :8:252)
at HTMLScriptElement.onScriptError (eval at e (https://res-1.cdn.office.net/files/sp-client/sp-pages-assembly_en-us_76321800eff580162db09111ef3c3533.js:198:10299), :30:244)