Is there a way to make the field(s) in Power Apps visible or hidden based on the Yes No column? Of course, yes.
This Power Apps tutorial will guide you on working with Power Apps Show Hide Fields Based On the Yes No Column [using Check box control].
Also, we will see how to show hide fields based on SharePoint Yes No Column with various scenarios.
Power Apps Show Hide Fields Based On Yes No Column
Here, I will explain two approaches to work with power apps hide fields based on condition. Such as:
- Power Apps Show Hide fields based on Checkbox Value
- Power Apps Show Hide fields based on SharePoint Yes No Column
Let’s explore the examples below.
Example – 1: [Power Apps Show Hide fields based on Checkbox Value]
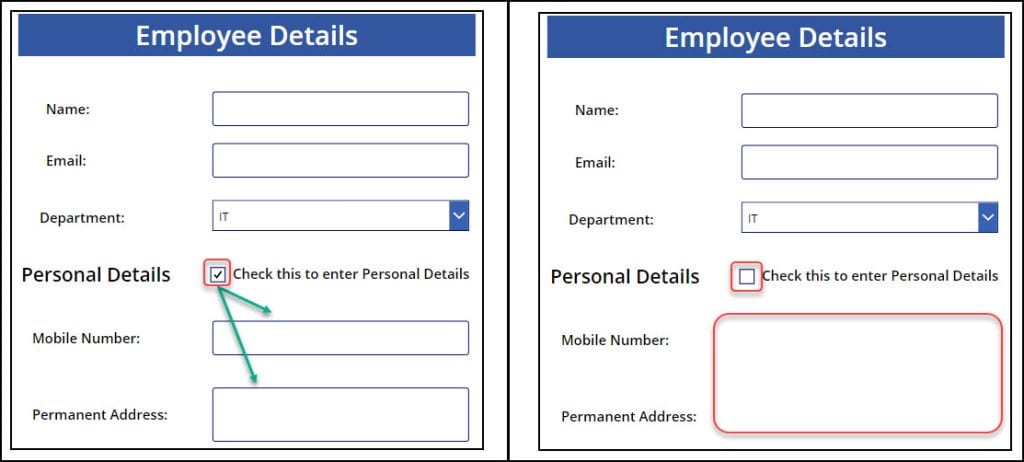
1. The image below represents an Employee Details form [using various custom input controls]. This app contains a Check box control [Check this to enter Personal Details].
2. If a user checks this option, the other two fields [Mobile Number & Permanent Address] will appear where the user can enter the personal details.
If the user unchecks this option, these two fields will disappear in the app, as shown below.
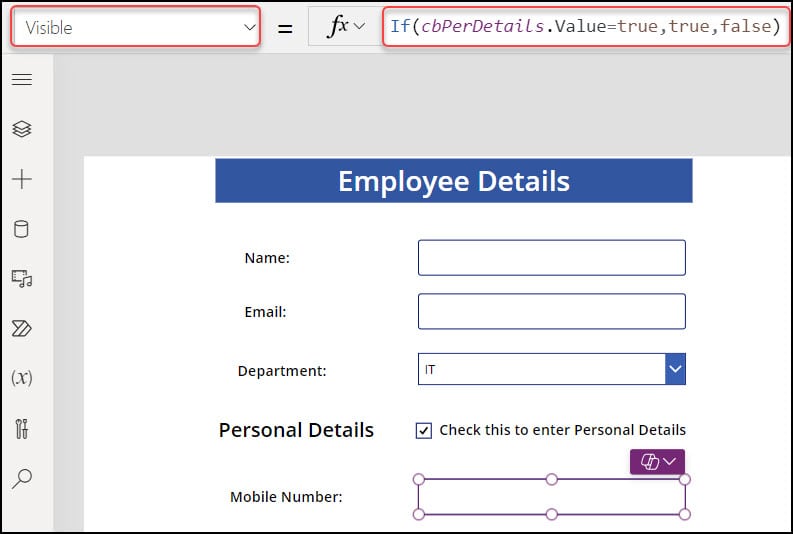
3. To achieve this, select the Mobile Number Text label control and set its Visible property to the code below:
Visible = If(
    cbPerDetails.Value = true,
    true,
    false
)
Where,
cbPerDetails = Check box control name
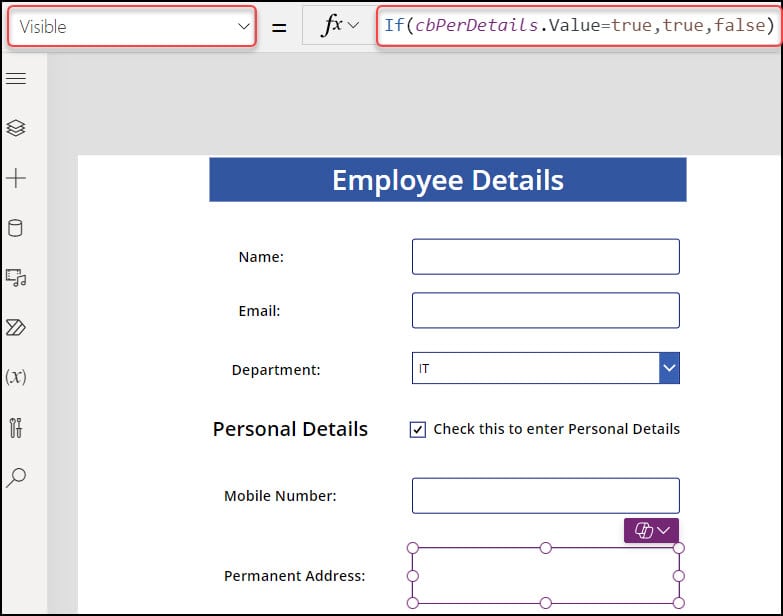
4. Similarly, select the Permanent Address Text label control and set its Visible property to the code below:
Visible = If(
    cbPerDetails.Value = true,
    true,
    false
)
Refer to the image below.
5. Save, Publish, and Preview the app. After entering the employee’s information, tick the box. Both fields will be visible. Once more, both fields will be hidden if the tick box is unchecked.
Example – 2: [Power Apps ShowHide fields based on SharePoint Yes No Column]
In this example, we will see how to show hide fields based on SharePoint Yes No Column.
The screenshot below represents a Power Apps Edit form and a Submit button control. All the fields are retrieved from the SharePoint list.
The form has a field called Want To Upload Any File [Toggle control]. When the user is on the toggle, the other two fields, i.e., Describe The Problem and Attachments, will appear.
The two fields will disappear from the Power Apps form when the user offsets the toggle.

Let me describe step by step how to achieve this:
1. I have a SharePoint list named IT Service Ticket. This list has these many fields below with various data types:
| Column | Datatype |
|---|---|
| Name | This is the Title column with a Single line of text. I just renamed it to Name. |
| Single line of text | |
| Department | Choice |
| Computer ID | Single line of text |
| Want To Upload Any File | Yes/no |
| Describe the Problem | Multiple lines of text |
| Attachments | Attachments |
Refer to the image below.

2. Sign in to Power Apps with valid Microsoft credentials.
3. Create a Blank Canvas app [+ Create -> Blank app -> Click Create under the Blank canvas app].
4. Provide the App name and choose any Format [Tablet/Phone]. Click on Create.
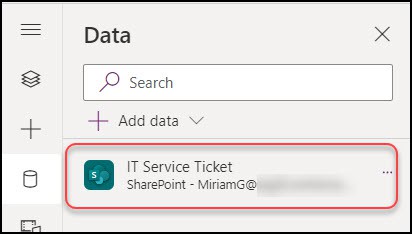
5. Next, connect the SharePoint list to the app. After connecting, the SharePoint connection will display like below.
6. On the Power Apps screen, insert an Edit form [+ Insert -> Edit form] and set its DataSource property to the SharePoint list.
DataSource = 'IT Service Ticket'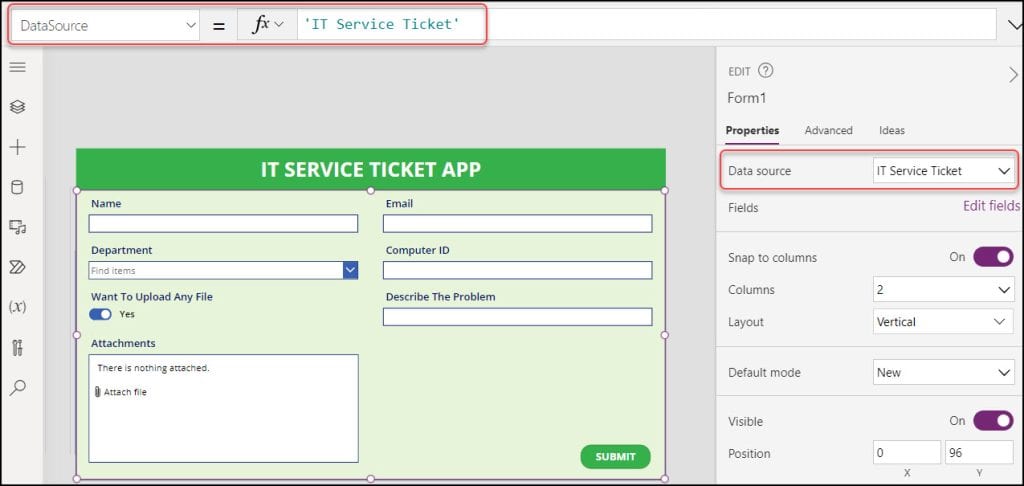
7. Once you connect the list to the form, all the list columns will be retrieved and displayed in the form. You can also add or remove the columns from the edit form.
Now, I will apply the condition based on the Toggle control value. Here, the toggle data card name is “DataCardValue5“.
NOTE:
Here, I have changed the properties below of the Toggle control:
- TrueText = “Yes”
- FalseText = “No”
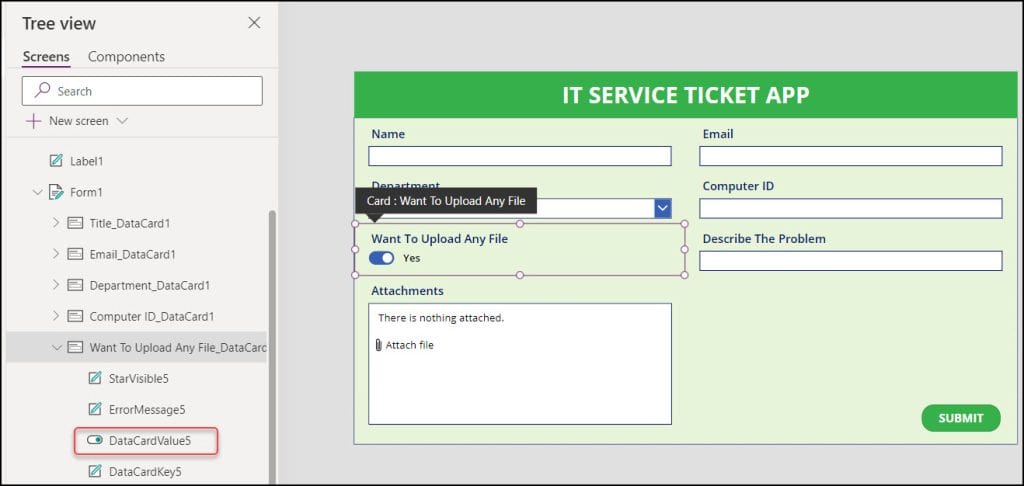
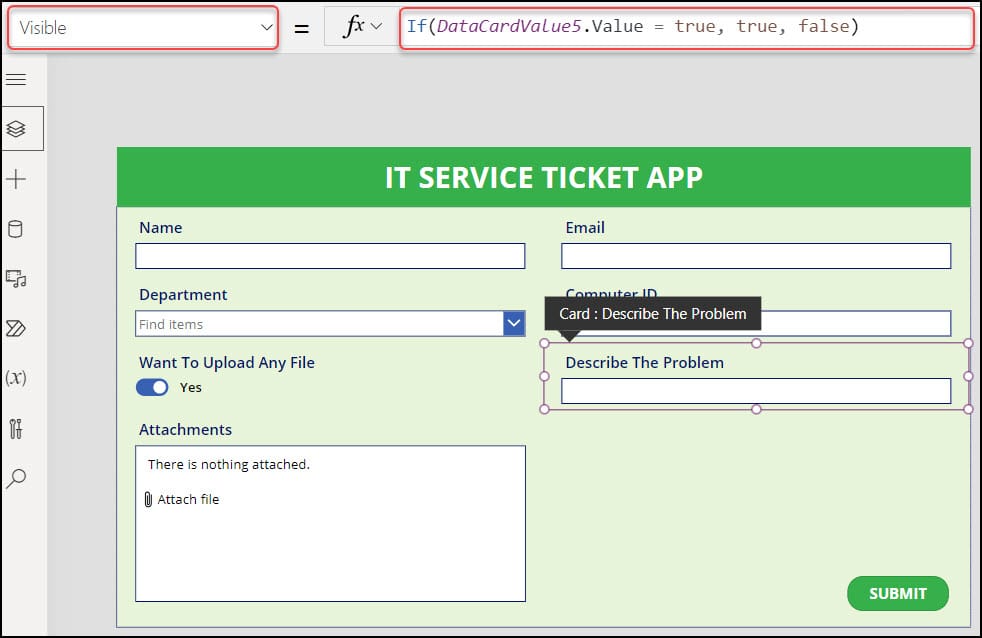
8. Then, select the Datacard that you want to hide, i.e., Describe The Problem, and set its Visible property to the code below:
Visible = If(
    DataCardValue5.Value = true,
    true,
    false
)
Where,
DataCardValue5 = Toggle control name
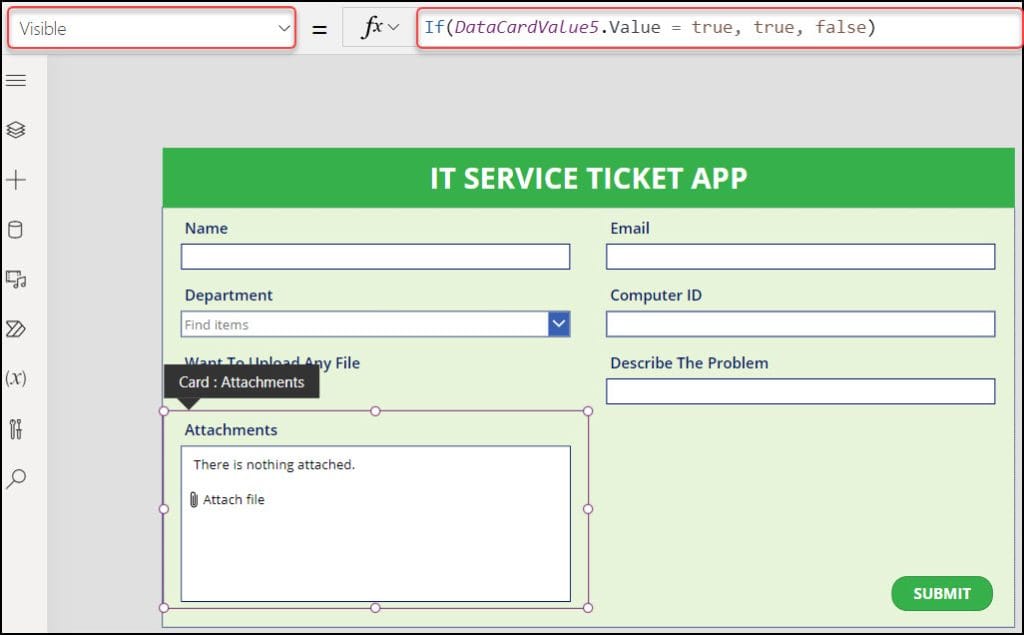
9. Similarly, select the Attachments data card and apply the code below on its Visible property as:
Visible = If(
    DataCardValue5.Value = true,
    true,
    false
)
10. Finally, save, publish, and preview the app. Here, we will test two cases. Such as:
When Toggle On:
Fill out the form, make the toggle on, and enter all the attachment details. Click on the Submit button. Then, go to the specific SharePoint list and refresh it.
The new item has been created in the list with all the details in the screenshot below.

When Toggle Off:
Fill out the form, make the toggle off, and then the other two fields disappear. Click on the Submit button. Then, go to the specific SharePoint list and refresh it.
The new item has been created in the list with all the details in the screenshot below.

This is how to work with Power Apps Show Hide Fields Based On Yes No Column.
Conclusion
I hope this article gives you some idea of how to work with Power Apps Show Hide Fields Based On the Yes No Column [using Check box control].
Also, we saw how to show hide fields based on the SharePoint Yes No column with different scenarios.
Also, you may like some more Power Apps tutorials:
- Show hide fields based on dropdown selection PowerApps
- Create Multiple Tabs in Power Apps Form
- Power Apps Show/Hide Button Based On The Current User
- Hide Top Navigation Bar in Power Apps
I am Bijay a Microsoft MVP (10 times – My MVP Profile) in SharePoint and have more than 17 years of expertise in SharePoint Online Office 365, SharePoint subscription edition, and SharePoint 2019/2016/2013. Currently working in my own venture TSInfo Technologies a SharePoint development, consulting, and training company. I also run the popular SharePoint website EnjoySharePoint.com
So thanks about the §4 ! Several days of research before finding this solution. I adapted this solution to my case :
If(
DataCardValue12.Text=”No Customer OK”;
true;
false
)