In this Power Apps tutorial, We will discuss the Rating control in PowerApps, its properties, and how to add a Rating control in Power Apps.
As far as we know, Power Apps has various controls to work with canvas apps; apart from that, Rating control is a user interface component within the app that allows users to input and display ratings.
Also, we will discuss various Power Apps Rating control examples and Power Apps rating control SharePoint list.
Moreover, I will let you know some more stuff like:
- How to Calculate 5 Star Rating Average in Excel
- Power Apps average rating
- Power Apps reset rating
- Power Apps coalesce
Power Apps Rating Control
Power Apps Rating Control is a type of control where the user will indicate the value between 1 and a maximum number that the user will specify.
The Power Apps Rating control looks like a star icon. A user can indicate how much he/she liked something by selecting the number of stars.
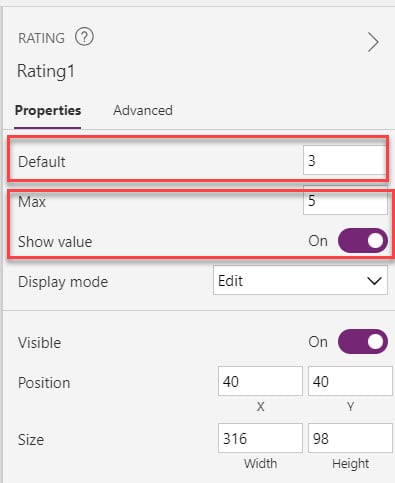
Whenever you add a Rating control to the app, it shows a maximum 5-star rating by default. However, you are allowed to set the minimum and maximum stars in the rating control for some properties. Look at the below image.

Power Apps Rating Control Properties
Next, I will show you what are the properties of the Rating control. Have a look at the below table.
| Property | Description |
| Max | It defines the maximum value to which the user can set a slider or a rating |
| Default | It specifies the initial value of a control before it is changed by the user |
| DisplayMode | It defines whether the control allows user input (Edit), only displays data (View), or is disabled (Disabled) |
| OnChange | It defines when the user changes the value of a control (for example, by adjusting a slider), then the actions performed |
| OnSelect | It defines when the user taps or clicks a control, then the action performs |
| RatingFill | It represents the color of the stars in a rating control |
| ReadOnly | It defines whether a user can change the value of a slider or rating control |
| Reset | It defines whether a control reverts to its default value |
| ShowValue | It defines whether a slider’s or rating’s value appears as the user changes that value or hovers over the control |
| TabIndex | It specifies the keyboard navigation order in relation to other controls |
| Visible | It specifies whether a control appears or is hidden |
Add Power Apps Rating Control
To add a Power Apps Rating control, follow the below steps. Such as:
1. On the Power Apps Screen, insert a Rating control [+ Insert > Inputs > Rating]. Once you click on it, the control will appear like a star symbol. You can also provide the rating using the star marks.
Refer to the below screenshot:
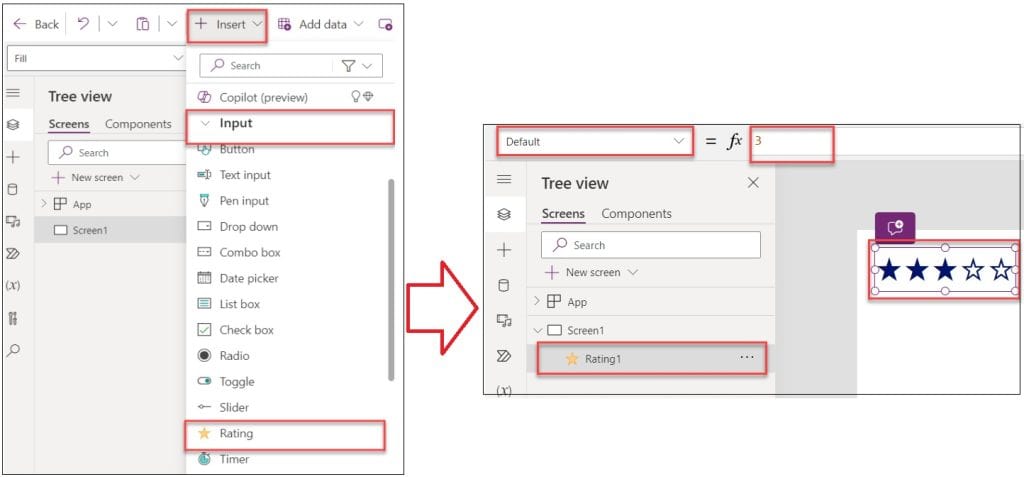
2. By default, the rating control shows five stars in the app, and three stars will be selected for them. You can increase your stars by using the Max property of the control. You can make the star selection by using the Default property of the control.
Power Apps Rating Control Example
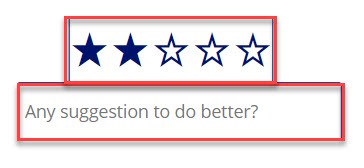
In Power Apps, there is a Rating control and a Text input control. When a user gives a product 2 stars, the text control will display, “Any suggestion to do better?“
Similarly, when the user will give more than 2 stars (like 3, 4, and 5 stars), then the text will display as “Which product you liked the most?“
You can also use the text input control to enter any text or service feedback. The output is shown in the screenshot below.

To work around this example, follow the below steps. Such as:
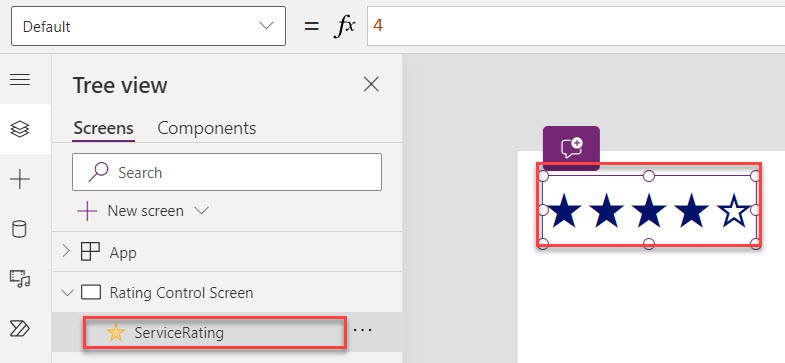
1. On the Power Apps Screen, insert a Rating control and rename it to ServiceRating.
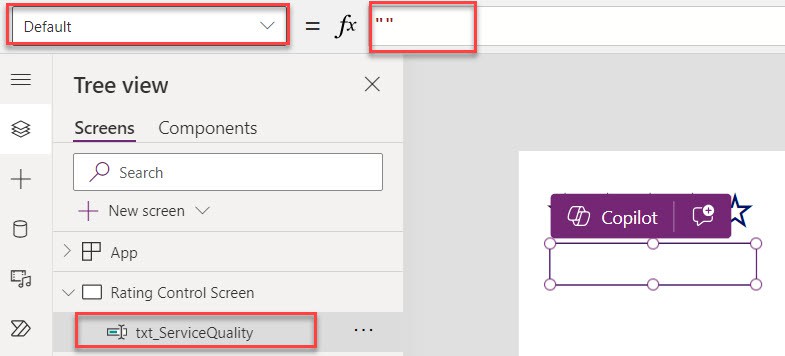
2. Next, add a Text input control under the Rating control and Set its Default property to blank (” “).
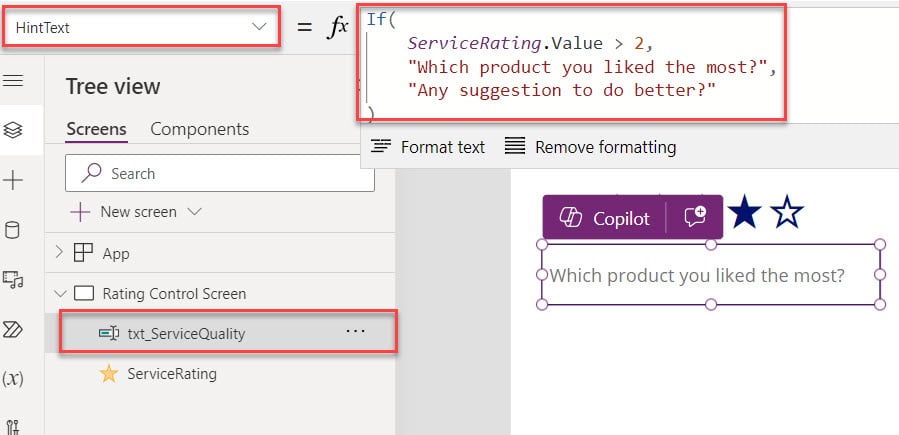
3. At last, Select the text input control and apply the below code on its HintText property as:
HintText = If(
    ServiceRating.Value > 2,
    "Which product you liked the most?",
    "Any suggestion to do better?"
)
Where,
- ServiceRating = Power Apps rating control name
4. Save and Preview the app. When you select a star, the text input control value displays that star’s selection.
Power Apps Rating Control SharePoint list
In this section, I will explain how to use the Power Apps rating control from the SharePoint list.
Scenario:
- I have a SharePoint list named “PowerApps Rating,” which contains two fields.
| Column Name | Data Type |
| Title | It is a default single line of text |
| PowerApps Service Rating | A single line of text |

- Next, we will customize this list using Power Apps. To do so, click on the Integrate tab -> Power Apps -> Select Customize forms, as shown below.

- Once you click on Customize forms, the screen below will open in PowerApps. All the SharePoint fields, including an attachment control, will appear on the Power Apps screen.
- Now insert a Rating control below the Attachments control and rename it RatingNumber. By default, the rating value will display as 3 stars.
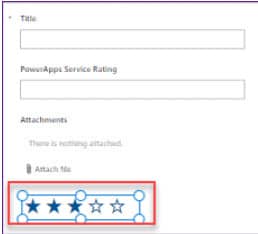
- Now, select the Power Apps Service Rating Data Card and unlock it once (Advanced -> Unlock), as in the screenshot below.

- Then click on the Advanced tab (of the PowerApps Service Rating Data card) and replace the Update property from DataCardValue2.Text to RatingNumber.Value, as shown below.
Update = RatingNumber.ValueWhere,
- RatingNumber = Rating control name that you have added

- Finally, Select the text box of the Power Apps Service Rating field and set its Visible property to false. Then, drag the Rating control to its place. Save and Publish the app to SharePoint and go back to the SharePoint List.
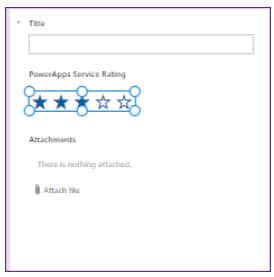
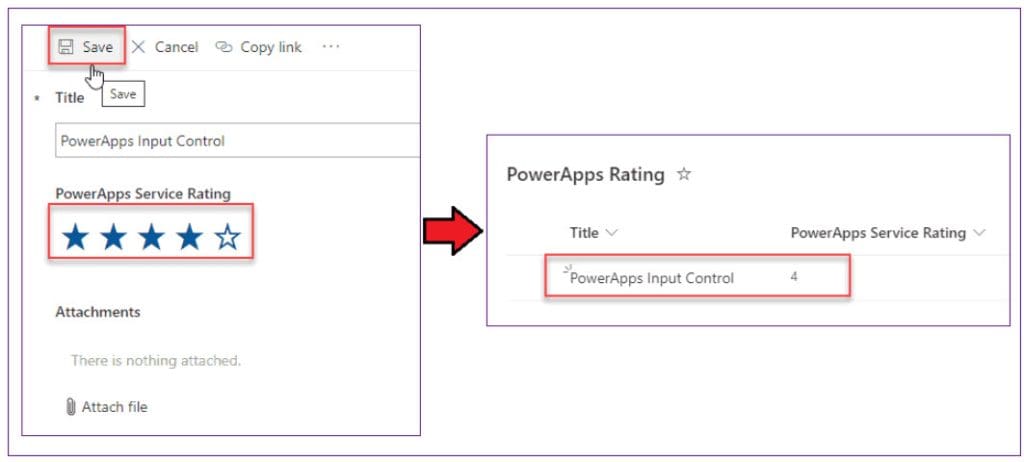
- In the SharePoint list, create an item, provide the service rating of your choice, and then Save it. Once you refresh the list, you can see the new record with its service rating, as shown below.
How to Calculate 5 Star Rating Average in Excel
Let’s see how to calculate a 5-star rating average in Excel using the SharePoint Online list [Product Details]. This list contains the fields below.
| Column Name | Data Type |
| Product Name | It is a default single line of text |
| Manufacturer | Choice |
| Price | Currency |
| Quantity | Number |
| Purchase Date | Date and time |
| Rating | Rating |
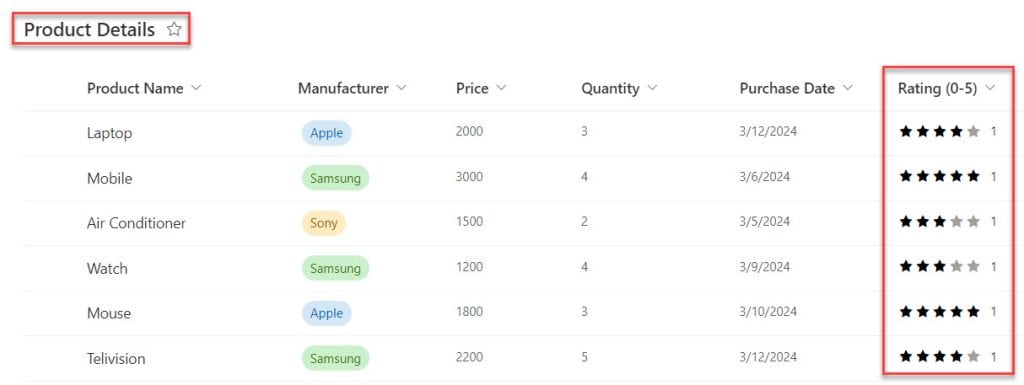
Now, I would like to export this list to Excel and calculate the 5-star rating average. To do so, follow the below steps.
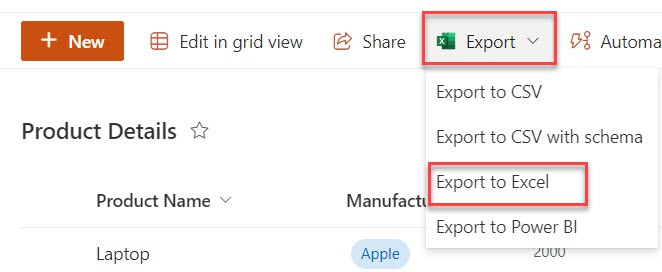
1. On the SharePoint Online list, expand the Export dropdown and select the Export to Excel option, as shown below.
2. On the Excel Spreadsheet, provide the AVERAGE function using Rating column values, like below.
=AVERAGE(F2:F9)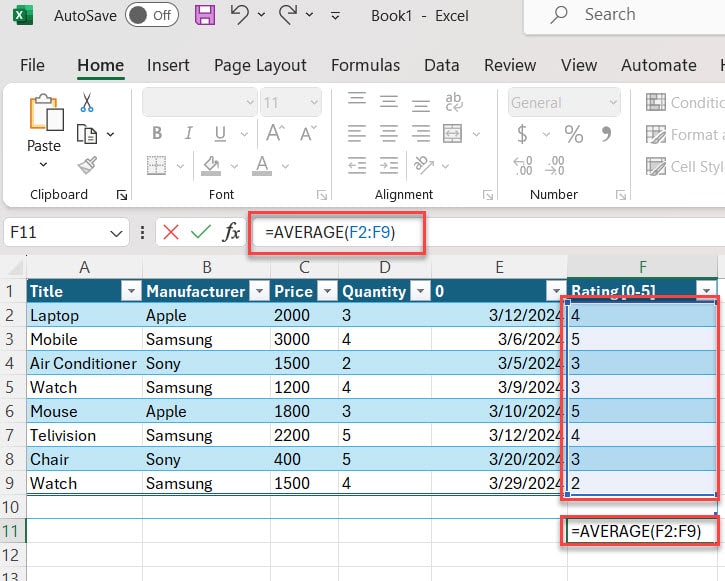
3. Once it is done, click on the enter button to get the Average value of the 5 star rating control.
Output:
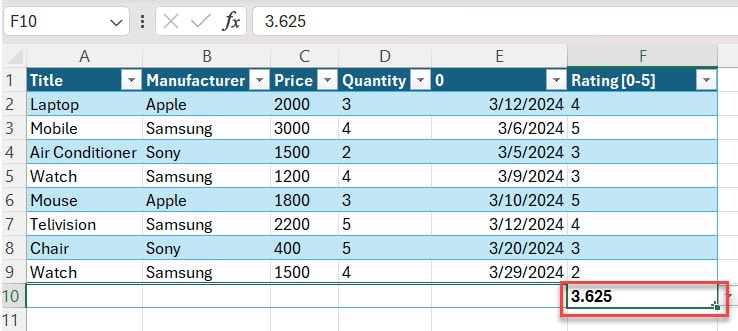
This is how we can work with how to calculate 5 star rating average in Excel.
Power Apps Average Rating
In this topic, We will see how we can view the average rating of an item in Power Apps from a SharePoint List.
- The screenshot below represents a SharePoint List named Image Rating. There are three fields: Title, Image Name, and Image Rating.
- This list also includes some records or images, including their image ratings. Now, using Power Apps, I want to view the average rating for each image file present in this list.
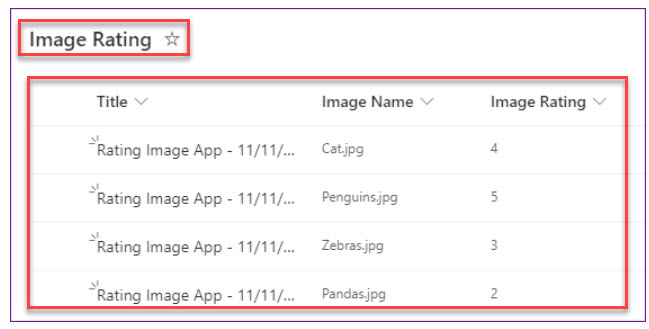
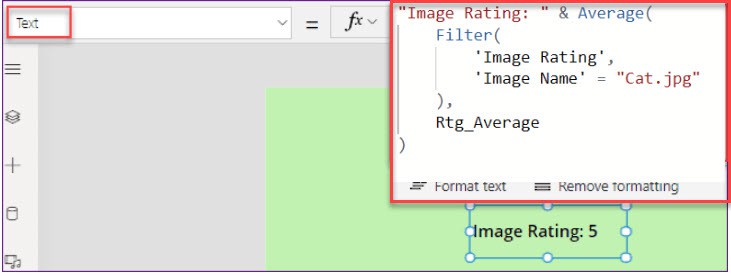
To workaround with this, Insert a Label control and set the below formula on its Text property as:
Text = "Image Rating: " & Average(
    Filter(
        'Image Rating',
        'Image Name' = "Cat.jpg"
    ),
    Rtg_Average
)
Where,
- ‘Image Rating’ = SharePoint list name
- ‘Image Name’ = SharePoint image control name
- Rtg_Average = Power Apps rating control name
Save and Preview the app. In the text label control, you can see the average rating of that specified image, as shown in the screenshot below.
Power Apps Reset Rating
In this example, I will show you how to reset the Power Apps rating control.
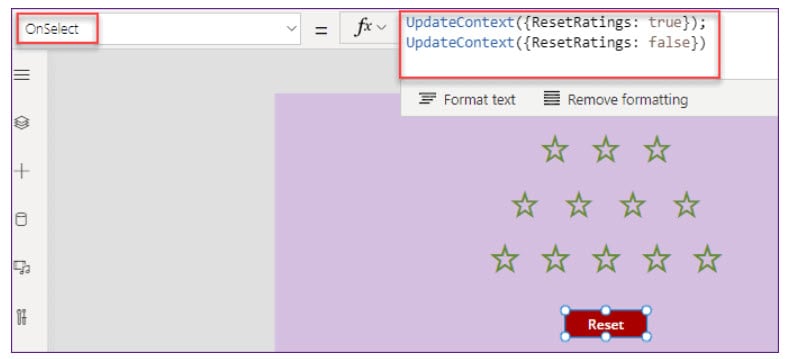
In the Power Apps app, there are three rating controls and a Button control. Now, I would like to reset all these rating controls using a Button control. That means that when a user presses the reset button, all the ratings will clear, as shown below.
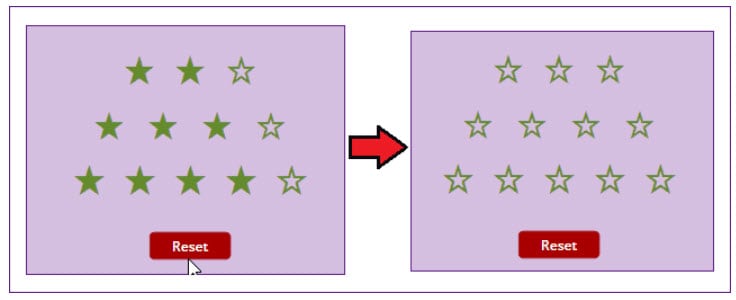
To do so, Select the Button control (Reset) and apply the below code on its OnSelect property:
OnSelect = UpdateContext({ResetRatings: true});
UpdateContext({ResetRatings: false})
Where,
ResetRatings = Specify the context variable name
Next, apply the context variable (ResetRatings) to all the Rating’s Reset properties as:
Reset = ResetRatings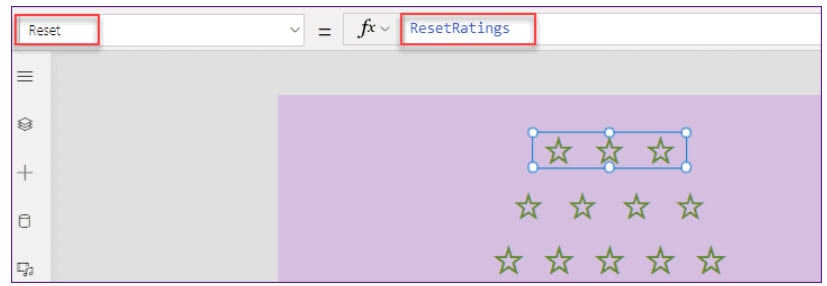
Power Apps Coalesce
In Power Apps, there is an Edit form where the user enters the data. This form contains a rating control, where the user can rate a specific item.
But what happens is that every time the user opens the app, the rating control displays 3 stars by default, and that should not be the case. Instead of 3 stars, it should display blank stars using coalesce.
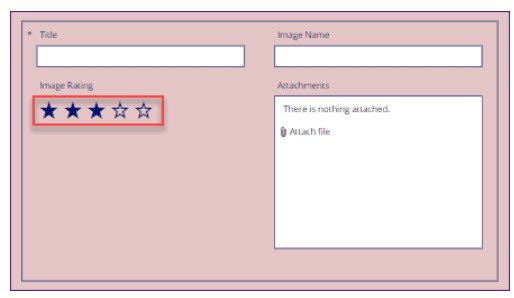
To achieve this, select the rating control and apply the below code on its Default property:
 Coalesce(
    Parent.Default,
    0
)
Where,
- Coalesce() = The Coalesce function returns the first value that isn’t blank or an empty string
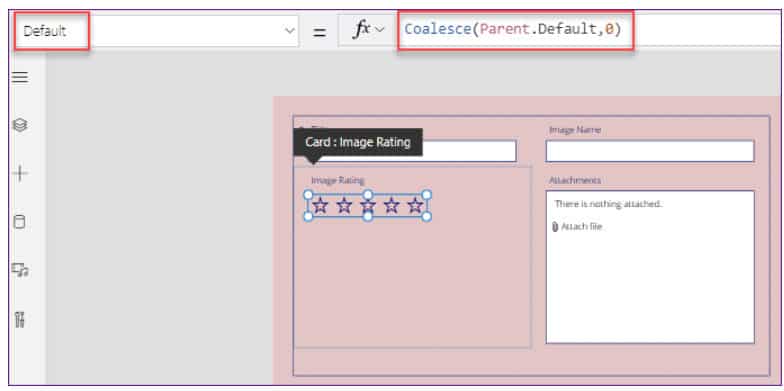
This way, you can work with the Power Apps coalesce.
Also, you may like:
- Power Apps Modern Slider Control
- Power Apps Today Date Without Time
- Power Apps Timer Control
- Navigate Function in Power Apps
- Power Apps First, FirstN, Last, and LastN functions
- Create Power Apps Login Page
I hope this Power Apps tutorial taught you detailed information about the Power Apps Rating control. If you have any requirements related to the Power Apps rating control, you can follow the the above different examples to do it.
I am Bijay a Microsoft MVP (10 times – My MVP Profile) in SharePoint and have more than 17 years of expertise in SharePoint Online Office 365, SharePoint subscription edition, and SharePoint 2019/2016/2013. Currently working in my own venture TSInfo Technologies a SharePoint development, consulting, and training company. I also run the popular SharePoint website EnjoySharePoint.com
Great post! Is there a way to disable a rating if rating has already been submitted to an employee from the gallery?