In this Power Automate article, I will discuss a commonly used case in the SharePoint document library using Power Automate: the Power Automate copy folder action and how it is used in Microsoft Flow.
Also, I will demonstrate the following points:
- Power Automate copy folder with a new name
- Power Automate copy files from one Library to another
- Power Automate copy folder structure
- SharePoint copy folder structure without files using Power Automate
- Power Automate rename file SharePoint
Power Automate Copy Folder with New Name
To copy the folder with a new name using Power Automate, see the example below:
For example, I have random files and folders in one SharePoint Document library [Sales Documents], i.e., the Source document library.
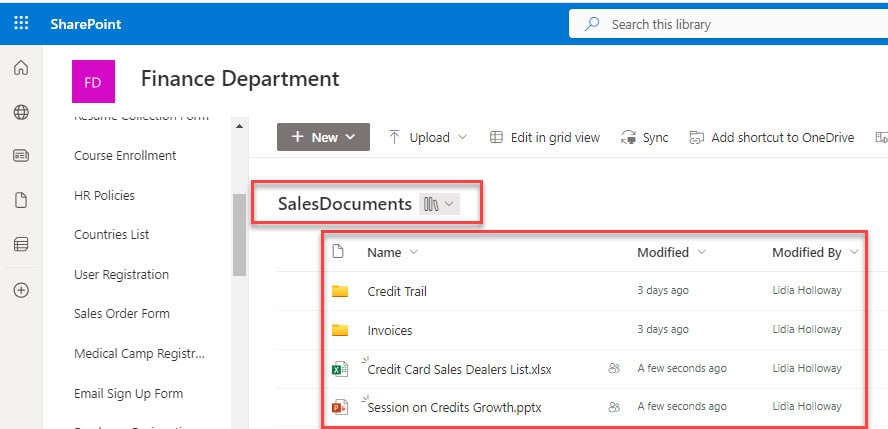
I wanted to copy a folder from the source document library folder present in the SharePoint site [Finance Department] to the targeted library [Sales Documents] in another SharePoint site [Sales].
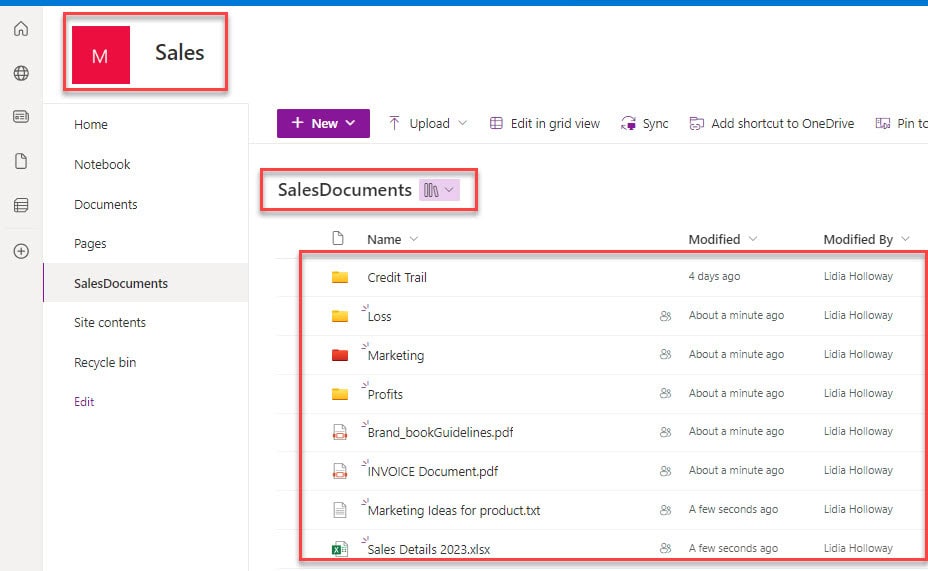
Let’s create the Power Automate flow:
1. On the Power Automate Home page, go to + Create > Instant cloud flow > Select the trigger ‘Manually trigger a flow‘.
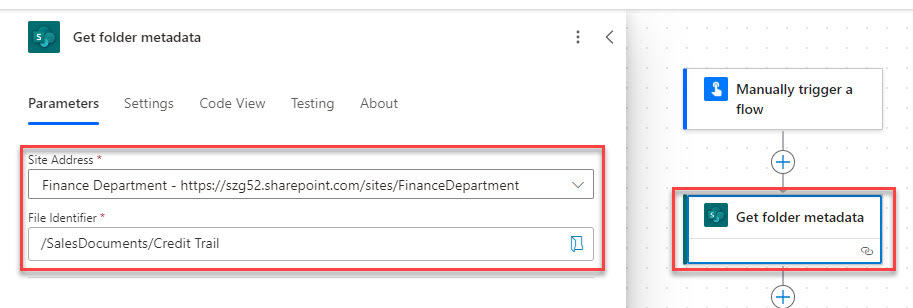
2. Then, add the Get folder metadata action. This action will get the information about the folder by using a file identifier to pick the folder.
- Site Address– Set the source site address.
- File Identifier– Set the folder path from where you will get the folder metadata.
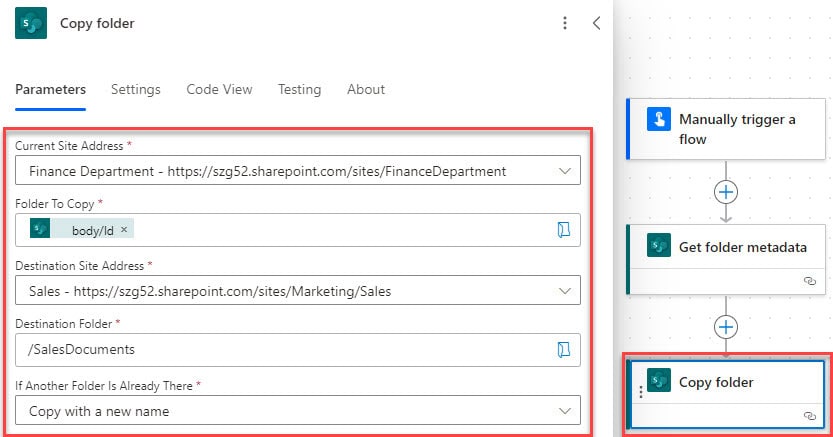
3. Next, I will add an action to copy the folder from the source site address to the destination site. Select the Copy folder flow action. Then, set the below properties, such as:
- Current Site Address– Set the source SharePoint site address.
- Folder to Copy– Select Body/Id from the dynamic content of the Get folder metadata.
- Destination Site Address– Set the destination site address.
- Destination Folder– Set the destination document library where you want to store the copied files and folders.
- If another folder is already there– Set it as a Copy with a new name.
Note:
Copy with a new name option only allowas to take integer values from the dynamic content. If the folder/file is exist in library, it will just add an integer value to the existing name.
4. Let’s save the flow and test it manually. Then click on Run the Flow.
5. When the flow triggers and runs successfully, you can see the folder has been copied with a new name if it already exists in the destination document library.
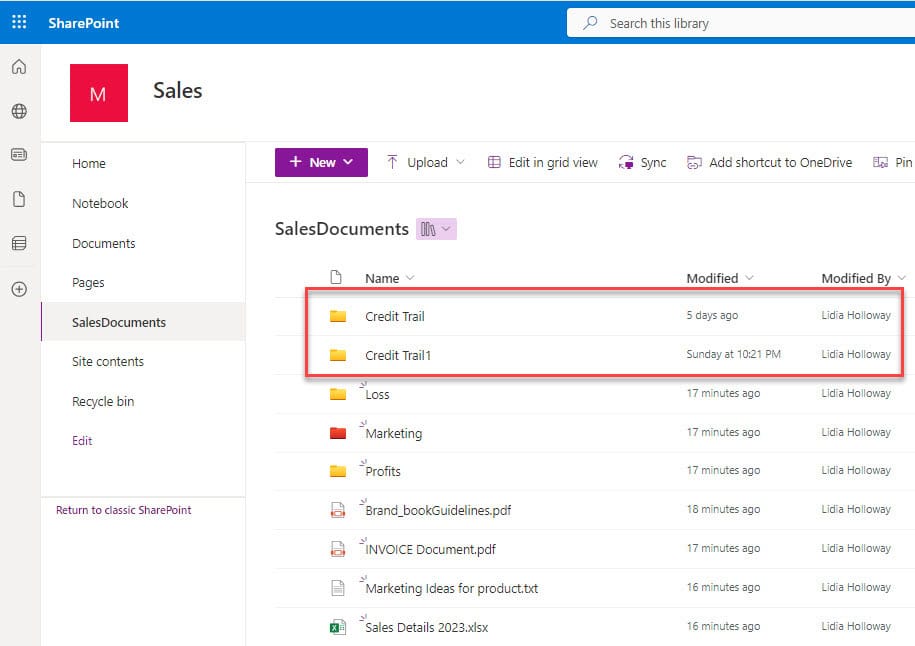
This is how to copy a SharePoint document library folder using Power Automate.
Power Automate Copy files from one Folder to Another
Now, let’s check how to use Power Automate to copy files from one folder to another folder and from the SharePoint document library to another.
Example:
I have a SharePoint document library named ‘Training Related Documents‘ as shown in the following figure:
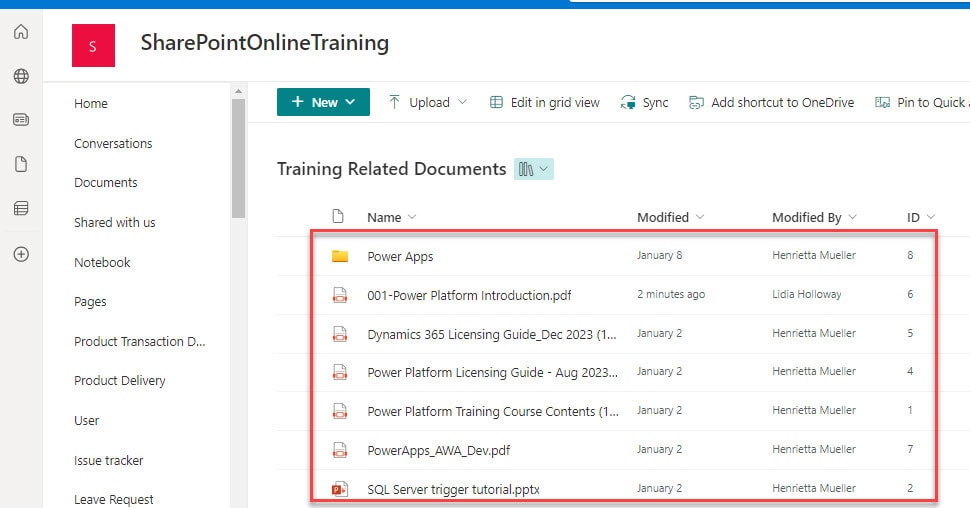
I also have one more document library like ‘Power Platform Course‘ looks like in the below image:
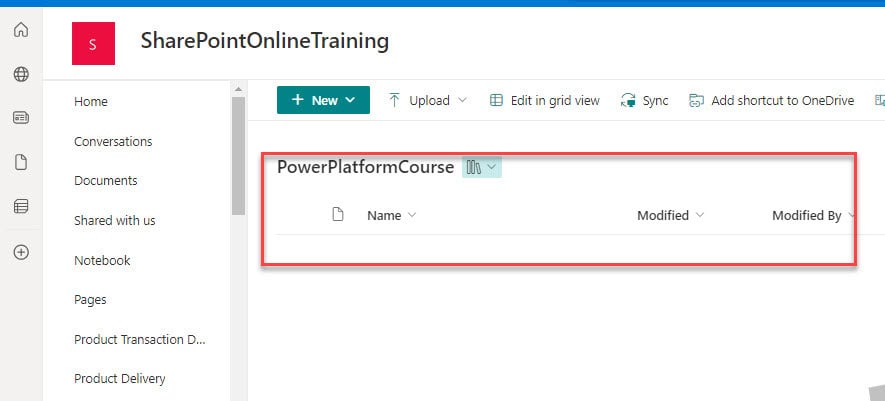
Whenever a file is modified or created in the Training Related Documents -> Copy the file to another SharePoint document library [Power Platform Course].
Check out the steps below:
1. In Power Automate, select Automated cloud flow with the trigger ‘When a file is created or modified‘ -> Choose Site Address and Library name.

2. After that, take the Copy file flow action. Configure the below given parameters:
- Current Site Address: Select the SharePoint site from where you want to copy files.
- File to Copy: Choose File Identifier from dynamic content of when a file is created or modified.
- Destination Site Address: Choose a targeted SharePoint site.
- Destination Folder: Select the document library from the open folder icon.
- If another file is already there: Choose copy with a new name option from the drop down.
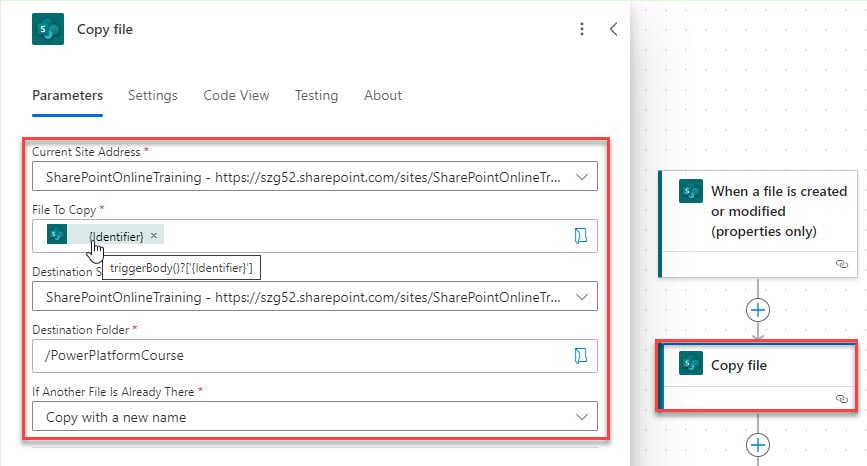
3. Then, save and run the flow. Go back to the SharePoint document library and add or modify a file.
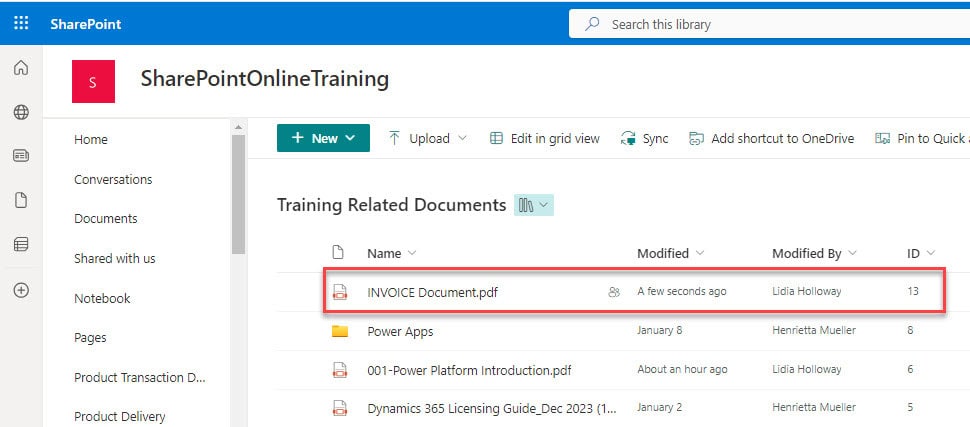
4. The flow will trigger and copy the created file to a targeted document library in SharePoint.
Refer to the image below:

This way, you can copy files from one document library to another using Power Automate.
Power Automate Copy Folder Structure without Files
To copy the SharePoint document library folder structure from one SharePoint site to another SharePoint site, follow the below example:
Example:
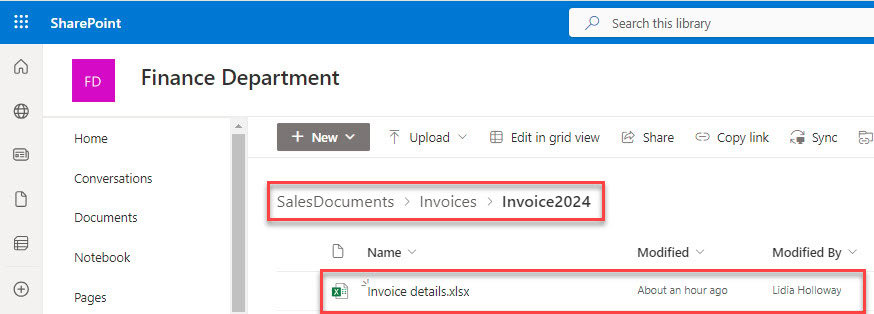
The below-represented image will show the SharePoint document library [Source Document Library] with a folder structure:
- Invoices [Folder] -> Invoice 2024 [Folder] -> Invoice details.xlsx file
I have another SharePoint site [Sales] with another empty document library [Sales Documents], as shown in the figure:
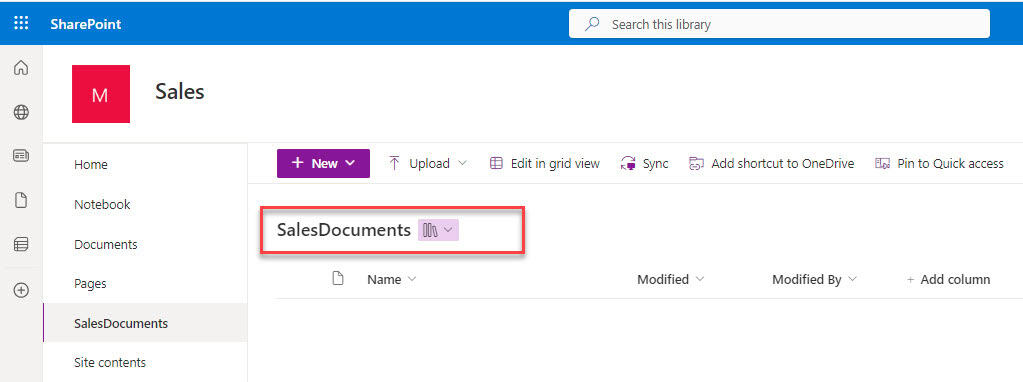
My requirement is to copy the folder structure without files from a source document library [Sales Documents] to the Targeted SharePoint document library [Sales Documents].
Check out the instructions below:
1. Navigate to the Power Automate Home page, select Instant Cloud flow, choose Manually trigger a flow action, and Click the Create button.
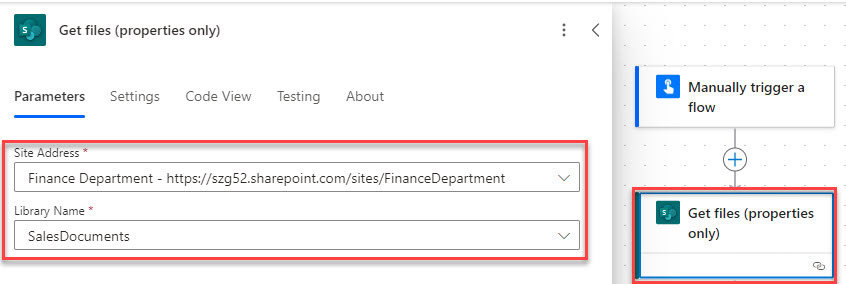
2. Now, add the Get files(Properties only) flow action -> Select the Site Address and Library Name from where you want to copy the folder structure.
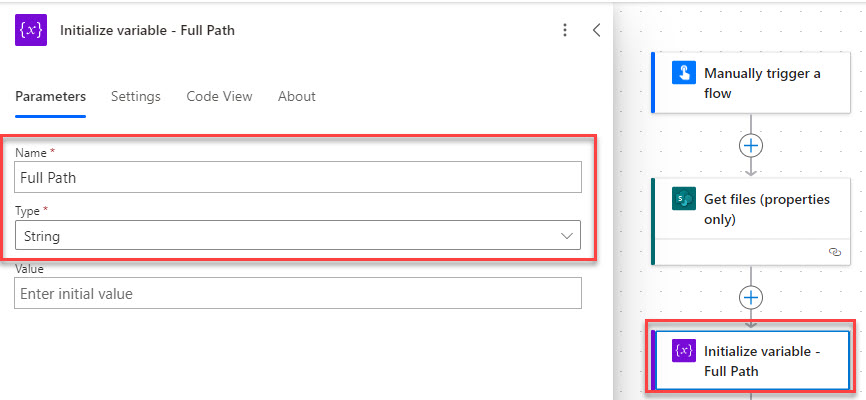
3. After that, take an Initialize variable flow action, name the variable, and select the datatype as String.
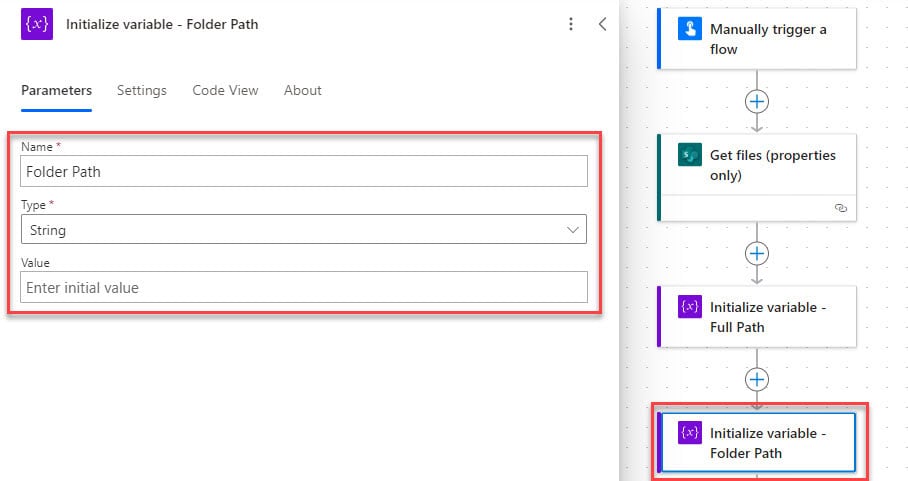
4. After that, create one more initialized variable for the folder path, providing a name for the variable and a String datatype.
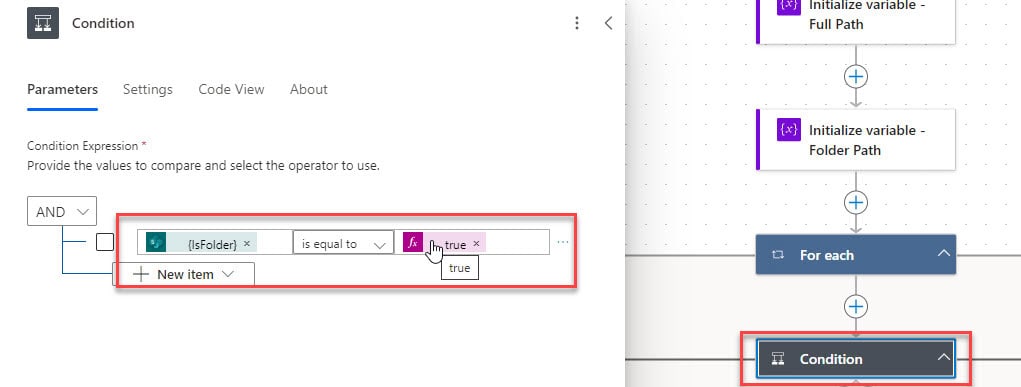
5. Next, add a Condition control action to filter out only document folders, excluding files from the SharePoint library.
| Choose Value | Operator | Choose Value |
| IsFolder [Dynamic content] | is equal to | true() |
6. Under the True condition, select Set variable action. Configure the parameters:
- Name: Choose the name from the drop-down as Full Path that we have taken the variable action.
- Value: Select FullPath from the dynamic content.

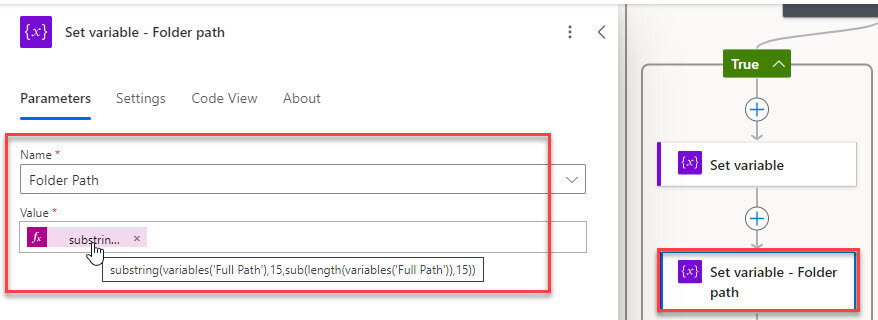
7. Again, take another Set Variable action under the True condition. Choose the parameters:
- Name: Select the name as Folder Path from the drop-down.
- Value: Insert the expression below that will only take the folder path from the full path.’
substring(variables('Full Path'),15,sub(length(variables('Full Path')),15))In the above-given expression, replace the number with the length of your document library name.
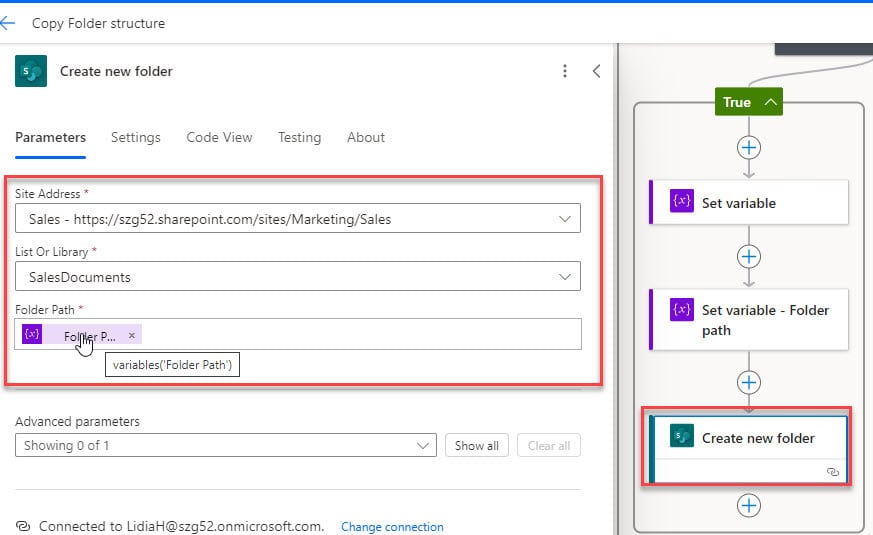
8. Finally, take the Create new folder flow action. Ensure to give the below parameters:
- Site Address: Choose the targeted SharePoint site.
- List or Library: Select the destination SharePoint document library where you want to copy the folders.
- Folder Path: Select the variables of the folder path from the dynamic content.
9. Now the flow is ready, save the flow. Click on Test -> Select Manually radio button -> Click Runflow.
10. Once the flow runs successfully, you can see that the folder structure has been copied from the source library to the destination library in SharePoint.
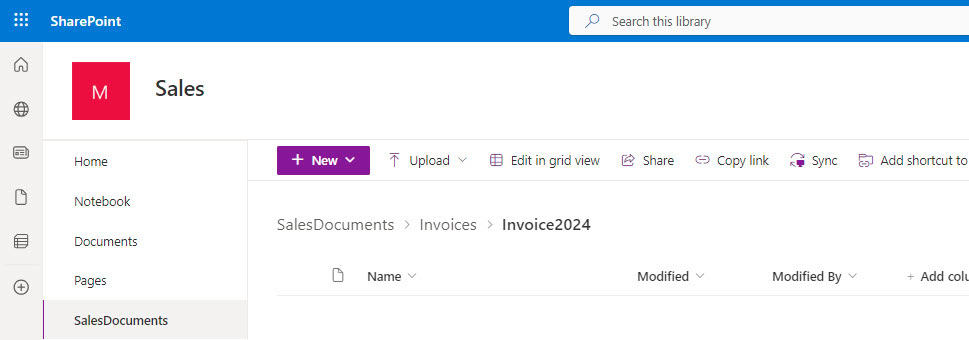
This way, you can copy folder structure from one SharePoint document library to another using Power Automate.
Power Automate Rename File SharePoint
To rename the SharePoint document library files using Power Automate, follow the below points:
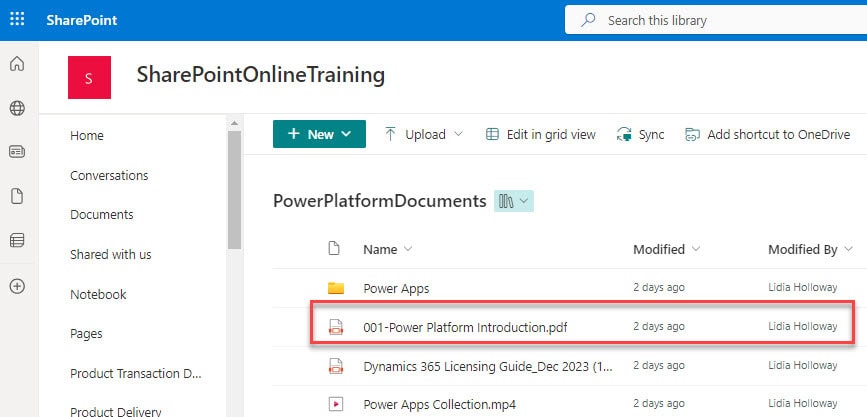
Renaming a file flow action is not available directly in Power Automate. If we want to rename the file name, we would need to create a copy of the file and remove the previous one.I have a SharePoint document library with a few files and folders, as looked at in the image below:
I wanted to rename the highlighted files from the below picture:
1. Browse to https://make.powerautomate.com/, click on +Create, select Instant cloud flow, choose Manually trigger a flow, and tap on the Create button.
Inside the trigger, take a text input to provide the File name.
2. Add a Get file metadata flow action. Add details like Site Address and library Name.

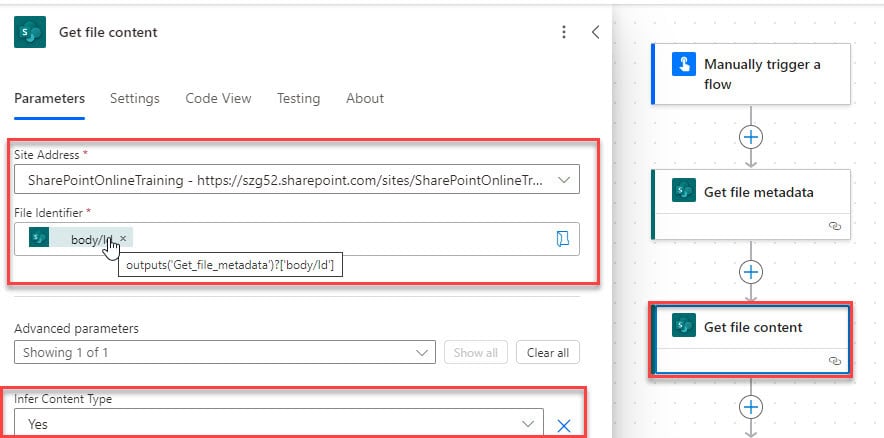
3. In the next step, add the Get file content action and configure the required parameters:
- Site Address: Choose the SharePoint site or enter the custom value.
- File Identifier: Select body/Id value from the dynamic content.
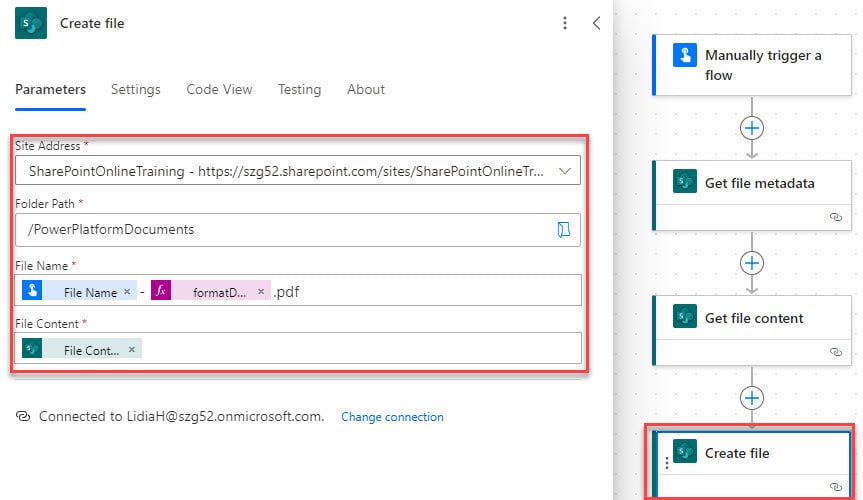
4. Select the Create file action in SharePoint and fill in details like the Site Address and Folder path.
- File Name: Provide the file name along with the date expression.
@{triggerBody()?['text']}-@{formatDateTime(utcNow(),'dd-MM-yyyy')}.docx- File Content: Take the File content Body under Get file content.
5. After creating the file, delete the old existing file. Select Delete File action.
- Site Address: Enter the site address from custom value.
- File Identifier: Select Body/Id from Get file metadata of dynamic content.
@{outputs('Get_file_metadata')?['body/Id']}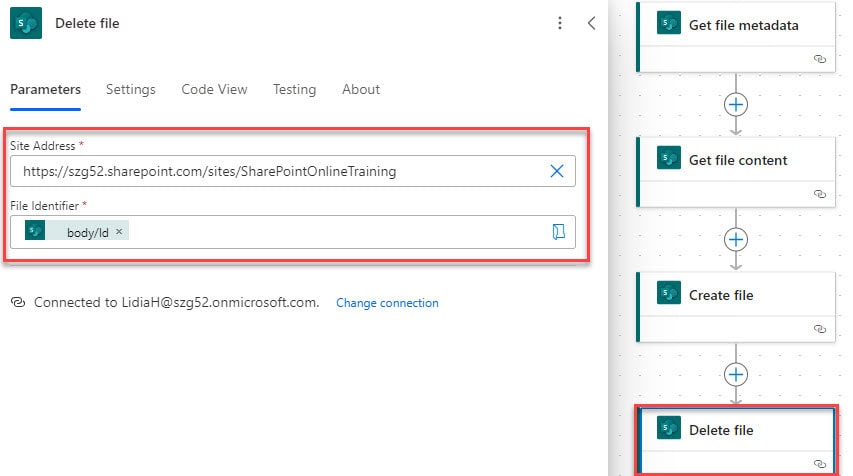
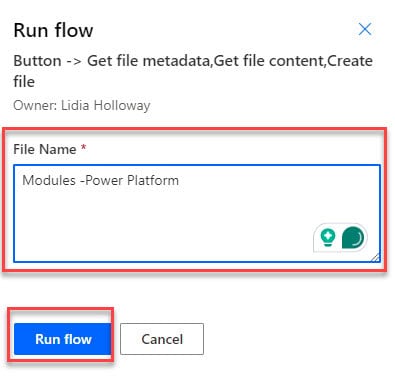
Once it is done, save and run the flow manually. In the Runflow window, provide a file name and click on the Runflow button.
6. The below-represented image shows that the file has been renamed in the SharePoint document library.
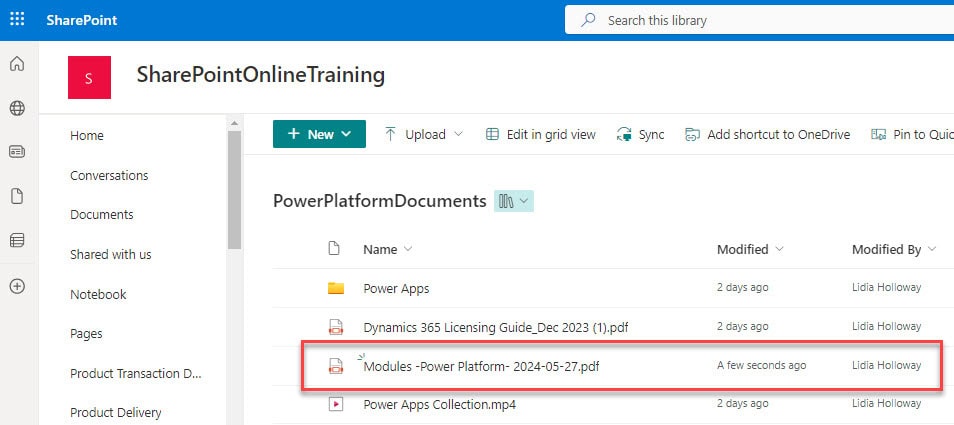
This is how to rename a file in the SharePoint document library using Power Automate.
Some more Power Automate articles you may also like:
- Copy New Files from Your PC to SharePoint using Power Automate
- Power Automate Shared Mailbox
- Power Automate Trigger Conditions
- Initialize Variable in Power Automate
- Power Automate delete all files in SharePoint folder
Conclusion
I hope this article will be helpful. In this article, we have discussed about Power Automate copy folder, how to copy folder in Power Automate with a new name, Power Automate Copy Folder Structure, and a lot more.
I am Bijay a Microsoft MVP (10 times – My MVP Profile) in SharePoint and have more than 17 years of expertise in SharePoint Online Office 365, SharePoint subscription edition, and SharePoint 2019/2016/2013. Currently working in my own venture TSInfo Technologies a SharePoint development, consulting, and training company. I also run the popular SharePoint website EnjoySharePoint.com
Thank you Bijay, very useful! I work with libraries that often may have more than 50,000 files, in folder structures. Files may have been tagged with retention labels. Are there any showstoppers you may warn about when dealing with large libraries and the workflows you presented?
Cheers!