Do you ever know how to add a column with a dropdown list in Power Query? Don’t wait. This Microsoft Power BI Tutorial explains how to add a column with a drop-down list using Power Query.
We can add a column with a dropdown list using the Power Query editor in the Excel Spreadsheet, but it is not possible to add a column with a dropdown list using the Query editor in Power BI.
Power Query add a column with a dropdown list
Let us see how we can add a column with a dropdown list using the Power Query editor,
- In this example, I have used the sales table data mentioned below. Initially, open the excel workbook and load the data into the excel sheet.
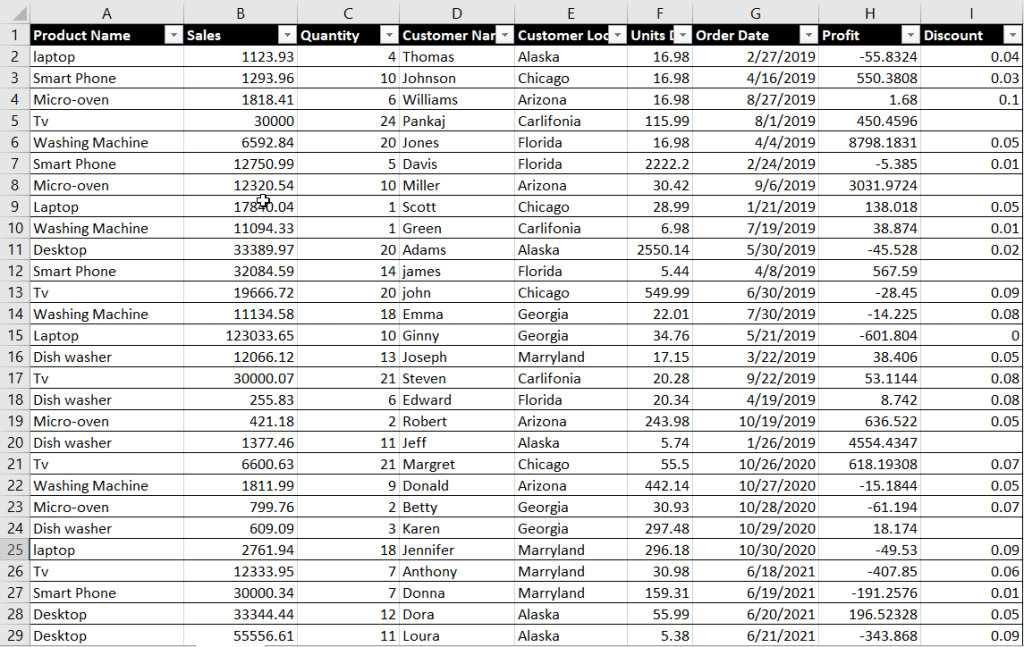
- Now select any cell within the table and click on Data > From Table from the ribbon.
- So that it will redirect to the Query Editor dialog to transform the data shown below:

- Now we will remove the other columns using the query editor to update the query.
- In the Power Query window, to remove other columns from the table, select the particular column and right click on it and choose to Remove other columns option to update the query as below:
= Table.SelectColumns(#"Changed Type",{"Product Name"})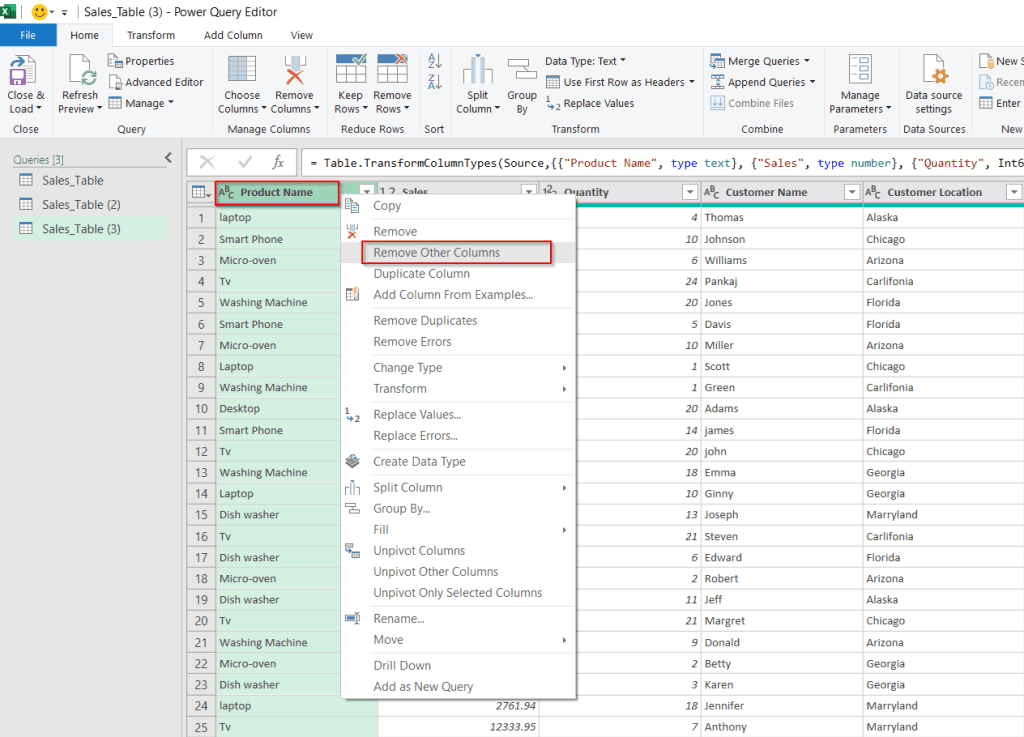
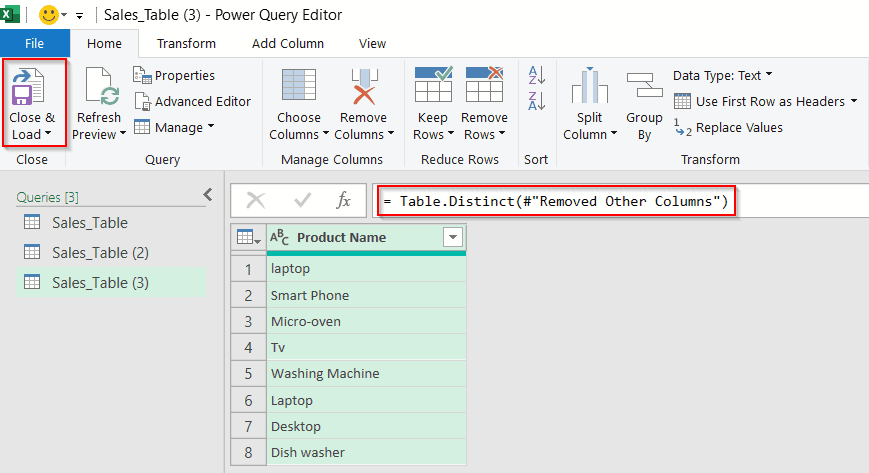
- Now right-click on the Product column and choose to Remove Duplicates option to remove the duplicate values that are presented in the table.
= Table.Distinct(#"Removed Other Columns")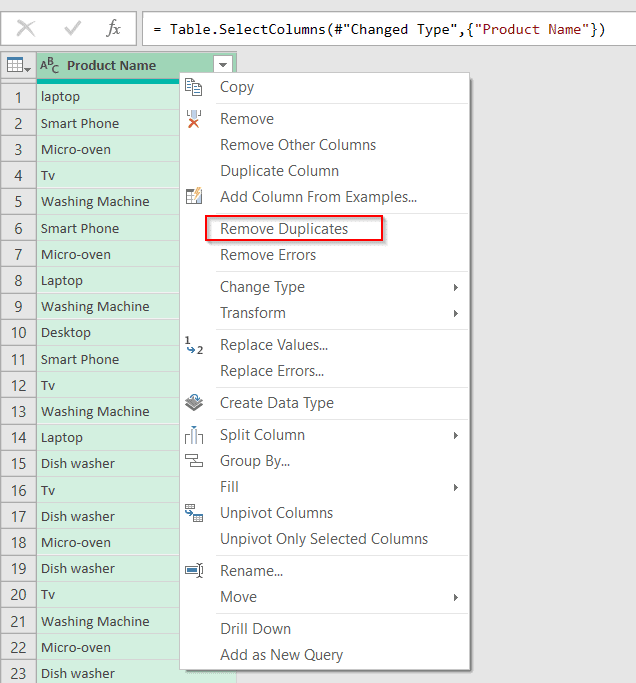
- Now sort out the product column, To Sort the list in ascending order select Sort ascending order as shown below:
= Table.Sort(#"Removed Duplicates",{{"Product Name", Order.Ascending}})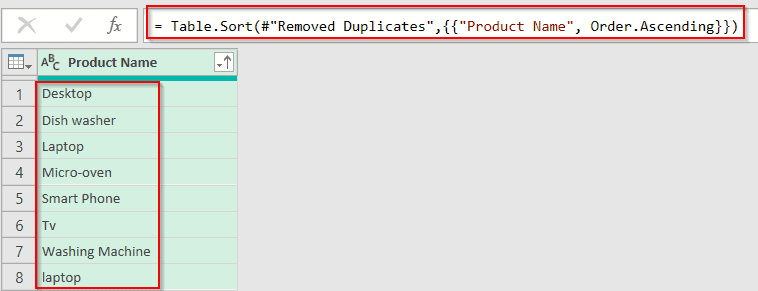
- Now click on the Close and load option, so that the changes will be reflected in the excel workbook as below:
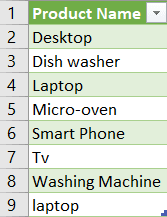
- Now the new list appears in the excel workbook as a table as mentioned below:
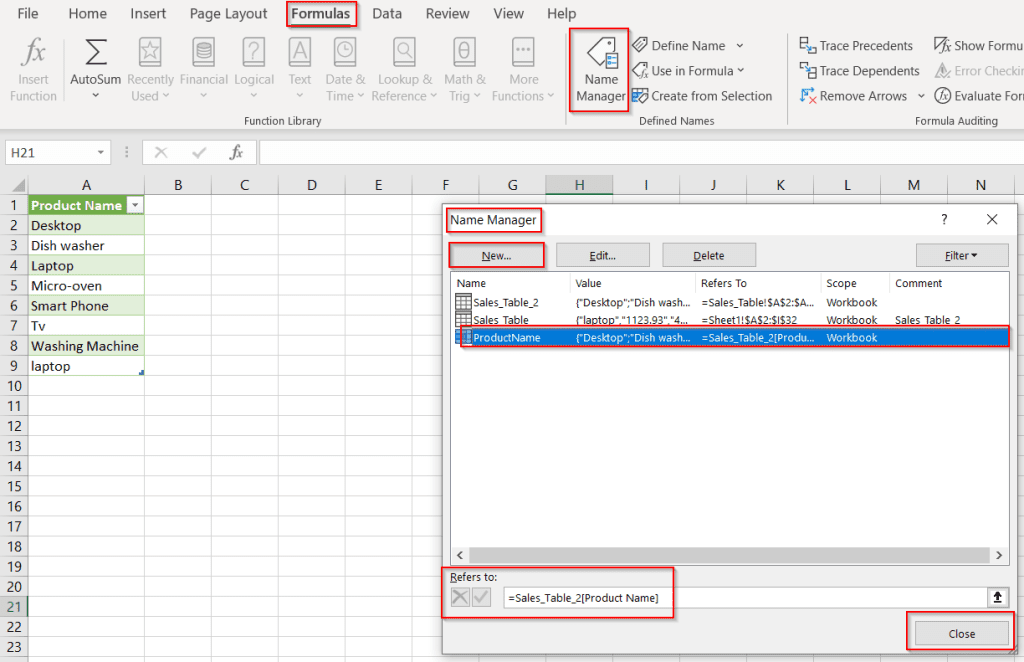
- To make the new list as a dropdown list follow the steps below: Now select the Formulas > Name Manager option from the ribbon.
- In the Name Manager dialog, we click the New button to create a new name and click on the ok button.
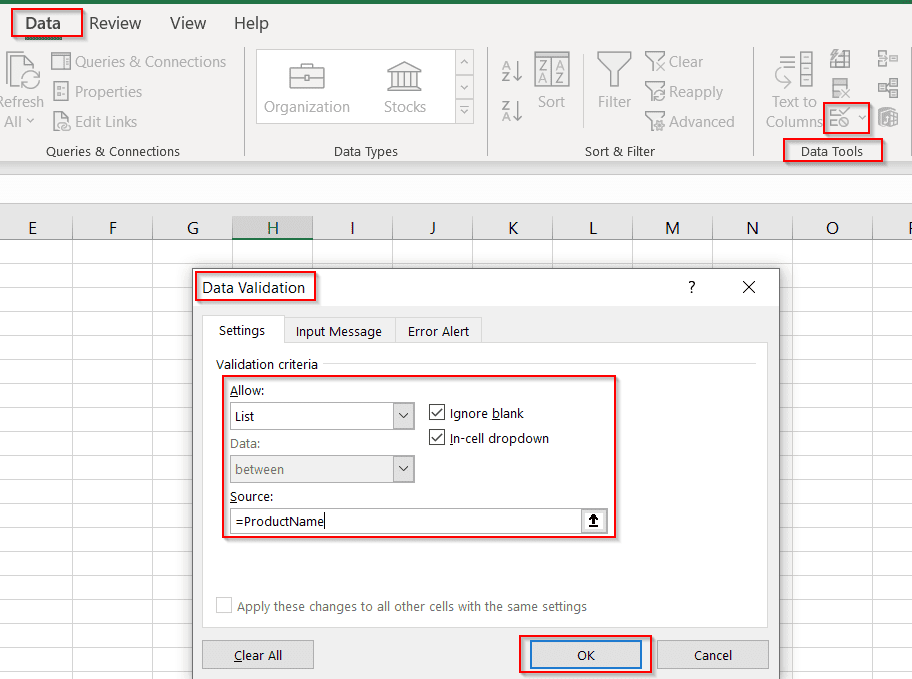
- To Create the drop-down select the input cell that should contain our drop-down, and then select Data > Data Validation.
- In the Data Validation dialog, select the List option. The Source is equal to our name =ProductName, as shown below.
- In the below screenshot, you can see that the new column has been added with a dropdown list using the Power Query editor in excel Workbook.
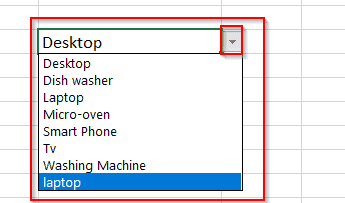
This is how to add a new column with a dropdown list using the Power Query editor.
You may like the following Power query tutorials:
- Power Query Add Column If Statement
- Power Query Add Column
- How to Append Columns in Power Query
- How to merge columns in Power Query
- How to remove rows in power query editor
- Power Query Date
- Power BI Dax Filter [With 15+ Examples]
I am Bijay a Microsoft MVP (10 times – My MVP Profile) in SharePoint and have more than 17 years of expertise in SharePoint Online Office 365, SharePoint subscription edition, and SharePoint 2019/2016/2013. Currently working in my own venture TSInfo Technologies a SharePoint development, consulting, and training company. I also run the popular SharePoint website EnjoySharePoint.com