In this React js tutorial, we will learn all about State in React js like What is the state in react js, and how to use it in react js. Also, we will cover the below topic:
- What is the state in react js
- Why state in react js
- props vs state react js
- State in react js class component
- update state in react js
- default state in react js
- reset state react js
- react js state array
- react js state array update
- react js add state array
- Remove items from an array in React js state
- react js filter state
- React state array length
- React js pass state from child to parent
What is a state in react js
React js state is another built-in object, allowing components to create and manage their own data. Unlike props, components cannot pass the data to the state but can be internally created and managed.
Why state in React js
With state, we can keep track in React of how data changes over time in React application. In React managing state is a crucial skill because it allows us to make interactive React components and dynamic React web applications.
React state is used for everything from tracking form inputs to recording dynamic data from an API. To manage state in the functional component we need to know React Hooks.

Props vs State in React js
Here we will see the difference between props and state in react js.
Prop vs State in React js
| State | Props |
|---|---|
| State changes can be asynchronous | As props are noneditable, so we can read only. |
| States are mutable i.e. the value of a state can be changed | Props are immutable i.e. the value of props cannot be changed |
| The state can be accessed by Functional component: useState Hook, Class component: this. state | props can be accessed using this. props in both the component (Functional and class) |
| As the state holds information about the components | Props allow us to pass data as an argument from one component to another component |
| In React state cannot be accessed by the child component | In React props can be accessed by the child component |
| The React States may be used for rendering dynamic adjustments with the component. | With props, we can communicate between two components. |
| The state cannot make the program reusable | props can make the program reusable |
| The State is inner and managed through the React Component itself. | Props are external and managed by something that renders the component |
Read Components in React js
State in React js class component
Here we will see how to use state in React js class component.
In this example, we will create a counter component, to get the actual count value we need to create a state object we will use the Constructor. A constructor is nothing but a method that is used to initialize an object state in class.
Let’s say index.html contains the below statement inside the body tag:
<div id="root"></div>Next in the index.js file write the below code:
import React from 'react';
import ReactDOM from 'react-dom/client';
import './index.css';
import App from './App';
import reportWebVitals from './reportWebVitals';

const root = ReactDOM.createRoot(document.getElementById('root'));
root.render(
    <App />

);
reportWebVitals();
Next, in the Counter component, write the below code:
import { Component } from "react";

class Counter extends Component{
    constructor(){
        super();
        this.state= {
            counter:0,
        };
    }

    render(){
        return <h3>Count value is : {this.state.counter}</h3>
    }
}
export default Counter;
Now run the app with the npm start command, to render the above code on the page.

This is how we can define the state in React js.
Read State in React js Hooks
Update state in react js
Here we will see how to update state value in React js
We will use the above Counter example, here every time we will click on the button, the counter value gets incremented. As in the above example, the counter value is set to 0, so to update the state of the counter we will use the setState method.
Let’s say index.html contains the below statement inside the body tag:
<div id="root"></div>Next in the index.js file write the below code:
import React from 'react';
import ReactDOM from 'react-dom/client';
import './index.css';
import App from './App';
import reportWebVitals from './reportWebVitals';

const root = ReactDOM.createRoot(document.getElementById('root'));
root.render(
    <App />

);
reportWebVitals();
Next in the Counter js file write the below code to update the counter state value.
import { Component } from "react";

class Counter extends Component{
    constructor(){
        super();
        this.state= {
            counter:0,
        };
    }

    increment(){
        this.setState({
            counter: this.state.counter +1,
        });
    }

    render(){
        return (
        <div>
        <h1>Count value is : {this.state.counter}</h1>
    <button onClick={()=> this.increment()}>Click</button>
        </div>
        )
    }
}
export default Counter;
Now start the application using the npm start command, and then click on the button to increment the value.

This is an example of how we can update the state in React js.
Read What is JSX in React js
Default state in react js
Here we will see how to set the default state in react js.
For example, we have a Customer component, in this one set of objects contains the default value and another object contains the updated value. So by default, it will render the default information, once you click on the button it will show you the updated value. Every time we will refresh the page it will show you the Default information.
Let’s say index.html contains the below statement inside the body tag:
<div id="root"></div>Next in the index.js file write the below code:
import React from 'react';
import ReactDOM from 'react-dom/client';
import './index.css';
import App from './App';
import reportWebVitals from './reportWebVitals';

const root = ReactDOM.createRoot(document.getElementById('root'));
root.render(
    <App />

);
reportWebVitals();
Next, the App component is the default component and contains below set of code:
import './App.css';

import Customer from './Components/Customer';

function App() {
  return (
    <div className="App">
      <Customer></Customer>

    </div>
  );
}
export default App
Next, in the Customer.js file write the below code to update the Customer information.
import {Component} from 'react'

 var initialState = {
    firstName: "Alex",
    lastName :"Cubon",
    age      : 28,
    address  : "Italy",
}
var updateValue={
    firstName: "Ruby",
    lastName:"Petisson",
    age:36,
    address:"Canada",
}

class Customer extends Component {
    constructor(){
        super();

this.state = {
        ...initialState
    }
}
    // Set state to default state
    setDefaultState = () => {
        this.setState({
            ...initialState
        });

    }
    //update the state
    updateValue= ()=>{
        this.setState({
            ...updateValue
        })
    }
    render() {
        return(
            <div>
         <h2>Customer details: </h2>
         <p> First name:{this.state.firstName} </p> <br></br>
             <p>last name:{this.state.lastName} </p><br></br>
            <p>Age:{this.state.age}</p><br></br>
            <p>Address: {this.state.address}</p> <br></br>
         <button onClick={()=> this.updateValue()}> Click </button>
            </div>
        );
    }
}

export default Customer;
Now run the application using the npm start command, you can see the default value is showing, like below, and if you click on the button it will show you the updated value.
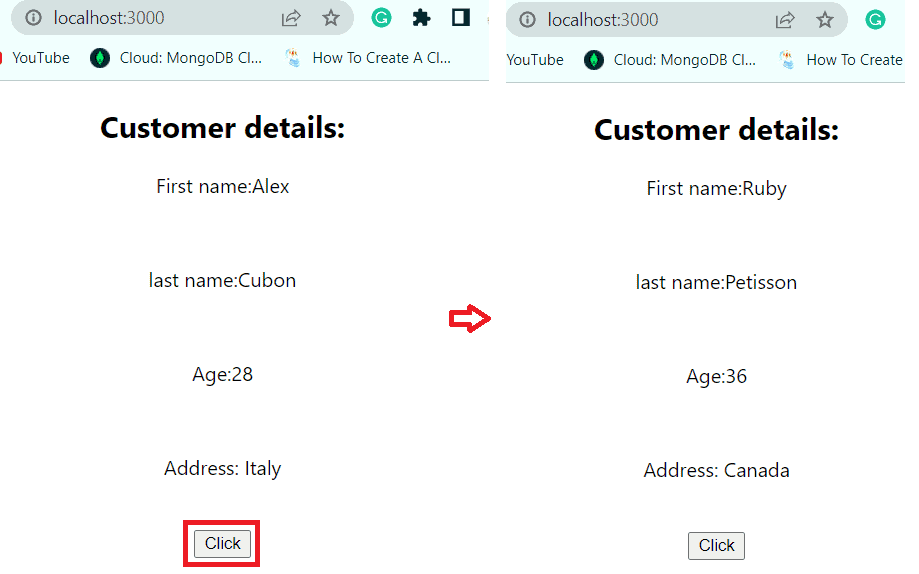
Next click on the Refresh icon to show you the default state value.
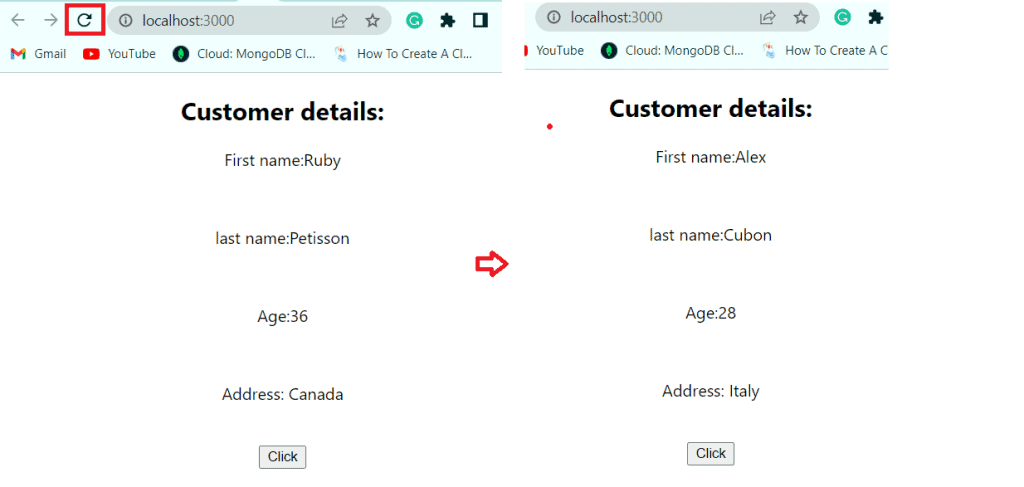
This is an example of the default state value in react js.
Read Props in React js
Reset state react js
Here we will see how to reset to the initial state in React js
For example, we will reset the component to the initial state in React js.
Let’s say index.html contains the below statement inside the body tag:
<div id="root"></div>Next in the index.js file write the below code:
import React from 'react';
import ReactDOM from 'react-dom/client';
import './index.css';
import App from './App';
import reportWebVitals from './reportWebVitals';

const root = ReactDOM.createRoot(document.getElementById('root'));
root.render(
    <App />

);
reportWebVitals();
Next, the App component is the default component and contains the below set of code:
import './App.css';

import Customer from './Components/Customer';

function App() {
  return (
    <div className="App">
      <Customer></Customer>

    </div>
  );
}
export default App
Next, in the Customer.js file write the below code to update and reset the Customer information.
import {Component} from 'react'

 var initialState = {
    firstName: "Alex",
    lastName :"Cubon",
    age      : 28,
    address  : "Italy",
}


class Customer extends Component {
    constructor(){
        super();

this.state = {
        ...initialState
    }
}


//reset to initial state
    resetState = () => {
        this.setState({
            ...initialState
        });
    }
    //update the state
    updateValue= ()=>{
        this.setState({

firstName: "John" , lastName:"Biden", Age:39, address:"America"
        })
    }

    render() {
        return(
            <div>
         <h2>Customer details: </h2>
       <p> First name:{this.state.firstName} </p> <br></br>
       <p>last name:{this.state.lastName} </p><br></br>
       <p>Age:{this.state.age}</p><br></br>
       <p>Address: {this.state.address}</p> <br></br>
         <button onClick={()=> this.updateValue()}>Update </button>
         <button onClick={()=> this.resetState()}> Reset </button>
            </div>
        );
    }
}
export default Customer;
Now run the application using the npm start command, then click on the update button to update the state value.
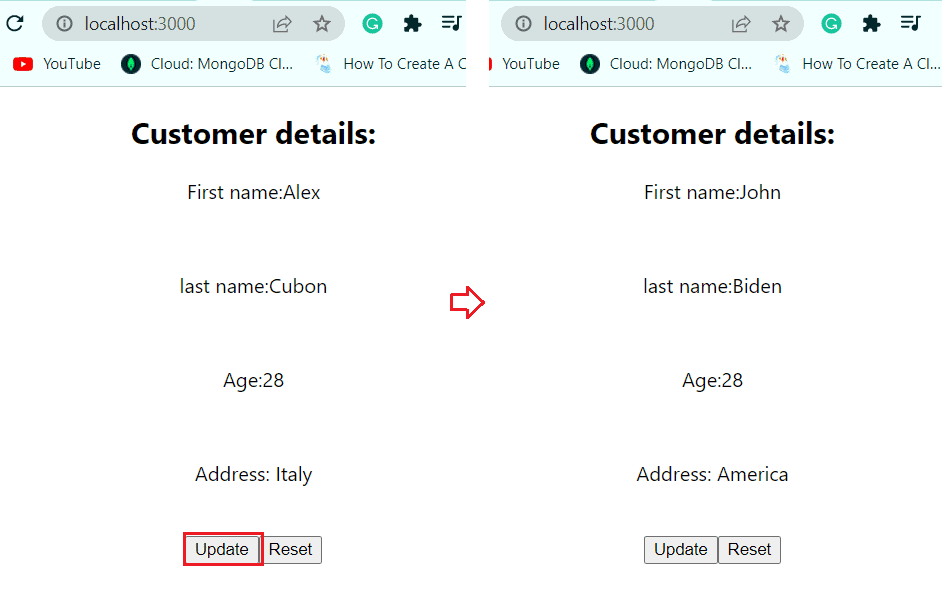
Next click on the Reset button, to come to the initial state, which you can see in the below screenshot.
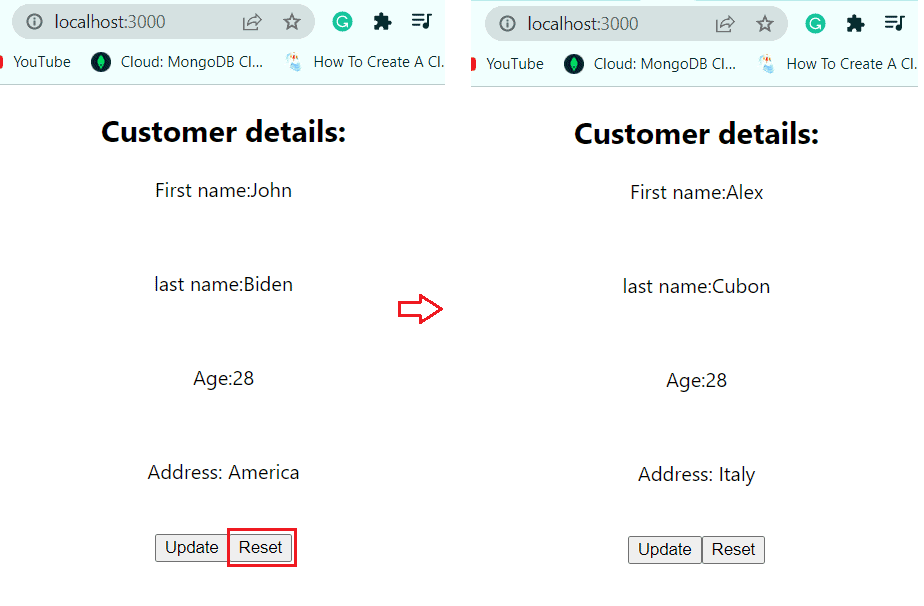
This is an example of a Reset state value in React js.
Read What is react js and react native
React js state array
Here we will see an example of how to define an array using React js state.
Example 1: Define an Array in React state
Let’s say index.html contains the below statement inside the body tag:
<div id="root"></div>Next in the index.js file write the below code:
import React from 'react';
import ReactDOM from 'react-dom/client';
import './index.css';
import App from './App';
import reportWebVitals from './reportWebVitals';

const root = ReactDOM.createRoot(document.getElementById('root'));
root.render(
    <App />

);
reportWebVitals();
Next, the App component is the default component contained below set of code:
import './App.css';
import ArrayExample from './Components/ArrayExample';

function App() {
  return (
    <div className="App">
      <ArrayExample></ArrayExample>

    </div>
  );
}
export default App;
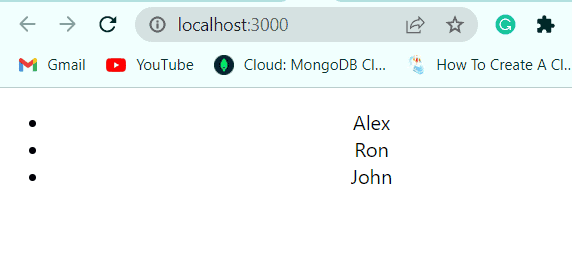
Now in the ArrayExample component having the below code, the map () is used to iterate over an array and manipulate the items.
import { Component } from "react"
class ArrayExample extends Component {
    constructor(props) {
      super(props);

      this.state = {
        list: [{id: "a", name:"Alex"}, {id:"b",name:"Ron"},{id:"c",name: "John"}],
      };
    }

    render() {
      return (
        <div>
          <ul>
            {this.state.list.map(item => (
              <li key={item.id}>{item.name}</li>
            ))}
          </ul>
        </div>
      );
    }
  }

export default ArrayExample;
Now run the app using the npm start command, and you can see the below result on the page:
Example 2: Define the Empty array state in React js
Here we will see how to initialize an empty array state in react js
Let’s say index.html contains the below statement inside the body tag:
<div id="root"></div>Next in the index.js file write the below code:
import React from 'react';
import ReactDOM from 'react-dom/client';
import './index.css';
import App from './App';
import reportWebVitals from './reportWebVitals';

const root = ReactDOM.createRoot(document.getElementById('root'));
root.render(
    <App />

);
reportWebVitals();
Next, the App component is the default component contained below set of code:
import './App.css';
import ArrayExample from './Components/ArrayExample';

function App() {
  return (
    <div className="App">
      <ArrayExample></ArrayExample>

    </div>
  );
}
export default App;
Now in the ArrayExample component, having an empty state array, so it will not render anything as the array is empty, write the below code:
import { Component } from "react"
class ArrayExample extends Component {
    constructor(props) {
      super(props);

//empty array define
      this.state = {
        list:[],
      };
    }

    render() {
      return (
        <div>
          <ul>
            {this.state.list.map(item => (
              <li key={item}>{item}</li>
            ))}
          </ul>
        </div>
      );
    }
  }

export default ArrayExample;
As the array is empty, the map() in render(), suppose to return the item, map() will iterate through the array and render no item.
Read Conditional rendering react js
Example 3: Null state array in React js
Let’s say index.html contains the below statement inside the body tag:
<div id="root"></div>Next in the index.js file write the below code:
import React from 'react';
import ReactDOM from 'react-dom/client';
import './index.css';
import App from './App';
import reportWebVitals from './reportWebVitals';

const root = ReactDOM.createRoot(document.getElementById('root'));
root.render(
    <App />

);
reportWebVitals();
Next, the App component is the default component contained below set of code:
import './App.css';
import ArrayExample from './Components/ArrayExample';

function App() {
  return (
    <div className="App">
      <ArrayExample></ArrayExample>

    </div>
  );
}
export default App;
Now in the ArrayExample component, has a null state array, which is a fallback for the null array.
class ArrayExample extends Component {
    constructor(props) {
      super(props);

      this.state = {
        list:null
      };
    }

    render() {
      return (
        <div>
          <ul>
            {(this.state.list || []).map(item => (
              <li key={item}>{item}</li>
            ))}
          </ul>
        </div>
      );
    }
  }

export default ArrayExample;
The above code renders the null on the page because the list is assigned as null, and this is the only way we can retreat the array as null.
Example 4: Push an empty array in React state
Here we will see how to push an empty array in React state.
For example, we will create a set of names and the list of names will render on the page, to clear names we will push the empty array to the button click event.
Let’s say index.html contains the below statement inside the body tag:
<div id="root"></div>Next in the index.js file write the below code:
import React from 'react';
import ReactDOM from 'react-dom/client';
import './index.css';
import App from './App';
import reportWebVitals from './reportWebVitals';

const root = ReactDOM.createRoot(document.getElementById('root'));
root.render(
    <App />

);
reportWebVitals();
Next, the App component is the default component contained below set of code:
import './App.css';
import ArrayExample from './Components/ArrayExample';

function App() {
  return (
    <div className="App">
      <ArrayExample></ArrayExample>

    </div>
  );
}
export default App;
Now in the ArrayExample component, we will push an empty array to manipulate the current state using this.setState(). And we will assign the empty state to the button.
import { Component } from "react"
class ArrayExample extends Component {
    constructor(props) {
      super(props);

      this.state = {
        names:["Alex","Ruby","Celia","John"],
      };
    }

//method to clear items in Array
    onClearArray=()=>{
      this.setState({names:[]});
    }

    render() {
      return (
        <div>
          <ul>
            {this.state.names.map(item => (
              <li key={item}>{item}</li>
            ))}
          </ul>
          <button type="button" onClick={this.onClearArray}>
          Clear names
        </button>
        </div>
      );
    }
  }

export default ArrayExample;
Now run the react application, you can see the above codes render on the page below.

Read Handling Events in React js
Example 5: Default array state in React js
For example, we will define the initial state array and then we will clear the array using the button event, to get back to the initial array we will use the Reset array button.
Let’s say index.html contains the below statement inside the body tag:
<div id="root"></div>Next in the index.js file write the below code:
import React from 'react';
import ReactDOM from 'react-dom/client';
import './index.css';
import App from './App';
import reportWebVitals from './reportWebVitals';

const root = ReactDOM.createRoot(document.getElementById('root'));
root.render(
    <App />

);
reportWebVitals();
Next, the App component is the default component contained below set of code:
import './App.css';
import ArrayExample from './Components/ArrayExample';

function App() {
  return (
    <div className="App">
      <ArrayExample></ArrayExample>

    </div>
  );
}
export default App;
Now in the ArrayExample component, we declare a default array and then reset to the default array using a button event.
import { Component } from "react"
//default array
const names=["Alex","Ruby","Celia","John"]
class ArrayExample extends Component {
    constructor(props) {
      super(props);

      this.state = {
        names,
      };
    }
// clear array items
    onClearArray=()=>{
      this.setState({names:[]});
    }
//show default array items
    onResetArray=()=>{
      this.setState({names});
    }

    render() {
      return (
        <div>
          <ul>
            {this.state.names.map(item => (
              <li key={item}>{item}</li>
            ))}
          </ul>
          <button type="button" onClick={this.onClearArray}>
          Clear names
        </button>

        <button type="button" onClick={this.onResetArray}>
          Reset names
        </button>
        </div>
      );
    }
  }

export default ArrayExample;
Now, run the flow using the npm start command, and you can see the default array on the screen, then click on clear items to clear all items.

Next click on the Reset names to see the default names on the page.

Example 6: Initial object state in React js
In the above example, we see only how to reset the state for the array. But we can apply it to our complete state too, by extracting the entire initial state object.
Let’s say index.html contains the below statement inside the body tag:
<div id="root"></div>Next in the index.js file write the below code:
import React from 'react';
import ReactDOM from 'react-dom/client';
import './index.css';
import App from './App';
import reportWebVitals from './reportWebVitals';

const root = ReactDOM.createRoot(document.getElementById('root'));
root.render(
    <App />

);
reportWebVitals();
Next, the App component is the default component contained below set of code:
import './App.css';
import ArrayExample from './Components/ArrayExample';

function App() {
  return (
    <div className="App">
      <ArrayExample></ArrayExample>

    </div>
  );
}
export default App;
Now in the ArrayExample component, we declare an initial state object and then reset to the default array using a button event.
import { Component } from "react"
const initialState={ names:["Alex","Ruby","Celia","John"]}
class ArrayExample extends Component {
    constructor(props) {
      super(props);

      this.state = initialState
    }
    onClearArray=()=>{
      this.setState({names:[]});
    }
    onResetArray=()=>{
      this.setState({...initialState});
    }

    render() {
      return (
        <div>
          <ul>
            {this.state.names.map(item => (
              <li key={item}>{item}</li>
            ))}
          </ul>
          <button type="button" onClick={this.onClearArray}>
          Clear names
        </button>

        <button type="button" onClick={this.onResetArray}>
          Reset names
        </button>
        </div>
      );
    }
  }

export default ArrayExample;
Now run the app using the npm start command, you can see the initial state object on the page. Then click on clear names and names get cleared.

And click on the Reset names button, and you can see the initial default names on the page.

These are examples of React js arrays.
Read React js form tutorial
React js state array update
Here we will see how to update the state of an array using React js.
So here we will see go through two cases to update items in an Array:
- Update all items in an array in React js state
- Update a single item in an array React js state
Update all items in an array in React js state
Now we will see how to update all items in an array in React js state.
For example, we will take an array of Persons’ ages, and we will update the age with a button click.
Let’s say index.html contains the below statement inside the body tag:
<div id="root"></div>Next in the index.js file write the below code:
import React from 'react';
import ReactDOM from 'react-dom/client';
import './index.css';
import App from './App';
import reportWebVitals from './reportWebVitals';

const root = ReactDOM.createRoot(document.getElementById('root'));
root.render(
    <App />

);
reportWebVitals();
Next, the App component is the default component contained below set of code:
import './App.css';
import PersonAge from './Components/PersonAge';

function App() {
  return (
    <div className="App">
      <PersonAge></PersonAge>

    </div>
  );
}
export default App;
Now in the PersonAge component, we will update the person’s age +1 with map(), and it will return a new array without mutating the previous array.
import React, { Component } from 'react';

class PersonAge extends Component {
  constructor(props) {
    super(props);

    this.state = {
      age: [42, 33, 68],
    };
  }

  onUpdateItems = () => {
    this.setState(state => {
      const age = state.age.map(item => item + 1);

      return {
        age,
      };
    });
  };

  render() {
    return (
      <div>
        <ul>
          {this.state.age.map(item => (
            <li key={item}>The person is {item} years old.</li>
          ))}
        </ul>

        <button type="button" onClick={this.onUpdateItems}>
          Make everyone one year older
        </button>
      </div>
    );
  }
}

export default PersonAge;
Now run the app with the npm start command, and you can see the person’s age list, with a button to make persons age one year old.

This is an example of React js state array update.
Update a single item in an array React js state
Here we will see how to update a single item in an array React js state.
In the above example, we see how to update all items in an array, so here we will only update a single item(age) in an array.
Let’s say index.html contains the below statement inside the body tag:
<div id="root"></div>Next in the index.js file write the below code:
import React from 'react';
import ReactDOM from 'react-dom/client';
import './index.css';
import App from './App';
import reportWebVitals from './reportWebVitals';

const root = ReactDOM.createRoot(document.getElementById('root'));
root.render(
    <App />

);
reportWebVitals();
Next, the App component is the default component contained below set of code:
import './App.css';
import PersonAge from './Components/PersonAge';

function App() {
  return (
    <div className="App">
      <PersonAge></PersonAge>

    </div>
  );
}
export default App;
Now, in the PersonAge component, we will update the item in the array, to recognize it later in the updated item() in the class method. With the map method, we will iterate over all the items in the array and we can update the needed item with the conditional logic.
import React, { Component } from 'react';
class PersonAge extends Component {
    constructor(props) {
      super(props);

      this.state = {
        age: [44, 36, 66],
      };
    }

    updateItem = i => {
      this.setState(state => {
        const age = state.age.map((item, j) => {
          if (j === i) {
            return item + 1;
          } else {
            return item;
          }
        });

        return {
          age,
        };
      });
    };

    render() {
      return (
        <div>
          <ul>
            {this.state.age.map((item, index) => (
              <li key={item}>
                The person is {item} years old.
                <button
                  type="button"
                  onClick={() => this.updateItem(index)}
                >
                  Make me one year older
                </button>
              </li>
            ))}
          </ul>
        </div>
      );
    }
  }

export default PersonAge;
Now run the app you can see the person’s age and also to update the item, you can click on the button. So, to update each item, click on the respective button. In this case, we will update the age from 36 to 37.

This is an example of React js state array update single item.
React js add state array
Here we will see how to add an item in an array in React Js state.
For example, we have a list of names, and we will add names to the array using concat().
So in React, to add the item to an array, we cannot use the push() method because it mutates the array in React js. It does not depart the array intact however adjustments it. Instead, there ought to be a brand new array created that’s used to replace the state.
Even if we will use the Push(), it won’t work, not return an updated array. So, instead of push(), we will use concat () to add an item to an array.
Let’s say index.html contains the below statement inside the body tag:
<div id="root"></div>Next in the index.js file write the below code:
import React from 'react';
import ReactDOM from 'react-dom/client';
import './index.css';
import App from './App';
import reportWebVitals from './reportWebVitals';

const root = ReactDOM.createRoot(document.getElementById('root'));
root.render(
    <App />

);
reportWebVitals();
Next, the App component is the default component contained below set of code:
import './App.css';
import  PersonName from './Components/ PersonName';

function App() {
  return (
    <div className="App">
      < PersonName></ PersonName>

    </div>
  );
}
export default App;
Now in the PersonName components contains the below code to add item to array in React js state.
import React, { Component } from 'react';

class PersonName extends Component {
  constructor(props) {
    super(props);

    this.state = {
      value: '',
      names: ['Alex', 'Bob', 'Chow'],
    };
  }

// to get the target value
  onChangeValue = event => {
    this.setState({ value: event.target.value });
  };

// add item to array method
  onAddItem = () => {
    // not allowed AND not working
    this.setState(state => {
      const names = state.names.concat(state.value);

      return {
        names,
        value: '',
      };
    });
  };

  render() {
    return (
      <div>
        <ul>
          {this.state.names.map(item => (
            <li key={item}>{item}</li>
          ))}
        </ul>

        <input
          type="text"
          value={this.state.value}
          onChange={this.onChangeValue}
        />
        <button
          type="button"
          onClick={this.onAddItem}
          disabled={!this.state.value}
        >
          Add
        </button>
      </div>
    );
  }
}

export default PersonName;
Now run the application and you can see the text box and Add button. So write a name and click on Add button to add the name to the list.

This is an example of React js state array add an item.
Remove items from an array in React js state
Here we will see how to remove items from an array in React js state,
To remove items from an array we will use the filter method, so follow the below code.
Let’s say index.html contains the below statement inside the body tag:
<div id="root"></div>Next in the index.js file write the below code:
import React from 'react';
import ReactDOM from 'react-dom/client';
import './index.css';
import App from './App';
import reportWebVitals from './reportWebVitals';

const root = ReactDOM.createRoot(document.getElementById('root'));
root.render(
    <App />

);
reportWebVitals();
Next, the App component is the default component contained below set of code:
import './App.css';
import  PersonAge from './Components/ PersonAge';

function App() {
  return (
    <div className="App">
      < PersonAge></ PersonAge>

    </div>
  );
}
export default App;
Now in the PersonAge component write the below code to remove an item from an event in a button click.
import React, { Component } from 'react';

class PersonAge extends Component {
  constructor(props) {
    super(props);

    this.state = {
      ages: [43, 32, 66,42,43,66],
    };
  }

//to remove item from array
  onRemoveItem = i => {
    this.setState(state => {
      const ages = state.ages.filter((item, j) => i !== j);

      return {
        ages,
      };
    });
  };

  render() {
    return (
      <div>
        <ul>
          {this.state.ages.map((item, index) => (
            <li key={item}>
              The person is {item} years old.
              <button
                type="button"
                onClick={() => this.onRemoveItem(index)}
              >
                Remove
              </button>
            </li>
          ))}
        </ul>
      </div>
    );
  }
}
export default PersonAge;
Now run the React application with the npm start command, and you can see that each item contains the Remove item button, by clicking on the button, you can remove the item.

This is an example of React js state array remove the item
React js filter state
Here we will see what is a filter in React js state
What is Filter in React js?
The Filter in reacts js is the process of iterating through an array and excluding and including items in the array based on the condition that you provide. The filter is a javascript function that we can execute on an array type of object.
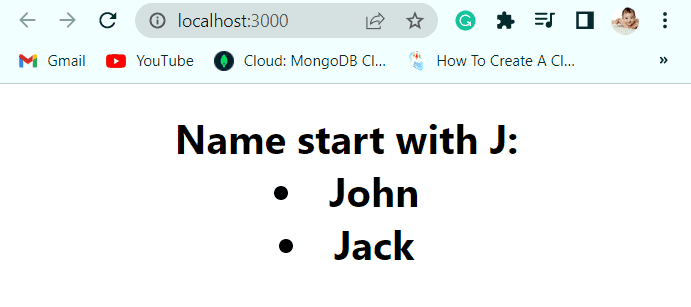
For example, we will see how to filter a name start with J from an array using React js filter state.
Let’s say index.html contains the below statement inside the body tag:
<div id="root"></div>Next in the index.js file write the below code:
import React from 'react';
import ReactDOM from 'react-dom/client';
import './index.css';
import App from './App';
import reportWebVitals from './reportWebVitals';

const root = ReactDOM.createRoot(document.getElementById('root'));
root.render(
    <App />

);
reportWebVitals();
Next, the App component is the default component contained below set of code:
import './App.css';
import  FilterArray from './Components/ FilterArray';

function App() {
  return (
    <div className="App">
      < FilterArray></ FilterArray>

    </div>
  );
}
export default App;
Now in the FIlterArray component, write the below code to get the name that starts with ‘J’.
import React, { Component } from 'react';

class FilterArray extends Component {
  state = {
    array: ["Alex", "John", "Ruby", "Rock","Jack"]
  };


  render() {
    return (
      <div>

        <h1>Name start with J:{this.state.array.filter(name => name.includes('J')).map(filteredName => (
        <li>
          {filteredName}
        </li>))}</h1>
      </div>
    );
  }
}
export default FilterArray;
Now run the react app, and you can see the list of names starting with J.
This is an example of React js filter state
React state array length
Here we will see how to react state array length.
Let’s say index.html contains the below statement inside the body tag:
<div id="root"></div>Next in the index.js file write the below code:
import React from 'react';
import ReactDOM from 'react-dom/client';
import './index.css';
import App from './App';
import reportWebVitals from './reportWebVitals';

const root = ReactDOM.createRoot(document.getElementById('root'));
root.render(
    <App />

);
reportWebVitals();
Next, the App component is the default component contained below set of code:
import './App.css';
import  FilterArray from './Components/ FilterArray';

function App() {
  return (
    <div className="App">
      < FilterArray></ FilterArray>

    </div>
  );
}
export default App;
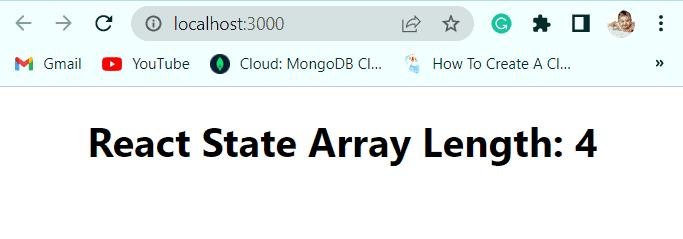
Now in the FilterArray component, write the below code to check the length of the array:
class FilterArray extends Component {
  state = {
    array: ["Alex", "John", "Ruby", "Rock"]
  };


  render() {
    return (
      <div>
        <h1>React State Array Length: {this.state.array.length}</h1>

      </div>
    );
  }
}
export default FilterArray;
Next run the app using npm start command, then you can see the length of the array on the page.
React js pass state from child to parent
Here we will see how to pass state from child to parent component.
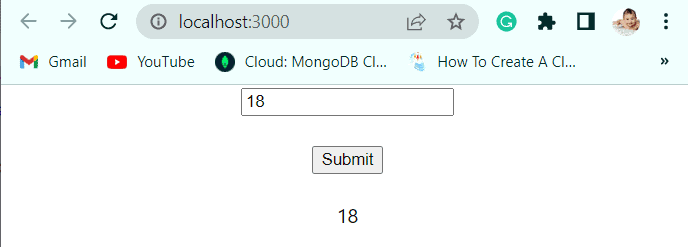
In Parent component(App.js) we will create a call-back function, and this function will get the data from child component. Then we will pass the call back function to the child component as a props from the parent component.
Let’s say index.html contains the below statement inside the body tag:
<div id="root"></div>Next in the index.js file write the below code:
import React from 'react';
import ReactDOM from 'react-dom/client';
import './index.css';
import App from './App';
import reportWebVitals from './reportWebVitals';

const root = ReactDOM.createRoot(document.getElementById('root'));
root.render(
    <App />

);
reportWebVitals();
Now in the App.js file, App is the parent component, so we will begin the callback function like below :
import React from 'react';
import Child from './Components/Child'
class App extends React.Component{

       state = {
        Number: "",
       }

    handleCallback = (childData) =>{
        this.setState({Number: childData})
    }

    render(){
        const {Number} = this.state;
        return(
            <div className='App'>
                <Child parentCallback = {this.handleCallback}/>
                {Number}
            </div>
        )
    }
}
export default App
Next, in the Child, js file write the below code
import { Component } from "react";
class Child extends Component{

	onTrigger = (event) => {
		this.props.parentCallback(event.target.number.value);
		event.preventDefault();
	}

	render(){
		return(
		<div>
			<form onSubmit = {this.onTrigger}>
				<input type = "Number"
				name = "number" placeholder = "Enter Number"/>
				<br></br><br></br>
				<input type = "submit" value = "Submit"/>
				<br></br><br></br>
			</form>
		</div>
		)
	}
}
export default Child
Now run the app, you can see the box on page, provide number and click on Submit button. you can see the number will display on the page.
This is how we can pass state from child to parent in React js.
In this React js tutorial, we learned all about the state in React js with different example:
- What is the state in react js
- Why state in react js
- Props vs state react js
- State in react js class component
- update state in react js
- default state in react js
- reset state react js
- react js state array
- react js state array update
- react js add state array
- Remove items from an array in React js state
- react js filter state
- React state array length
- React js pass state from child to parent
I am Bijay a Microsoft MVP (10 times – My MVP Profile) in SharePoint and have more than 17 years of expertise in SharePoint Online Office 365, SharePoint subscription edition, and SharePoint 2019/2016/2013. Currently working in my own venture TSInfo Technologies a SharePoint development, consulting, and training company. I also run the popular SharePoint website EnjoySharePoint.com