This SPFx tutorial, we will discuss how to create a list using SharePoint Framework (SPFx) development model in SharePoint Online Office 365.
Here, we will be having a button and whenever a user clicks on the button, a list will be created in the SharePoint Online site.
It will not just create the SharePoint list, rather it will check if the list exists in the SharePoint site or not, if the list is not presented in the SharePoint site, then it will create the list.
If you are new to the SPFx Development model, you need to first set up you SharePoint Framework development environment.
Also, you need to have knowledge of TypeScript and ReactJS for SPFx development.
SharePoint Framework Introduction
SharePoint Framework (SPFX) is a page and web part model that provides full support for client-side SharePoint development, easy integration with SharePoint data, and support for open source tooling.
SPFx works for SharePoint Online and also for on-premises (SharePoint 2016 Feature Pack 2 and SharePoint 2019).
Create a list using the SharePoint Framework (SPFx)
Now we will see how to create a list using the SharePoint Framework (SPFx) and TypeScript.
So let us first create the SPFx solution.
Step 1: To Create a new Solution for example “CheckListExists“
Open the Nodejs command prompt. Create a directory for SPFx solution.
md CheckListExistsNavigate to the above created directory
cd CheckListExistsStep 2: Run Yeoman SharePoint Generator to create the SharePoint client-side solution.
yo @microsoft/sharepointYeoman generator will present you with the wizard by asking questions about the solution to be created like below:
- Solution Name: Hit Enter to have a default name (CheckListExists in this case) or type in any other name for your solution.
- Target for component: Here, we can select the target environment where we are planning to deploy the client web-part; i.e., SharePoint Online or SharePoint On-premise (SharePoint 2016 onwards). Selected choice – SharePoint Online only (latest)
- Place of files: We may choose to use the same folder or create a subfolder for our solution.Selected choice – Same folder.
- Deployment option: Selecting Y will allow the app to be deployed instantly to all sites and will be accessible everywhere. Selected choice – N (install on each site explicitly)
- Type of client-side component to create: We can choose to create a client-side web part or an extension. Choose the web part option. Select option – Web-part.
- Web part name: Hit enter to select the default name or type in any other name. Type name – checkListExists
- Web part description: Hit enter to select the default description or type in any other value.
- Framework to use: Select any JavaScript framework to develop the component. Available choices are No JavaScript Framework, React, and Knockout. Select option – No JavaScript Framework
At this point, Yeoman installs the required dependencies and scaffolds the solution files along with the checkListExists web part. This might take a few minutes.
When the scaffold is complete, you should get Successful message.
Step 3: In the same command prompt type the below command to open the solution in the visual studio code editor -> ” code .“

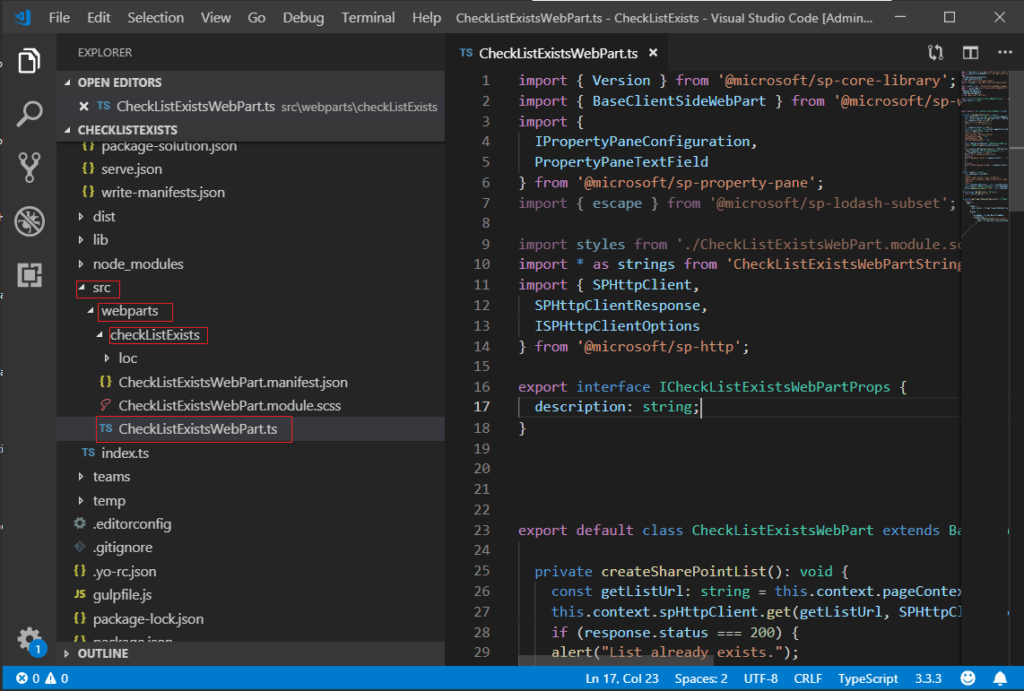
Step 4: Go to the “CheckListExistsWebPart.ts” file, copy, and paste the below code.
Here we have used Rest API to create SharePoint list inside the code in SharePoint Framework.
import { Version } from '@microsoft/sp-core-library';
import { BaseClientSideWebPart } from '@microsoft/sp-webpart-base';
import {
  IPropertyPaneConfiguration,
  PropertyPaneTextField
} from '@microsoft/sp-property-pane';
import { escape } from '@microsoft/sp-lodash-subset';

import styles from './CheckListExistsWebPart.module.scss';
import * as strings from 'CheckListExistsWebPartStrings';
import { SPHttpClient,
  SPHttpClientResponse,
  ISPHttpClientOptions
} from '@microsoft/sp-http';

export interface ICheckListExistsWebPartProps {
  description: string;
}

export default class CheckListExistsWebPart extends BaseClientSideWebPart<ICheckListExistsWebPartProps> {

  private createSharePointList(): void {
    const getListUrl: string = this.context.pageContext.web.absoluteUrl + "/_api/web/lists/GetByTitle('My List')";
    this.context.spHttpClient.get(getListUrl, SPHttpClient.configurations.v1).then((response: SPHttpClientResponse) => {
    if (response.status === 200) {
    alert("List already exists.");
    return; // list already exists
    }
    if (response.status === 404) {
    const url: string = this.context.pageContext.web.absoluteUrl + "/_api/web/lists";
    const listDefinition : any = {
    "Title": "My List",
    "Description": "My description",
    "AllowContentTypes": true,
    "BaseTemplate": 100,
    "ContentTypesEnabled": true,
    };
    const spHttpClientOptions: ISPHttpClientOptions = {
    "body": JSON.stringify(listDefinition)
    };
    this.context.spHttpClient.post(url, SPHttpClient.configurations.v1, spHttpClientOptions)
    .then((response: SPHttpClientResponse) => {
    if (response.status === 201) {
    alert("List created successfully");
    } else {
    alert("Response status "+response.status+" - "+response.statusText);
    }
    });
    } else {
    alert("Something went wrong. "+response.status+" "+response.statusText);
    }
    });
    }
  public render(): void {
    this.domElement.innerHTML =
    `<div>
    <button type='button' class='ms-Button'>
    <span class='ms-Button-label'>Create List</span>
    </button>
    </div>`;
    this.createSharePointList = this.createSharePointList.bind(this);
    const button: HTMLButtonElement = this.domElement.getElementsByTagName("BUTTON")[0] as HTMLButtonElement;
    button.addEventListener("click", this.createSharePointList);
  }
  protected get dataVersion(): Version {
    return Version.parse('1.0');
  }

  protected getPropertyPaneConfiguration(): IPropertyPaneConfiguration {
    return {
      pages: [
        {
          header: {
            description: strings.PropertyPaneDescription
          },
          groups: [
            {
              groupName: strings.BasicGroupName,
              groupFields: [
                PropertyPaneTextField('description', {
                  label: strings.DescriptionFieldLabel
                })
              ]
            }
          ]
        }
      ]
    };
  }
}
Step 5: In the command prompt, type “gulp serve” which will the localwork bench.
While the SharPoint local workbench is running, open the SharePoint workbench by typing an URL like below:
https://<domain-name>.SharePoint.com/sites/<SiteName>/_layouts/15/workbench.aspx

Example:
https://tsinfo.SharePoint.com/sites/HR/_layouts/15/workbench.aspx
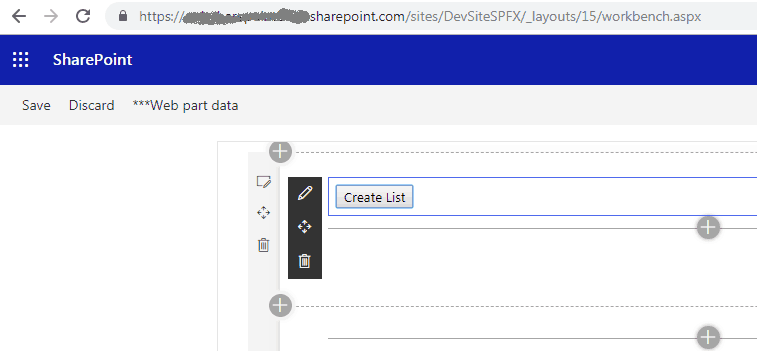
Step 6: In the SharePoint workbench page, add the web part “CheckListExists”. Then it will show the “Create List” Button.

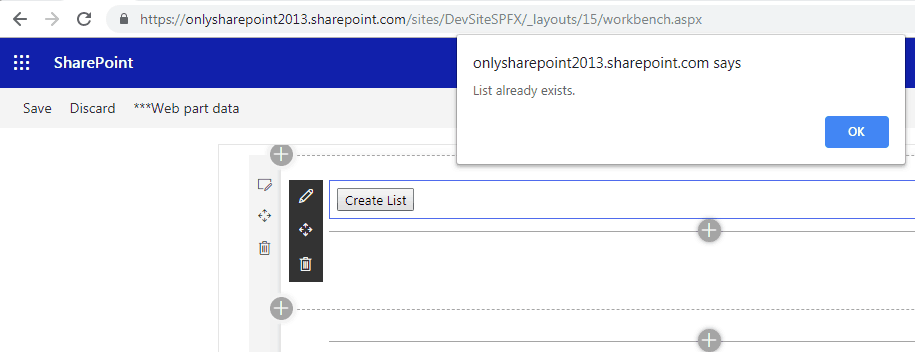
Step 7: When a user clicks on the Create List button, it will check if the list with the same Title exists, then it will show an alert message “List already exists” like below:

Step 8: If the list does not exist with the name “My List” in the SharePoint site, then a new SharePoint list will be created with the name “My List” in the SharePoint site.

You may also like following SharePoint Framework tutorials:
- [Solved] [spfx-serve] The api entry could not be loaded: node_modules/@microsoft/sp-webpart-workbench/lib/api/ in SharePoint Framework
- [Solved] cannot find module ‘@microsoft/sp-build-web’ SharePoint Framework (spfx)
- [Resolved] SharePoint framework Local Workbench is showing empty
- [Solved] SPFx multiline textbox field rending as a single line of text in SharePoint Online
- Setup SharePoint Framework (SPFx) development environment in Windows 10 workstation
- Use JavaScript Core Library with SharePoint Framework (Async or await and normal promises)
- Tutorial on how to create SPFx web part with ReactJS for SharePoint 2016 On-Premise environment
- spfx client-side web part
- Property welcome does not exist on type ‘JSX.IntrinsicElements’ in SPFx React
- React vs Angular in Details
In this SharePoint tutorial, we learned how to create a SharePoint list in SharePoint Framework (SPFx) in SharePoint Online. It will also, check if the SharePoint list already exists or not before creating the SharePoint Online list.
I am Bijay a Microsoft MVP (10 times – My MVP Profile) in SharePoint and have more than 17 years of expertise in SharePoint Online Office 365, SharePoint subscription edition, and SharePoint 2019/2016/2013. Currently working in my own venture TSInfo Technologies a SharePoint development, consulting, and training company. I also run the popular SharePoint website EnjoySharePoint.com
How to create the list using templates.
How to add columns or create a list from an existing list or template
First of all, thank you for the article, it helped a lot. Is there a way to add the “Add to website navigation” here too?
Like a keyword to add in the definition and set to true / false depending on the checkbox (just like in the standard SharePoint create list dialog)?
const listDefinition : any = {
“Title”: “My List”,
“Description”: “My description”,
“AllowContentTypes”: true,
“BaseTemplate”: 100,
“ContentTypesEnabled”: true,
“???”: this.state.addListToWebsiteNavigation
};
Thanks in advance!
I’ve found the solution myself right now. Didn’t find the keyword anywhere. But it is:
“OnQuickLaunch”. I hope it helps someone.