This SPFx tutorial, we will discuss how to create a SharePoint framework (spfx) client web part in SharePoint Online Office 365. Also, we will see how to deploy a client-side web part to a SharePoint page by deploying to the SharePoint App Catalog.
If you are new to SPFx, check out my tutorial on the SharePoint Framework (SPFx) tutorial. There I have explained an overview of the SharePoint framework, advantages of using the SharePoint framework, how to set up your SharePoint Framework development environment.
Create SharePoint framework (spfx) client web part (step by step)
Previously, we used to develop SharePoint visual web parts for SharePoint 2010/2013/2016, in SharePoint modern experience, we will use SharePoint client-side web parts.
Now, we will see step by step how to create a client-side web part in SharePoint framework (SPFx) for SharePoint Online. In the same way, also we can develop the SharePoint framework (spfx) client-side web part for SharePoint 2016 or SharePoint Online.
I will explain, on which step you need to change for SharePoint on-premises versions like SharePoint 2016 or SharePoint 2019.
But you need to make sure, you need to install SharePoint 2016 feature pack 2 to work with SPFx in SharePoint 2016 version. Because SharePoint Server 2016 Feature Pack 2 contains SharePoint Framework client-side web part support with classic SharePoint pages.
By this time, I assume you have already installed the below things.
- Nodejs (Instal LTS SharePoint framework supported version)
- Visual Studio Code/Atom/Webstom etc.
- Yeoman and gulp (Run command: npm install -g yo gulp)
- Yeoman SharePoint generator (Run command: npm install -g @microsoft/generator-sharepoint)
- If you are developing the SPFx web part for the first time in your local system then run this command also gulp trust-dev-cert.
Now, we will see how to create our first SPFx client-side web part.
Open Nodejs command prompt, I prefer Nodejs command prompt, but you can use any command prompt.
Here first create a folder and navigate to the folder by using the below command.
md SPFXClientWebPartExample

cd SPFXClientWebPartExample
Now run the below command.
yo @microsoft/sharepointThe above command will help us to create the SharePoint client-side solution project structure. And you can see a welcome message like below:
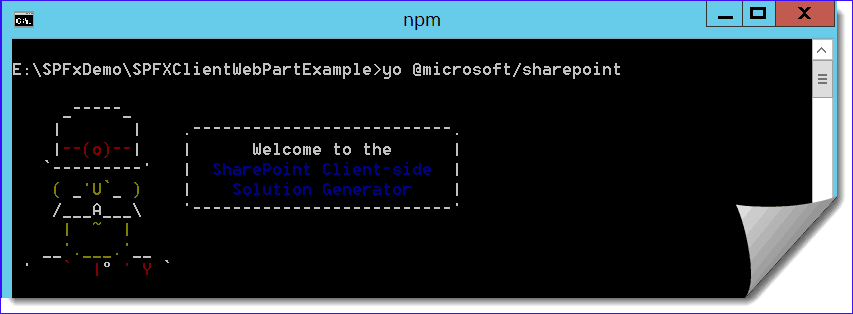
Now, it will ask us below things, either you can go for the default things or you can also change.
What is your solution name? Hit enter to go with the default name or type to change the solution name.
Which baseline package do you want to target for your environment(s)? You can change by using the arrow key.
You can select from the below things.
- SharePoint Online only (latest): If you are targeting to the SharePoint Online version only.
- SharePoint 2016 onwards, including 2019 and SharePoint Online: I will suggest to chose this option if you are using SharePoint 2016.
- SharePoint 2019 onwards, including SharePoint Online: Here also I will suggest selecting if you are using SharePoint server 2019.
I have selected SharePoint Online only.
Where you want to place the files? Select Use the current folder unless you want to create a subfolder with a solution name.
Do you want to allow the tenant admin the choice of being able to deploy the solution to all sites immediately without running any feature deployment or adding apps in sites? Select N.
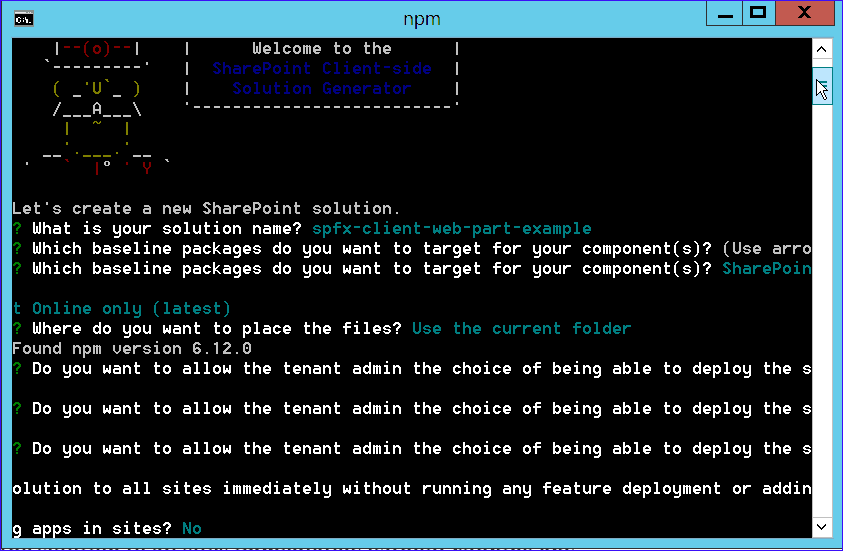
Will the components in the solution require permission to access web APIs that are unique and not shared with other components in the tenant? Select N.
Which type of client-side component to create? Select WebPart. We will see in other tutorials, how to use SharePoint extensions.
What is your web part name? By default it will show HelloWorld, here I change it to ClientWebPartExample.
What is your web part description? Select the default one.
Which framework would you like to use? Select No JavaScript Framework.
If you want to develop using React or Knockout, then you can select any framework.
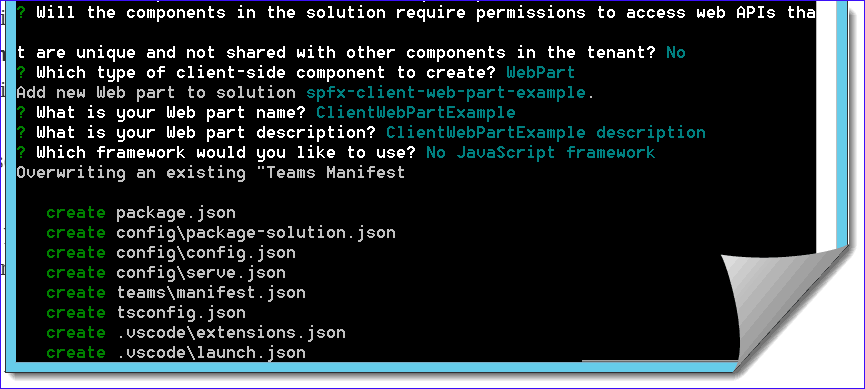
Now, it will create and import all the files inside the folder which we have created. It will take some time to create the sharepoint framework client web part. It looks like below:
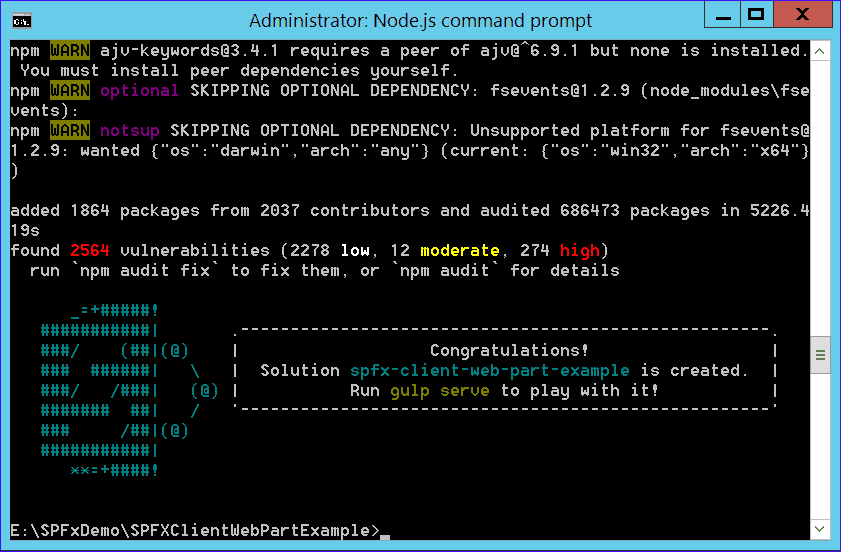
If the first time you are developing the client-side web part in spfx, then run the below command once.
gulp trust-dev-certOnce the sharepoint framework client web part created successfully, use the below command to open the SharePoint project using Visual Studio Code.
code . (Code space dot)You can also directly open in the Visual Studio Code. Open Visual Studio Code and Add workspace folder or Open folder and then select our SharePoint framework client-side web part folder.
Now, you can see the SPFx client-side web part structure looks like below:
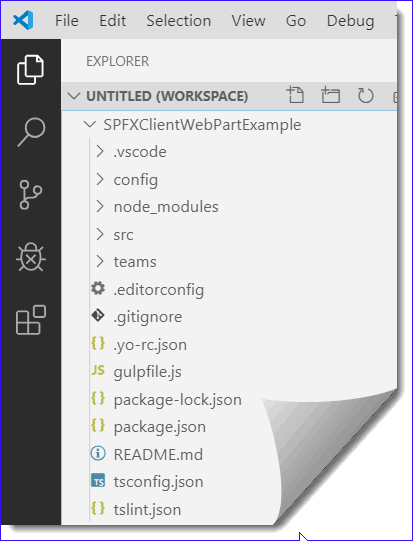
SharePoint framework client web part folder structure
Now, we should know the SharePoint framework client web part folder structure, to understand a few important files and folders.
Src is the most important folder and within that, you can see out webpart (.ts) as selected below, where we can add or modify code.
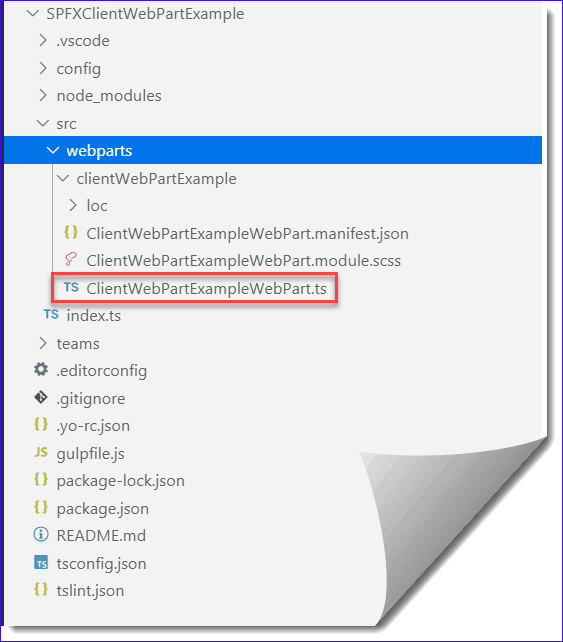
Below is the code in our web part render method which you can modify.
public render(): void {
    this.domElement.innerHTML = `
      <div class="${ styles.clientWebPartExample }">
        <div class="${ styles.container }">
          <div class="${ styles.row }">
            <div class="${ styles.column }">
              <span class="${ styles.title }">Welcome to SharePoint!</span>
              <p class="${ styles.subTitle }">Customize SharePoint experiences using Web Parts.</p>
              <p class="${ styles.description }">${escape(this.properties.description)}</p>
              <a href="https://aka.ms/spfx" class="${ styles.button }">
                <span class="${ styles.label }">Learn more</span>
              </a>
            </div>
          </div>
        </div>
      </div>`;
}- src: This is one of the important folders and we will mostly modify files under this folder while adding functionality to the web parts.
- config: This folder contains configuration files, we will modify a few files from this folder also.
- dist: This contains the distributable files, the typescript files which are compiled to JavaScript files will be in this folder.
- lib: This folder contains compile-time files.
- node_modules: This folder contains all the dependencies files. These are required for the SPFx development environment to work.
- temp: This folder contains temporary files used by the SPFx development environment.
- .editorconfig: This configuration file defines how the visual studio code editor works in this folder. Information like, if an indent style is based on a tab or space, and how many characters are used to indent with one Tab click.
- .gitignore: This file instructs Git to ignore certain files.
- .npmignore: This file instructs npm to ignore certain files.
- .yo-rc.json: This json file contains information on the Yeoman generator used in this project.
- gulpfile.js: This is a Gulp configuration file. This file executes gulp command in this folder.
- package.json: This file is used by the npm and it defines the dependencies and their versions also.
- README.md: This is the web part documentation file.
- tsconcfig.json: This file contains TypeScript compilation options.
Test SharePoint framework client web part using local or SharePoint workbench
Now, we will see, how we can test the SharePoint client web part using local workbench or SharePoint workbench.
From the same command prompt, run the below command
gulp serveOr you can also use the Visual Studio code Terminal (View -> Terminal), to run the gulp serve command prompt.
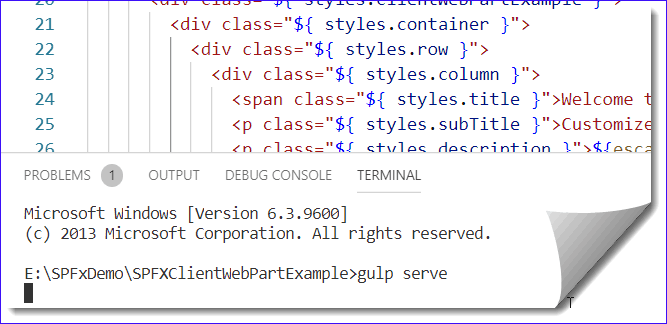
This will open the local workbench, where we can add the SPFx client-side web part to the page and test the web part.
Below is the SharePoint Framework local workbench URL.
https://localhost:4321/temp/workbench.htmlNow, you can add the spfx client-side web part by clicking on the + icon like below in the local workbench.
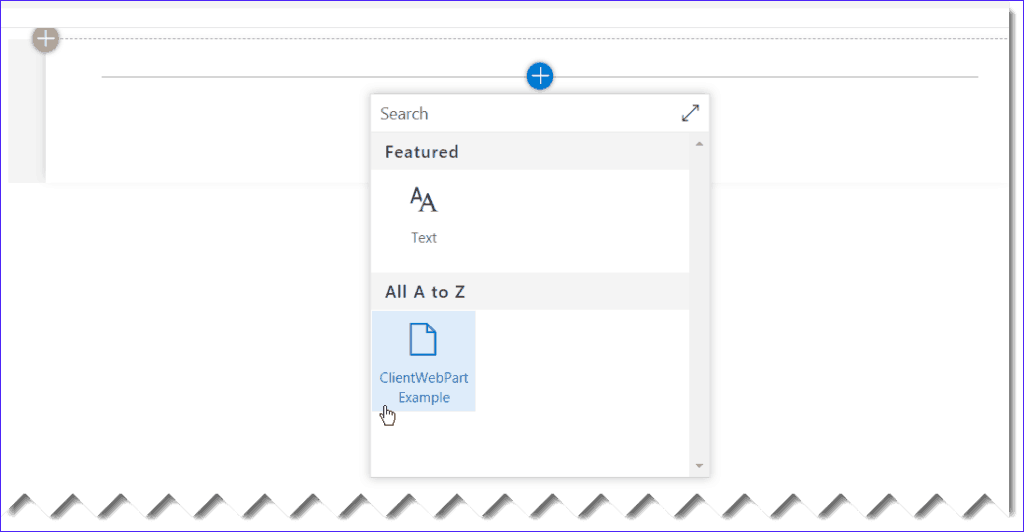
Once you add, you can see the web part will look like below:
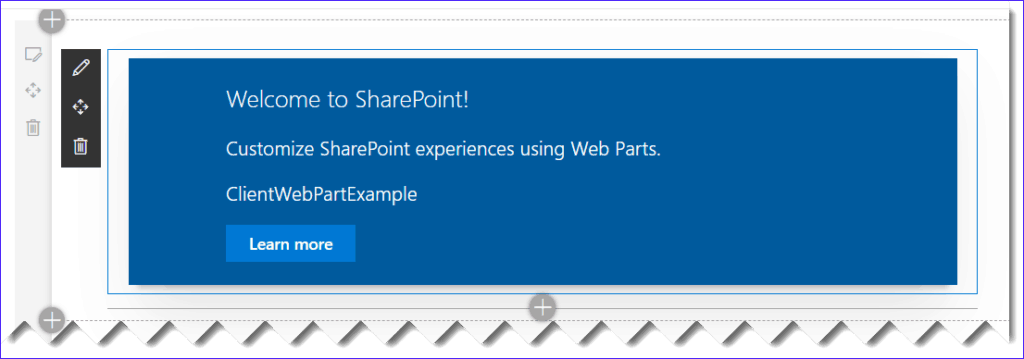
While the local workbench is running, you can also open any SharePoint site and navigate to the SharePoint workbench, you will be able to add the SPFx client-side webpart like below:
https://tsinfo.sharepoint.com/sites/TSInfoClassic/_layouts/15/workbench.aspxThe SharePoint client-side web part will be available in the SharePoint workbench also, you can see below (provided your local workbench should be running):
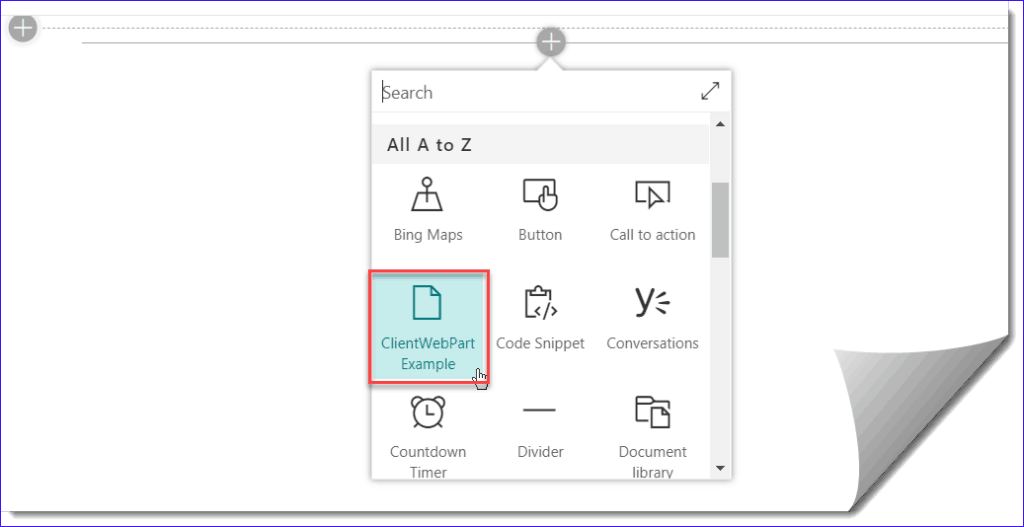
We can add in the SPFx web part to the above SharePoint workbench.
Any time to stop the local workbench, run the below command.
Ctrl + C and then Type Y and click EnterDeploy SharePoint Framework client web part to SharePoint Online App Catalog
Now, we will see how we can deploy the SharePoint Framework client-side web part to the SharePoint page, by using the SharePoint Online App Catalog site.
The same steps we can follow to deploy the SPFx client-side web part to SharePoint 2016 or SharePoint Online.
In the command prompt or in the Visual Studio code Terminal, run the below command one by one.
gulp cleanThe above command will delete previous temporary files created during any previous command.
Now, before running the below command, you can configure the CDN path in the below file location.
config/write-manifests.jsonFor SharePoint 2016/2019, you can also provide any SharePoint folder or library path which will act as your CDN. You can also configure Azure CDN to deploy your SharePoint client-side web part.
For SharePoint 2016/2019, you can add the CDN path like below:

If you have not mentioned any CDN path, then the files will be deployed to the Site Assets library of the SharePoint App Catalog site.
Our CDN file path will be blank and looks like below:

You really do not need to create a CDN path, just add the –ship in the below gulp commands, it will upload the files to Site Assets library of the SharePoint App Catalog site.
Now run the below command.
gulp bundle --ship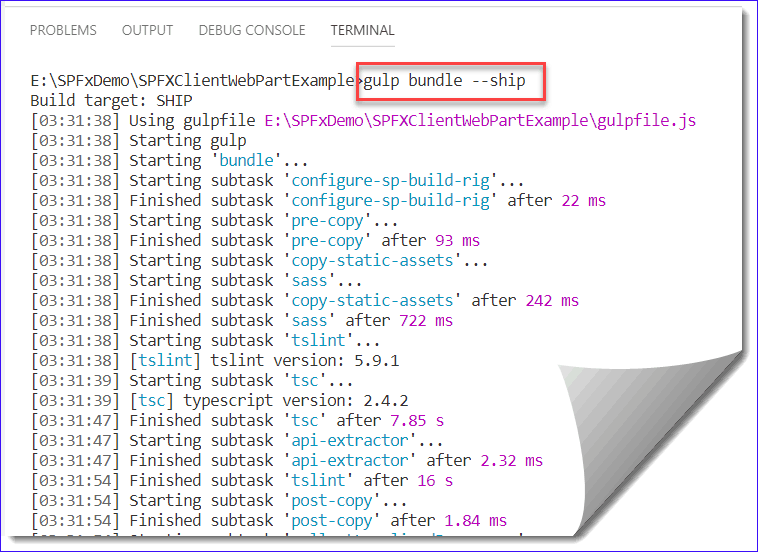
The above command will create the files in the /temp/deploy folder which has to be there in the CDN folder or in the site assets folder in the App catalog site.
You can see the files like below:

Now, run the below command.
gulp package-solution --ship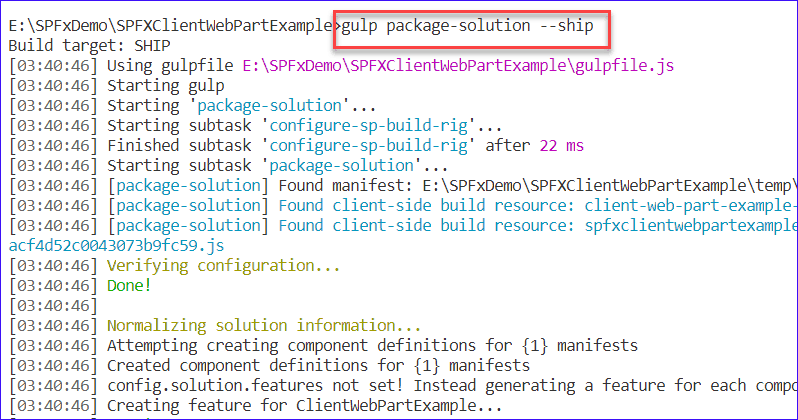
This will create the package file (.sppkg) which we need to deploy to the SharePoint Online app catalog site.
The .sppkg file will be created under a sub-directory of the project folder at /sharepoint/solution. The package file looks like below:
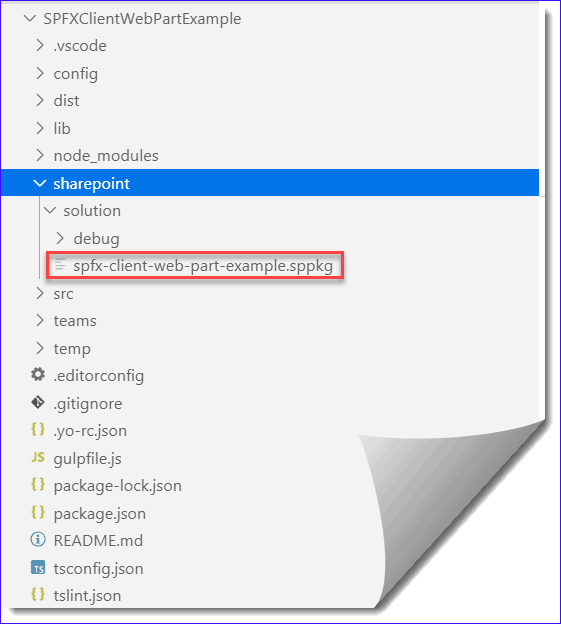
Now we need to upload the .sppkg file to the SharePoint App catalog site.
Upload .sppkg file to SharePoint Online App Catalog Site
Now, we can upload the .sppkg file to the SharePoint Online app catalog site.
Open SharePoint Online App catalog site and drag and drop the .sppkg file to the App for SharePoint folder.
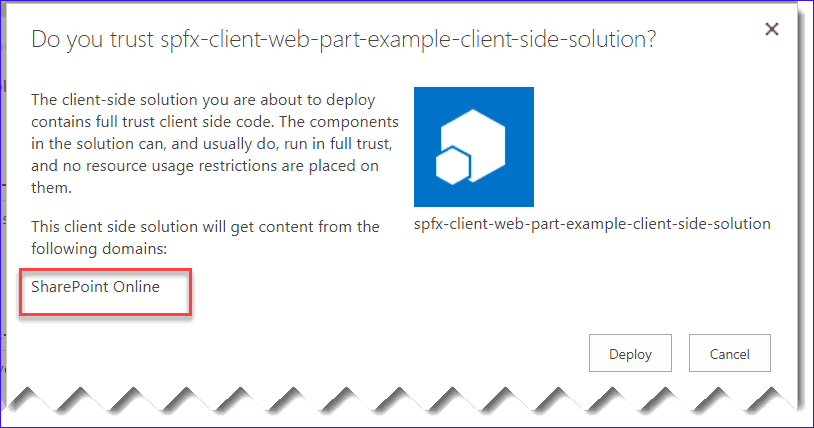
The sharepoint framework client web part will be deployed to the SharePoint Online app catalog site like below:

Add SharePoint framework client web part to classic web part page
Now we can see how to add sharepoint framework client web part to a SharePoint classic web part page.
First, we need to add the sharepoint framework client web part to the SharePoint classic site.
Open the SharePoint site and then click on the Settings icon and then Add an app.
You can see the spfx client-side web part in the site content. Click on the web part to add the web part to the SharePoint classic site.

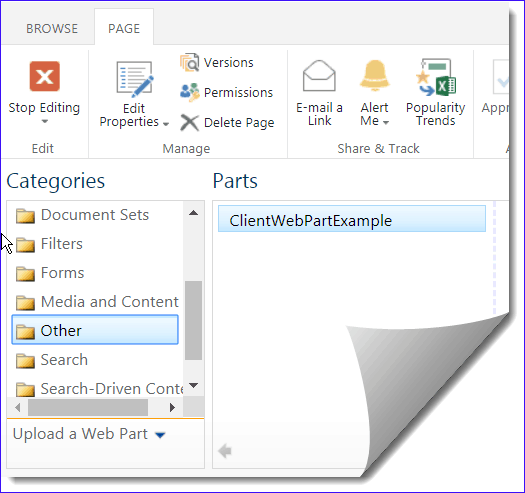
Once the client-side web part added successfully, Open a web part page and click on Add a web part. Then you can see in the Other web part category, you can see the spfx client-side web part.
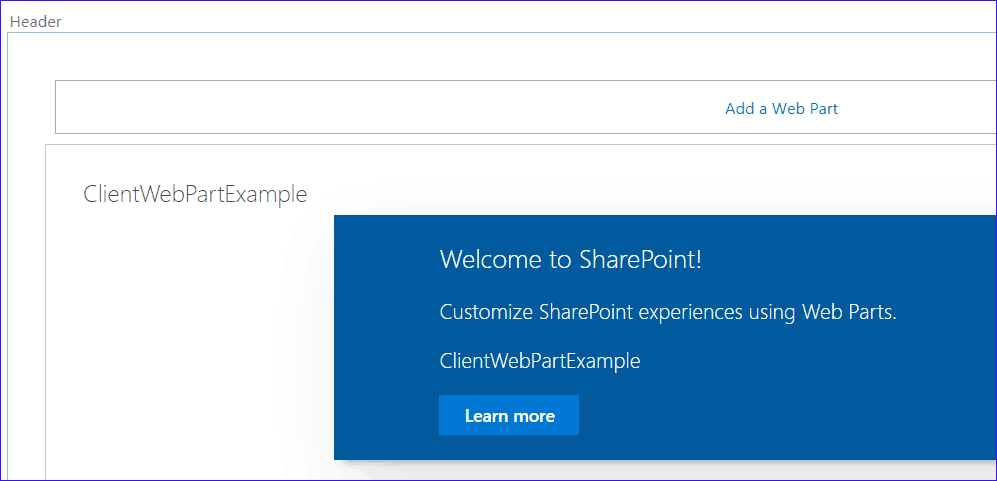
Once you add the sharepoint framework client web part to the SharePoint classic web part page, it looks like below:
Add SPFx client web part to SharePoint modern page
Now, we will see how to add spfx client-side web part to a SharePoint Online modern page.
Like in the classic site, first add the sharepoint framework client web part into the SharePoint Online modern site. To do so, from the home page click on New -> App and select the app from the Yours Apps page.

Now open any SharePoint Online modern page, Edit the page and then click on the + icon to add a web part to the page. There you can see our spfx client-side web part will be available.
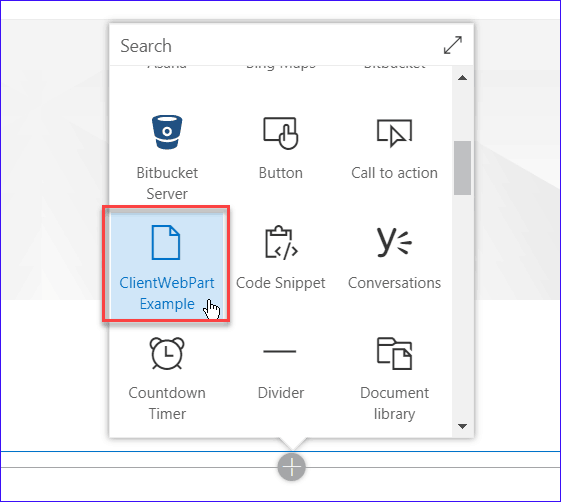
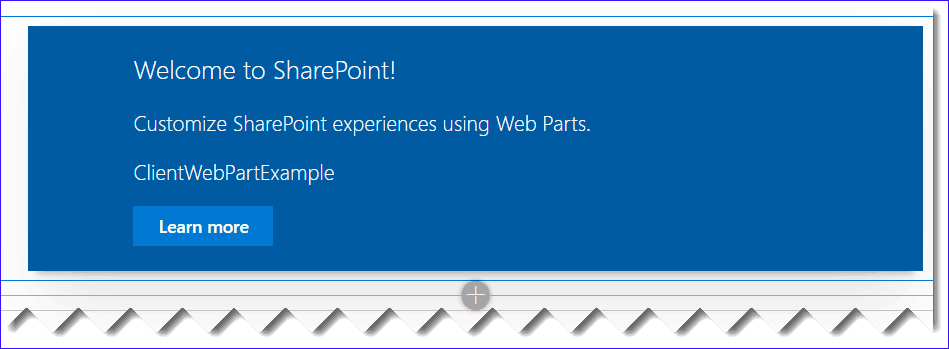
Click on the web part to add it to the SharePoint Online modern page.
Conclusion
SharePoint framework (spfx) is a little new and here in this SharePoint SPFx tutorial, we learned how to create a sharepoint framework client web part. We also saw how to build and deploy client-side web part (spfx) in sharepoint online.
You may like following SPFx tutorials:
- Property welcome does not exist on type ‘JSX.IntrinsicElements’ in SPFx React
- React vs Angular in Details
- Create and Deploy SharePoint Framework (SPFx) extension field customizer
- SharePoint Framework (SPFx) Extensions Application Customizer Example
- Create and deploy SharePoint Framework (SPFx) listview command set extension
- SharePoint Online Highlighted Content Web Part
We saw how we can deploy spfx client-side web part to the SharePoint Online app catalog site.
Then we saw how we can add a sharepoint framework client web part to a SharePoint classic web part page and how to add the spfx web part to a modern SharePoint page.
In the same way, we can build and deploy the client-side web part (spfx) in sharepoint 2016 or sharepoint 2019.
I am Bijay a Microsoft MVP (10 times – My MVP Profile) in SharePoint and have more than 17 years of expertise in SharePoint Online Office 365, SharePoint subscription edition, and SharePoint 2019/2016/2013. Currently working in my own venture TSInfo Technologies a SharePoint development, consulting, and training company. I also run the popular SharePoint website EnjoySharePoint.com
Hi, thanks for your article.
I need your urgently help.
Please contact me.
Thank you
Austin Lorans