While working with the SharePoint Online document library, sometimes we need to move or copy the files or folders from one location to another location. Follow this SharePoint tutorial to learn all about how to move folders in SharePoint Online.
How to Move Folders in SharePoint Online
In SharePoint Online, moving files or folders is a common and simple feature to organize or group documents. This feature is not available in the Classic SharePoint. If you want to move the folders in SharePoint Online, then you should have the required permissions. Like:
- As a SharePoint site owner, you have “Full control access” to both the source site and the destination site.
- Also, for the source site, you need to have at least an “Edit control access“. Then only you can able to move or copy the files and folders.
- Similarly, for the destination site, you need to have at least the “Contribute control access” to add folders.
Whenever you want to move folders in SharePoint Online, there are three destination places where you can move or copy the files. Such as:
- Move folders or files within the SharePoint Online document library
- How to move or copy folders from SharePoint library to Ondrive
- Working with moving folders from one SharePoint site to another
Move Folders or Files Within the SharePoint Online Document Library
I will show you how to move folders within the SharePoint document library with an example.
Example:
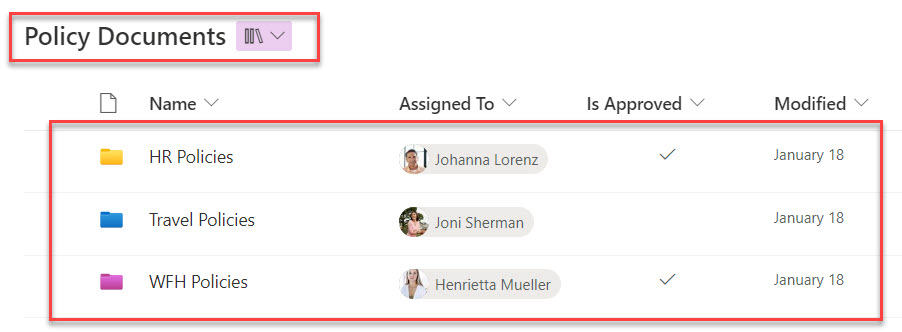
Suppose I have a SharePoint document library [Policy Documents] with some folders.
Now, I want to move the “Travel Policies” folder to another document library [Marketing Policies]. Have a look at the below screenshot for output.
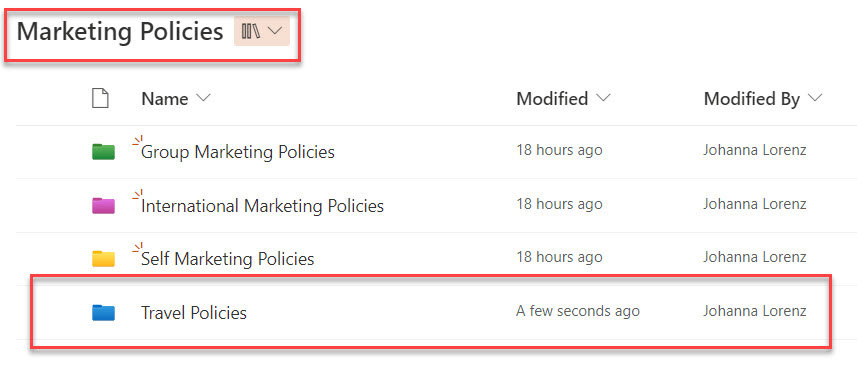
To work around this example, follow the below steps.
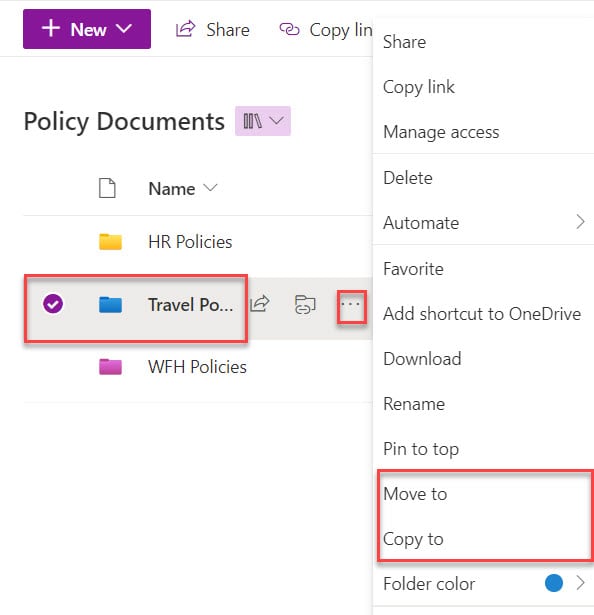
1. Open your SharePoint Online document library -> Select the specific folder which you want to move or copy -> Select the Ellipses (…) button and inside this, we will get two options, i.e., [Move to and Copy to] to move a folder
Refer to the table below to get the differences between the Move to and Copy to options.
| Move to | Copy to |
| It is secure to the metadata like Created by, Modified By, etc… | It is not secure to the metadata [Created by, Modified by, etc…] |
| It will maintain the versioning history of the files and folders | It will only show the latest version of the folder or file |
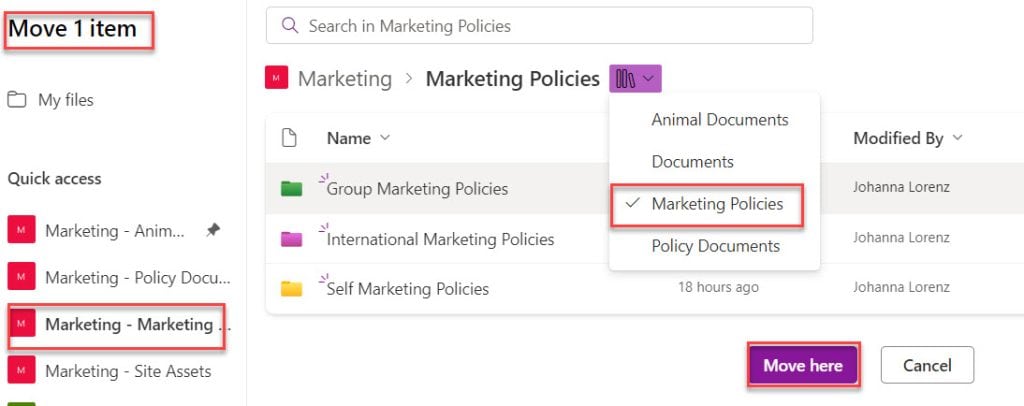
2. Next, select the Move to option, it will redirect to the next page where we can select the destination library [Marketing policies] and click on the Move here button.
3. Once you move the file, you will get the confirmation message [Moved 1 item to Marketing Policies] like below.
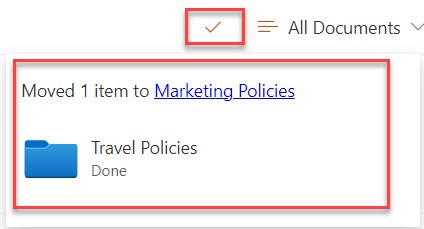
4. Now, you will get the specific file in the destination library from the source library as shown below.

How to Move or Copy Folders from SharePoint Library to OneDrive
Next, we will see how to move folders from the SharePoint library to OneDrive.
Example:
Suppose I have a SharePoint document library named “Marketing Policies,” and inside this, I have added different policy folders. Now, I would like to move two folders into my OneDrive. Have a look at the output:

To achieve it, follow the below steps.
1. Open your SharePoint document library -> Select respective folders and click on the Move to option.
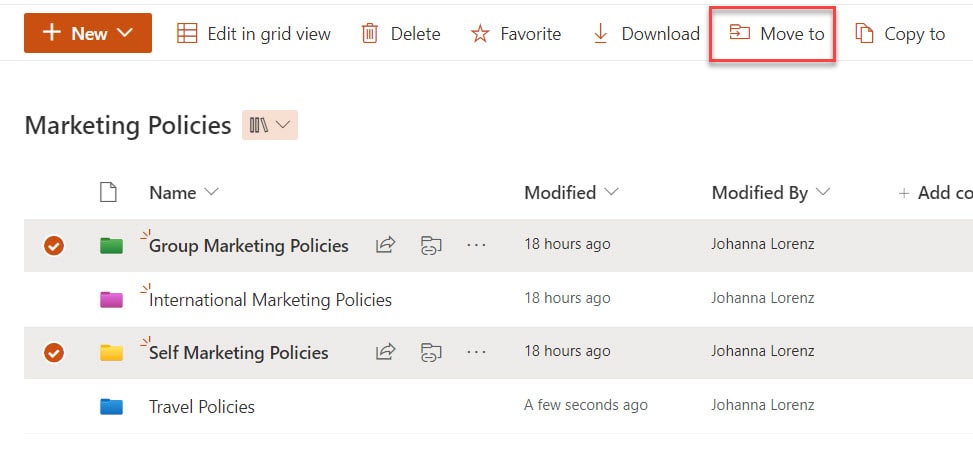
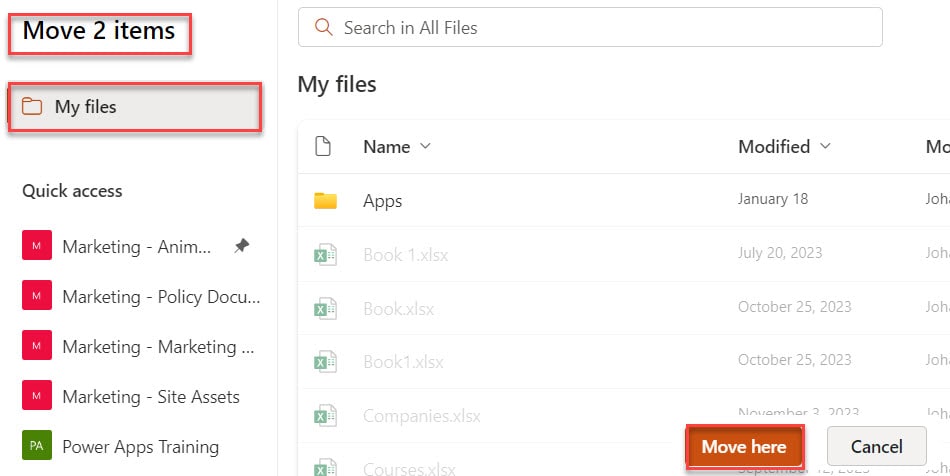
2. On the next page, select the “My files” option and click on the Move here button.
3. Next, you will get the confirmation message [Moved 2 items to Documents].
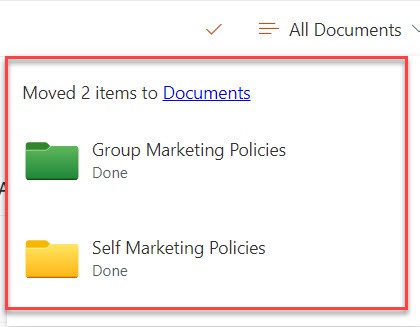
4. Now, open your OnDrive, and you will get the moved folders under the “My files” page, as in the screenshot below.
This way, you can move or copy the folders from the SharePoint library to OneDrive.

How to Move Folders from One SharePoint Site to Another
Let’s see how to move folders from one SharePoint site to another. To do so, follow the below example.
Example:
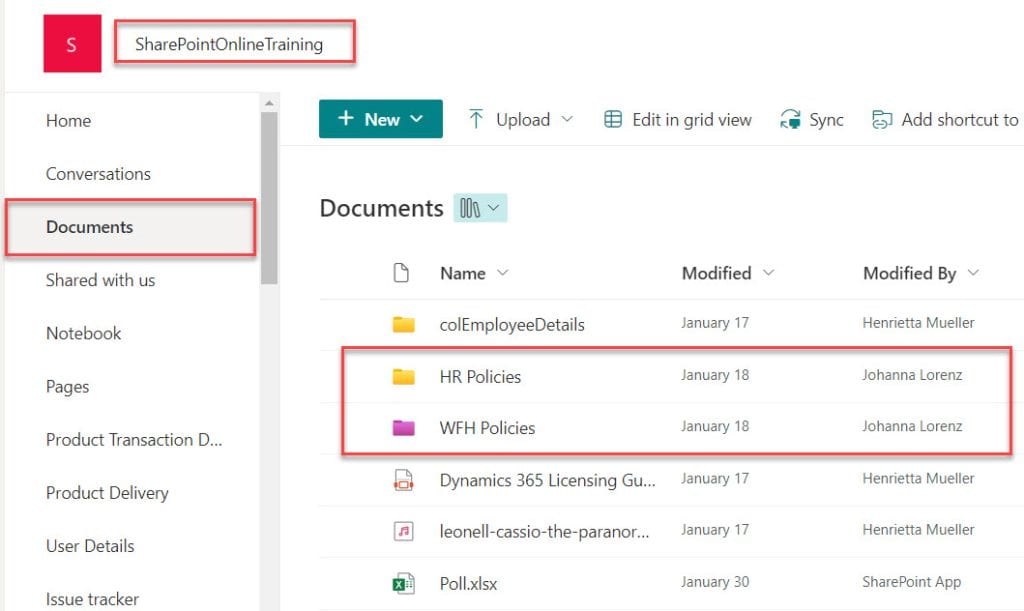
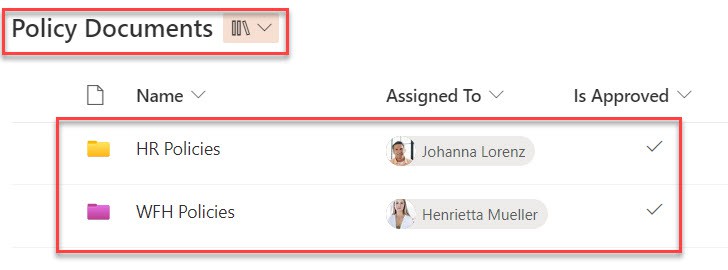
I have a SharePoint document library [Policy Documents]; inside this, I have two folders, i.e., [HR Policies and WFH Policies]. Now, I want to move these two folders to another site library [Documents] like the one below.
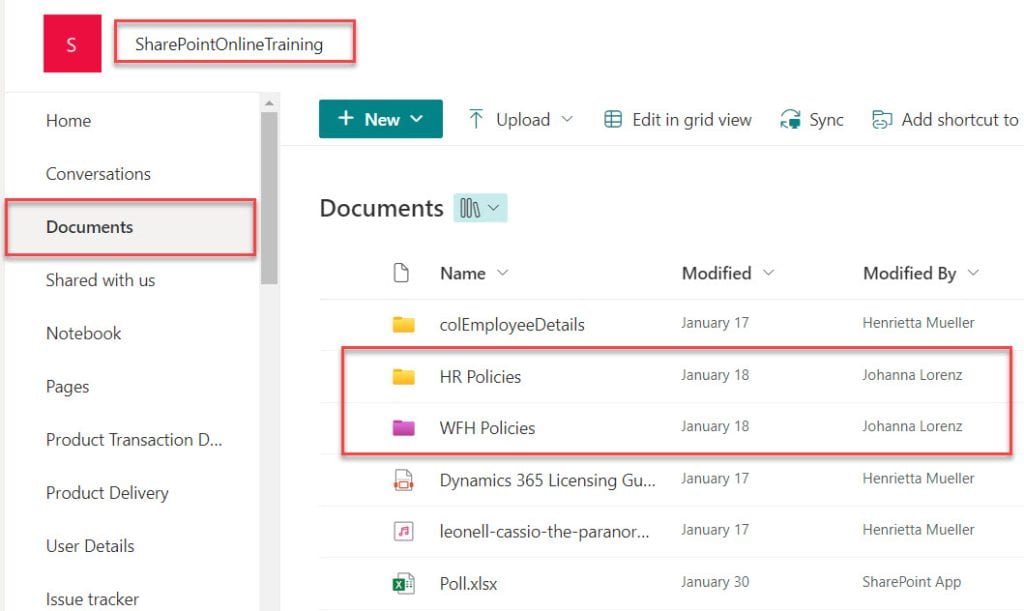
To do so, follow the below steps. Such as:
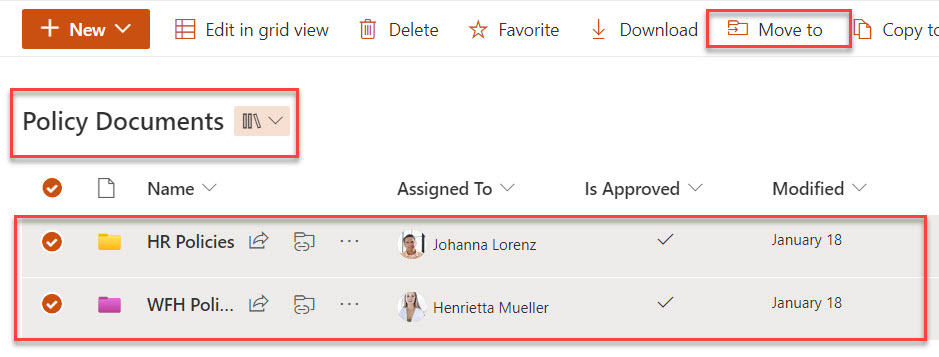
1. Open your SharePoint document library -> Select the folders that you want to move to the destination site library -> Click on the Move to button.
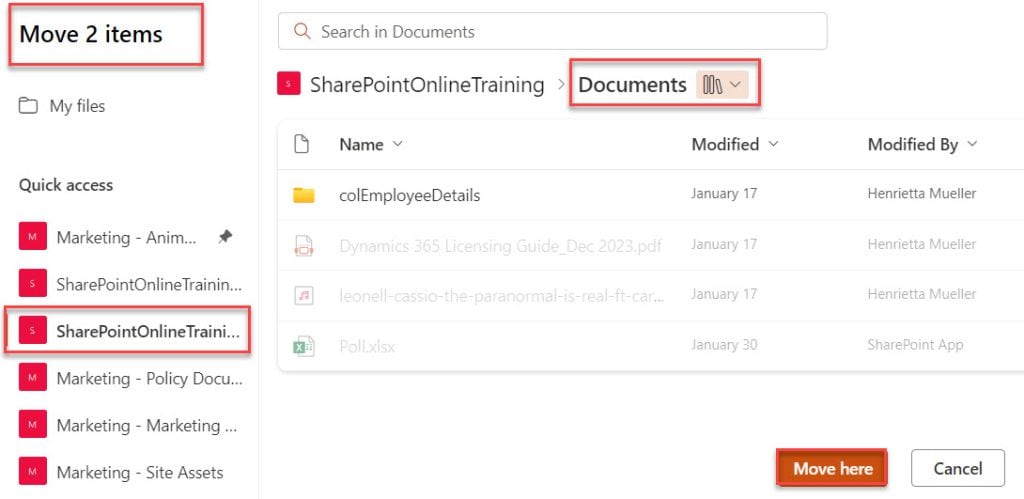
2. Next, select the destination site and choose the document library where you want to move the folders. Then, click on the Move here button.
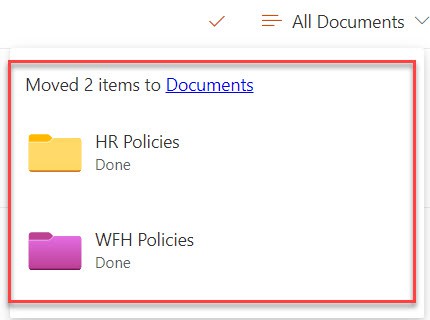
3. Next, you will get a confirmation message like “Moved 2 items to Documents“.
4. Now, open your destination SharePoint site -> Select the specific library where you will get the folders from the source list. Refer to the screenshot below.
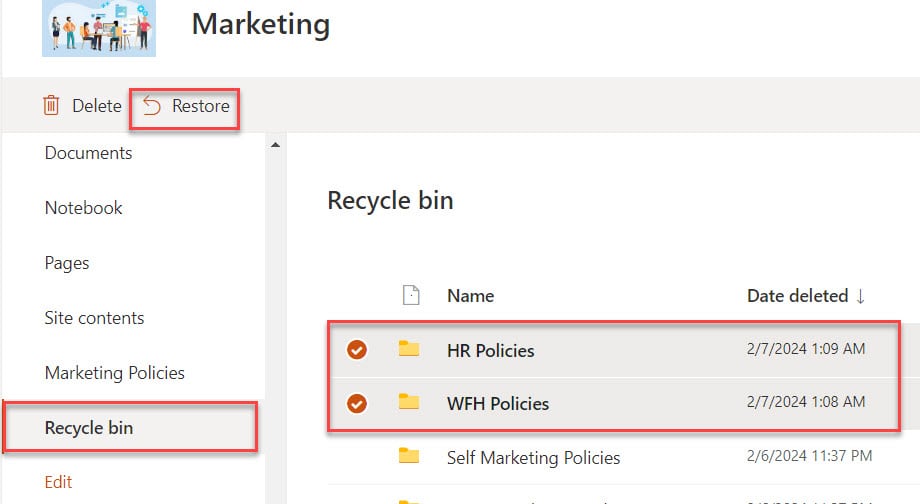
5. Also, if you want to get the moved files or folders in the source site then go to the Recycle bin, select the respective folders, and select the Restore button like below.
6. Now, open your specific document library, where you will get moved files or folders, as in the screenshot below.
Note:

1. We can move up to 100 GB of the Data (Files or Folders) at a time.
2. We can't move a file with the same name.
3. You should remember that destination document library doesn't have the same custom meta data as the source document library.
4. Also, if someone is checked out a document or file then, it will not move untill they checked in.
Conclusion
I hope you have any requirements related to moving SharePoint files and folders; this SharePoint tutorial helps you. Here, I explained all the information about how to move folders in SharePoint Online, including:
- How to move folders or files within the SharePoint Online document library
- Move or copy folders from the SharePoint library to Ondrive.
- How to move folders or files from one SharePoint site to another
You may also like:
- SharePoint Document Set vs Folder
- How to Create a Folder in SharePoint?
- Power Automate delete all files in SharePoint folder
- Power Automate Copy Folders
I am Bijay a Microsoft MVP (10 times – My MVP Profile) in SharePoint and have more than 17 years of expertise in SharePoint Online Office 365, SharePoint subscription edition, and SharePoint 2019/2016/2013. Currently working in my own venture TSInfo Technologies a SharePoint development, consulting, and training company. I also run the popular SharePoint website EnjoySharePoint.com