Whenever I used Power Apps, I encountered difficulties creating the same banner repeatedly or copying and pasting it onto every screen. I researched and resolved the issue by creating a simple Power Apps Component.
In this Power Apps tutorial, we will discuss how to create a header component in Power Apps.
I will also explain how to reuse the header/banner in various Power Apps screens or forms and how to edit and delete a Power Apps header component.
How to Create a Header Component in Power Apps
A Header Component in Power Apps is a reusable element you can add to your application to provide a consistent header across multiple screens or forms.
We will create the banner once and reuse it multiple times on various Power Apps screens. This will save time compared to repeatedly creating or copy-pasting the banner in the app.
It includes elements like the app title, navigation buttons, user profile information, and any other relevant information or controls that should be consistently visible at the top of the app.

Follow the instructions below:
1. In Power Apps, go to the Tree view -> Components -> + New component.
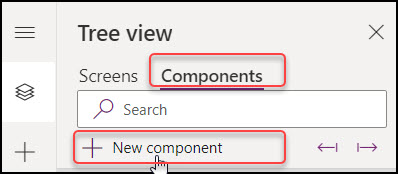
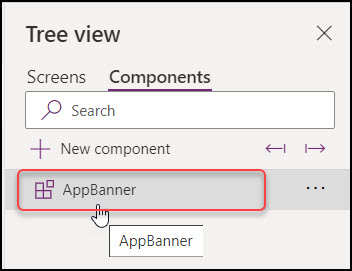
2. Rename the new component [AppBanner].
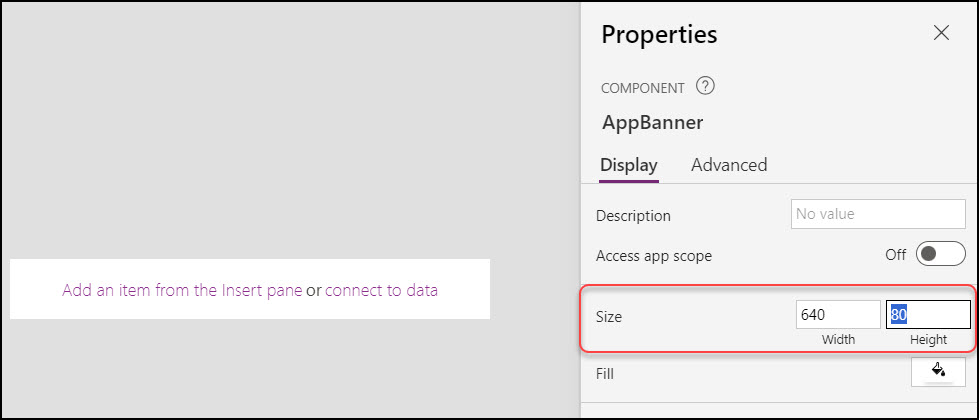
3. Go to the Component Properties pane -> Select Display -> Size -> Make the Height property 80.
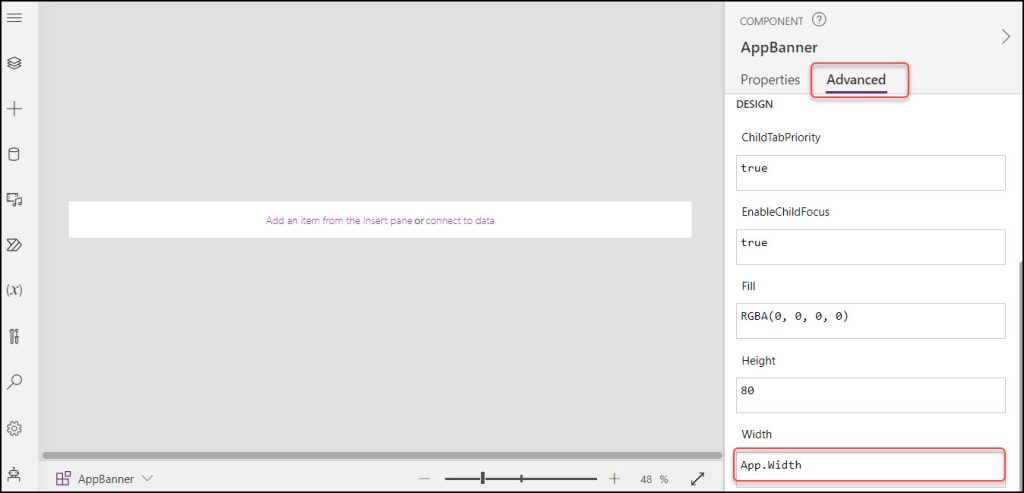
4. Go to the Advanced property -> Width -> Set App.Width as shown below.
5. Next, we need to add some input controls, like whatever you want to put in the banner (Text label, Image, Icon, etc.)

Image:
As I wanted to put the current user photo, I took an image control and set its Image property as:
Image = User().Image
Text Label:
To display a Title/header, set the Text property of the Label control as:
Text = "IT SERVICE REQUEST"
Back icon:
The back button will help the user to navigate to the back screen. You can put any icon you need. Set its OnSelect property as:
OnSelect = Back();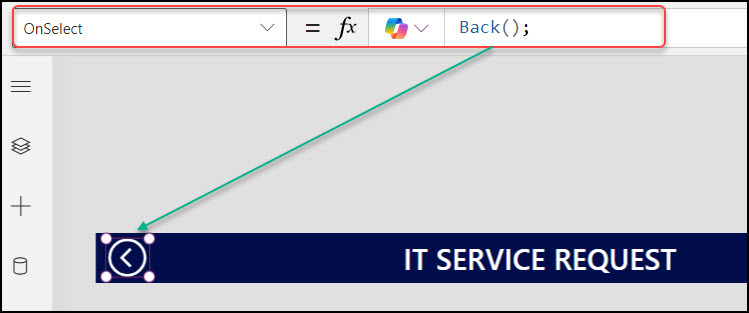
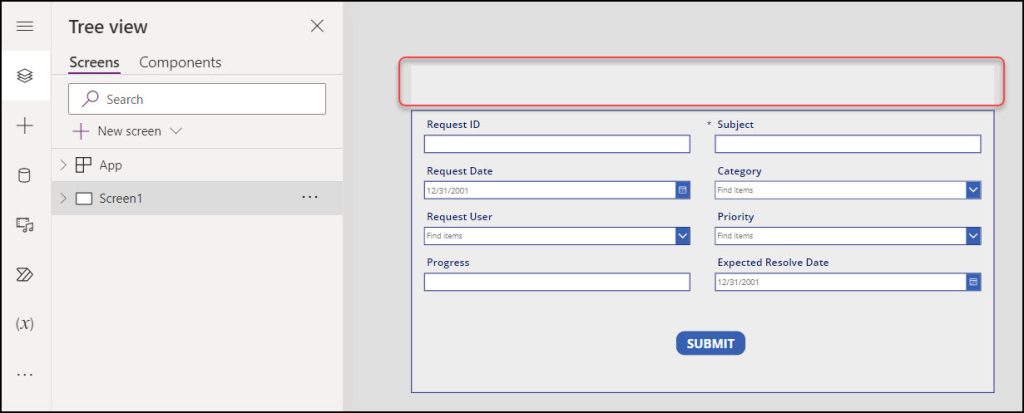
6. The Power Apps header component is ready to use on any screen or form within the app. Come to the screen or form wherever you want to add the banner.
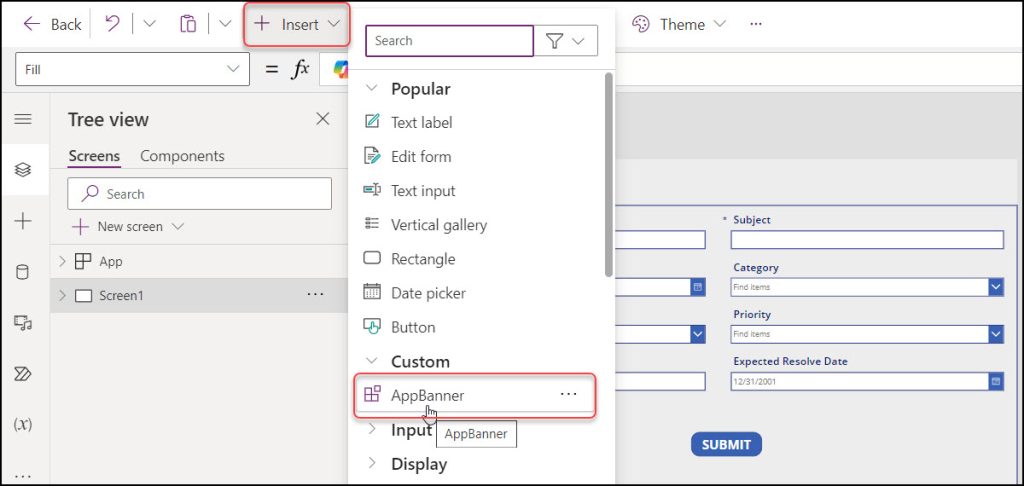
Go to + Insert -> Expand Custom -> AppBanner (Component name).
Once the header component is added to the screen, it will look like below. You can resize your banner based on your screen size.
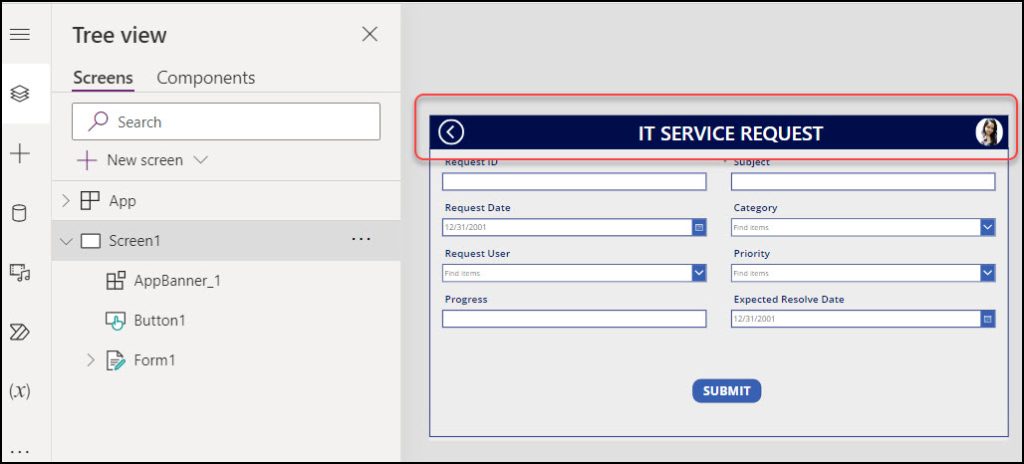
This way we can create the Power Apps reusable banner.
How to Edit Power Apps Banner/Header Component
Suppose you want to edit or change something in the banner, like adding or removing any control; you do not need to change it on each screen.
Instead, you can go to the header component and change whatever you need. The change will be reflected throughout the app, wherever you use it.
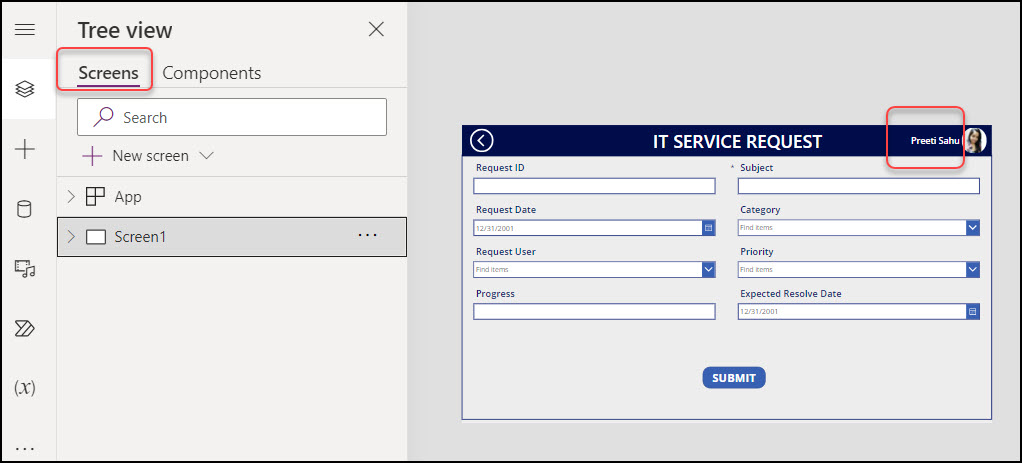
Go to the Components tab -> Add a Text label (you can add any control as per your need) -> Set its Text property as:
Text = User().FullName // It will display the current user full name
Now, return to the screens; the changes are reflected throughout the app wherever you use the banner.
Delete a Power Apps Header Component
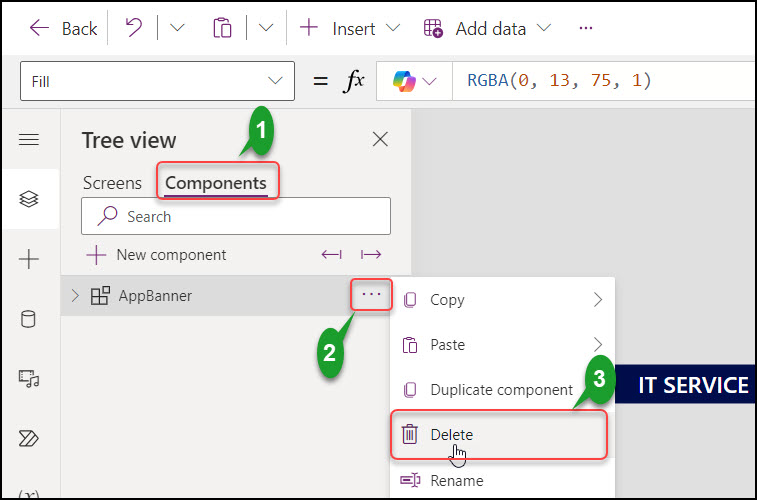
To delete the Power Apps header component, go to Components -> click More (…) -> Delete. The specific header will then be removed entirely from the app.
I hope this article will help you create a header component in Power Apps. We also discussed how to edit and delete the Power Apps banner.
Moreover, you may like some more articles below:
- How to Create Repeating Table in Power Apps
- How to Use Environment Variables in Power Platform
- Save Power Apps Current User and Manager Name in SharePoint Person Column
- Get Last Item ID in SharePoint List Based on Current User in Power Apps
- Power Apps Find Function
I am Bijay a Microsoft MVP (10 times – My MVP Profile) in SharePoint and have more than 17 years of expertise in SharePoint Online Office 365, SharePoint subscription edition, and SharePoint 2019/2016/2013. Currently working in my own venture TSInfo Technologies a SharePoint development, consulting, and training company. I also run the popular SharePoint website EnjoySharePoint.com