A few weeks back, a requirement came up for building an Issue Tracker application using Power Apps. While exporting this application from the development environment to the testing environment, I found the Power Apps environmental variables very helpful because they made it easy to automatically adjust the URLs and connections without manually doing it.
In this article, I will explain the Power Platform environment variables and how to use environment variables in Power Platform [Power Apps & Power Automate] with a simple example.
Moreover, we will see the following topics:
- Power Apps update environment variables
- Power Automate environment variables
- Update environment variables during import in the Power Apps canvas app
Environmental Variables in Power Apps
Power Apps environmental variables are crucial in importing and exporting Power Apps Solutions. They help store the parameter keys and values, which serve as input to other applications.
While exporting, the parameter keys stay the same, but their values are removed. When importing into another environment, we must provide these keys’ values.
Why We Use Environment Variables in Power Platform
Understand the use of Power Apps environment variables with the help of the simple example below.
Example: I have an application in Power Apps connected with a Power Automate flow. This application and flow are connected to the SharePoint site and list. Now, I need to export this application to other environment users.
Now, they need to update their SharePoint connections in a new environment for this application. At that time, we can use these environment variables. It will take the SharePoint site and list addresses as values for those variables before importing them into the new environment.
So, there is no need to change connections manually everywhere we use in the app.
Environment Variables in Power Apps Canvas App
Let’s see how to use environment variables in Power Apps. I have an Issue tracker application in the production environment. I need to export it to the testing environment.
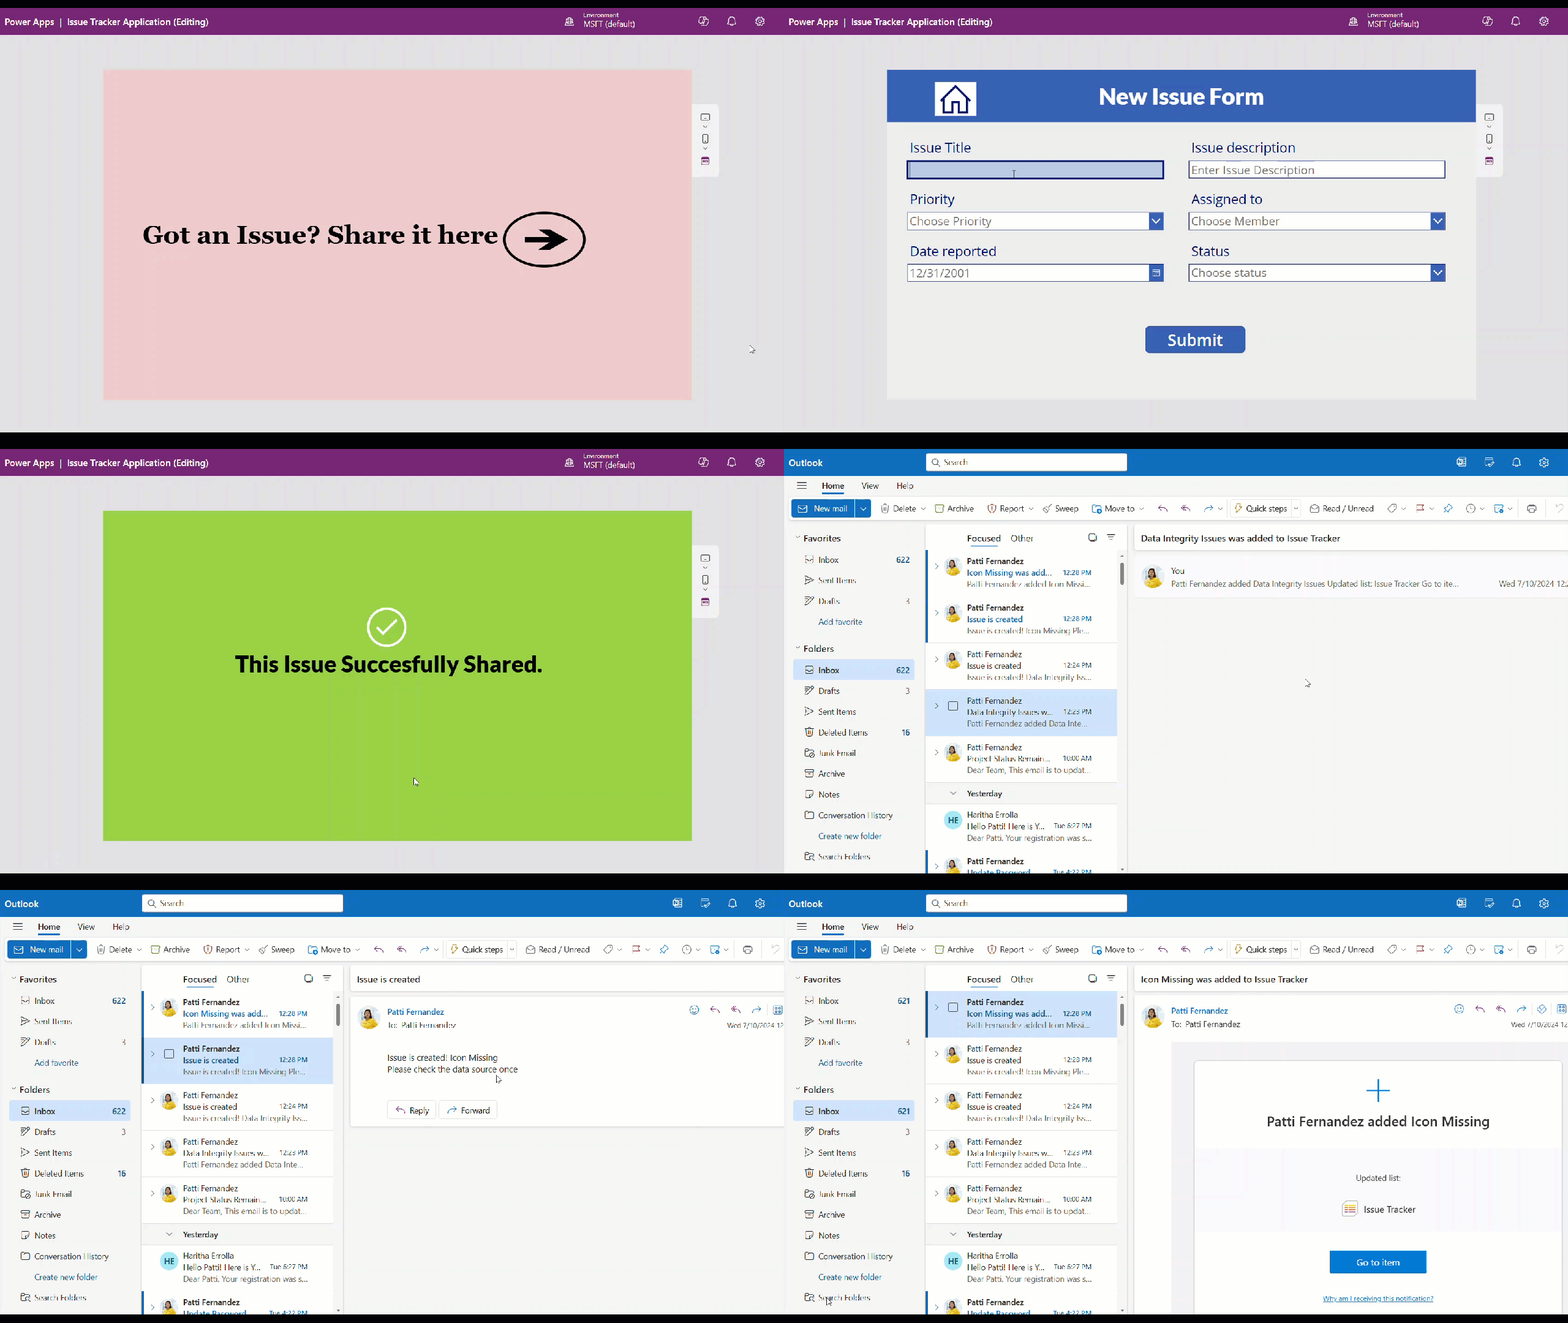
I created this application to raise issues. Once they submit the issue details, they will be mailed to the assigned people.
NOTE:
Environment variables can be reused across many different solution components in Power Apps and Power Automate.
For the above application, I have a data source in the SharePoint list named “Issue Tracker.”
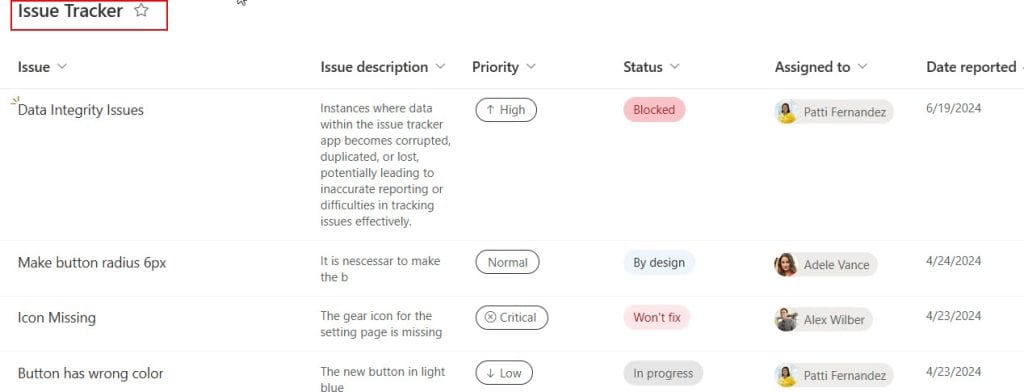
This list contains the following columns.
| Column Name | Data Type |
|---|---|
| Issue | Title(Single line of text) |
| Issue description | Multi lines of text |
| Priority | Choice |
| Status | Choice |
| Assigned To | Person or group |
| Date Reported | Date and Time |
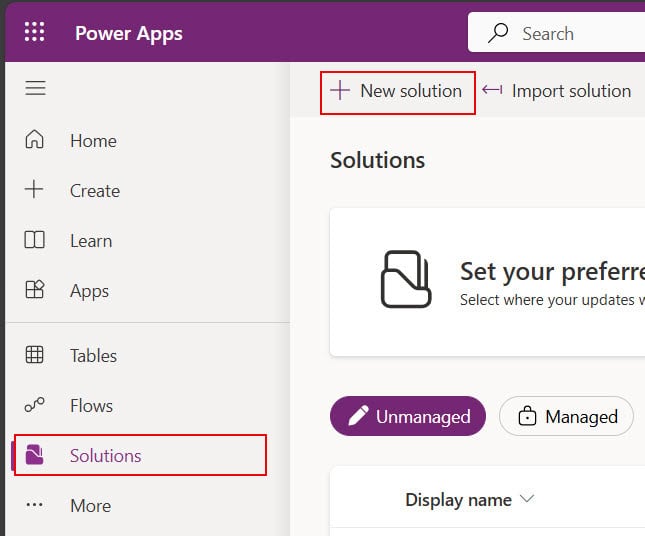
1. Open PowerApps studio -> Click Solutions in left navigation -> Click +New solution.
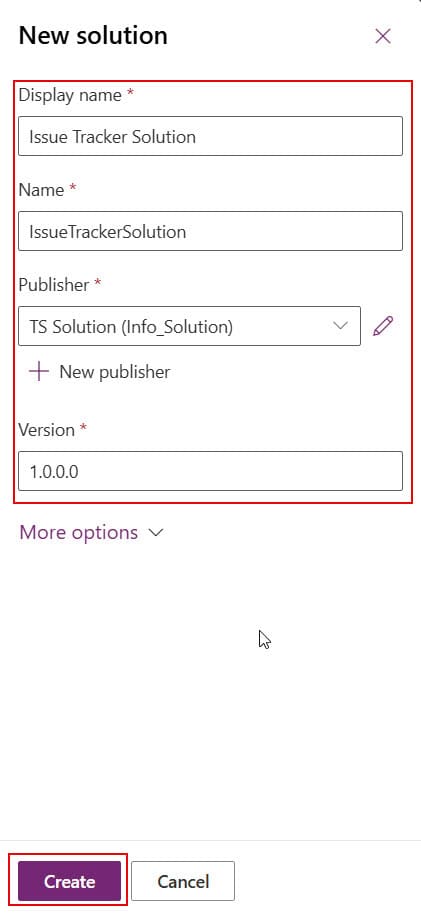
2. Now, provide the solution details, then click Create.
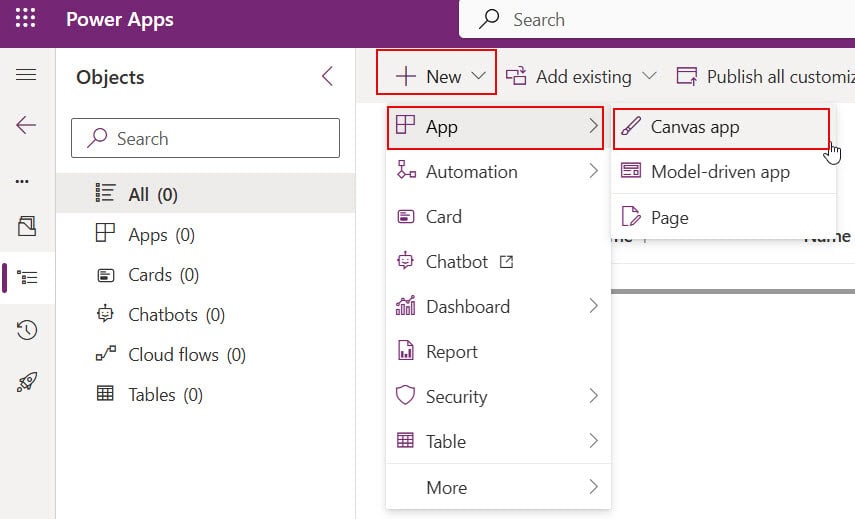
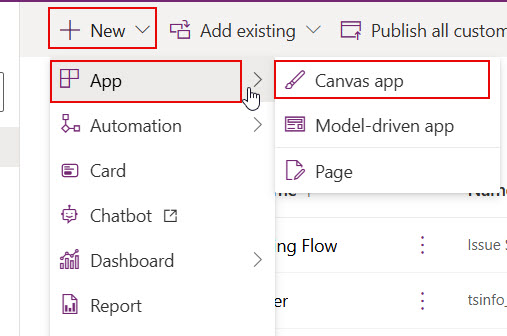
3. Enter in to the solution -> Click on +New -> Select App -> Click on Canvas app. It will create one Power Apps application and provide its name.
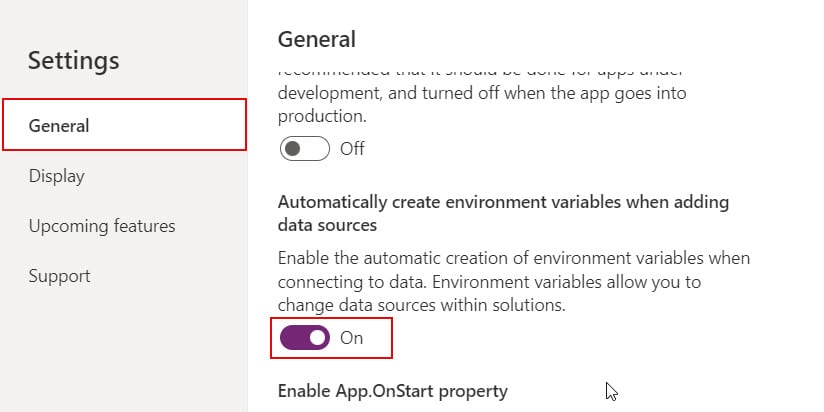
4. Then, in the app. Go to Settings -> Under General -> toggle On the Automatically create environment variables when adding data sources.
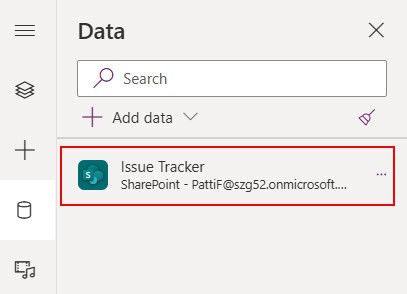
5. Now, add the SharePoint list to the application.
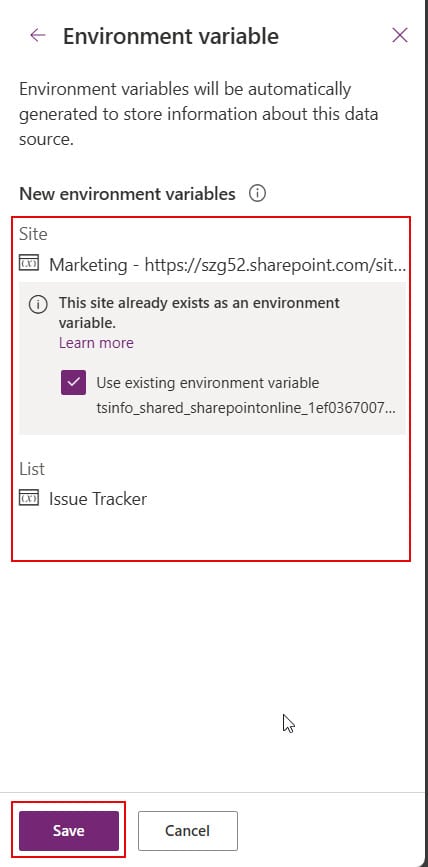
6. Then, the environment variables will be created automatically. Refer to the image below to see how the variables are created. Click on Save.
7. You’ll receive this success message, as in the image below. Click on Manage them here.

8. It will open the solution. Here, you’ll see the created variables.

9. To create an app in the solution, Click +New -> Select App -> Select Canva app.
10. Here, I created an issue tracker application. You can make your application using Power Apps.
To create an Issue tracker application, follow the steps below.
- Take three screens -The welcome screen, the Issue submits screen, and the success screen.
- In the welcome screen :
- Add Text label -To display the welcome message.
- Next arrow icon -> Use Navigate(screen2 name) in its OnSelect property.
- In the Issue submit screen:
- Add Edit Form – Connect it with the Issue Tracker SharePoint list. Change Default mode to New.
- Button control – Use SubmitForm(Form name); Navigate(screen3 name) in it’s OnSelect property.
- In success screen:
- Add Text label -To display the success message.
At last, save and publish the application.
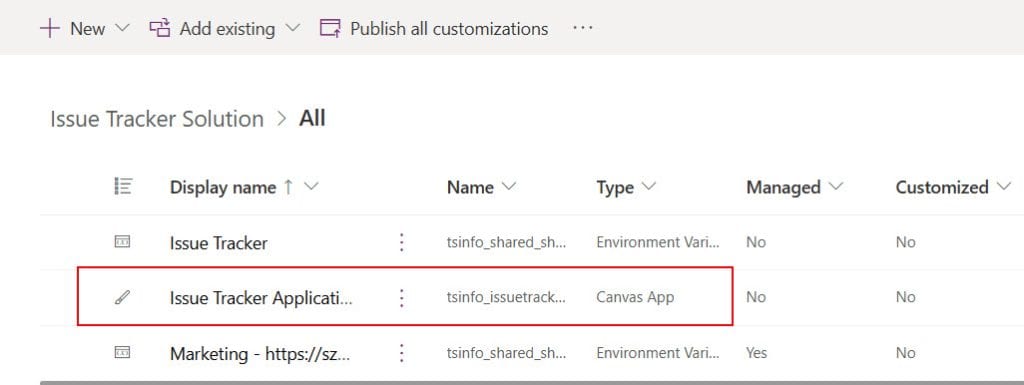
10. Now, you can see the application in the solution.
Power Automate Environment Variables
As I said, the application requires a Power Automate flow to send the issue details to assigned people.
This flow also has connections with the SharePoint list. So, while exporting, we need to change the connection. Therefore, I’m using the environment variables in the Power Automate flow.
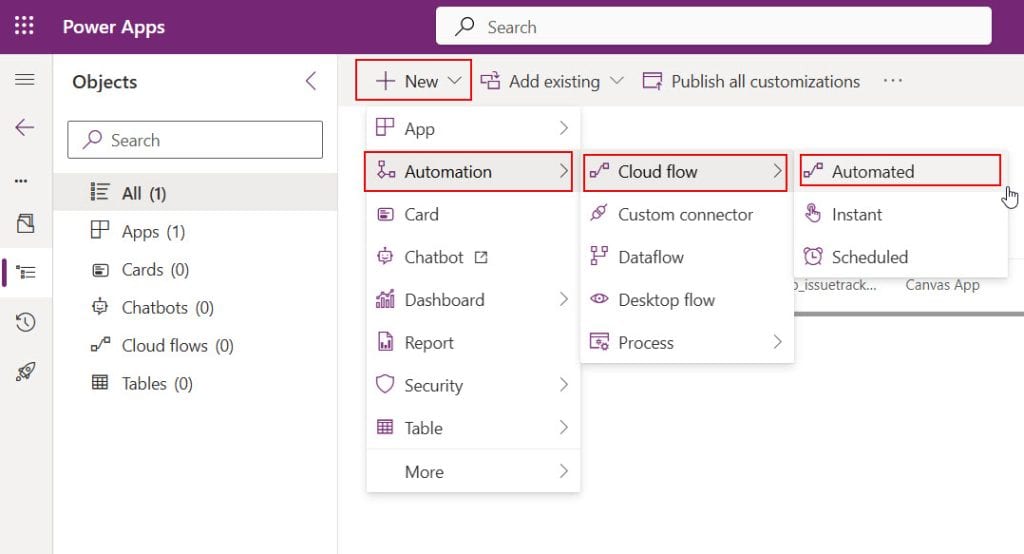
1. To create flow in the solution, click on the +New -> Select Automation -> Click on the Cloud flow -> Click on Automated.
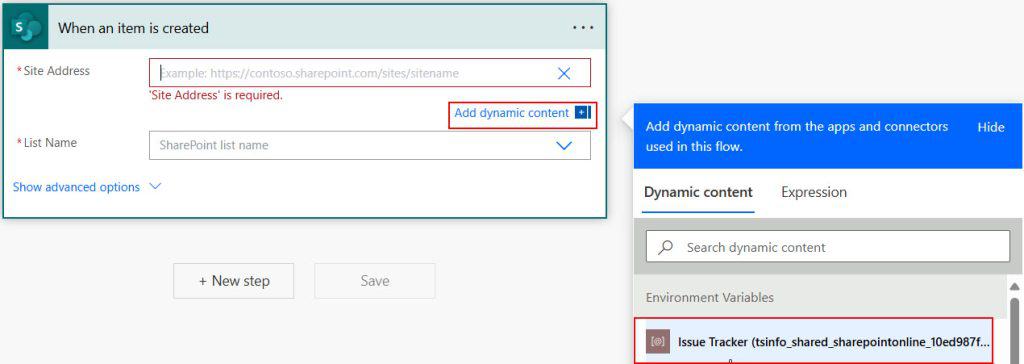
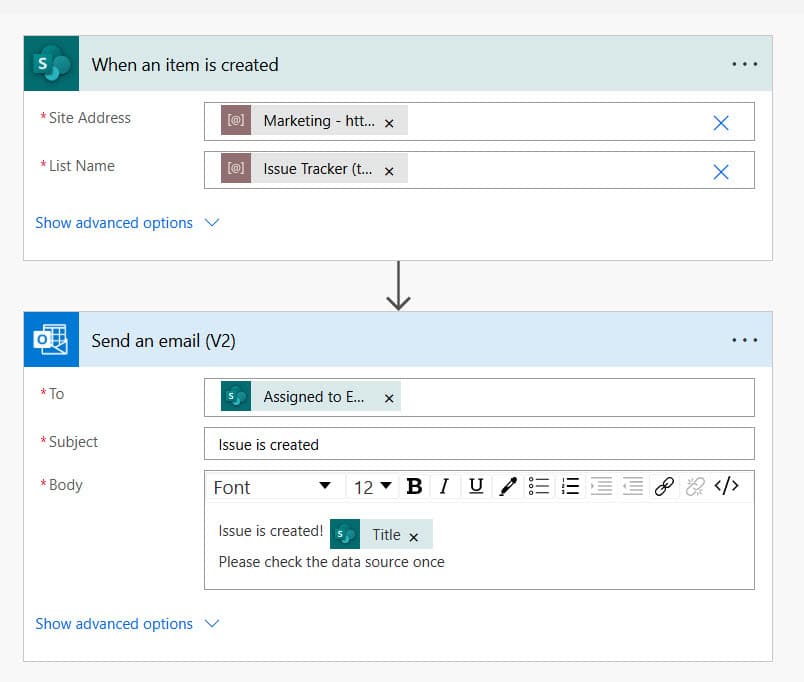
2. In the flow, add When an item is created, trigger -> To provide the SharePoint site address -> click dropdown ->select Enter custom value -> Choose the environment variable created for SharePoint site.
Repeat the same step for List Name selection.
3. As in the image below, create the flow to send an email when an issue is submitted.
4. Now, the flow is ready. In the solution, you can see the newly created flow.

Power Apps Update Environment Variables [Before Exporting]
Now, the solution is ready to export. Before exporting, we need to update the environment variables. Then, only in the testing environment, the other users provide their SharePoint site address and list name.
Follow the steps below to update the environment variables.
1. In the solution -> Select the Environment Variable -> Click on ellipses(…)-> Click on Edit.
Note: you can identify the Environment Variables in the solution by check ing the value in Type column.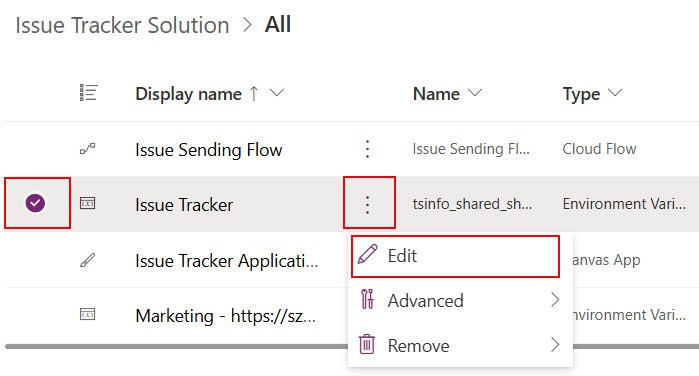
2. It will open the Edit pane for updating variables. In the Advance section-> Turn Off the Export Value ->Click on Save.
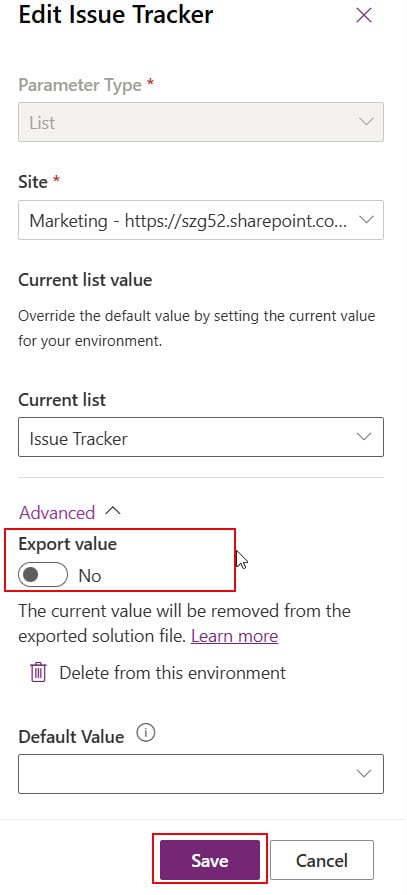
Repeat the same step for other environment variables. Then, click on Publish all customizations.
Note: To Export and import solution follow the links.Update Environment Variables During Import in Power Apps Canvas App
Before importing the solution into another environment in Power Apps. We need to create the SharePoint list precisely as it was in the previous environment.
Look at the image below. While importing, I got this page to update the SharePoint site address, issue tracker list name, and environment variables.
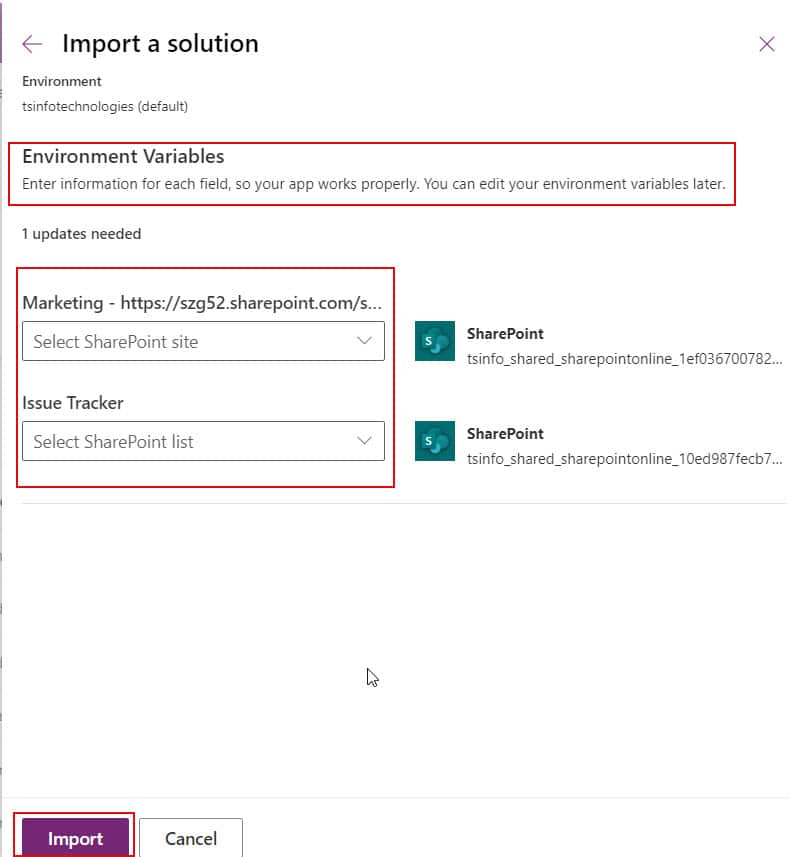
After providing details, click on the Import button. Then, it will be imported into your environment. Refer to the image below.
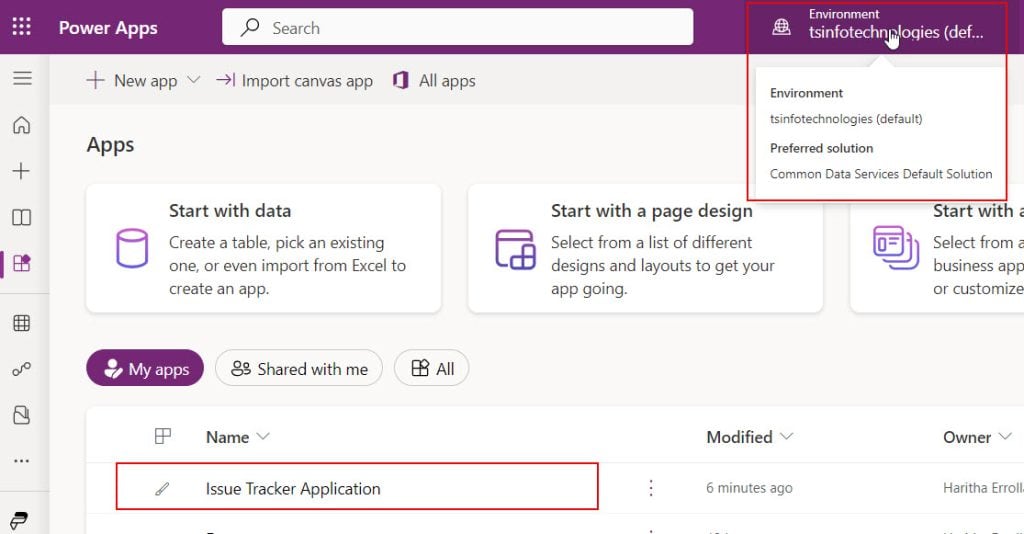
You can run the application in this environment now. Like this, the environment variables will help you change the connections between export and import.
Also, you may like:
- How to send an email from Power Apps
- Bind SharePoint Lookup Column in Power Apps Dropdown
- How to use the Power Apps search function
- Power Apps sum function
- Power Apps patch function
I hope you found this helpful article. Use it as a reference when you’re trying to run the Power Apps application in another environment to update the SharePoint connection.
I am Bijay a Microsoft MVP (10 times – My MVP Profile) in SharePoint and have more than 17 years of expertise in SharePoint Online Office 365, SharePoint subscription edition, and SharePoint 2019/2016/2013. Currently working in my own venture TSInfo Technologies a SharePoint development, consulting, and training company. I also run the popular SharePoint website EnjoySharePoint.com