Are you looking for how to set up a Power Apps gallery border between items or rows? Follow this Power Apps tutorial to learn about setting up a Power Apps gallery border between items.
Set Up Power Apps Gallery Border Between Items
Here, we will discuss how to set a Power Apps gallery border between items in two different ways. Such as:
- Set Up Power Apps Gallery Border Between Items using Border Property
- How to Set Up Power Apps Gallery Border Between Items using TemplateFill Property
- Working with Remove Power Apps Gallery Border Between Items
Set Up Power Apps Gallery Border Between Items using Border Property
Let’s take a simple scenario: I have a Power Apps gallery, i.e., [gal_TrainingCourses], and this gallery contains the below records from the SharePoint list as in the screenshot below.

Now, I would like to set up a Power Apps gallery between items using a Border property as shown below.
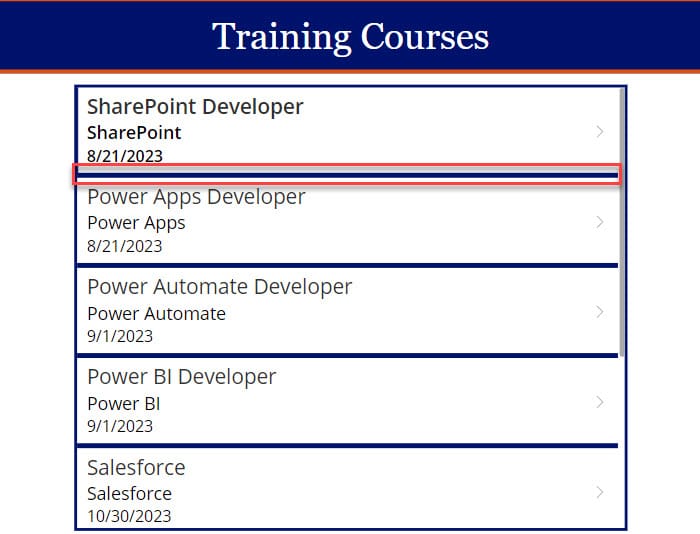
To work around this, follow the below-mentioned steps. Such as:
1. Open Power Apps -> Create a Blank canvas app and connect it to the SharePoint list -> Insert a Gallery control and set its Items property to the code below.
Items = 'Training Courses'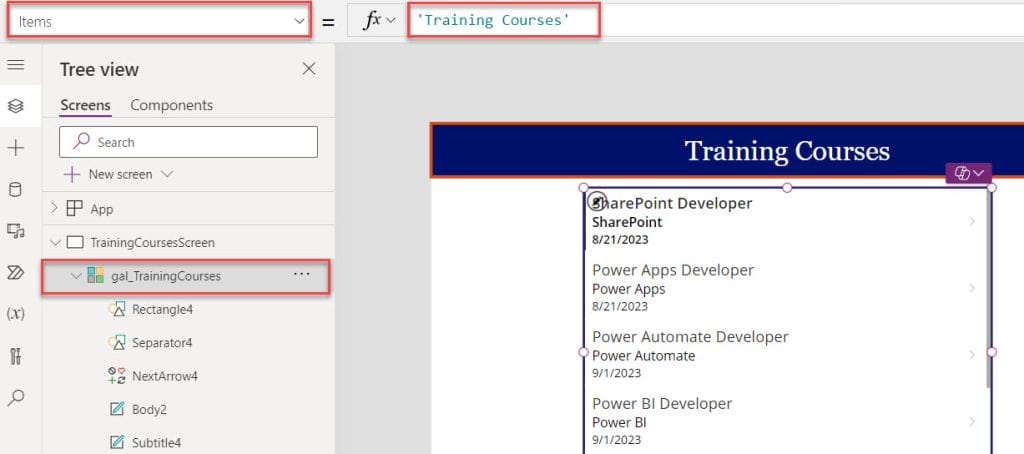
2. Then, go to the Gallery’s Properties pane -> Set its Border property like below.

3. Save, Publish, and Preview the app; the gallery will set up a border between the items or records as shown below.
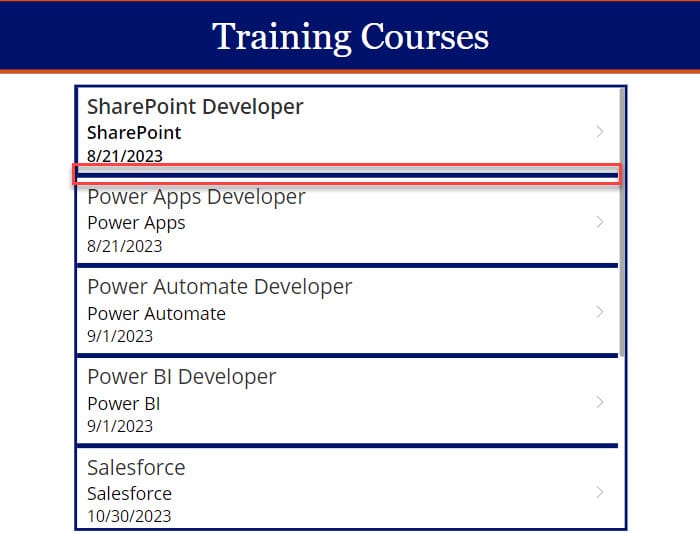
This is how to set up a Power Apps gallery border between items.
Set Up Power Apps Gallery Border Between Items using TemplateFill Property
Next, we will see how to set up a Power Apps gallery border between items using a TemplateFill Property with a simple example.
Example:
Suppose there is a PowerApps gallery control, and I want to give some gaps and borders between the items. The gallery will look something like the screenshot below.
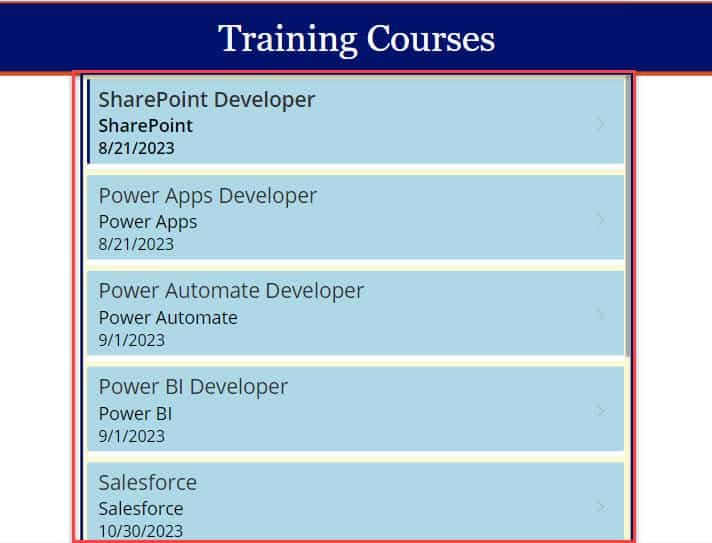
- To workaround this, We will use the TemplatePadding property of the gallery. Select this property and increase the number to 10.
- Then, Select the TemplateFill property and provide other colors as needed.
- Next, Select the Fill property of the gallery and provide a color to the gallery you want.
TemplatePadding = 10

Fill = Color.LightGoldenRodYellow

TemplateFill = Color.LightBlue
- Once you apply all the formulas to all the above properties, you can see the difference in the gallery control as in the screenshot below.

This is how to set up a Power Apps gallery border between items using a TemplateFill Property.
Remove Power Apps Gallery Border Between Items
In the last, we will see how to remove the Power Apps gallery border between items with a simple scenario:
Scenario:
- Suppose there is a Blank gallery control in the app. Now, I want to provide a separator line between the records in the gallery that will look like the one below screenshot.
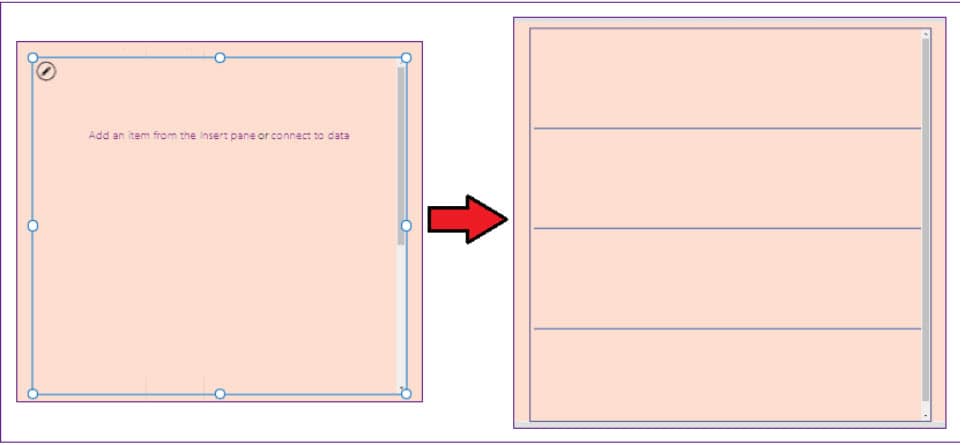
- To achieve this, first of all, select the edit pen icon in the blank gallery control and insert a Rectangle icon (Insert -> Icons -> Rectangle) as shown below.
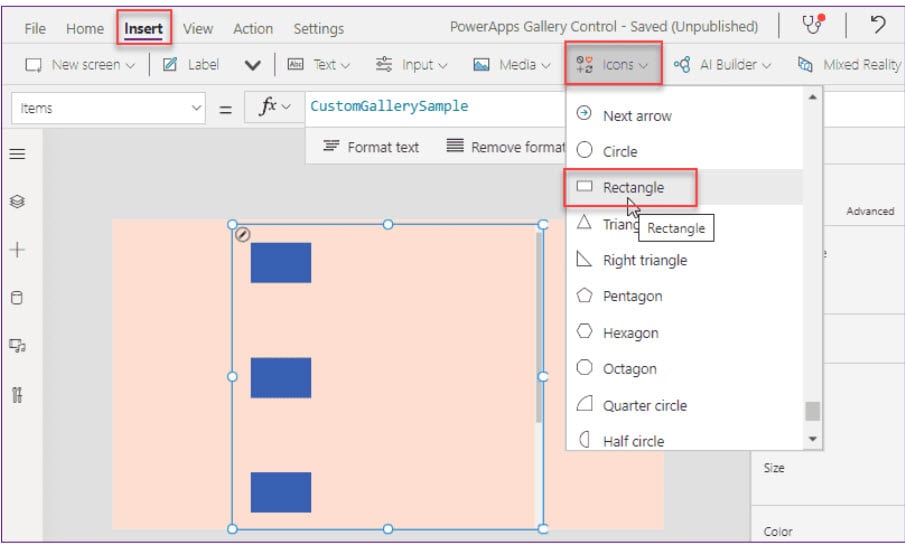
- Next, Set the below properties of the Rectangle icon as:
Rectangle_Border.X: 2
Rectangle_Border.Y: Gal_Records.TemplateHeight - Rectangle_Border.Height
Rectangle_Border.Width: Gal_Records.TemplateWidth - 2 * Rectangle_Border.X
Rectangle_Border.Height: 2
Where,
- Gallery_Records = Gallery control name
- Rectangle_Border= Rectangle icon name
- Overall the above code specifies that it will insert a separator line at the bottom of each record in the gallery control.
- If you want to change the rectangle’s color, then in that case you can use the Border color and Fill color.
- Also, you can change the X and Height properties to change how the separator looks like below.
Refer to the below screenshot:
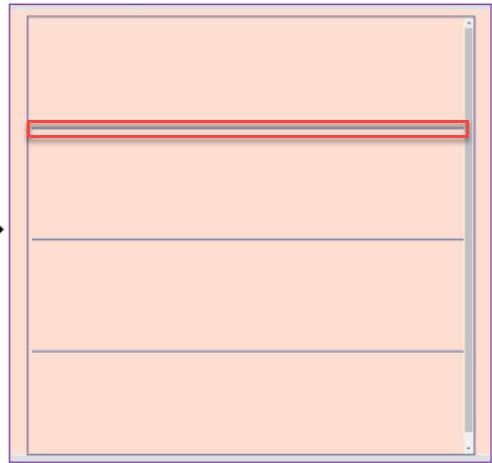
Now, I would like to remove the separator line that is present at the bottom of every item. It is very simple and easy to do. Refer to the below screenshot to see the difference.
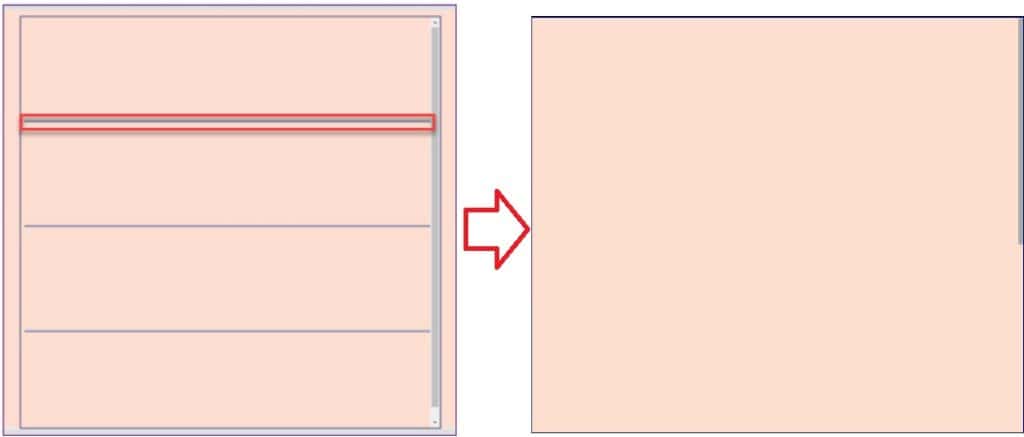
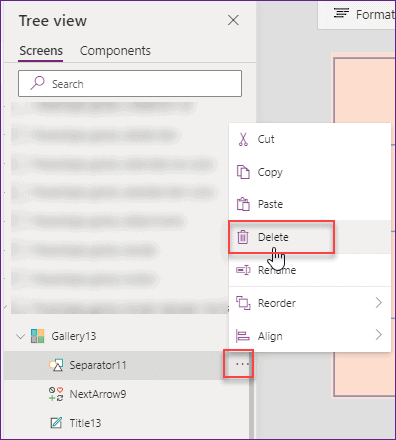
- To do so, Select the Gallery Separator from the Tree View -> Click on Elipses (…) -> Delete as shown below.
- Once your app is ready, Save, Publish, and Preview the app. The gallery will display records without borders, as in the screenshot below.
This is how to remove the Power Apps gallery border between items.
Conclusion
This Power Apps tutorial taught in detail information about how to set up a Power Apps gallery border between items, including:
- Set Up Power Apps Gallery Border Between Items using Border Property
- How to Set Up Power Apps Gallery Border Between Items using TemplateFill Property
- Working with Remove Power Apps Gallery Border Between Items
You may also like:
- How to Add Attachments in Power Apps Gallery?
- Sort Power Apps Gallery Alphabetically
- Show Message If Gallery is Empty in Power Apps
- How to Sort Power Apps Gallery by Choice Column?
- Count Rows in Power Apps Gallery Control
- How to Set Power Apps Gallery Control Row Color
I am Bijay a Microsoft MVP (10 times – My MVP Profile) in SharePoint and have more than 17 years of expertise in SharePoint Online Office 365, SharePoint subscription edition, and SharePoint 2019/2016/2013. Currently working in my own venture TSInfo Technologies a SharePoint development, consulting, and training company. I also run the popular SharePoint website EnjoySharePoint.com