Do you know how to add gallery data to a collection in Power Apps? Well, in this Power Apps tutorial, we will discuss how we can add gallery items to a collection in Power Apps.
Also, we will see how to add some specific columns from the gallery control to the Power Apps collection.
Moreover, we will get to know where we can view the created collection in Power Apps Canvas App.
How to Add Gallery Data to a Collection in Power Apps
Let’s see how we to add gallery items to a Power Apps Collection by taking a simple scenario.
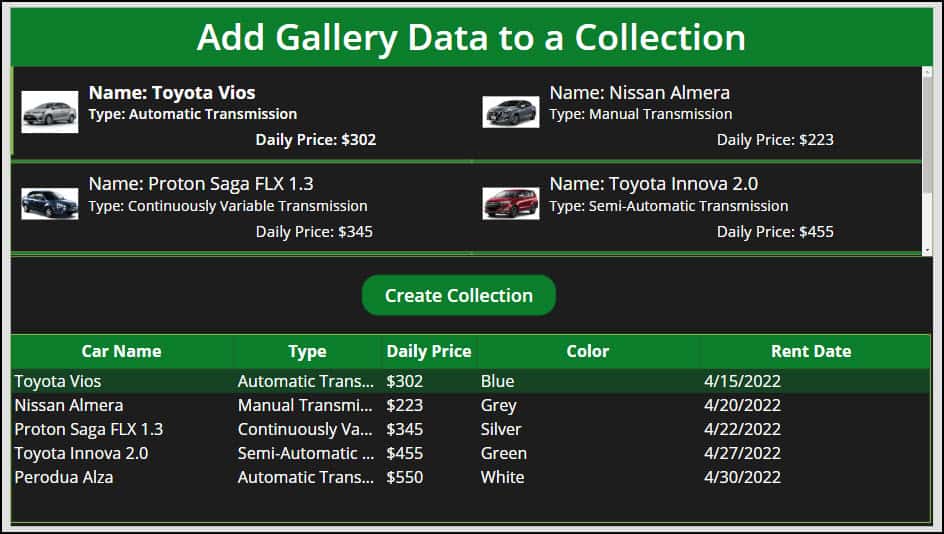
- In the screenshot below, you can see there is a Power Apps Gallery Control, Button Control, and a Data Table Control.
- The gallery control contains all the items from a SharePoint List. When a user will click on the button (Create Collection), then the collection will create and store all the gallery data into it. Also, the result (collection values) will display in the Data table control as shown below.
So let’s get started to achieve this.
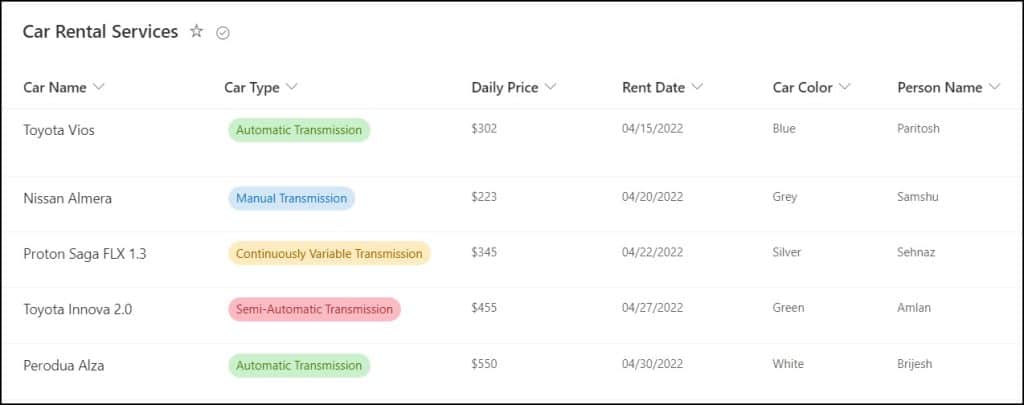
- This is the SharePoint List named Car Rental Services which contains various columns with different data types. Such as:
| Column Name | Data Type |
|---|---|
| Car Name | This is a Title column with a Single line of text data type. I just renamed it to Car Name. |
| Car Type | Choice Column |
| Daily Price | Single line of text Column |
| Rent Date | Date and time Column |
| Car Color | Single line of text Column |
| Person Name | Single line of text Column |
Refer to the SharePoint List image below:
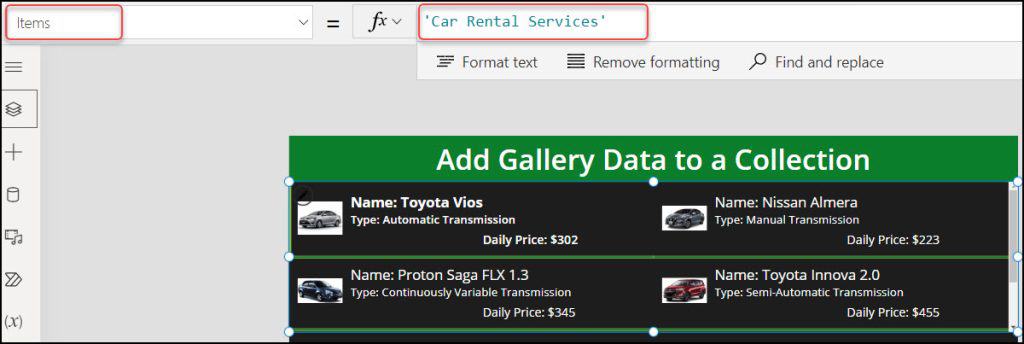
- In Power Apps, insert a Vertical gallery control and add its Items property as:
Items = 'Car Rental Services'Where,
‘Car Rental Services’ = SharePoint List Name
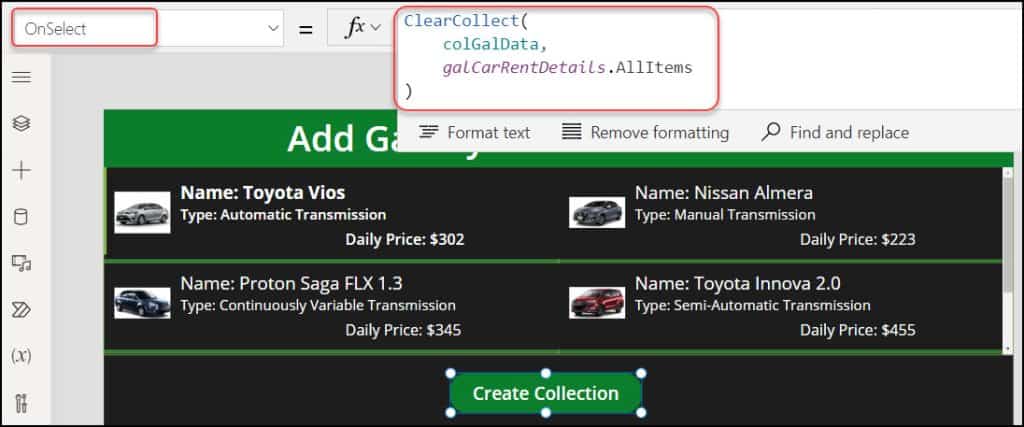
- Add a Button control and rename it to Create Collection and set its OnSelect property to the code below:
OnSelect = ClearCollect(
    colGalData,
    galCarRentDetails.AllItems
)
Where,
- colGalData = Collection Name
- galCarRentDetails = Gallery Control Name
NOTE:
As an alternative to the ClearCollect() function, you can also use Power Apps Collect().
However, if you use the Collect() method, there will be a problem where the same collection will keep creating and adding values to the Data table control whenever a user clicks the button repeatedly.
Use of the Power Apps ClearCollect() is advised because of this.
Refer to the screenshot below.
- Now insert a Data table control and set the collection name on its Items property:
Items = colGalDatacolGalData = Collection name that we have created on Button’s Onselect property
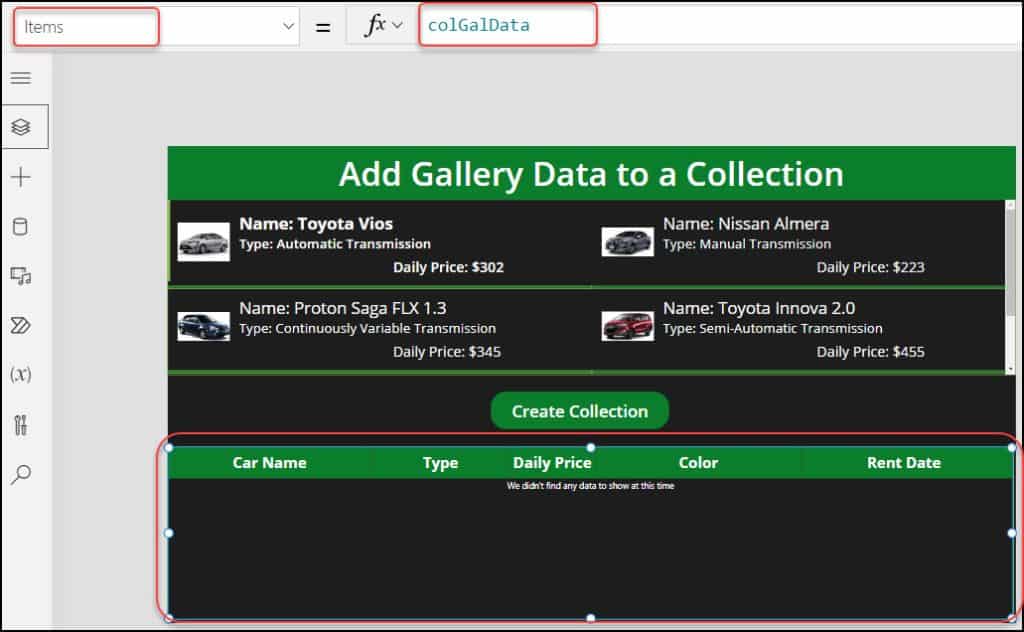
- Finally, Save, Publish, and Preview the app. When you will click on the Create Collection button, then the collection will create and add all the gallery items to the Data table control as in the image below.
NOTE:
You can add the Data table columns/headers by using Edit fields property (from Properties pane).

This is how to add Gallery Data to a Collection in Power Apps.
Also, Check: Scan Barcodes using Power Apps Barcode Reader [Display Product Information]
How to Add Specific Gallery Data to a Collection in Power Apps
Next, we will see how to add some specific gallery data to a collection in Power Apps.
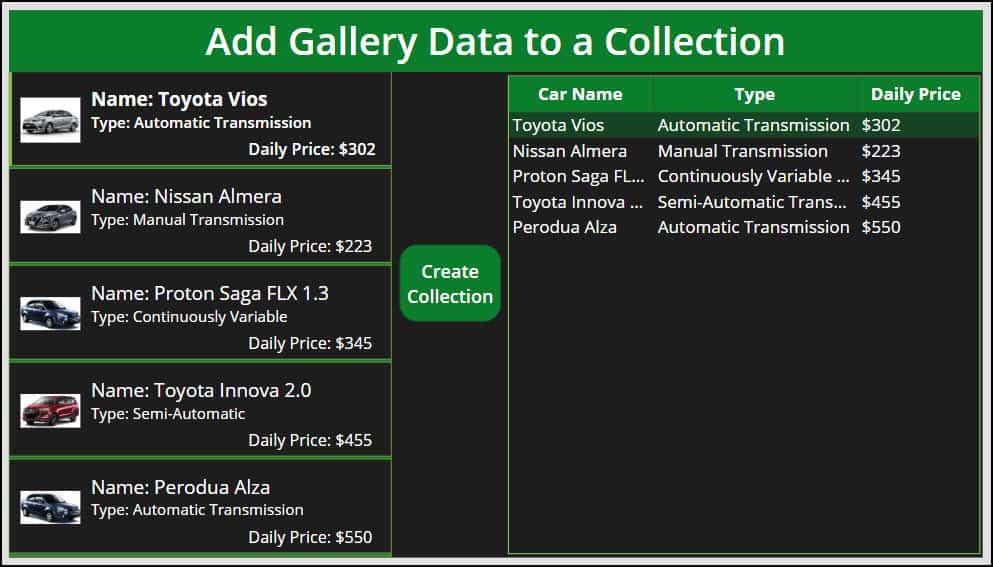
Let’s say, there is a Power Apps Gallery Control (left side image) that contains all the SharePoint list items. Now, rather than including every item in a collection, I want to add some unique or significant data, such as Car Name, Type, and Daily Price.
And the collection result will appear in a Power Apps Data table control as shown below.
Follow the instructions below to work around this.
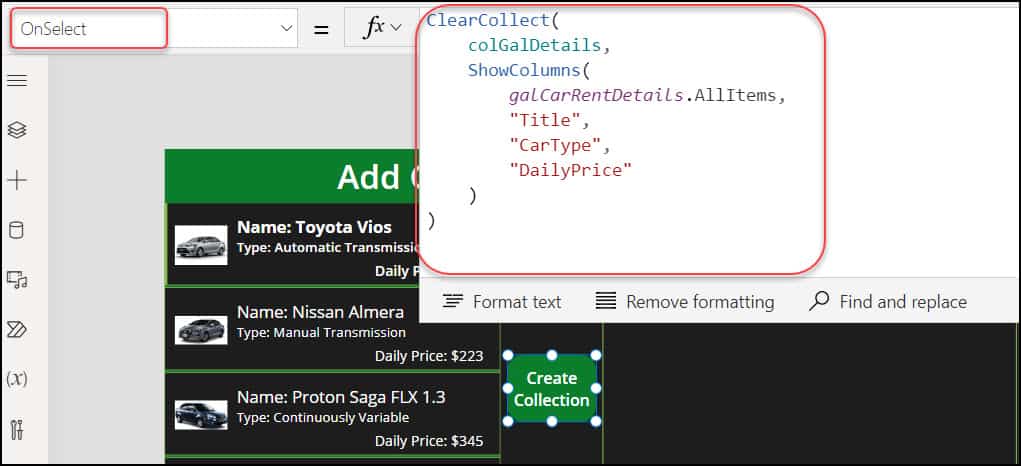
- In Power Apps, select the Button control (Create Collection) and apply the code below on its OnSelect property as:
OnSelect = ClearCollect(
    colGalDetails,
    ShowColumns(
        galCarRentDetails.AllItems,
        "Title",
        "CarType",
        "DailyPrice"
    )
)
Where,
- colGalDetails = Collection Name
- galCarRentDetails = Gallery Control Name
- “Title“, “CarType“, and “DailyPrice” = These are the special columns that I want to add in the collection
- Now, add a Data table control and set its Items property:
Items = colGalDetailscolGalDetails = Specify the created collection name on Button’s OnSelect property
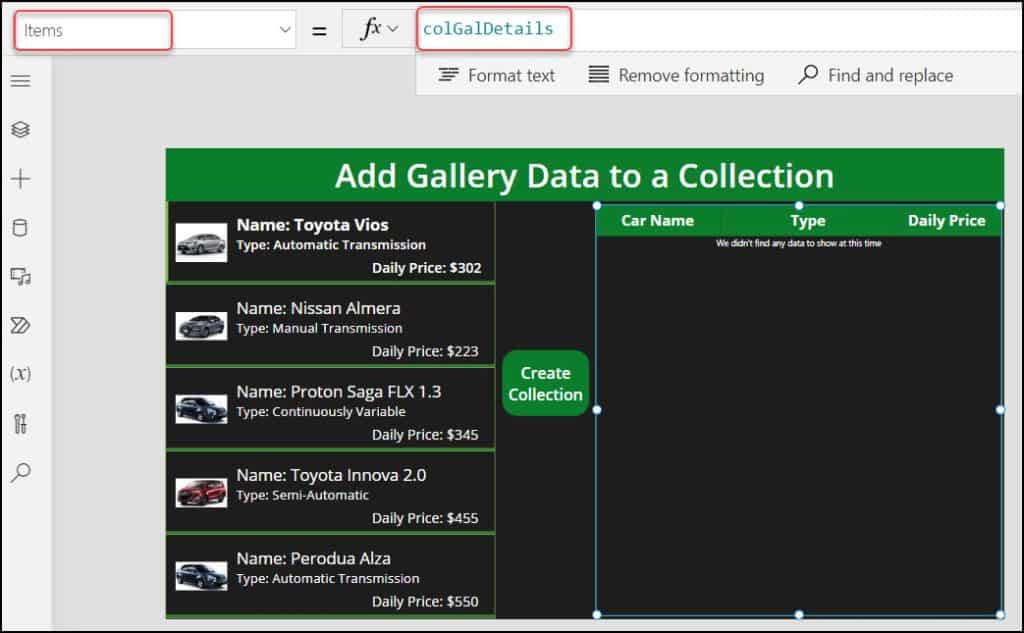
- Save, Publish, and Preview the app. When you will click on the Create Collection button, then the collection will create and add the specific gallery items to the Data table control as in the image below.

This is how to add specific gallery data to a collection in Power Apps.
Have a look: How to Filter Gallery by Current User in Power Apps
How to View Power Apps Collection
- Suppose, you want to view all the Power Apps Collection that you have created recently (On Button’s OnSelect), then click on the (x) from the left menu -> Expand Collections -> Click on More (…) of a specific Collection -> View Table -> Select the Collection (colGalDetails).
- Finally, you can view all the Power Apps Collection values in the figure below.
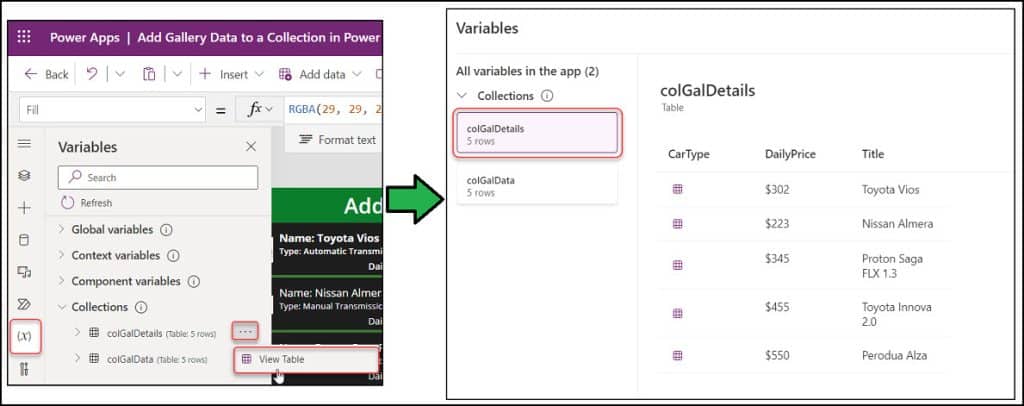
This is how we can view Power Apps Collection.
Furthermore, you may like some more Power Apps tutorials:
- Power Apps Gallery Control Examples Download [20 Various Real Scenarios]
- Create Multiple Tabs in Power Apps Form [Lead Management Apps Example]
- How to Launch Email in Power Apps
- How to Set Gallery First Item in Power Apps Display Form
- How to Delete Power Apps Customize Form from SharePoint List
- How to Visualize Model-Driven Data in Power BI
- How to Get Dataverse Created by in Power Automate
- Power Automate Get Display Name From Email
In this Power Apps tutorial, we learned how to add gallery items to a collection in Power Apps. Also, we saw how to add some specific columns from the gallery control to the Power Apps collection.
Moreover, we discussed how to view the created collection in Power Apps Canvas App.
I am Bijay a Microsoft MVP (10 times – My MVP Profile) in SharePoint and have more than 17 years of expertise in SharePoint Online Office 365, SharePoint subscription edition, and SharePoint 2019/2016/2013. Currently working in my own venture TSInfo Technologies a SharePoint development, consulting, and training company. I also run the popular SharePoint website EnjoySharePoint.com