As a SharePoint developer, you should learn JSOM in SharePoint. JSOM stands for JavaScript Object Model. In this tutorial, we will discuss everything about how to use JSOM in SharePoint and various SharePoint JavaScript examples.
We can use JSOM in SharePoint Online as well as in SharePoint on-premises versions like SharePoint server subscription edition or in SharePoint server 2019/2016/2013, etc.
SharePoint JSOM
SharePoint provides various client-side libraries to work with SharePoint sites, lists, and libraries, and similarly, it provides some Javascript libraries. JavaScript Object Model(JSOM) is a SharePoint Online client object model which is nothing but a set of classes and libraries. We can use those classes and objects to work with SharePoint data.
To work with jsom, SP.js file should already be loaded on the page.
How to use JSOM in SharePoint Online?
Jsom SharePoint code, we can use in:
- Content editor web part
- Script editor web part
- SharePoint hosted Add-in
This post will discuss how to use jsom code inside a content editor web part and script editor web part.
Jsom SharePoint Code in Content Editor web part
Writing your HTML, CSS, or jsom code directly inside the content editor web part is not recommended. So first, create an HTML File that will contain your HTML code and create .js file where we can write our JSOM code.
For creating both Files, you can use Notepad++ and Visual Studio or you can use Visual Studio Code.
Let’s take an example: Create an HTML file and add some code of paragraph or content. Then will retrieve the data using JSOM, which is present inside the JS file.
Here the HTML File Code is given below-
HTML code:
<!DOCTYPE html>
<html lang="en" xmlns="http://www.w3.org/1999/xhtml">
<script src="https://ajax.googleapis.com/ajax/libs/jquery/3.3.1/jquery.min.js"></script>
<script src="https://<TenantName.sharepoint.com/sites/Finance/SiteAssets/FolderName/SpProperties.js"></script>
<head>
<meta charset="utf-8" />
<title></title>
</head>
<body>
<h2>Retrive Web Site Details</h2>
Site Title: <p id="pTitle"></p>
Site description: <p id="pdescript"></p>
Site template: <p id="ptemp"></p>
</body>
</html>
In this HTML Code, I added some content as paragraphs, such as the Site Title, description, and template.
For each paragraph, we have to give a different “id”, whereas I have given for “Site Title” as “pTitle” and so on. So that by using their specific “id”, we can retrieve the data by using JSOM Code which is present below-
JS Code:
// JavaScript source code
ExecuteOrDelayUntilScriptLoaded(clickMethod, 'sp.js');
$(document).ready(function () {
});
var site;
function clickMethod() {
var clientContext = new SP.ClientContext.get_current();
site = clientContext.get_web();
clientContext.load(site);
clientContext.executeQueryAsync(success, failure);
}
function success() {
$("#pTitle").html(site.get_title());
$("#pdescript").html(site.get_description());
$("#ptemp").html(site.get_webTemplate());
}
function failure() {
alert("Failure!");
}
Either the server-side or client-side object model requires a starting point to work with SharePoint objects. This starting point is known as context.
The context object provides an entry point into the associated application programming interface (API) that can be used to gain access to other objects. Once you have access to the objects, you may freely interact with their scalar properties, such as Name, Title, Url, etc.
We can use the below code to retrieve the current context.
var clientContext = SP.ClientContext.get_current();The SP.ClientContext class in the JavaScript client object model inherits from the SP.Client ContextRuntime class.
The ClientContextRuntime class provides two methods for loading objects: Load and LoadQuery.
The Load method specifies an object or collection to retrieve, while the LoadQuery method allows you to return collections of objects using a LINQ query.
Executing the Load or LoadQuery method does not cause the client to communicate with the server.
Instead, it adds the load operation to a batch that will be executed on the server. In fact, you may execute multiple load methods (as well as other operations) before calling the server.
Each operation is batched, waiting for your code to initiate communication with the server. To execute the batched operations, your code must call the ExecuteQuery or ExecuteQueryAsync method.
The ExecuteQuery method creates an XML request and passes it to the Client.svc service. The client then waits synchronously while the batch is executed and the JSON results are returned.
The ExecuteQueryAsync method, which is used in the Silverlight client object model, sends the XML request to the server, but it returns immediately. Designated success and failure callback methods receive a notification when the batch operation is complete.
Here, by using this JSOM Code as [“$(“#pTitle”).html(site.get_title());” ], we can retrieve the Site Title data.
Similarly, for other content named “Site description” and “Site template,” we can use the same JSOM Code by using their specific “id.” So, using this JSOM code, we can retrieve the data from an HTML File.
Add files into a content editor web part
To run this HTML and JS Code in the “Content Editor Web Part”, we have to upload that two files(HTML File, JS File) in the “Site Assets”.
Once all the files are uploaded to the Site Assets library, create a web part page, edit it, and click on add a web part to add the content editor web part.
Edit the page and then click on the “Add a web part” link; then, it will open the Web part categories in the ribbon. From the web part categories, select Media and Content, and then from the Parts, select Content Editor.
Once the content editor web part is added, edit the web part like below:
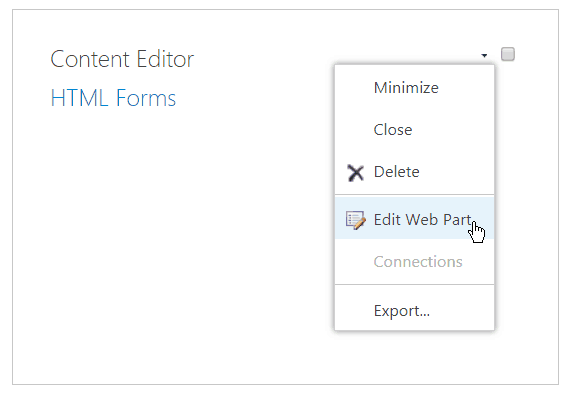
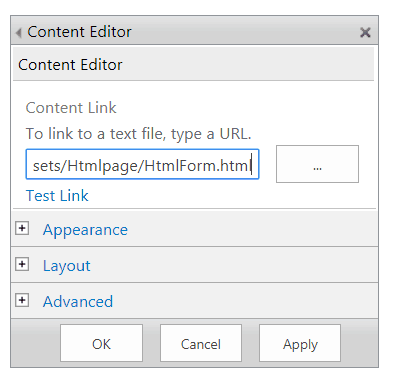
Then, in the web part properties dialog box, give your HTML File link path, which you have uploaded inside the “Site Assets”. Then click on “Apply” and “OK”.
Now stop the editing; it will show you the final result, as shown in the screenshot below.
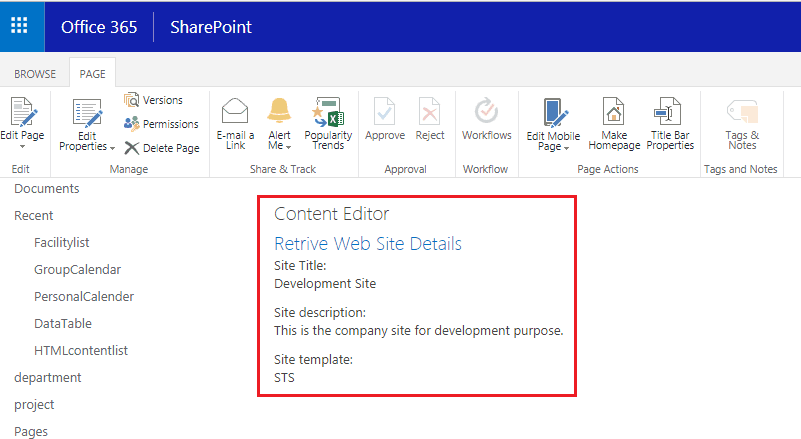
Here we can see the “Site Title”, “Site description,” and “Site template”.
JSOM Code in Script Editor web part
SharePoint 2013 or SharePoint online provides the script editor web part where we can write our JS or HTML code directly.
To add a script editor web part, open the edit the page and then edit the web part page. Then click on the Add a web part link.
Then, it will open the Web part categories in the ribbon. From the web part categories, select Media and Content, and then from the Parts, select Script Editor web part and click on Add as shown in the fig below:
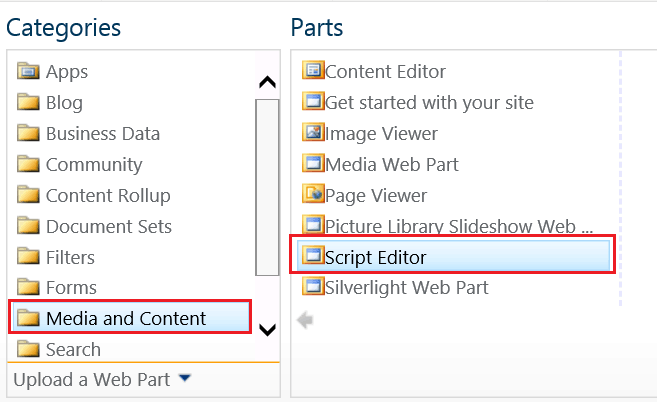
Once the web part is added successfully, click on Edit Snippet, as shown in the figure below, and then put your JavaScript code in the Embed section.
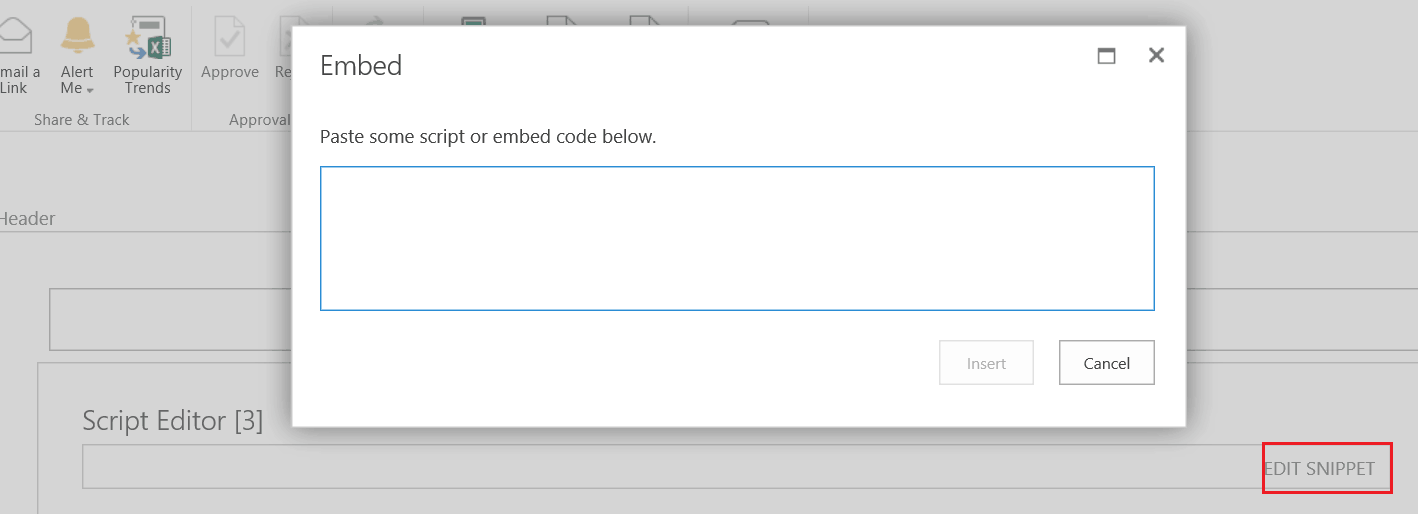
You can add the below code to test if your javascript is working fine or not.
<input type='button' value='Load JavaScript' onclick="clickMethod();"/>
<br />
<script language="javascript" type="text/javascript">
function clickMethod() {
alert('hello');
}
</script>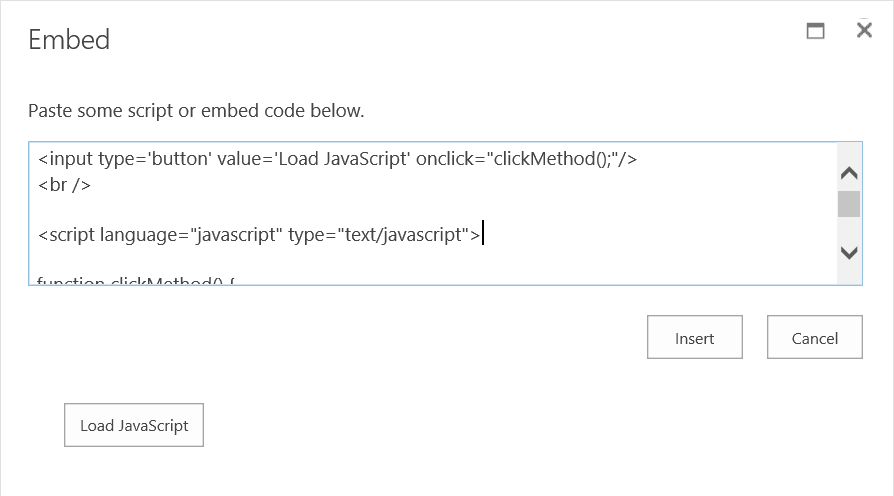
Save the page and click on Load JavaScript; it should show you the alert, which means it works fine.
Call jsom code in a Button click in SharePoint Online
We can use jQuery to call our jsom code in SharePoint online with a button click.
<script src="https://ajax.googleapis.com/ajax/libs/jquery/3.3.1/jquery.min.js"></script>
<script>
$(document).ready(function(){
$("#btnClick").click(function(){
yFunction();
});
});
function myFunction()
{
//Your jsom code will be here
var clientContext = new SP.ClientContext.get_current();
site=clientContext.get_web();
clientContext.load(site);
clientContext.executeQueryAsync(success, failure);
}
function success() {
alert(site.get_title());
}
function failure() {
alert("Failure!");
}
</script>
<input type='button' id='btnClick' value='Get Site Title'/>
Call JSOM code in Page Load in SharePoint Online
SharePoint provides ExecuteOrDelayUntilScriptLoaded() method to call the jsom code after SP.js loaded successfully. Below is how we can a method on the page/form load after sp.js loaded successfully.
<script src="https://ajax.googleapis.com/ajax/libs/jquery/3.3.1/jquery.min.js"></script>
<script>
ExecuteOrDelayUntilScriptLoaded(myFunction,'sp.js');
function myFunction()
{
//Your jsom code will be here
var clientContext = new SP.ClientContext.get_current();
site=clientContext.get_web();
clientContext.load(site);
clientContext.executeQueryAsync(success, failure);
}
function success() {
alert(site.get_title());
}
function failure() {
alert("Failure!");
}
</script>
SharePoint JavaScript examples
Now, let us check out some SharePoint javascript examples.
Example 1: Create a SharePoint Site using JSOM
This jsom SharePoint example will show how to create a SharePoint Site or Subsite using JavaScript.
Here, it will ask the user for a site name and description using an HTML form.
<html>
<head>
<script src="https://ajax.googleapis.com/ajax/libs/jquery/3.2.1/jquery.min.js"></script>
<script type="text/javascript">
$(function() {
bindButtonClick();
});
function bindButtonClick() {
$("#register").on("click", function() {
var name = $("#txtSiteTitle").val();
var id = $("#txtSiteDescription").val();
if (name == '' || id == '') {
alert("Please fill all fields...!!!!!!");
} else {
siteCreation();
}
});
}
function siteCreation () {
var siteTitle = $("#txtSiteTitle").val();
var siteDesc = $("#txtSiteDescription").val();
var siteUrl = siteDesc.replace(/\s/g, "");
var clientContext = new SP.ClientContext(https://onlysharepoint2013.sharepoint.com/sites/Finance/);
var collWeb = clientContext.get_web().get_webs();
var webCreationInfo = new SP.WebCreationInformation();
webCreationInfo.set_title(siteTitle);
webCreationInfo.set_description(siteDesc);
webCreationInfo.set_language(1033);
webCreationInfo.set_url(siteUrl);
webCreationInfo.set_useSamePermissionsAsParentSite(true);
webCreationInfo.set_webTemplate('STS#0');
var oNewWebsite = collWeb.add(webCreationInfo);
clientContext.executeQueryAsync(Function.createDelegate(this, onQuerySucceeded), Function.createDelegate(this, this.onQueryFailed));
}
function onQuerySucceeded() {
alert('Site successfully Created!');
}
function onQueryFailed(sender, args) {
alert('Request failed. ' + args.get_message() + '\n' + args.get_stackTrace());
}
</script>
</head>
<body>
<div class="container">
<div class="main">
<form class="form" method="post" action="#">
<h2>Create Subsite Site</h2> <label>Site Name :</label> <input type="text" name="dname" id="txtSiteTitle"> <label>Site Description :</label> <input type="text" name="demail" id="txtSiteDescription"> <input type="button" name="register" id="register" value="Submit"> </form>
</div>
</body>
</html>
Once you save the code, it will ask the user for an input form like the one below:

Once the user clicks Submit, it will create the site, and you can verify it from the Site Contents page.
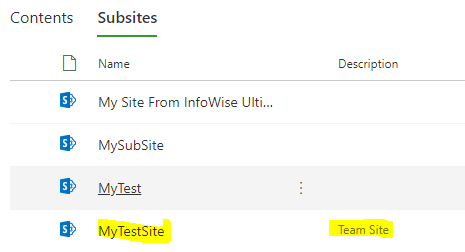
Example 2: Delete a SharePoint Site using JavaScript
In this jsom SharePoint example, we will see how to delete a SharePoint site using the JavaScript object model in SharePoint online.
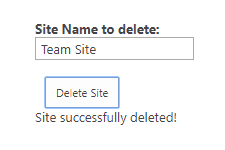
Here, we have added a textbox where the user can put the site title and click on the submit button, which will delete the site, and on successful deletion, it will display a successful message to the user.
<html>
<head>
<script src="https://ajax.googleapis.com/ajax/libs/jquery/1.11.2/jquery.min.js"></script>
<script>
$(function () {
bindButtonClick();
});
function bindButtonClick() {
$("#btnSubmit").on("click", function () {
deleteSite();
});
}
function deleteSite() {
var siteTitle = $("#txtSiteTitle").val();
var siteTitleNoSpaces = siteTitle.replace(/\s/g, "");
var siteUrl = _spPageContextInfo.webAbsoluteUrl + "/" + siteTitleNoSpaces;
alert(siteUrl);
var clientContext = new SP.ClientContext(siteUrl);
var oWebsite = clientContext.get_web();
alert(oWebsite);
oWebsite.deleteObject();
clientContext.executeQueryAsync(
Function.createDelegate(this, this.onQuerySucceeded),
Function.createDelegate(this, this.onQueryFailed)
);
}
function onQuerySucceeded() {
$("#divResults").html("Site successfully deleted!");
}
function onQueryFailed(sender, args) {
alert('Request failed. '+ args.get_message() +
'\n' + args.get_stackTrace());
}
</script></head>
<body>  <div id="DeleteSite">
<div><strong>Site Name to delete:</strong>
<br />
<input type="text" id="txtSiteTitle"/>
</div>
<br />
<input type="button" id="btnSubmit" value="Delete Site" />
</div>
<div id="divResults"></div></body>
</html>
You can see it will display a successful message like the one below:
Example 3: Get SharePoint web properties using JavaScript
This SharePoint JavaScript example will discuss how to read website properties like Title, Created date, ID, language, etc., using JSOM (JavaScript object model) in SharePoint Online or SharePoint on-premises.
<script language="javascript" type="text/javascript" src="//ajax.googleapis.com/ajax/libs/jquery/1.8.1/jquery.min.js"></script>
<script language="javascript" type="text/javascript">
$(document).ready(function() {
SP.SOD.executeFunc('sp.js', 'SP.ClientContext', readWebProperties);
});
function readWebProperties ()
{
var context = SP.ClientContext.get_current();
var web = context.get_web();
var webDetails="";
context.load(web);
context.load(web);
context.executeQueryAsync(function()
{
webDetails += "Web Details <br/>";
webDetails += "<br/> Title: " + web.get_title();
webDetails += "<br/> Created: " + web.get_created();
webDetails += "<br/> ID: " + web.get_id();
webDetails += "<br/> Language: " + web.get_language();
var insert = document.getElementById('webDetails');
insert.innerHTML = webDetails;
},
function(sender, args)
{
alert('Failed to get the web Details. Error:' + args.get_message());
});
}
</script>
<div id="webDetails">
</div>
Below is the output where we can see SharePoint website details like Name, Created, and language.

Example 4: Create SharePoint Online List using JSOM
Let us see how to create a SharePoint list using JavaScript by accepting its name from the user.
Below, you will see one form that accepts the list’s name from the user and creates a list with that name.
<HTML>
<head>
<script src="https://ajax.googleapis.com/ajax/libs/jquery/3.2.1/jquery.min.js"></script>
<script>
$(function() {
btncreate();
});
function btncreate() {
$('#btncreate').on("click", function() {
var listValue = $('#txtlistname').val();
CreateList(listValue);
});
}
function CreateList(listValue) {
var context = new SP.ClientContext()
var web = context.get_web();
var listcreation = new SP.ListCreationInformation();
listcreation.set_title(listValue);
listcreation.set_templateType(SP.ListTemplateType.genericList)
this.list = web.get_lists().add(listcreation);
context.load(list);
context.executeQueryAsync(Function.createDelegate(this, this.onsuccess), Function.createDelegate(this, this.onfailed));
}
function onsuccess() {
var results = list.get_title() + 'Create success';
$('#results').html(results);
}
function onfailed(sender, args) {
alert('Creation Failed' + args.get_message() + '\n' + args.get_stackTrace());
}
</script>
</head>
<body>
<div id="form">
<table>
<tr>
<td>
<p>Enter List Name</p>
</td>
<td> <input type="text" id="txtlistname" /> </td>
</tr>
<tr>
<td> <input type="button" id="btncreate" value="submit" /> </td>
</tr>
</table>
</div>
<div id="results"></div>
</body>
</html>
Below is the output where we have created a list as MyStore by name defined by the user.
Example 5: Delete SharePoint Online List using JavaScript Object Model
In this JSOM SharePoint example, I will show you how to delete a SharePoint list from JSOM by accepting its name from the user.
Below, you will see one form that accepts the user’s name and removes a list with that name.
<HTML>
<head>
<script src="https://ajax.googleapis.com/ajax/libs/jquery/3.2.1/jquery.min.js"></script>
<script>
$(function() {
btndelete()
});
function btndelete() {
$('#btndelete').on("click", function() {
var listValue = $('#txtlistname').val();
DeleteList(listValue);
});
}
function DeleteList(listValue) {
var context = new SP.ClientContext();
var web = context.get_web();
this.list = web.get_lists().getByTitle(listValue);
list.deleteObject(); // Delete the created list from the site
context.executeQueryAsync(Function.createDelegate(this, this.ondeletesuccess), Function.createDelegate(this, this.ondeletefailed));
}
function ondeletesuccess() {
$('#results').html("List deleted successfully"); // on success bind the results in HTML code
}
function ondeletefailed(sender, args) {
alert('Delete Failed' + args.get_message() + '\n' + args.get_stackTrace()); // display the errot details if deletion failed
} </script>
</head>
<body>
<div id="form">
<table>
<tr>
<td>
<p>Enter List Name</p>
</td>
<td> <input type="text" id="txtlistname" /> </td>
</tr>  <tr>
<td> <input type="button"     id="btndelete" value="delete" /> </td>
</tr>
</table>
</div>
<div id="results"></div>
</body>
</html>
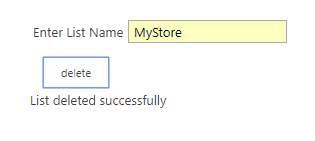
Below, you can see that the user will give the list name and click on the delete button, which will delete the list from the site.
Example 6: Create a column in a SharePoint list using javascript
Below is the complete JavaScript code to create a column in a SharePoint list. It will add a multiline column to the list using JavaScript.
<script src="https://ajax.googleapis.com/ajax/libs/jquery/3.2.1/jquery.min.js"></script>
<script>
$(document).ready(function() {
SP.SOD.executeFunc('sp.js', 'SP.ClientContext', createField);
});
function createField ()
{
var ctx = new SP.ClientContext.get_current();
var curWeb = ctx.get_web();
var myList = curWeb.get_lists().getByTitle('MyList');
ctx.load(myList);
ctx.executeQueryAsync(
function(){
//Create the field
var fields = myList.get_fields()
fields.addFieldAsXml('<Field ID="{c10f042e-ab13-435c-ab93-9885f0d48d02}" Name="myInternalName" DisplayName="A Multi User Column" Group="GroupName" Type="UserMulti" Mult="TRUE"></Field>', true, SP.AddFieldOptions.addToDefaultContentType)
ctx.executeQueryAsync(
function (){ alert('Created field!'); },
function (){ alert('Error: ' + args.get_message()); }
);
},
function(sender, args){ alert('Error: ' + args.get_message()); }
);
}
</script>
You can see in the screenshot below that it added a column to the SharePoint list.

Example 7: Add a new item in the SharePoint list using javascript
Here is the complete code to add an item to a SharePoint list using JavaScript.
<script src="https://ajax.googleapis.com/ajax/libs/jquery/3.2.1/jquery.min.js"></script>
<script>
$(document).ready(function() {
SP.SOD.executeFunc('sp.js', 'SP.ClientContext', addListItem);
});
function addListItem ()
{
var ctx = new SP.ClientContext.get_current();
var customList = ctx.get_web().get_lists().getByTitle('MyList');
var itemCreateInfo = new SP.ListItemCreationInformation();
var listItem = customList.addItem(itemCreateInfo);
listItem.set_item('Title', 'My Title');
listItem.update();
ctx.load(listItem);
ctx.executeQueryAsync(
function(){ alert('Item created: ' + listItem.get_id()); },
function(sender, args){ alert('Error: ' + args.get_message()); }
);
}
</script>
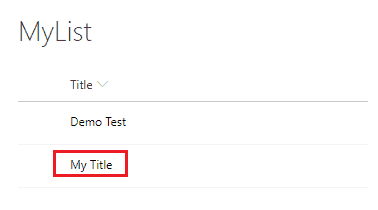
Here, I added an item to the SharePoint list using jsom, like in the screenshot below:
Example 8: Get SharePoint List Item by ID using JSOM
In this SharePoint JavaScript example, I will show you how to get a list item by ID in SharePoint using JavaScript.
<script src="https://ajax.googleapis.com/ajax/libs/jquery/3.2.1/jquery.min.js"></script>
<script>
$(document).ready(function() {
SP.SOD.executeFunc('sp.js', 'SP.ClientContext', geyByID);
});
function geyByID ()
{
var itemId = 1;
var ctx = new SP.ClientContext.get_current();
var customList = ctx.get_web().get_lists().getByTitle('MyList');
var listItem = customList.getItemById(itemId);
ctx.load(listItem);
ctx.executeQueryAsync(
function(){
alert('Item title: ' + listItem.get_item("Title"));
},
function(sender, args){ alert('Error: ' + args.get_message()); }
);
}
</script>
Once you run the above code, it will display the Title column value of the Item whose ID=1.
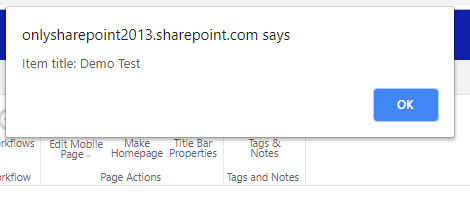
Here, I have hard-coded the item ID as 1; you can take a textbox and make this thing dynamic.
Example 9: Update SharePoint List Item using JavaScript
In this JavaScript SharePoint example, I will show you how to update a list item in SharePoint using JavaScript. We will update the SharePoint list item by item ID using JavaScript.
<script src="https://ajax.googleapis.com/ajax/libs/jquery/3.2.1/jquery.min.js"></script>
<script>
$(document).ready(function() {
SP.SOD.executeFunc('sp.js', 'SP.ClientContext', listItemUpdation);
});
function listItemUpdation ()
{
var itemId = 1;
var ctx = new SP.ClientContext.get_current();
var customList = ctx.get_web().get_lists().getByTitle('MyList');
var listItem = customList.getItemById(itemId);
listItem.set_item('Title', 'New Title');
listItem.update();
ctx.executeQueryAsync(
function(){ alert('Item updated');
})
}
</script>
Once you run the code, the title will be changed to “New Title”.

Example 10: Delete SharePoint List Item using JavaScript Object Model (jsom)
Now, we can see how to delete a list item using JavaScript in SharePoint. Here, we will delete an item from the list name MyList based on the item ID using JavaScript Object Model code.
<script src="https://ajax.googleapis.com/ajax/libs/jquery/3.2.1/jquery.min.js"></script>
<script>
$(document).ready(function() {
SP.SOD.executeFunc('sp.js', 'SP.ClientContext', listItemDeletion);
});
function listItemDeletion ()
{
var itemId = 1;
var ctx = new SP.ClientContext.get_current();
var customList = ctx.get_web().get_lists().getByTitle('CustomList');
var listItem = customList.getItemById(itemId);
listItem.deleteObject();
ctx.executeQueryAsync(
function(){ alert('Item deleted: ' + itemId); },
function(sender, args){ alert('Error: ' + args.get_message()); }
);
}
</script>
Once you execute the above code, the list item with ID=1 will be get deleted from the SharePoint Online list.
Example 11: Get all SharePoint list items using JavaScript
In this SharePoint JSOM Example, we will see how to get all list items from a SharePoint list using JavaScript.
<script src="https://ajax.googleapis.com/ajax/libs/jquery/3.3.1/jquery.min.js"></script>
<p style="font-size:20px;" width="500px;" id="Ptask"></p>
<script>
// JavaScript source code
$(document).ready(function () {
ExecuteOrDelayUntilScriptLoaded(retrivetasklistitems, "sp.js");
});
var colltaskListItem;
function retrivetasklistitems() {
var clientContext = new SP.ClientContext.get_current();
var oList = clientContext.get_web().get_lists().getByTitle('TaskList');
var camlQuery = new SP.CamlQuery();
colltaskListItem = oList.getItems(camlQuery);
clientContext.load(colltaskListItem);
clientContext.executeQueryAsync(Function.createDelegate(this, this.OnQuerySucceeded),
Function.createDelegate(this, this.OnQueryFailed));
}
function OnQuerySucceeded(sender, args) {
var listItemEnumerator = colltaskListItem.getEnumerator();
var tasks = '';
while (listItemEnumerator.moveNext()) {
var oListItem = listItemEnumerator.get_current();
var url = "https://<tenant name.sharepoint.com/sites/Finance/Lists/TaskList/DispForm.aspx?ID=" + oListItem.get_item('ID');
tasks += "<a href='" + url + "'>" + oListItem.get_item('Title') + "</a>" + "<br />";
}
$("#Ptask").html(tasks);
}
function OnQueryFailed(sender, args) {
alert('Error: ' + args.get_message() + '\n' + args.get_stackTrace());
}
</script>
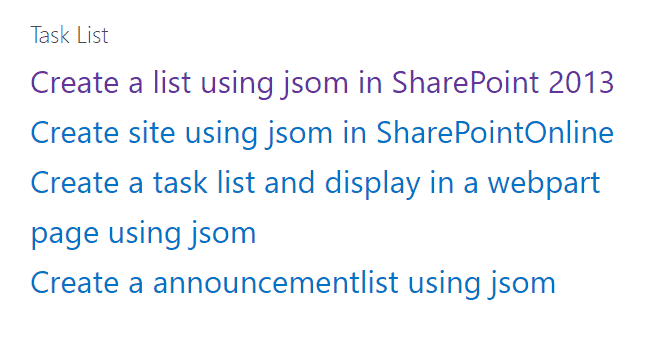
Once you run the code, you can see the output will come like below:
Here is also another example of displaying SharePoint list data in an HTML table using the JavaScript object model in SharePoint Online.
- User Name (single line text )
- Password(single line text)
- Address (Multiline textbox)
- Gender (Choice)
- Country (Choice / Dropdown list)
- Submission Date (Date and Time)
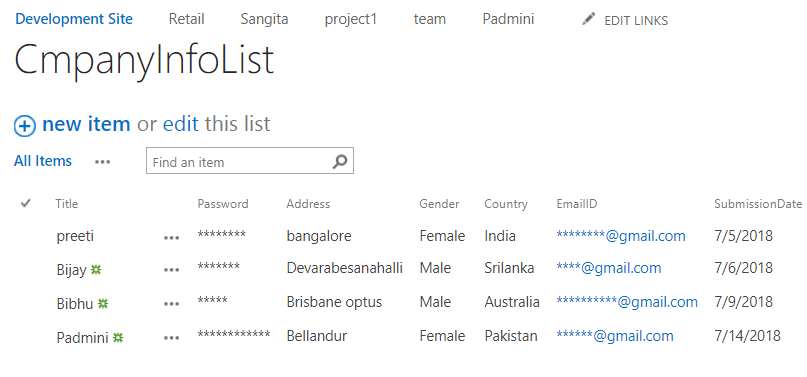
Here, I have created an HTML File as (Mytable.html), a JS File as (Mytable.js), and a CSS File as (Mytablestyle.css) in Visual Studio. The HTML code is given below:
<!DOCTYPE html>
<html lang="en" xmlns="http://www.w3.org/1999/xhtml">
<head>
<script src="https://ajax.googleapis.com/ajax/libs/jquery/3.3.1/jquery.min.js"></script>
<script src="https://<tenantname>.sharepoint.com/sites/Finance/SiteAssets/MyFiles/Mytable.js"></script>
<link rel="stylesheet" href="https://<tenantname>.sharepoint.com/sites/Finance/SiteAssets/MyFiles/Mytablestyle.css">
<meta charset="utf-8" />
<title></title>
</head>
<body>
<p id="ptitle"></p>
</body>
</html>
JS File
$(document).ready(function () {
ExecuteOrDelayUntilScriptLoaded(retrieveListItems, "sp.js");
});
var siteUrl = _spPageContextInfo.siteServerRelativeUrl;
var collListItem;
function retrieveListItems() {
var clientContext = new SP.ClientContext.get_current();
var oList = clientContext.get_web().get_lists().getByTitle('CmpanyInfoList');
var camlQuery = new SP.CamlQuery();
collListItem = oList.getItems(camlQuery);
clientContext.load(collListItem);
clientContext.executeQueryAsync(Function.createDelegate(this, this.onQuerySucceeded),
Function.createDelegate(this, this.onQueryFailed));
}
function onQuerySucceeded(sender, args) {
var listItemEnumerator = collListItem.getEnumerator();
var mytable = "<table class=\"alternate\"><tr>" +
"<th>Title</th>" +
"<th>Address</th>" +
"<th>Gender</th>" +
"<th>Country</th>" +
"<th>EmailID</th>" +
"<th>SubmissionDate</th></tr>";
while (listItemEnumerator.moveNext()) {
var oListItem = listItemEnumerator.get_current();
mytable += "<tr><td>" + oListItem.get_item('Title') + "</td><td>" + oListItem.get_item('Address') + "</td><td>" + oListItem.get_item('Gender') + "</td><td>" + oListItem.get_item('Country') + "</td><td>" + oListItem.get_item('EmailID') + "</td><td>" + oListItem.get_item('SubmissionDate') + "</td></tr>";}
mytable += "</table>";
$("#ptitle").html(mytable);
}
function onQueryFailed(sender, args) {
alert('Error: ' + args.get_message() + '\n' + args.get_stackTrace());
}
CSS File
table {
font-family: arial, sans-serif;
border-collapse: collapse;
width: 100%;
}
td, th {
border: 1px solid #dddddd;
text-align: left;
padding: 8px;
}
.alternate tr:nth-child(2n) {
background-color: silver;
}
.alternate tr {
background-color: white;
}
.alternate tr:nth-child(2n):hover, .alternate tr:hover {
background-color: grey;
}
Below is the SharePoint list and the final HTML tabular formatted data.

Example 12: Get Current user information using JSOM in SharePoint
In this jsom SharePoint example, we will see how to fetch current user information like Name, Id, Email, and Title using JSOM in SharePoint Online.
<script type="text/javascript">
ExecuteOrDelayUntilScriptLoaded(init,'sp.js');
var currentUser;
function init(){
this.clientContext = new SP.ClientContext.get_current();
this.oWeb = clientContext.get_web();
currentUser = this.oWeb.get_currentUser();
this.clientContext.load(currentUser);
this.clientContext.executeQueryAsync(Function.createDelegate(this,this.onQuerySucceeded), Function.createDelegate(this,this.onQueryFailed));
}
function onQuerySucceeded() {
document.getElementById('userLoginName').innerHTML = currentUser.get_loginName();
document.getElementById('userId').innerHTML = currentUser.get_id();
document.getElementById('userTitle').innerHTML = currentUser.get_title();
document.getElementById('userEmail').innerHTML = currentUser.get_email();
}
function onQueryFailed(sender, args) {
alert('Request failed. \nError: ' + args.get_message() + '\nStackTrace: ' + args.get_stackTrace());
}
</script>
<div>Current Logged User Info <br>
Login Name :-  <span id="userLoginName"></span></br>
User ID :- <span id="userId"></span></br>
User Title :-<span id="userTitle"></span></br>
Email :-<span id="userEmail"></span></br>
</div>
Below is the output where we can see complete information about the current user in SharePoint.

Example 13: Upload documents to a SharePoint document library using JavaScript
Now, this jsom SharePoint example explains how to upload documents to a SharePoint document library using the javascript object model in SharePoint.
Here, I have used an HTML file upload control and a button. The user will browse a file and click on the button to upload the file to the SharePoint document library.
<html>
<head>
<script src="https://ajax.googleapis.com/ajax/libs/jquery/3.2.1/jquery.min.js"></script>
<script>
var fileInput;
$(document)
.ready(function () {
fileInput = $("#getFile");
SP.SOD.executeFunc('sp.js', 'SP.ClientContext', myClickRegister);
});
function myClickRegister () {
//Register File Upload Click Event
$("#addFileButton").click(readFile);
}
var arrayBuffer;
function readFile() {
//Get File Input Control and read th file name
var element = document.getElementById("getFile");
var file = element.files[0];
var parts = element.value.split("\\");
var fileName = parts[parts.length - 1];
//Read File contents using file reader
var reader = new FileReader();
reader.onload = function (e) {
uploadFile(e.target.result, fileName);
}
reader.onerror = function (e) {
alert(e.target.error);
}
reader.readAsArrayBuffer(file);
}
var attachmentFiles;
function uploadFile(arrayBuffer, fileName) {
//Get Client Context,Web and List object.
var clientContext = new SP.ClientContext();
var oWeb = clientContext.get_web();
var oList = oWeb.get_lists().getByTitle('Documents');
//Convert the file contents into base64 data
var bytes = new Uint8Array(arrayBuffer);
var i, length, out = '';
for (i = 0, length = bytes.length; i < length; i += 1) {
out += String.fromCharCode(bytes[i]);
}
var base64 = btoa(out);
//Create FileCreationInformation object using the read file data
var createInfo = new SP.FileCreationInformation();
createInfo.set_content(base64);
createInfo.set_url(fileName);
//Add the file to the library
var uploadedDocument = oList.get_rootFolder().get_files().add(createInfo)
//Load client context and execcute the batch
clientContext.load(uploadedDocument);
clientContext.executeQueryAsync(QuerySuccess, QueryFailure);
}
function QuerySuccess() {
console.log('File Uploaded Successfully.');
alert("File Uploaded Successfully.");
}
function QueryFailure(sender, args) {
console.log('Request failed with error message - ' + args.get_message() + ' . Stack Trace - ' + args.get_stackTrace());
alert("Request failed with error message - " + args.get_message() + " . Stack Trace - " + args.get_stackTrace());
}
</script>
</head>
<body>
<input id="getFile" type="file" /><br /> <input id="addFileButton" type="button" value="Upload" />
</body>
<html>
Example 14: Delete a file from a SharePoint document library using JavaScript
In this SharePoint JavaScript example, we will see how to delete a file from a SharePoint document library using the JavaScript object model (JSOM).
<html>
<head>
<script src=”https://ajax.googleapis.com/ajax/libs/jquery/1.11.2/jquery.min.js”></script>
<script>
$(function () {
bindButtonClick();
});
function bindButtonClick() {
$(“#btnSubmit”).on(“click”, function () {
deleteDocument();
});
}
function deleteDocument() {
var docTitle = $(“#txtDocumentTitle”).val() + “.txt”;
var clientContext = new SP.ClientContext();
var oWebsite = clientContext.get_web();
var fileUrl = _spPageContextInfo.webServerRelativeUrl + “/Shared Documents/” + docTitle;
this.fileToDelete = oWebsite.getFileByServerRelativeUrl(fileUrl);
this.fileToDelete.deleteObject();
clientContext.executeQueryAsync(
Function.createDelegate(this, this.onQuerySucceeded),
Function.createDelegate(this, this.onQueryFailed)
);
}
function onQuerySucceeded() {
$(“#divResults”).html(“Document successfully deleted!”);
}
function onQueryFailed(sender, args) {
alert(‘Request failed. ‘ + args.get_message() +
‘\n’ + args.get_stackTrace());
}
</script>
</head>
<body>
<div id=”DeleteFile”>
<div>
<strong>Enter File Name to Delete:</strong>
<br />
<input type=”text” id=”txtDocumentTitle” />
</div>
<br />
<input type=”button” id=”btnSubmit” value=”Delete File” />
</div>
<div id=”divResults”></div>
</body>
</html>
Once you run the code, the user will input the file name and click on the button; the file will be deleted from the SharePoint document library.
Example 15: Create a folder inside a SharePoint document library using JSOM
In this SharePoint JavaScript example, we will see how to create a folder inside the document library using the JavaScript object model (jsom) in SharePoint Online.
HTML Code:
Below is the full HTML code to take an HTML textbox and an HTML button.
<div>
<strong>Enter FolderName:</strong><br />
<input type=”text” id=”txtFolderName” /><br />
<input type=”button” id=”btnSubmit” value=”Create Folder” />
</div>
<div id=”divResults”></div>
JSOM Code:
Below is the full jsom code. Here also, we have given a reference to the jQuery min file because we have used jQuery to bind the button click, and we are also retrieving the textbox value using jQuery like below:
var folderName = $(“#txtFolderName”).val();Here, we are creating the folder inside the “Documents” document library; if you want to give any other document library, then you can just replace the document library name in the below line.
var oList = oWebsite.get_lists().getByTitle(“Documents”);Below is the full jsom code:
<script src=”https://ajax.googleapis.com/ajax/libs/jquery/1.11.2/jquery.min.js”></script>
<script>
$(function () {
bindButtonClick();
});
function bindButtonClick() {
$(“#btnSubmit”).on(“click”, function () {
createFolder();
});
}
function createFolder() {
var folderName = $(“#txtFolderName”).val();
var clientContext = new SP.ClientContext();
var oWebsite = clientContext.get_web();
var oList = oWebsite.get_lists().getByTitle(“Documents”);
var folderCreateInfo = new SP.ListItemCreationInformation();
folderCreateInfo.set_underlyingObjectType(SP.FileSystemObjectType.folder);
folderCreateInfo.set_leafName(folderName);
this.oListItem = oList.addItem(folderCreateInfo);
this.oListItem.update();
clientContext.load(oList);
clientContext.executeQueryAsync(
Function.createDelegate(this, this.onQuerySucceeded),
Function.createDelegate(this, this.onQueryFailed)
);
}
function onQuerySucceeded() {
$(“#divResults”).html(“Folder successfully created!”);
}
function onQueryFailed(sender, args) {
alert(‘Request failed. ‘ + args.get_message() +
‘\n’ + args.get_stackTrace());
}
</script>
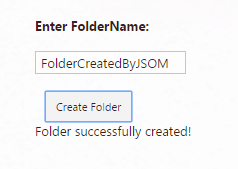
Once you run the above code, the user will enter a folder name and click on the button to create a folder inside a document library in SharePoint Online.
Example 16: Create a file or document using JavaScript in SharePoint Online
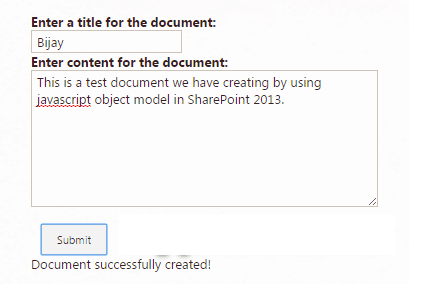
Here, we will see how to create a file or document stored in a SharePoint document library in SharePoint Online using JavaScript.
HTML Code
<div id=”CreateFile”>
<div>
<strong>Enter a title for the document:</strong>
<br />
<input type=”text” id=”txtDocumentTitle” />
</div>
<div>
<strong>Enter content for the document:</strong>
<br />
<textarea cols=”20″ id=”txtDocumentContent”></textarea>
</div>
<br />
<input type=”button” id=”btnSubmit” value=”Submit” />
</div>
<div id=”divResults”></div>
JSOM Code
<script src=”https://ajax.googleapis.com/ajax/libs/jquery/1.11.2/jquery.min.js”></script>
<script>
$(function () {
bindButtonClick();
});
function bindButtonClick() {
$(“#btnSubmit”).on(“click”, function () {
createDocument();
});
}
function createDocument() {
var docTitle = $(“#txtDocumentTitle”).val() + “.txt”;
var docContent = $(“#txtDocumentContent”).val();
var clientContext = new SP.ClientContext();
var oWebsite = clientContext.get_web();
var oList = oWebsite.get_lists().getByTitle(“Documents”);
var fileCreateInfo = new SP.FileCreationInformation();
fileCreateInfo.set_url(docTitle);
fileCreateInfo.set_content(new SP.Base64EncodedByteArray());
for (var i = 0; i < docContent.length; i++) {
fileCreateInfo.get_content().append(docContent.charCodeAt(i));
}
this.newFile = oList.get_rootFolder().get_files().add(fileCreateInfo);
clientContext.load(this.newFile);
clientContext.executeQueryAsync(
Function.createDelegate(this, this.onQuerySucceeded),
Function.createDelegate(this, this.onQueryFailed)
);
}
function onQuerySucceeded() {
$(“#divResults”).html(“Document successfully created!”);
}
function onQueryFailed(sender, args) {
alert(‘Request failed. ‘ + args.get_message() +
‘\n’ + args.get_stackTrace());
}
</script>
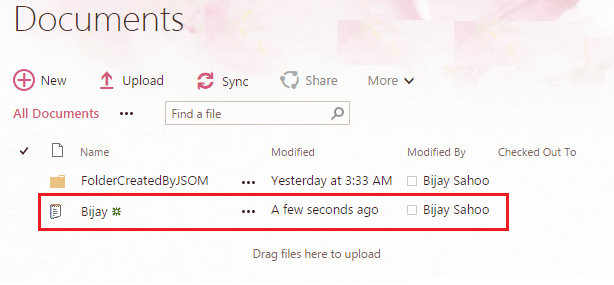
Now, if you open the SharePoint document library, you can see the document created in the Document library in SharePoint Online.
Example 17: Display SharePoint list data in an HTML table using JSOM
Here, I will show you how to display SharePoint list data in an HTML table in a tabular format using jsom and jQuery in SharePoint.
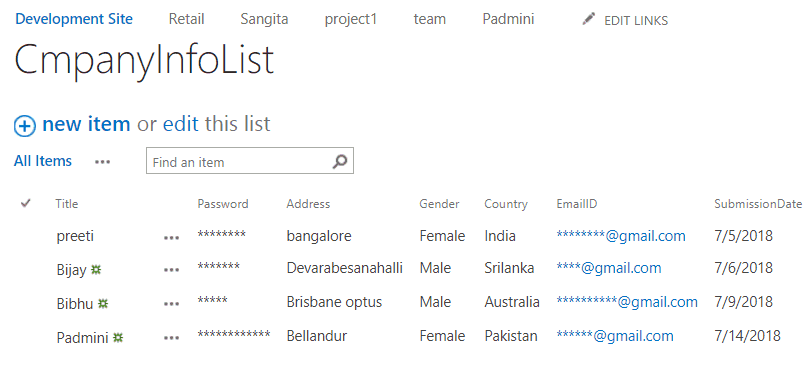
I have a SharePoint list that has a few columns like the one below:
- User Name (single line text )
- Password(single line text)
- Address (Multiline textbox)
- Gender (Choice)
- Country (Choice / Dropdown list)
- Submission Date (Date and Time)
The SharePoint list has some items shown below screenshot:
Here, we will create an HTML file, JS file, and CSS file.
HTML File
The HTML code to display SharePoint list items using JavaScript looks like this:
<!DOCTYPE html>
<html lang="en" xmlns="http://www.w3.org/1999/xhtml">
<head>
<script src="https://ajax.googleapis.com/ajax/libs/jquery/3.3.1/jquery.min.js"></script>
<script src="https://<tenantname>.sharepoint.com/sites/HR/SiteAssets/HRLIbrary/Mytable.js"></script>
<link rel="stylesheet" href="https://<tenantname>.sharepoint.com/sites/HR/SiteAssets/HRLIbrary/Mytablestyle.css">
<meta charset="utf-8" />
<title></title>
</head>
<body>
<p id="ptitle"></p>
</body>
</html>
In this HTML Code, I have given the JS path link as well as the CSS path link. Then, add a paragraph tag <P> with the ID attribute. Here, I have given (id=”ptitle”).
JavaScript (.js) file for get list items using javascript SharePoint 2013/Online
Below is the code that contains the JSOM (JavaScript object model) code to retrieve and display SharePoint list items in an HTML table using JavaScript.
$(document).ready(function () {
ExecuteOrDelayUntilScriptLoaded(retrieveListItems, "sp.js");
});
var siteUrl = _spPageContextInfo.siteServerRelativeUrl;
var collListItem;
function retrieveListItems() {
var clientContext = new SP.ClientContext.get_current();
var oList = clientContext.get_web().get_lists().getByTitle('CmpanyInfoList');
var camlQuery = new SP.CamlQuery();
collListItem = oList.getItems(camlQuery);
clientContext.load(collListItem);
clientContext.executeQueryAsync(Function.createDelegate(this, this.onQuerySucceeded),
Function.createDelegate(this, this.onQueryFailed));
}
function onQuerySucceeded(sender, args) {
var listItemEnumerator = collListItem.getEnumerator();
var mytable = "<table class=\"alternate\"><tr>" +
"<th>Title</th>" +
"<th>Address</th>" +
"<th>Gender</th>" +
"<th>Country</th>" +
"<th>EmailID</th>" +
"<th>SubmissionDate</th></tr>";
while (listItemEnumerator.moveNext()) {
var oListItem = listItemEnumerator.get_current();
mytable += "<tr><td>" + oListItem.get_item('Title') + "</td><td>" + oListItem.get_item('Address') + "</td><td>" + oListItem.get_item('Gender') + "</td><td>" + oListItem.get_item('Country') + "</td><td>" + oListItem.get_item('EmailID') + "</td><td>" + oListItem.get_item('SubmissionDate') + "</td></tr>";}
mytable += "</table>";
$("#ptitle").html(mytable);
}
function onQueryFailed(sender, args) {
alert('Error: ' + args.get_message() + '\n' + args.get_stackTrace());
}
Here in this js code, I have created the table dynamically, and in the last, I have bound the variable with the ID by using the below code-
$("#ptitle").html(mytable);.CSS File
Here, I have added the .css file to add some styling to the HTML table.
table {
font-family: arial, sans-serif;
border-collapse: collapse;
width: 100%;
}
td, th {
border: 1px solid #dddddd;
text-align: left;
padding: 8px;
}
.alternate tr:nth-child(2n) {
background-color: silver;
}
.alternate tr {
background-color: white;
}
.alternate tr:nth-child(2n):hover, .alternate tr:hover {
background-color: grey;
}
Then upload these three files(Mytable.html File, Mytable.JS File, Mytablestyle.CSS File) in the “Site Assets” document library in SharePoint.
Then, create a web part page. Edit the page and click on the Add a web part link; this will open the Web part categories in the ribbon. From the web part categories, select Media and Content, and then from the Parts, select the Content Editor web part.
By clicking on the “Edit web part“, we can give the HTML File path in the content editor web part. Once you save the page, the HTML file will be displayed on that Web Part Page like the below:-

This is how to display SharePoint list data in an HTML table using JavaScript.
SharePoint JavaScript Examples – PDF Download FREE
Now, you can download 51 SharePoint JavaScript examples as a PDF.
Conclusion
I hope you got an idea of what is JSOM in SharePoint. How to work with SharePoint JSOM. I have also explained how to use the JSOM SharePoint code in a SharePoint script editor web part or in a content editor web part. Also, we checked useful SharePoint JavaScript examples.
You may also like:
I am Bijay a Microsoft MVP (10 times – My MVP Profile) in SharePoint and have more than 17 years of expertise in SharePoint Online Office 365, SharePoint subscription edition, and SharePoint 2019/2016/2013. Currently working in my own venture TSInfo Technologies a SharePoint development, consulting, and training company. I also run the popular SharePoint website EnjoySharePoint.com
it did not work for sharepoint online i am afraid
Hi Rodolfo,
The demo is itself in SharePoint Online. So it should be working fine at your end also. Are you getting any specific error?
I think he means it does not work in the modern experience.