One of the challenges I encountered when creating a Power Apps form was transforming a combo box control into a multi-select checkbox control and storing those values in a SharePoint list.
It took me a little time to figure out, and then I tried a fantastic solution that worked as perfectly as I expected.
In this Power Apps article, I will explain how to create multi select checkboxes in Power Apps from a SharePoint List. Also, we will see how to save the multi-select checkbox values in the SharePoint Choice field.
Create Multi Select Checkboxes in Power Apps From a SharePoint List
The screenshot represents a Power Apps form called PRODUCT ORDER FORM. This form has a SharePoint choice field named Color. I want to make this field a Multi-select checkbox, as shown below.
Also, when the user submits the details, the multi-select check box values will be saved in the SharePoint choice field (Color).

Follow the instructions below to achieve this:
Step – 1:
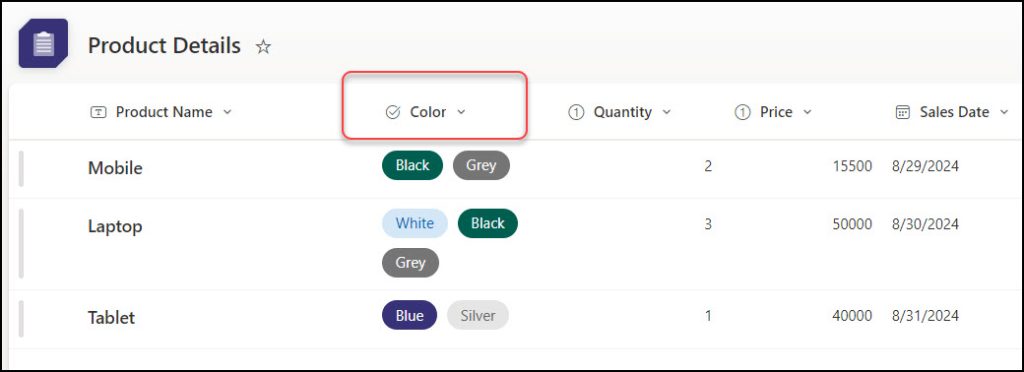
I have a SharePoint list named Product Details, where the Color is a Choice field with various colors.
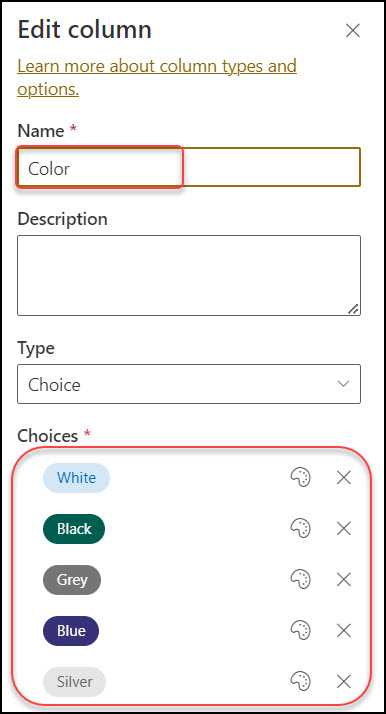
You can see all the choices here. To select multiple-choice values, enable the “Enable multiple selections” option.
When you connect the specific SharePoint list to the Power Apps form (here, I have taken a Modern form), the choice values will appear in a modern combobox control, as shown below.

Step – 2:
Select the Color Datacard and insert a Blank vertical gallery control (Insert -> Blank vertical gallery).
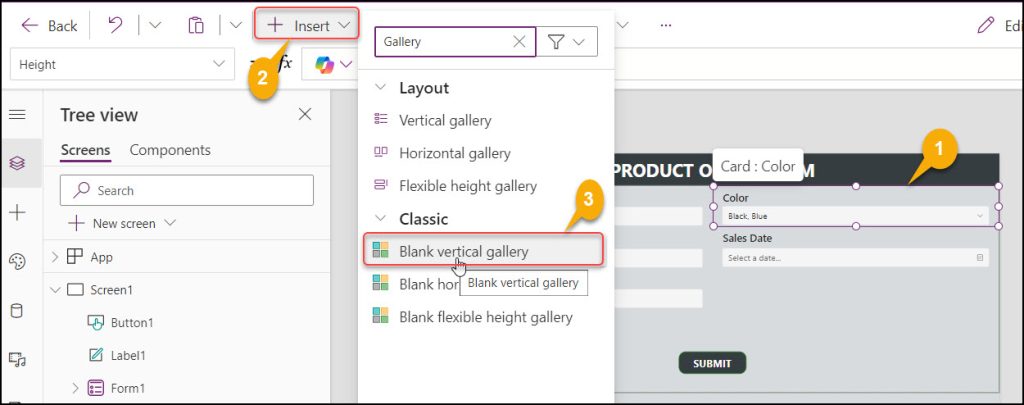
You will see that the gallery will be added outside the form. Just cut it (ctrl+x) and paste it inside the color data card.
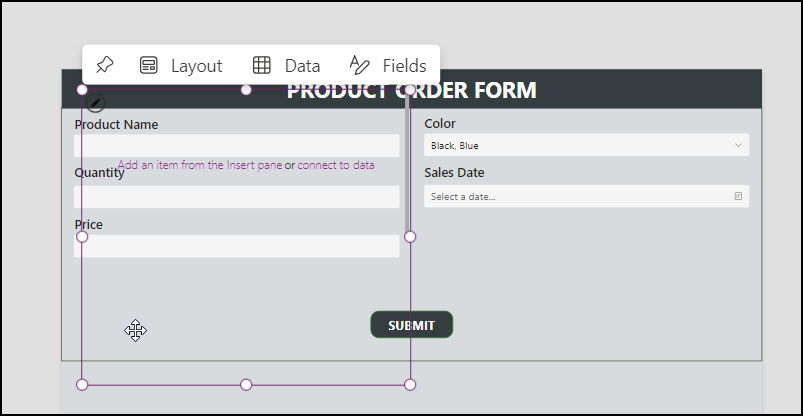
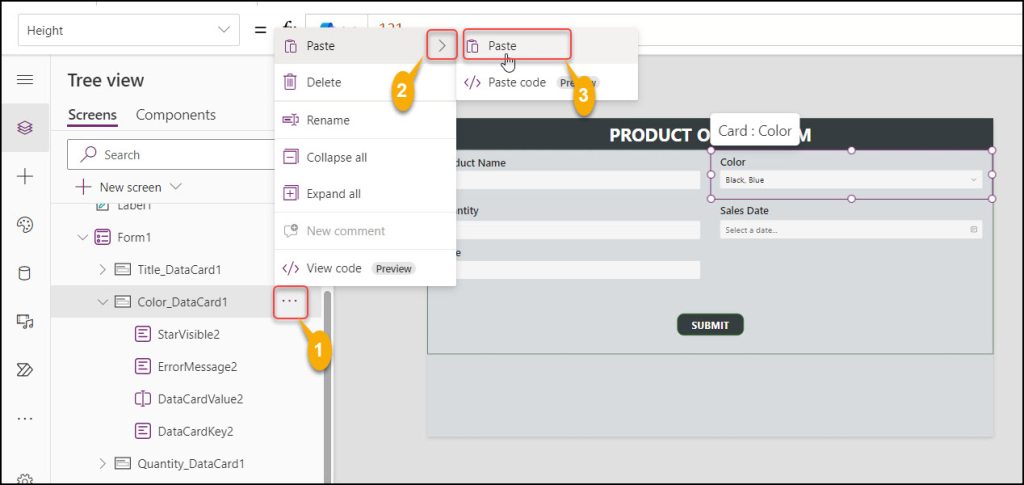
Select the Color data card -> go to more (…) -> Paste -> Paste it.
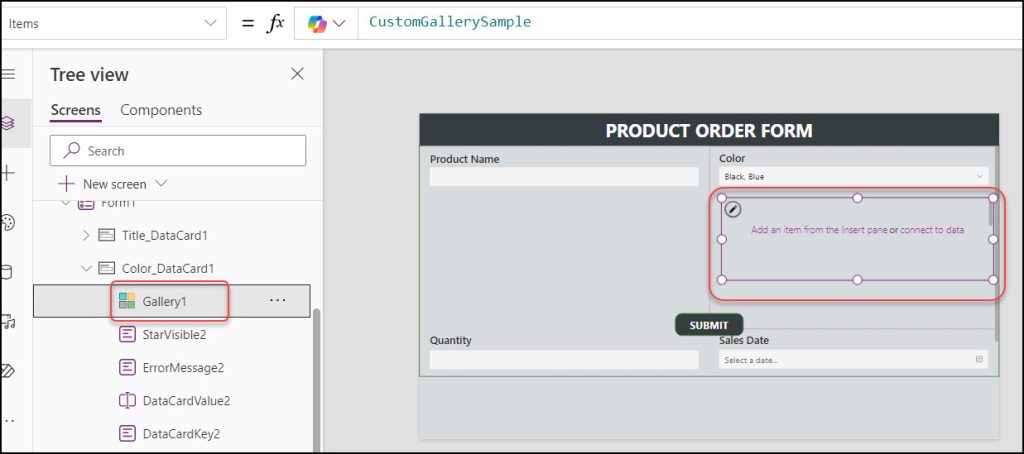
The gallery has now been appropriately inserted into the color data card.
Step – 3:
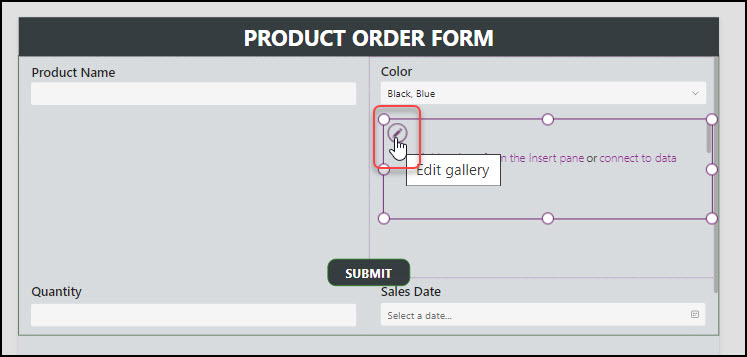
Now, edit the gallery and add a checkbox control to it.
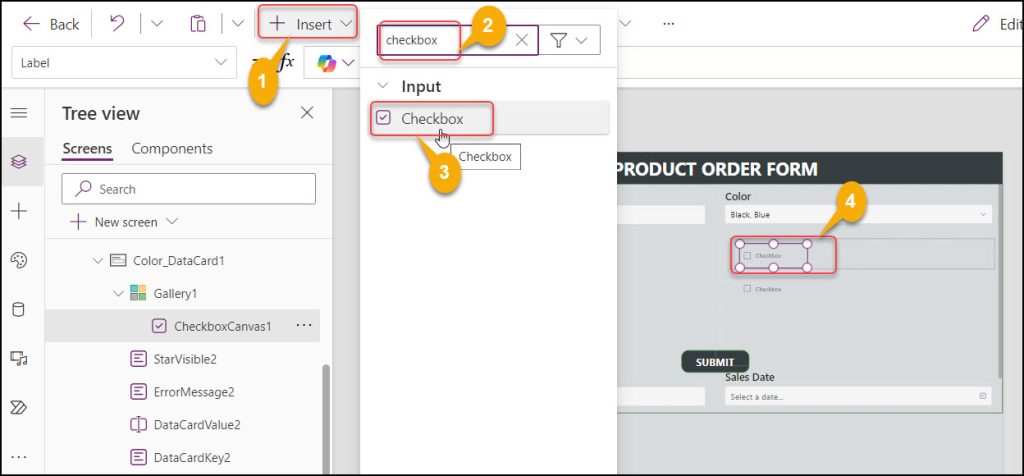
Go to the + Insert -> Search Checkbox -> Select Modern Checkbox like below.
Next, select the modern combo box control and copy the code from its Items property. Then, select the gallery control and paste the copied code from the combo box.
Items = Choices([@'Product Details'].Color)Where,
- Product Details = SharePoint List Name
- Color = SharePoint Choice Field

Step – 4:
Edit the gallery again and set the checkbox’s Label property as:
Label = ThisItem.Value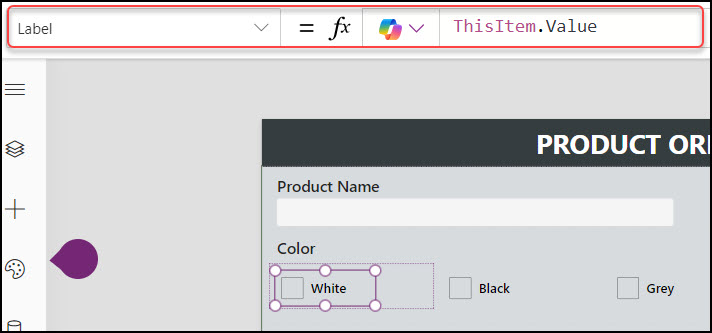
Step – 5:
The gallery has a property called Wrap count; you can wrap the item according to your need (e.g., 3, 4, 5, etc.).

Step – 6:
Now, we will make the modern combobox control (Color) Visible property false so that it will hide in the form.
Visible = false
Step – 7:
Now, we will resize the Color data card inside the form. Select the data card and set its below properties as:
Width = 1366
Wrap count = 5
Step – 8:
Edit the gallery and set Checkbox’s OnCheck property as:
OnCheck = Set(
    varColor,
    ShowColumns(
        Filter(
            Gallery1.AllItems,
            CheckboxCanvas1.Checked
        ),
        Value
    )
)
Where,
- varColor = Variable name
- Gallery1 = Gallery control name
- CheckboxCanvas1 = Modern Checkbox control name

Select any choice from the gallery and select the code part from the ShowColumns function to Value. Click on the table to see all the options you have chosen in the gallery.

Step – 9:
The exact code copy from the Checkbox’s OnCheck property and paste it into the OnUncheck property:
OnUncheck = Set(
    varColor,
    ShowColumns(
        Filter(
            Gallery1.AllItems,
            CheckboxCanvas1.Checked
        ),
        Value
    )
)
Refer to the image below:

Step – 10:
Select the Color Datacard and set its Update property to the code below:
Update = Coalesce(varColor,ThisItem.Color)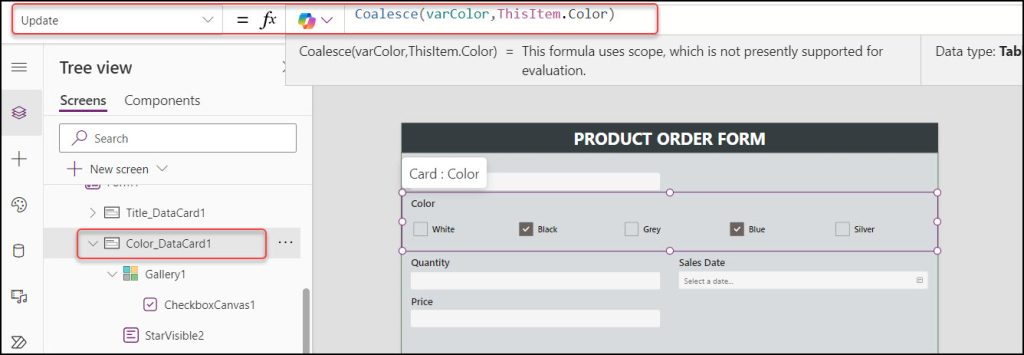
Step – 11:
Finally, save, publish, and preview the app. Fill in the details and the color check box values. Select multiple values from the check box control and submit the form.
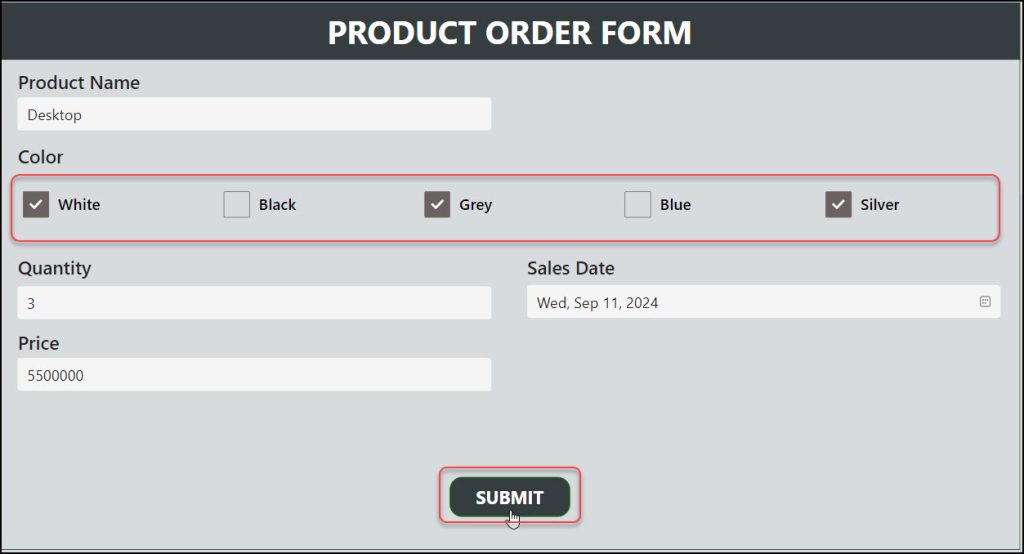
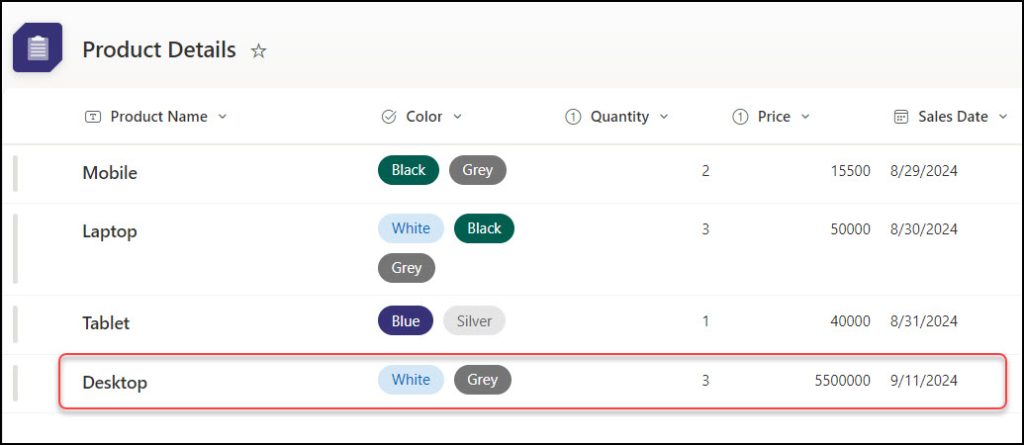
Go to the specific SharePoint list and refresh it once. The new item has been created in the list with all the multi-select check box values, as shown below.
Additionally, you may like some more Power Apps tutorials:
- Reset Check Boxes in a Power Apps Gallery
- Power Apps Modern Header Control
- Power Apps Modern Button Control
- Show/Hide Password in Power Apps Login Page
- Power Apps Left Navigation Component
I hope this article helped you learn how to create multi-select checkboxes in Power Apps from a SharePoint list. We also saw how to save the Power Apps multi-select choice values in a SharePoint list with an example.
I am Bijay a Microsoft MVP (10 times – My MVP Profile) in SharePoint and have more than 17 years of expertise in SharePoint Online Office 365, SharePoint subscription edition, and SharePoint 2019/2016/2013. Currently working in my own venture TSInfo Technologies a SharePoint development, consulting, and training company. I also run the popular SharePoint website EnjoySharePoint.com