Recently, while working with the Power Apps application, I was required to display the gallery-selected item details in a text label. I needed to make some bold text and increase the font to differentiate the details, but we can’t achieve this with a standard text label.
After researching, I learned that Power Apps has a control called Rich Text Editor. In this article, I will explain what the Power Apps Rich Text Editor control is and how to use it.
Additionally, we will discuss how to display gallery-selected item details using the Power Apps rich text editor.
Power Apps Rich Text Editor Control
In Power Apps, the Rich text editor control allows you to format text in bold, italic, underline, font size, color, and more. It can also support adding hyperlinks and images. We can also format the text into a numbered list or bullet list.
This control can be used whenever we want to format or customize text, such as by creating tables and lists. We can also use it for multi-line text fields in Power Apps form.
NOTE:
However, it has a limitation: We can interact with Power Apps rich text editor only in preview mode.
Refer to the image below:
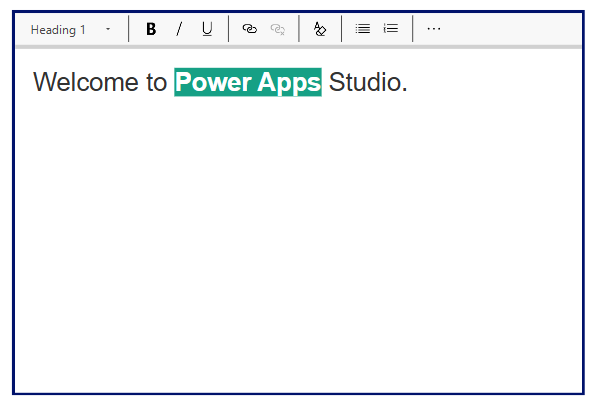
Let’s see how to use Rich text editor control in Power Apps.
How to Use Rich Text Editor Control in Power Apps
Follow the steps below to use this Rich text editor control in Power Apps.
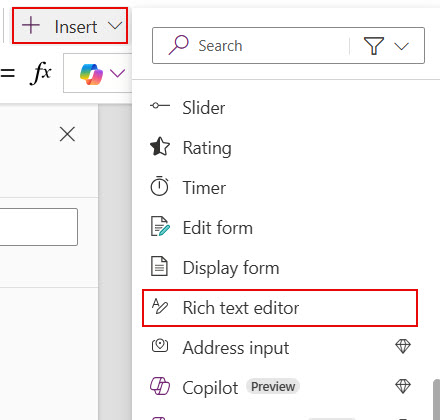
1. In Power Apps from +Insert tab -> Under Inputs -> Click on Rich text editor.
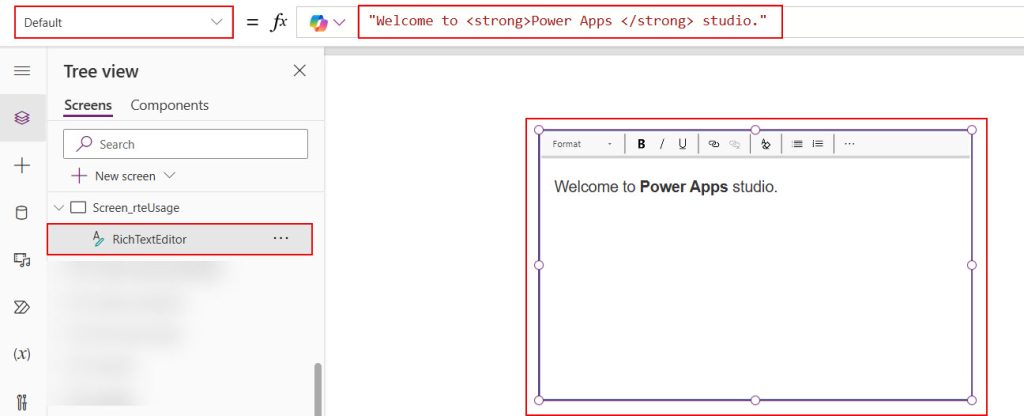
2. Here is the rich text editor control. To display some text over this control, put it in the default property of this control.
We can use HTML tags to highlight the text, such as bold, strong, italic, etc.
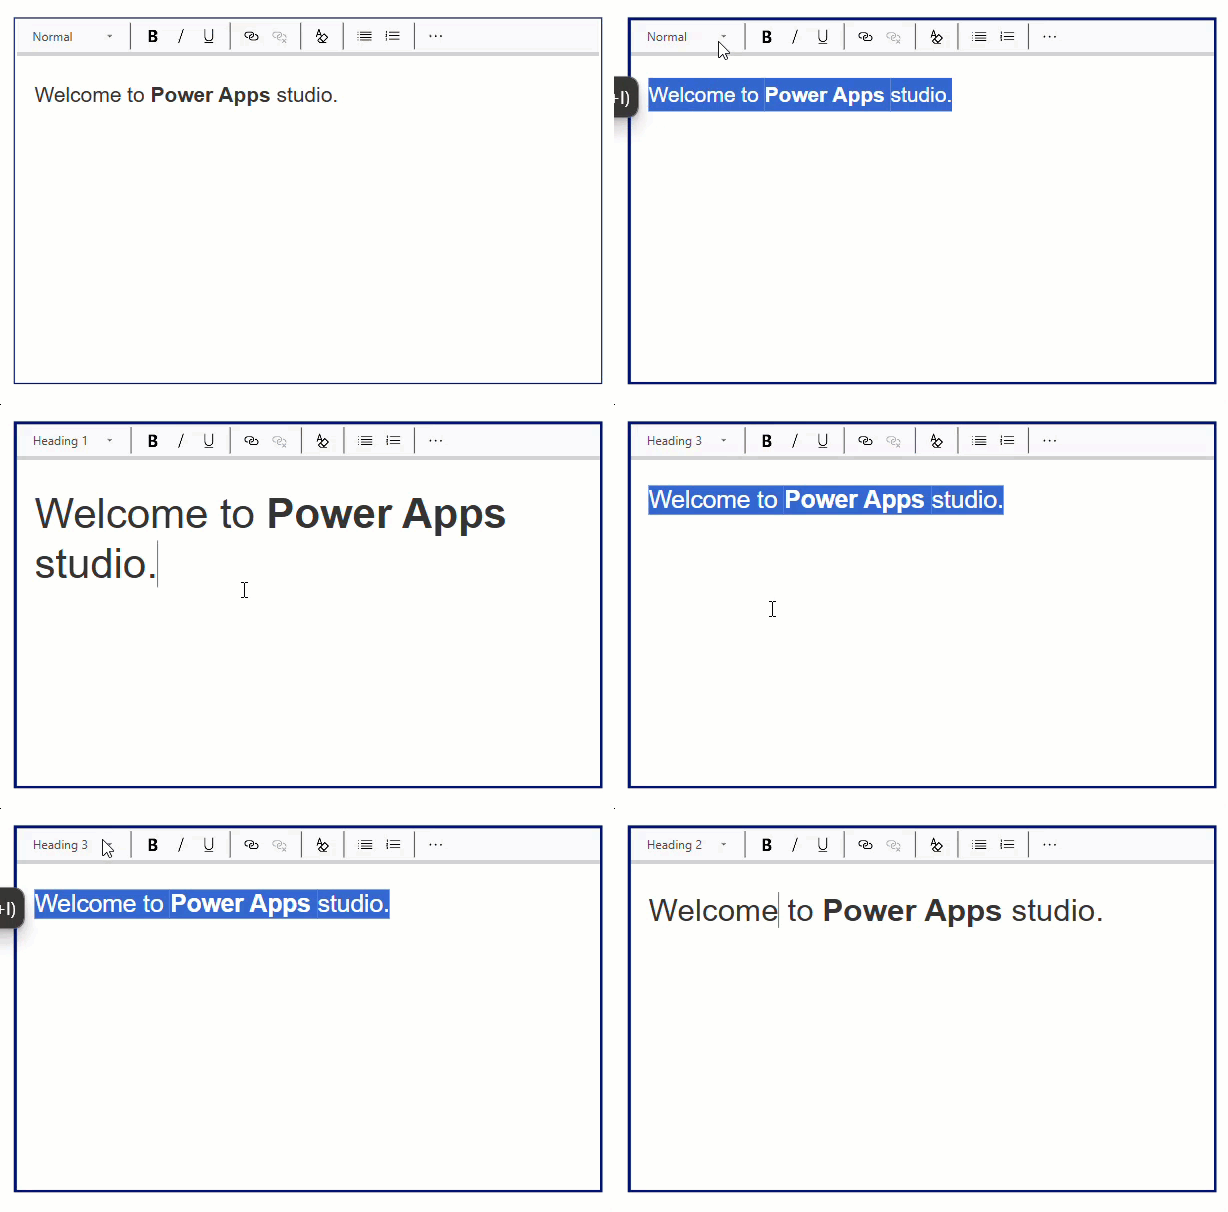
3. To change the font format, go to the preview mode and select the text; now, click the Format dropdown and choose the format you want.
Display Gallery Selected Item Details in Power Apps Rich Text Editor
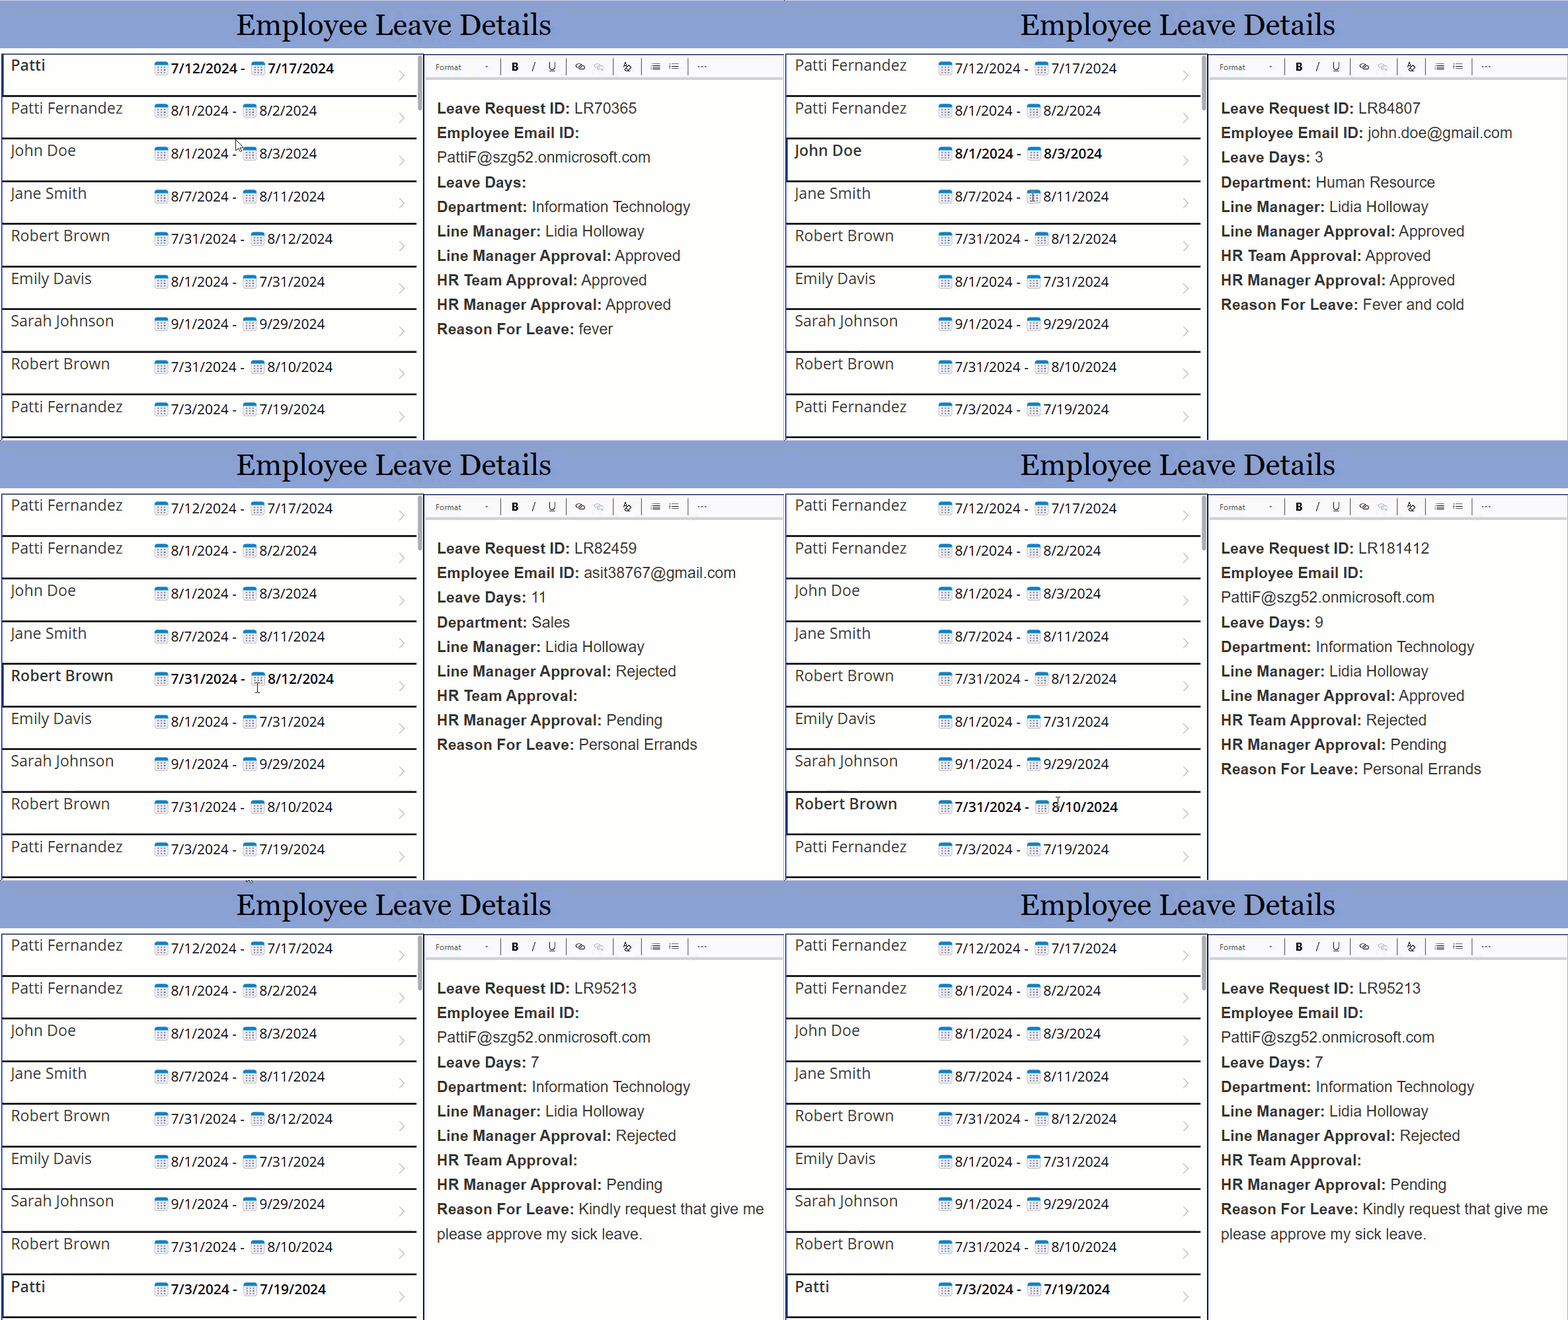
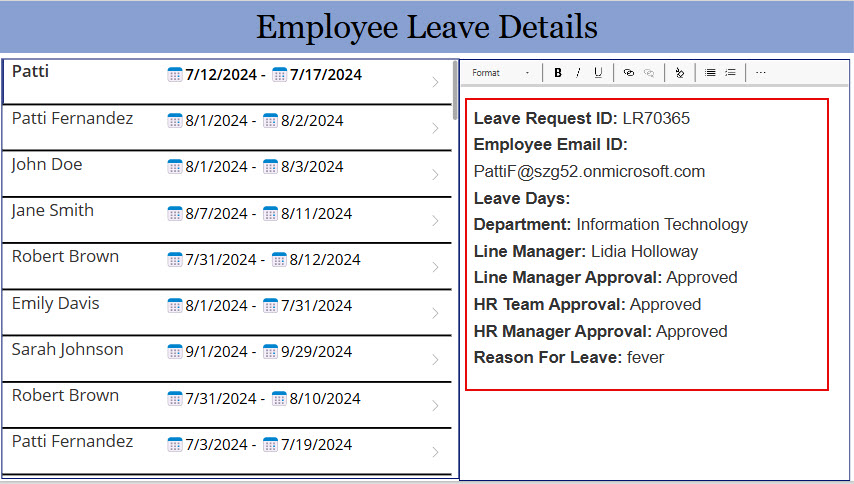
The example below shows the Power Apps gallery selected item displayed on the Rich Text Editor control. I have customized the text in that control, such as providing a font size and making it bold.
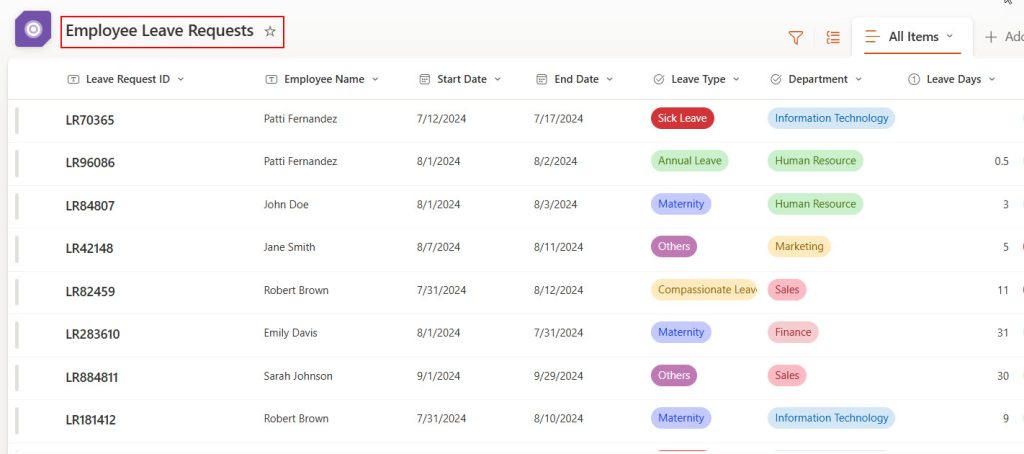
Here is the SharePoint list named Employee Leave Requests for the above Power Apps gallery.
To display gallery-selected item details on Power Apps rich text editor control. Follow the steps below!
1. In Power Apps, add a gallery control and provide the SharePoint list name in its Items property:
'Employee Leave Requests'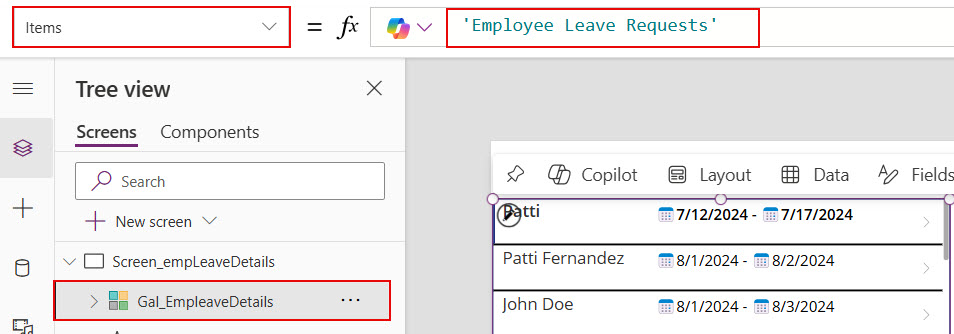
2. Add Power Apps Rich text editor control from the + Insert tab. Then, provide the formula below for its Default property.
"Leave Request ID: "& Gal_EmpleaveDetails.Selected.Title & "</br>" &
"Employee Email ID: "& Gal_EmpleaveDetails.Selected.'Employee Email ID' & "</br>"&
"Leave Days: "& Gal_EmpleaveDetails.Selected.'Leave Days' & "</br>" &
"Department: "&Gal_EmpleaveDetails.Selected.Department.Value & "</br>"&
"Line Manager: "& Gal_EmpleaveDetails.Selected.'Line Manager'.DisplayName &"</br>" &
"Line Manager Approval: "& Gal_EmpleaveDetails.Selected.'Line Manager Approval'.Value &"</br>"&
"HR Team Approval: "&Gal_EmpleaveDetails.Selected.'HR Team Approval'.Value & "</br>"&
"HR Manager Approval: "&Gal_EmpleaveDetails.Selected.'HR Manager Approval'.Value& "</br>"&
"Reason For Leave: "&Gal_EmpleaveDetails.Selected.'Reason For Leave'
Here, Gal_EmpleaveDetails is the gallery name. This formula will display the gallery-selected items in the rich text editor control.

3. We can customize the text present in rich text editor control only in preview mode. Look at the example below to see how we can customize the text, such as changing font size, font color, font styles, etc.
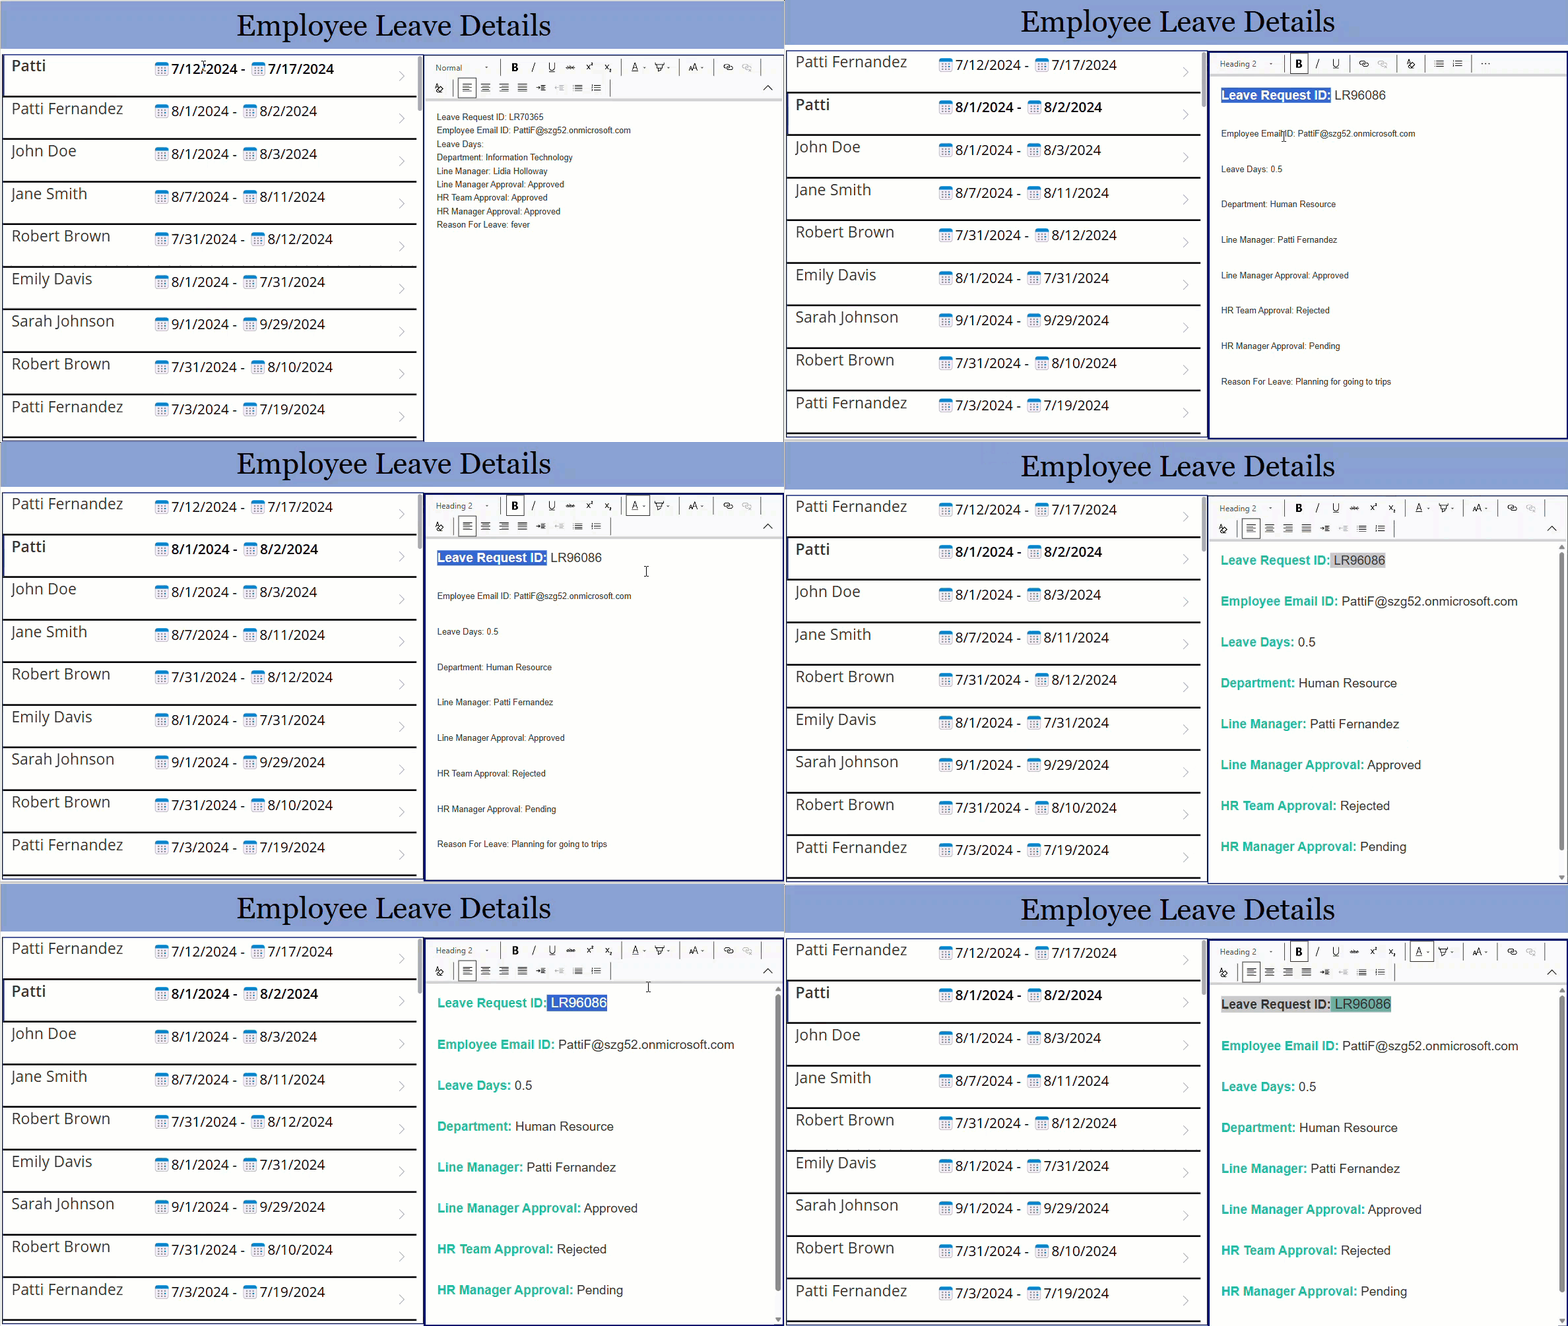
4. Instead of this, provide the formula below in the Default property of the rich text editor control.
"<strong>Leave Request ID:</strong> " & Gal_EmpLeaveDetails.Selected.Title & "</br>" &
"<strong>Employee Email ID:</strong> " & Gal_EmpLeaveDetails.Selected.'Employee Email ID' & "</br>" &
"<strong>Leave Days:</strong> " & Gal_EmpLeaveDetails.Selected.'Leave Days' & "</br>" &
"<strong>Department:</strong> " & Gal_EmpLeaveDetails.Selected.Department.Value & "</br>" &
"<strong>Line Manager:</strong> " & Gal_EmpLeaveDetails.Selected.'Line Manager'.DisplayName & "</br>" &
"<strong>Line Manager Approval:</strong> " & Gal_EmpLeaveDetails.Selected.'Line Manager Approval'.Value & "</br>" &
"<strong>HR Team Approval:</strong> " & Gal_EmpLeaveDetails.Selected.'HR Team Approval'.Value & "</br>" &
"<strong>HR Manager Approval:</strong> " & Gal_EmpLeaveDetails.Selected.'HR Manager Approval'.Value & "</br>" &
"<strong>Reason For Leave:</strong> " & Gal_EmpLeaveDetails.Selected.'Reason For Leave'
This formula will return output like the image below. We also change the font style by using HTML tags.
5. Follow the example below to format the text in the numbered or bullet list format and remove the applied customizations.
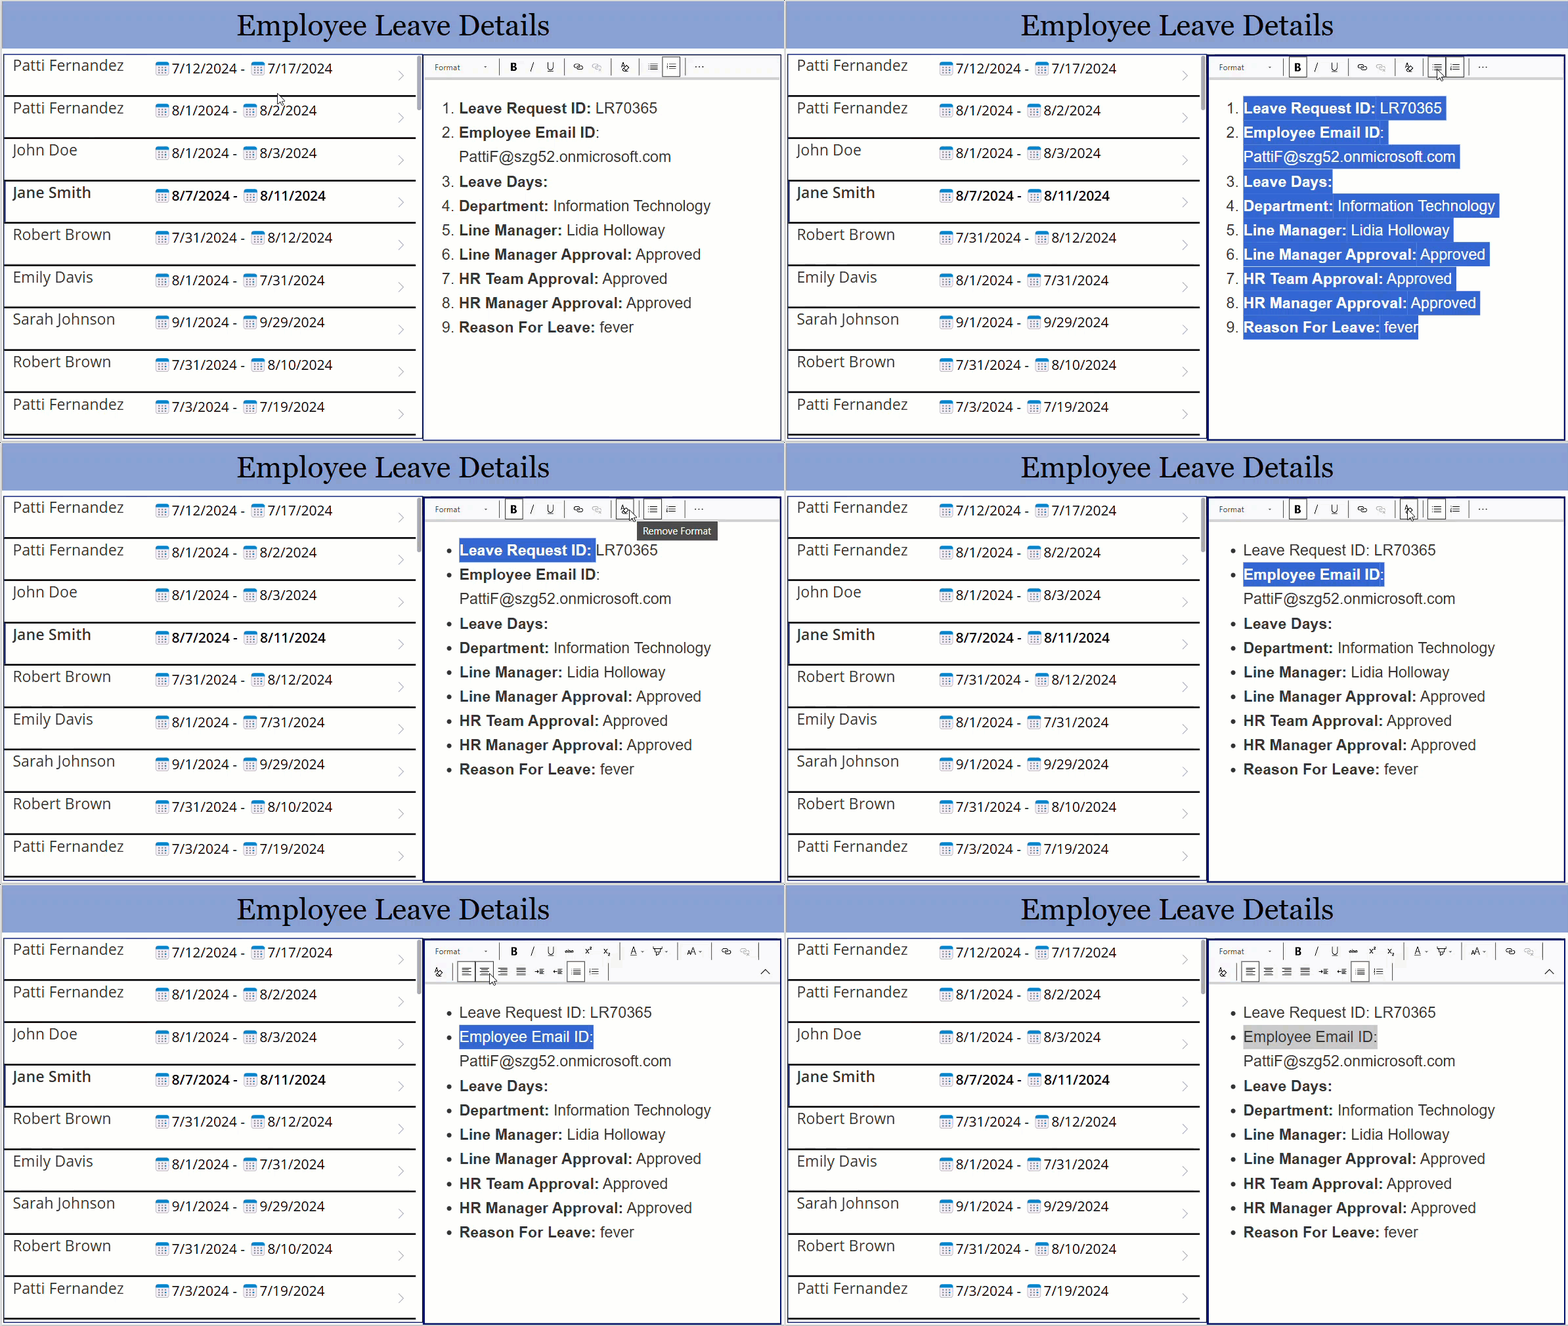
This way, we can use the Power Apps rich text editor control. I hope you found this helpful article. Here, I have explained the use of Power Apps rich text editor control and how to use this control to display the gallery selected item’s full details over this control.
You can follow this article when you want to customize the text in Power Apps.
Also, you may like:
- How to filter Power Apps gallery control
- Replace Position of First Name and Last Name in Power Apps
- Increment number in the Power Apps gallery
- Set default selected item Power Apps gallery
- Power App’s modern text input control
I am Bijay a Microsoft MVP (10 times – My MVP Profile) in SharePoint and have more than 17 years of expertise in SharePoint Online Office 365, SharePoint subscription edition, and SharePoint 2019/2016/2013. Currently working in my own venture TSInfo Technologies a SharePoint development, consulting, and training company. I also run the popular SharePoint website EnjoySharePoint.com