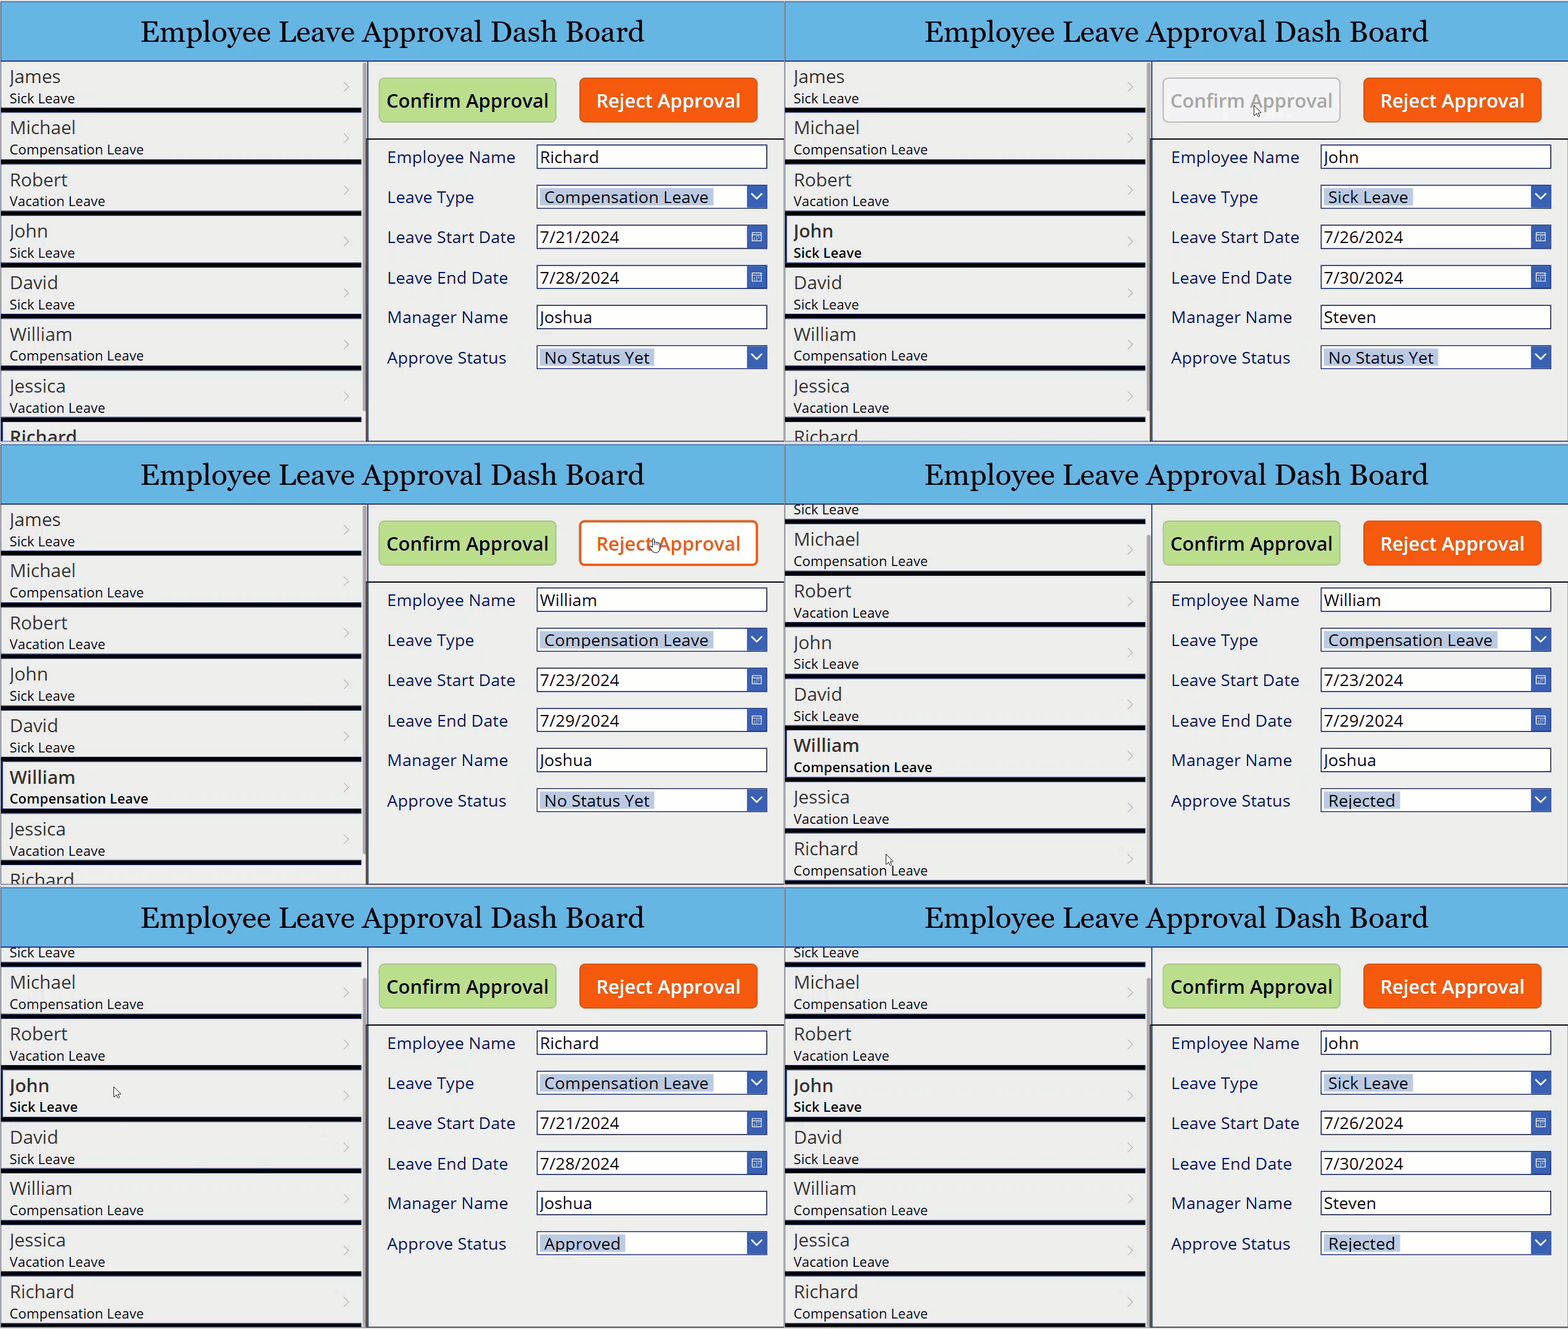
A few weeks ago, I created an app in Power Apps for approving employee leave requests. Here, I needed to set the approval status combo box value to Approved if I clicked the Approve button and reject if I clicked the Reject button.
In this article, I will explain how to set combo box value on button click in Power Apps with a simple scenario.
Set Combo Box Value On Button Click in Power Apps
In the example below, I have two button controls: To confirm and reject approvals. When I click the Confirm Approval button, the Approval Status combo box value is set to Approve, and when I click the Reject Approval button, the Approval Status combo box value is set to Rejected.

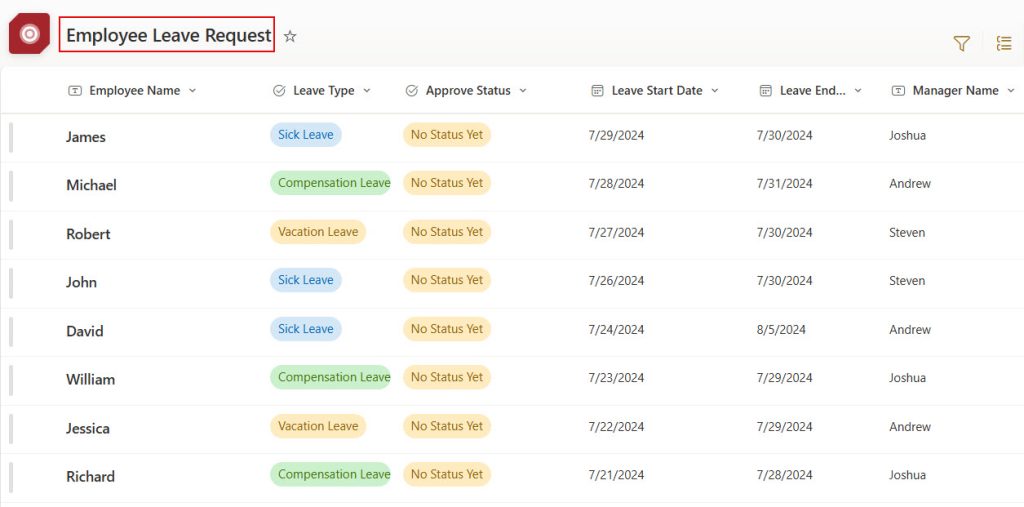
Here is the SharePoint list that stores the employee leave details.

This SharePoint list has the following columns.
| Column Name | Data Type |
|---|---|
| Employee Name | Title(Single line of text) |
| Leave Type | Choice(Sick Leave, Vacation Leave, Compensation Leave) |
| Approve Status | Choice(No Status Yet, Approved, Rejected) |
| Leave Start Date | Date and time |
| Leave End Date | Date and time |
| Manager Name | Single line of text |
1. Add the following controls to the Power Apps screen to achieve the above example.
- Vertical Gallery control
- Edit Form control
- Two Button controls for approve and reject.
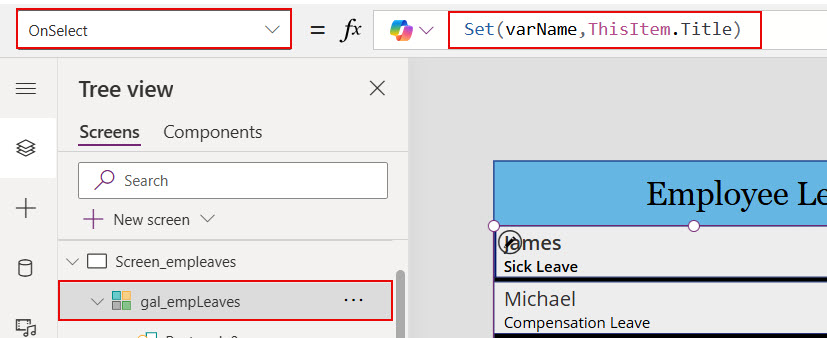
2. Connect the gallery with the SharePoint list by passing the list name in its Items property. Provide the formula below in the gallery control’s OnSelect property.
Items: 'Employee Leave Request'Here, ‘Employee Leave Request’ is the SharePoint list name.
OnSelect: Set(varName,ThisItem.Title)Here, varName will store the selected record employee name. The Title has employee names in the SharePoint list

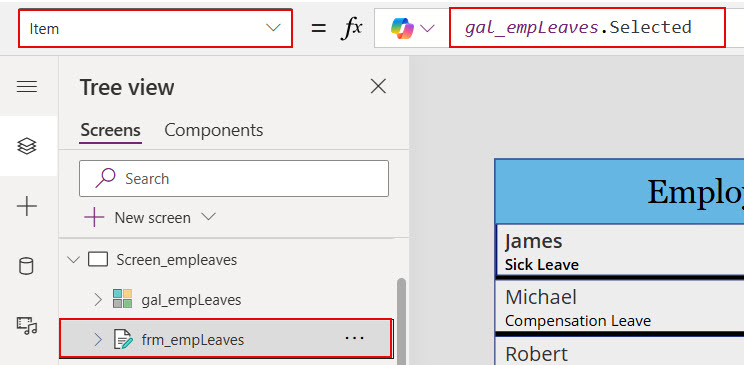
3. Provide the formula below in the Item property of the form control.
Item: gal_empLeaves.SelectedHere, gal_empLeaves is the gallery name. The above formula displays the selected item in the gallery in the form control.

4. Then, provide the formula below in the confirm approve button OnSelect property.
OnSelect: Patch('Employee Leave Request',LookUp('Employee Leave Request',Title=varName),{'Approve Status':{Value:"Approved"}})Here,
- Employee Leave Request = SharePoint list name.
- Title = which contains the employee’s name.
- Approve Status = Choice column.
- varName = Variable that we created in the gallery control OnSelect property.
This Patch function will update the approval status value to approve when we click this button control.

5. Provide the formula below in the OnSelect property of the Reject Approval button.
OnSelect: Patch('Employee Leave Request',LookUp('Employee Leave Request',Title=varName),{'Approve Status':{Value:"Rejected"}})This formula updates the approval status combo box value to Rejected when we click this button control.

Now, save the changes and publish the app. While previewing, click the confirm approve button. This will update the combo box value in the Power Apps form, and the same will be true for the reject approval button.
In this way, we can set the Power Apps combo box value on button click.
I hope you understand how to set a Power Apps combo box value based on a button click. Here, I have explained clearly with an example. If you’re setting a Power Apps combo box value based on a button click, you can try this approach according to your requirements.
Also, you may like:
- Reset Power Apps Combo Box Control
- Power Apps modern combo box control
- How to sort Power Apps combo box control
- How to create hyperlink button in Power Apps
- Power Apps modern information button control
- Calculate Business Days Excluding Weekends Holidays in Power Apps
I am Bijay a Microsoft MVP (10 times – My MVP Profile) in SharePoint and have more than 17 years of expertise in SharePoint Online Office 365, SharePoint subscription edition, and SharePoint 2019/2016/2013. Currently working in my own venture TSInfo Technologies a SharePoint development, consulting, and training company. I also run the popular SharePoint website EnjoySharePoint.com