Last week, I created a Leave Management application. For this app, I was required to generate PDFs of employee leave requests only if the final approvers approved them. This way, employees can view their approved leave requests and download them into their system.
In this article, I will explain how to generate and download PDFs from Power Apps without using any premium connector.
Create and Download PDFs in Power Apps
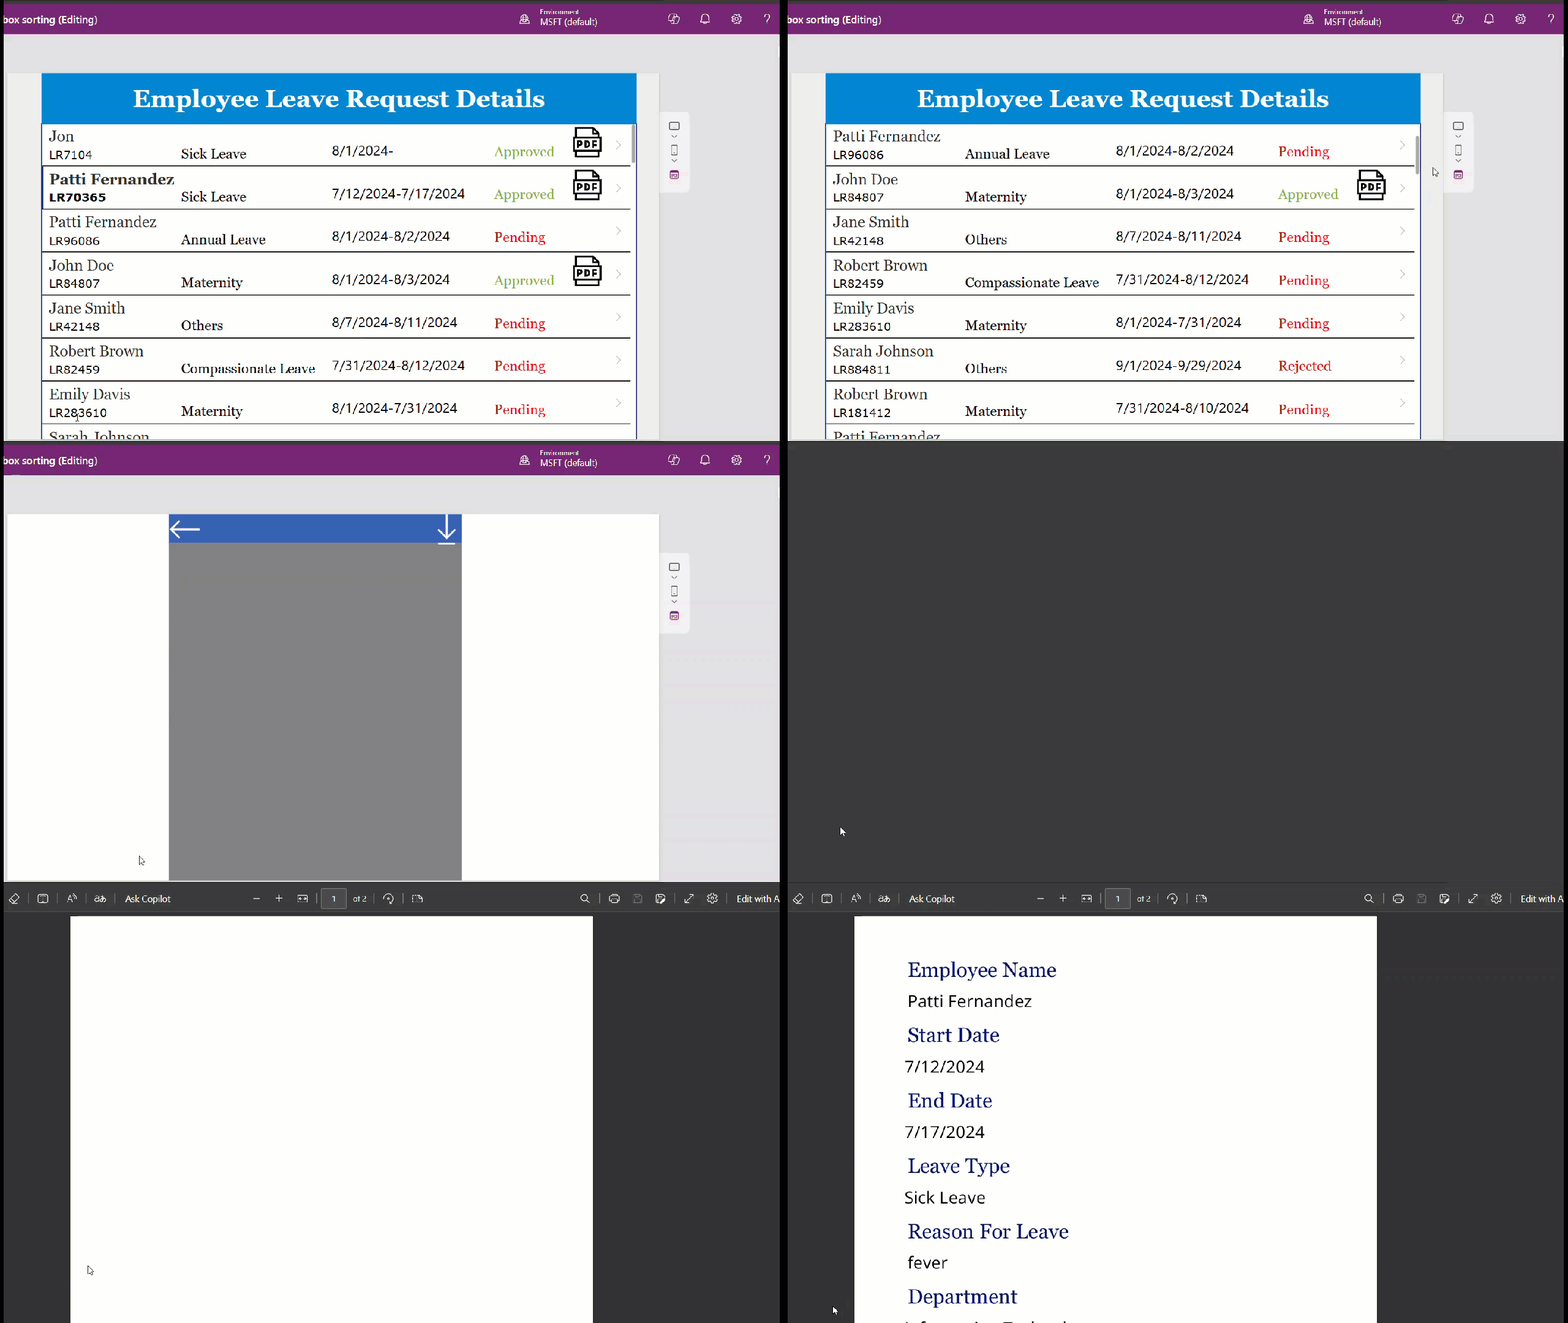
In the example below, there’s a gallery showing all employee leave requests. The PDF icon appears only for approved requests. Clicking the PDF icon opens a form with the full details of the request.
Clicking the PDF icon again on this form generates a PDF of the request details, and the download icon downloads the generated PDF file.
To achieve this, follow the below steps!
Display PDF Icon in Power Apps Gallery Only For Approved Leave Requests
Follow the steps below to make the PDF icon visible only in the Power Apps gallery for approved leave requests.
1. In Power Apps, click on the gallery and add the PDF icon from the +Insert tab. Then, add the formula below to its visible property.
If(ThisItem.'HR Manager Approval'.Value="Approved",true,false)Here, HR Manager Approval is the choice column in the SharePoint list, which has values like,
- Approved
- Rejected
- Pending
This formula makes the pdf icon visible only for the leave requests that the HR Manager approves.

2. Provide the formula below in the OnSelect property of the PDF icon. When we click on this, it will navigate to another screen.
Navigate(Screen_ViewLeaveDetails)Here, Screen_ViewLeaveDetails is the screen name where the gallery-selected items’ full details are displayed.
Now, let’s see how to display the full details of the selected leave request in the Power Apps form control.
3. Add Container into that add Power Apps View Form control and connect it with the SharePoint list where all employee leave requests are stored. Then, provide the formula below in the Item property of the form.
Gal_EmpLeaveDetails.Selected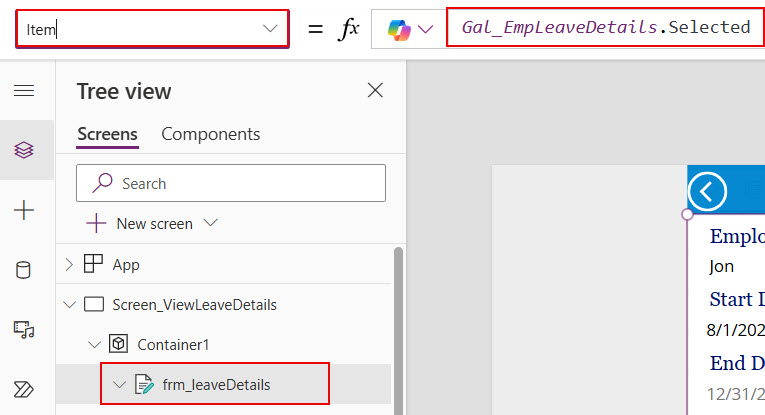
Now, save the changes and preview the app; a gallery of selected items will be displayed in the Power Apps form control.
Generate PDFs From Power Apps Form
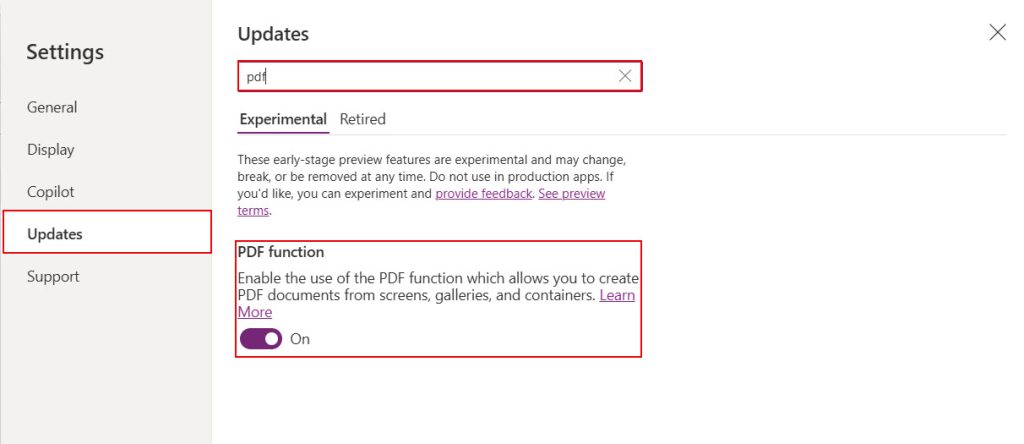
To generate and download the PDF from the Power Apps, first, we need to enable the PDF function in the app settings.
1. To enable this -> Open the Power Apps application -> In the top navigation, click on ellipses (…)-> Settings.

2. In Settings -> Open Updates -> Search for pdf in the search box -> Enable the PDF function.
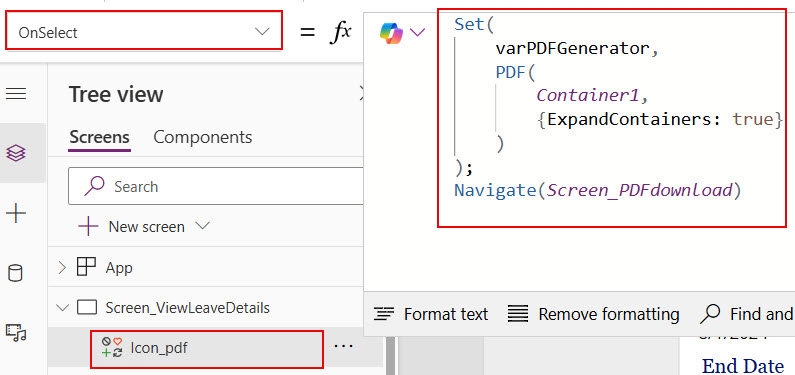
3. Add a PDF document icon on the screen where the view form control is displaying the gallery-selected item. Then, add the below formula in the OnSelect property of the PDF icon.
Set(
    varPDFGenerator,
    PDF(
        Container1,
        {ExpandContainers: true}
    )
);
Navigate(Screen_PDFdownload)
Before understanding the above code, let’s examine the syntax of the PDF function, what parameters it will take, and so on.
PDF(Screen or control name [,{Size, DPI, Margin, Orientation, ExpandContainers}])- Screen or control name: This is a Required parameter. We need to provide the screen name or control name that we want to generate as a PDF. Supported controls are Vertical Gallery, Vertical Layout Container, Horizontal Layout Container, Container, and Screen.
- Size: This is an optional parameter that provides the dimensions of PDF files, such as A3 and A4.
- DPI: Optional parameter used for providing scaling and resolution. The value must be greater than 0.
- Orientation: Optional parameter used for generating pdf in horizontal (landscape) or vertical (portrait). The default value is vertical.
- ExpandContainers: It takes boolean values. By passing the value as true, we can use it to display data within the container or screen that is not visible on the allocated size.
So, in our code, the PDF function will generate the form containing data within Container1 as a PDF and store it in varPDFGenerator. After storing the data, it will navigate to another screen where we can view and download the PDF.
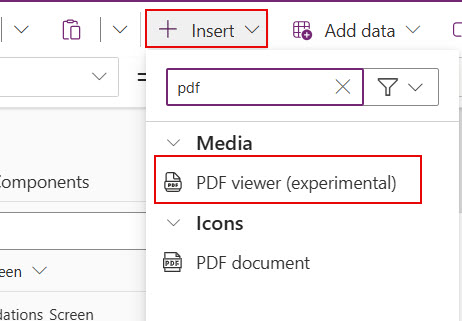
4. To view the generated PDF on the new screen, add a PDF viewer(experimental) control.
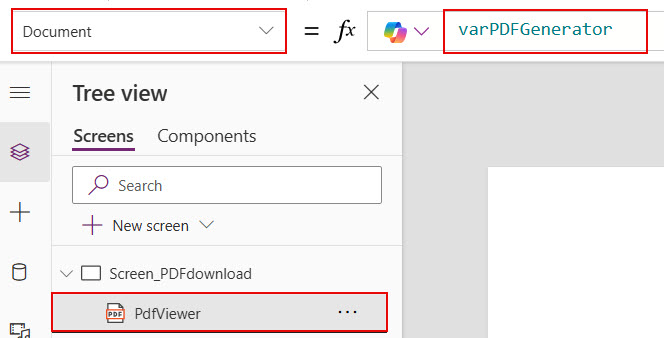
5. Provide the below variable name in the Document property of the PDF viewer control.
varPDFGeneratorThis variable contains the generated pdf in the form of Blob data type.
Now, save the changes and preview the app. You can see the gallery selected leave request full details in the form of pdf in this pdf viewer control.
Download PDF Directly From Power Apps
Let’s see how to download the generated PDF file in Power Apps. To do this, we need to create a flow. Follow the steps below to create a Power Automate flow within Power Apps.
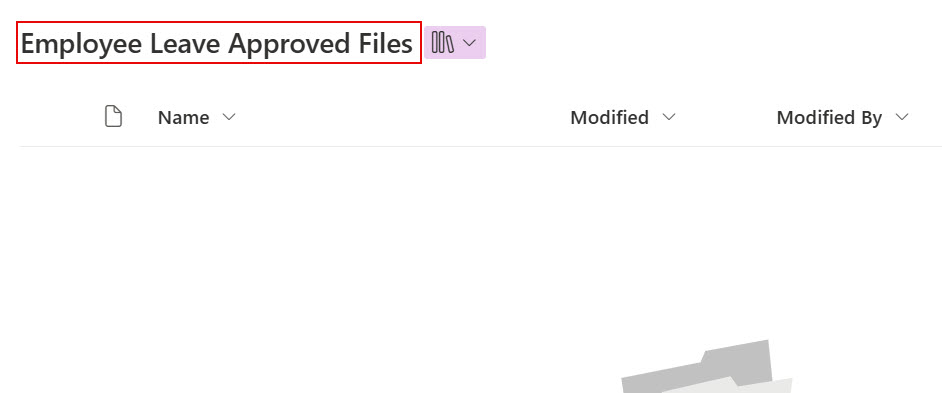
1. First, we need a SharePoint document library to store the downloaded files. Here, I created one document library named Employee Leave Approved Files.
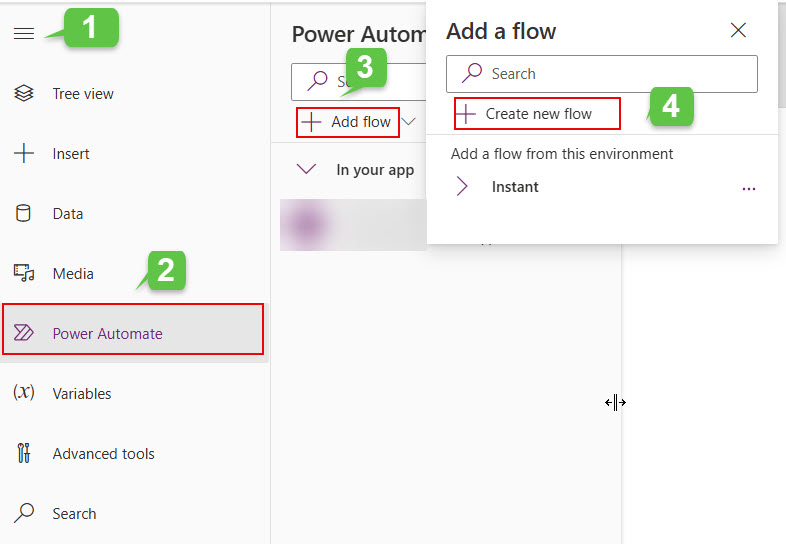
2. In the Power Apps left navigation, select Power Automate -> Click on +Add flow -> Click on +Create new flow.
3. The Power Apps (V2) trigger will be present within the flow by default. Add input as a File for this trigger, as shown in the image below.
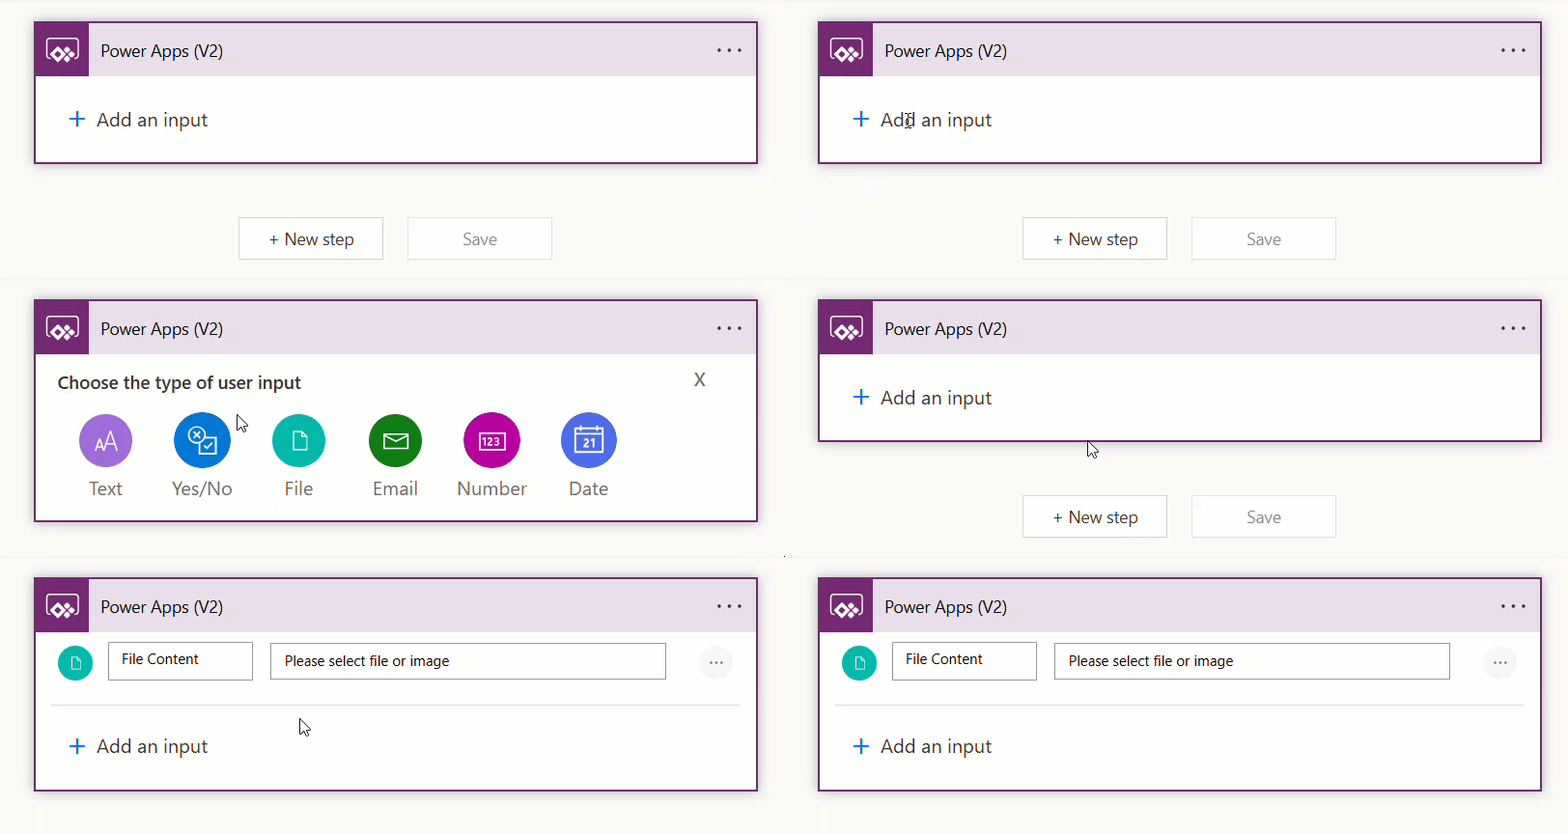
4. Add a SharePoint Create file action and provide the following values for the parameters of this action.
- Site Address: Provide the SharePoint site address where the SharePoint document library that we created at starting is present.
- Folder Path: Click on the folder icon present on the right side. It will display all the presented SharePoint document libraries within the site.
- File Name: Provide the triggerBody()?[‘file’]?[‘name’] in the Expression from Add Dynamic content.
- File Content: From dynamic content, add Power Apps (V2)’s input here.
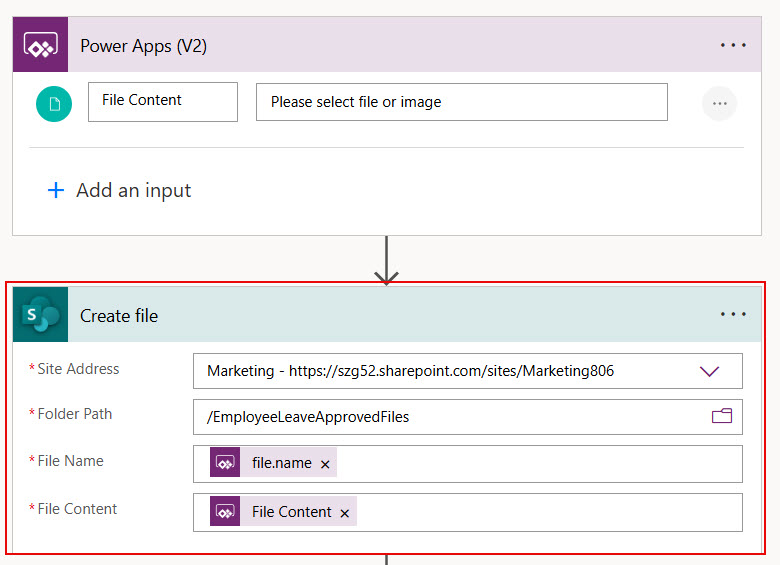
5. After this, add Compose, Respond to a Power Apps or flow actions like in the image below.
- Compose: Provide the SharePoint site URL, and at last, add Path from create file action.
- Respond to a Power Apps or flow: Add the outputs of the compose action.
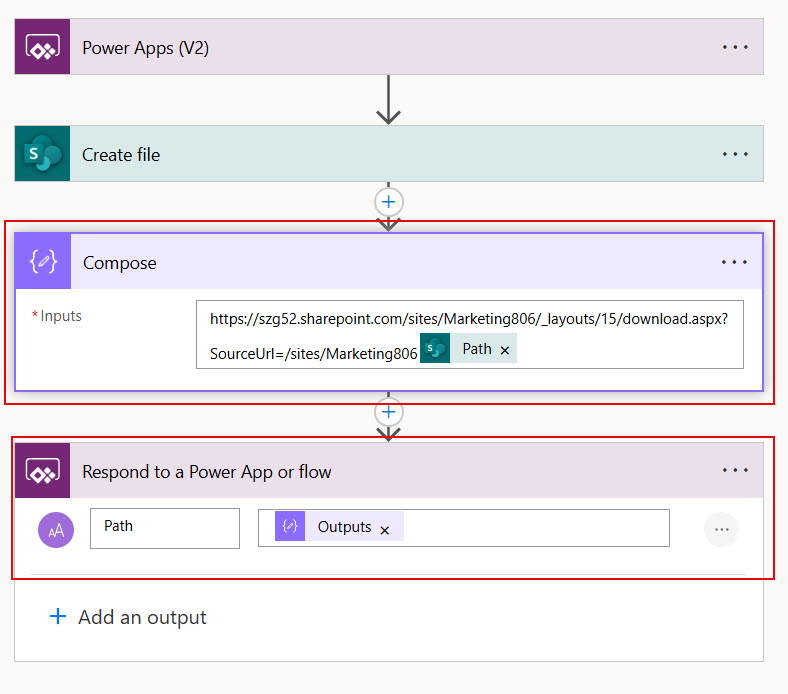
Now save the flow and rename it according to your requirements. The flow will then be present within the Power Apps under the Power Automate section.
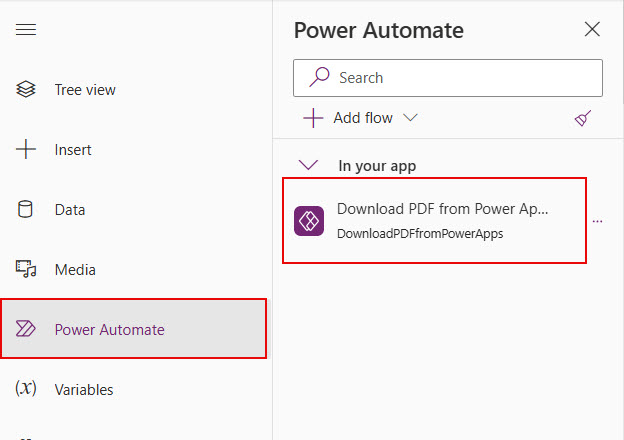
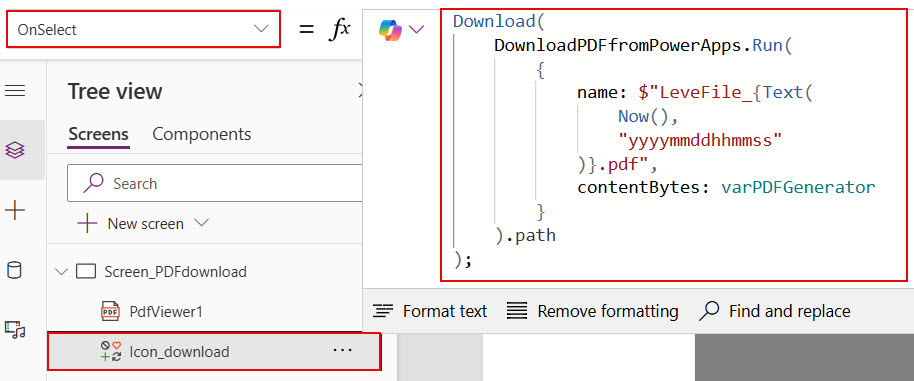
6. In Power Apps, add a Download icon to the screen where we display the generated PDF. Then, provide the formula below for the icon’s OnSelect property.
Download(
    DownloadPDFfromPowerApps.Run(
        {
            name: $"LeveFile_{Text(
                Now(),
                "yyyymmddhhmmss"
            )}.pdf",
            contentBytes: varPDFGenerator
        }
    ).path
);
Here,
- DownloadPDFfromPowerApps: Power Automate flow name.
- name: This is the parameter that I took in the File Name of the create file action. So, we’re providing file names dynamically.
- The file name will be “LeaveFile_202408121180721.” Along with the leave file, we’re adding year, month, day, hour, minute, and second.
- contentBytes: We need to provide input for the Power Apps trigger, which contains the pdf file. So, we need to pass the varPDFGenerator to this parameter.
- The Download () function in Power Apps allows you to download a file. To use this function, we need to pass the file’s address.
Save the changes and preview the app once. The generated PDF file can be downloaded from Power Apps.
I hope you understand how to download PDFs directly from Power Apps. I also explained how to generate PDF files in Power Apps.
You can refer to this article while you’re also trying to create and download PDF files directly from Power Apps.
Also, you may like:
- delete all files in SharePoint document library using Power Automate
- Power Apps functions tutorial
- Customize Power Apps gallery layout
- display SharePoint list items in Power Apps gallery
- Power Apps Left Navigation Component
I am Bijay a Microsoft MVP (10 times – My MVP Profile) in SharePoint and have more than 17 years of expertise in SharePoint Online Office 365, SharePoint subscription edition, and SharePoint 2019/2016/2013. Currently working in my own venture TSInfo Technologies a SharePoint development, consulting, and training company. I also run the popular SharePoint website EnjoySharePoint.com