Recently, I was working on building a Power Apps application that takes data sources as a SharePoint list. To avoid creating SharePoint lists and manually adding different types of columns, I wrote a PowerShell script.
While adding different types of columns to the SharePoint lists, I was required to enable and disable some of the properties of the columns. Such as allowing multiple selections for a person or group columns, turning off the comma separator for the number column, making the title column a required column, etc.
In this article, I will explain 10 different examples of updating the properties of fields in the SharePoint list using PnP PowerShell.
Update SharePoint List Field Properties Using PnP PowerShell
We need to use the Set-PnPField cmdlet of PnP PowerShell to update the SharePoint list field properties, such as providing field titles and descriptions, setting required fields, etc.
Now, we’ll update the SharePoint list title field properties through PnP PowerShell.
- Rename the title field
- Set title filed as required in SharePoint list
Rename SharePoint List Title Field Using PnP PowerShell
Here, I have a SharePoint list named Employee Leave Requests, which has the Title column.

Look at the image below after renaming the Title column to Leave Type using PnP PowerShell.

To achieve this, run the below PnP PowerShell cmd on the Visual Studio Code editor. You can also use other editors to run PowerShell scripts.
# Connect to SharePoint site
Connect-PnPOnline -Url "https://<tenant name >. sharepoint .com/ sites /Retail Management Site" -Interactive

#List name and new title name.
$ListName = "Employee Leave Requests"
$NewTitleName = "Leave Title"

Set-PnPField -List $ListName -Identity "Title" -Values @{Title=$NewTitleName}
In the above code, provide your credentials and SharePoint site URL, the name of your SharePoint list, and the new title name.
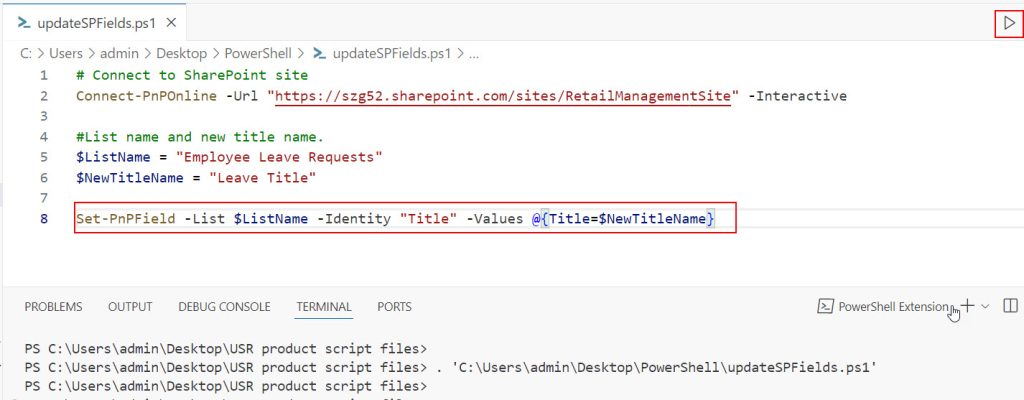
The above image shows the file running successfully. You can now check the SharePoint list. The title field name will be changed.
Check out SharePoint List Items CRUD Operations Using PnP PowerShell
Set Title Field as Required in SharePoint List Using PnP PowerShell
Look at the image below. The Title field is not a required field by default in the SharePoint list.
Note: Here, the Title column is renamed to Leave Title.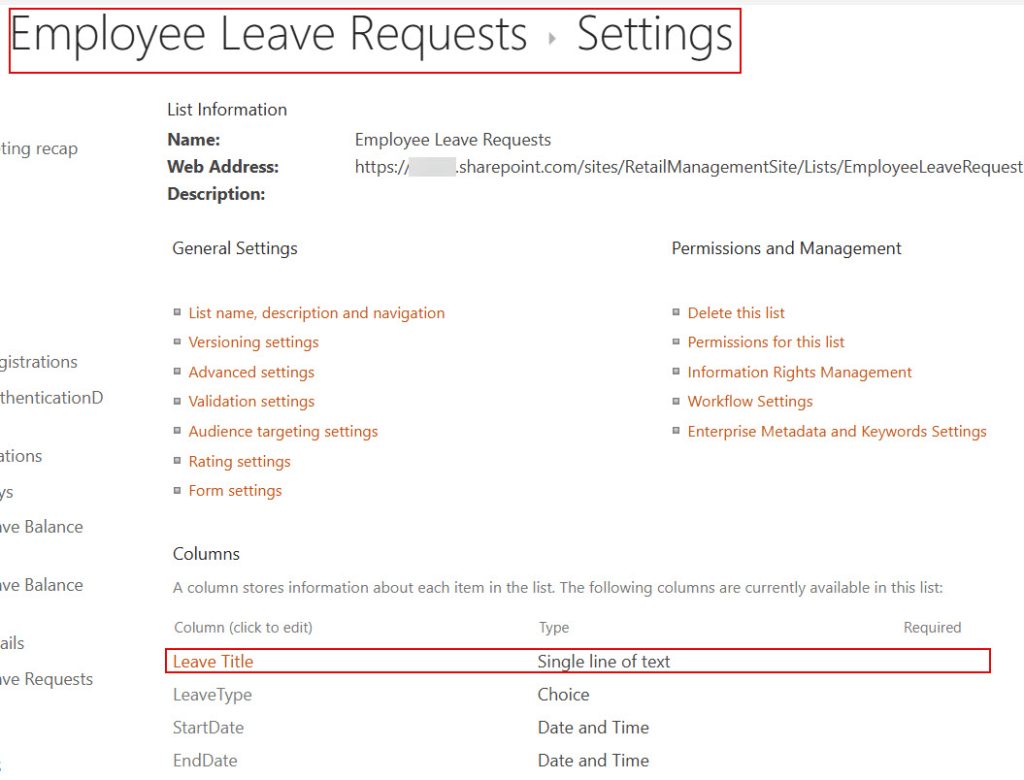
Here is the output of the PnP PowerShell cmd; it makes the title field a required field in the SharePoint list.
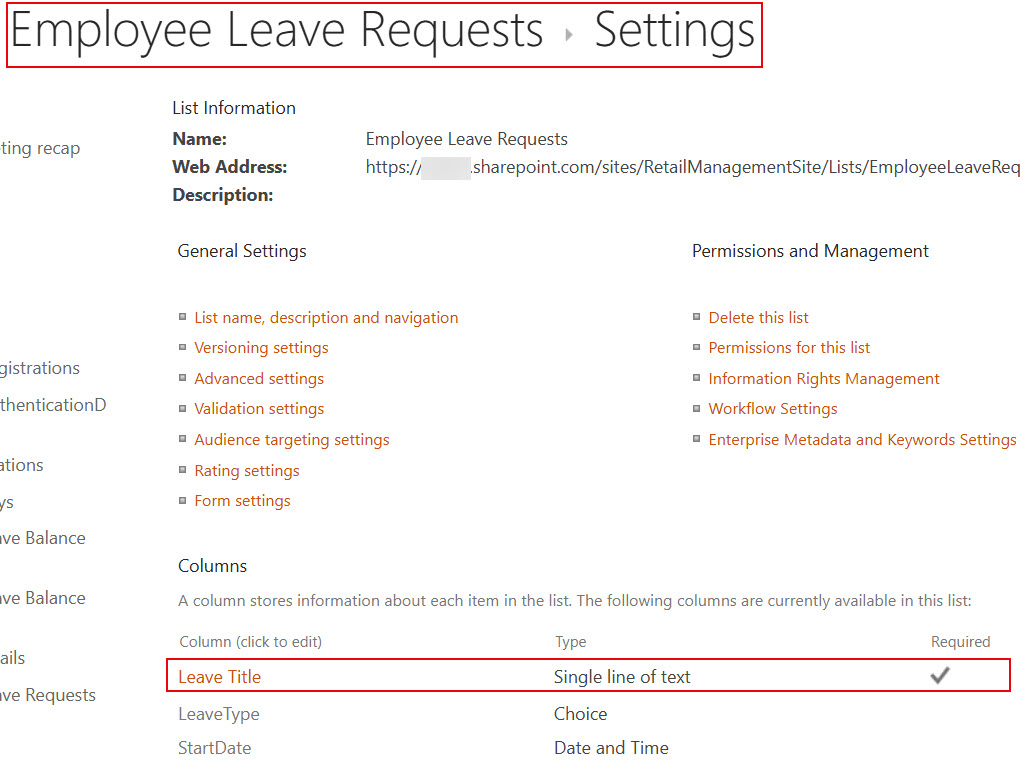
To do this, run the below PnP PowerShell script in VSCode.
# Connect to SharePoint site
Connect-PnPOnline -Url "https://<tenant name>.sharepoint.com/sites/RetailManagement Site" -Interactive

#List name and new title name.
$ListName = "Employee Leave Requests"

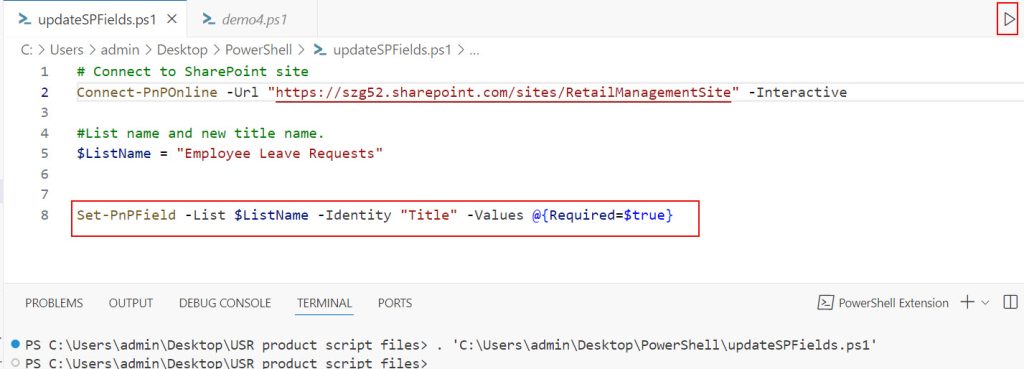
Set-PnPField -List $ListName -Identity "Title" -Values @{Required=$true}
You can also try this PowerShell script to make other fields required in the SharePoint list. Provide the internal name of the field for the Identity parameter in Set-PnPField.
Now, we’ll work with the SharePoint list Choice field. Such as,
- Set values to the SharePoint list choice field.
- Set the default value for the SharePoint list choice field.
Set Values to SharePoint List Choice Field Using PnP PowerShell
In the image below, you can see the choice field [Status] has no values by default. Now, we’ll see how to set value to this SharePoint list choice field using PnP PowerShell.
Note: We can add a choice field along with values in SharePoint list using the formula below.

Add-PnPField -Type Choice -Choices "PnP","Parker","Sharing Is Caring" -DisplayName "My Test Column" -InternalName "MyTestCol".
But the approach below will be useful when we’re trying to add multiple fields to the SharePoint list at a time. Because of that time, we are taking a single Add-PnPField inside the foreach loop for adding different fields, which will affect taking a choice parameter in the cmdlet.
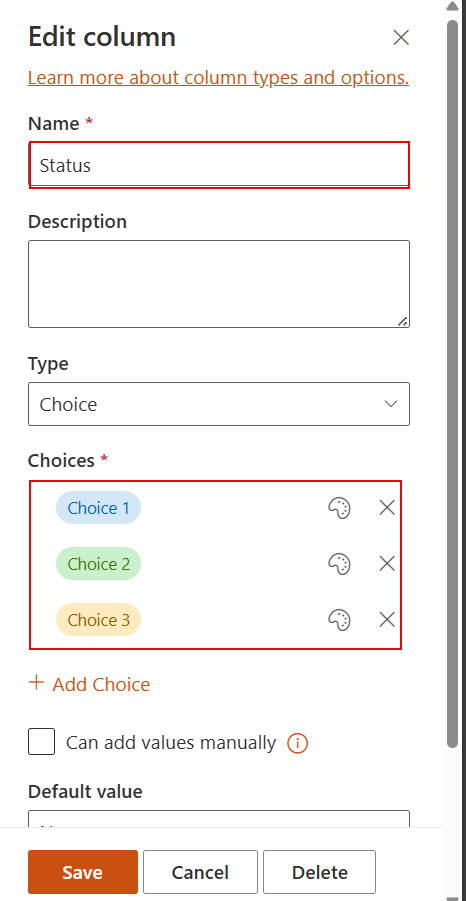
Here is the output image of the PnP Powershell script that sets values to the SharePoint list choice field.
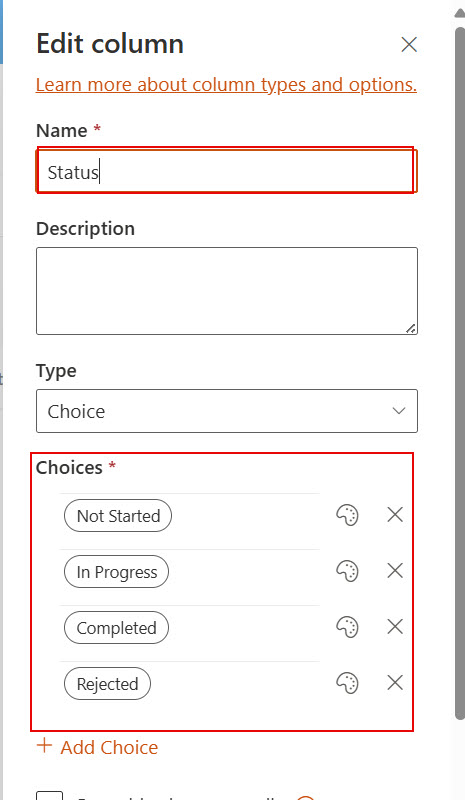
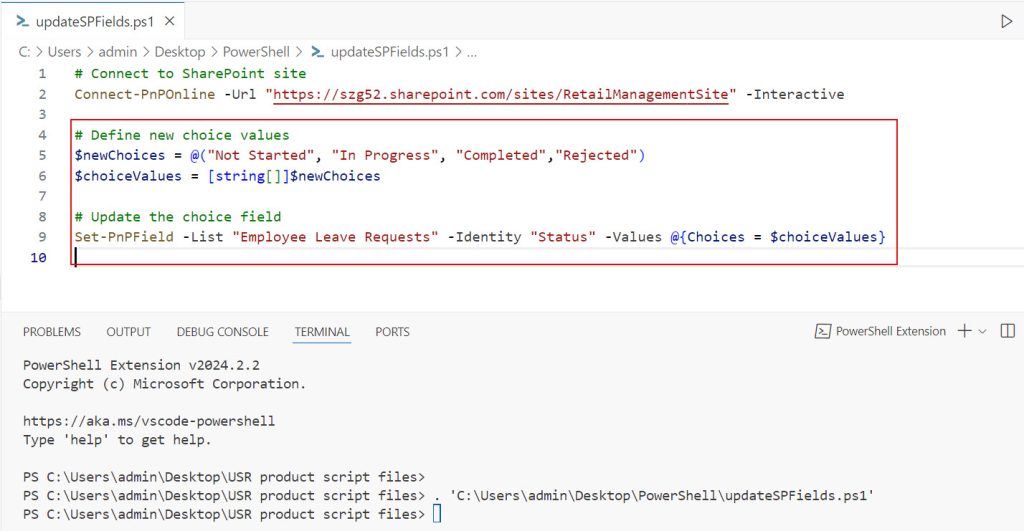
To add values to the SharePoint list choice field, run the below script in VScode.
# Connect to SharePoint site
Connect-PnPOnline -Url "https://<tenant name>.sharepoint.com/sites/RetailManagement Site" -Interactive

# Define new choice values
$newChoices = @("Not Started", "In Progress", "Completed","Rejected")
$choiceValues = [string[]]$newChoices

# Update the choice field
Set-PnPField -List "Employee Leave Requests" -Identity "Status" -Values @{Choices = $choiceValues}
In the Set-PnPField cmd, provide your SharePoint list name for the – list parameter and the choice field internal name for the -Identity parameter.
The newChoices variable in the PowerShell script contains the SharePoint list choice values, and the choiceValues variable fetches each value as a string.
Set Default Value for SharePoint List Choice Field Using PnP PowerShell
The SharePoint list choice field always defaults to None. However, we might need to update the default value when using this SharePoint list for automation tasks like leave approvals, etc. Let’s see how to set the default value using PnP PowerShell.
The image below shows that the choice field has the default value of None.
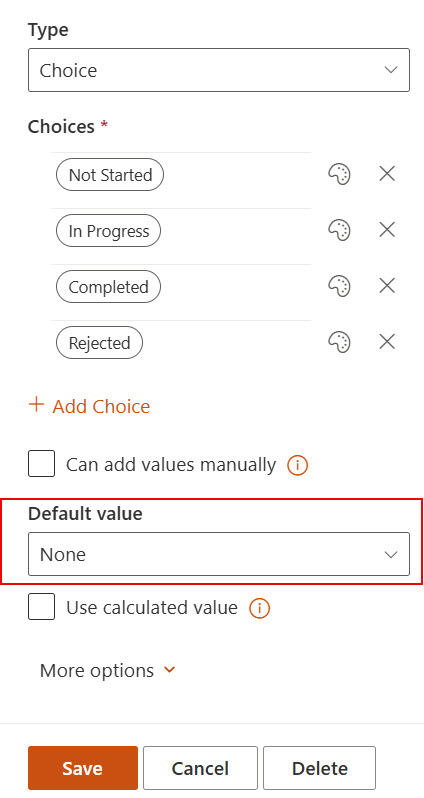
After running the PnP PowerShell script, the Not Started value is set as the default value for the choice field.
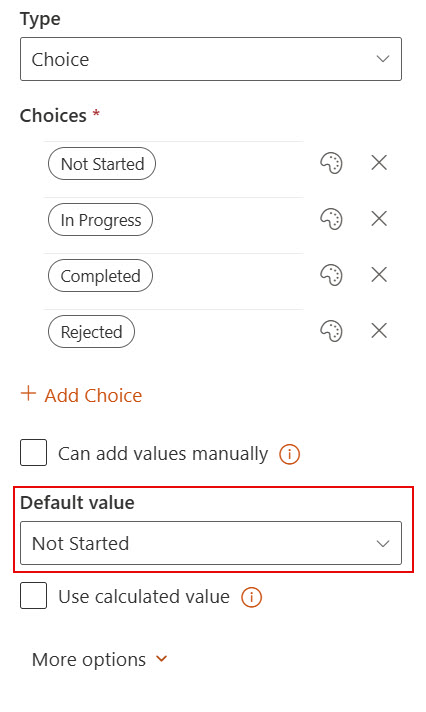
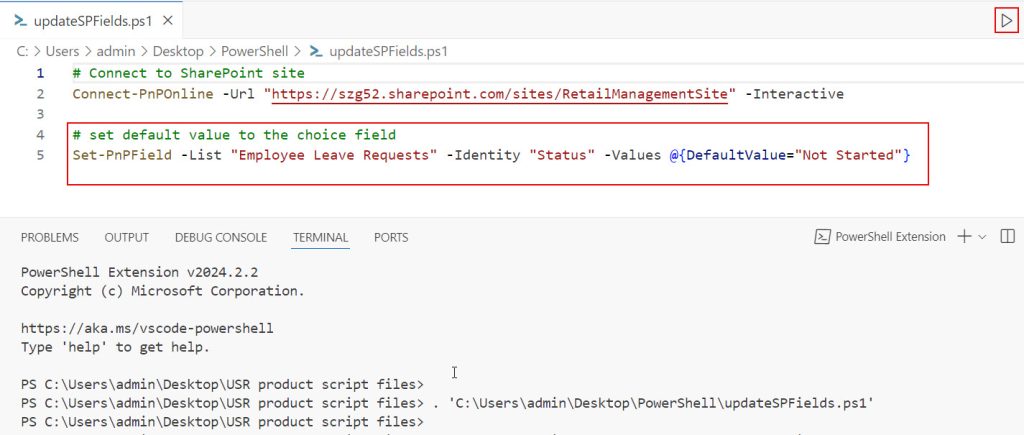
Run the PnP PowerShell script below to set the default values in the SharePoint list choice field.
# Connect to SharePoint site
Connect-PnPOnline -Url "https://<tenant name>.sharepoint.com/sites/RetailManagement Site" -Interactive

# set default value to the choice field
Set-PnPField -List "Employee Leave Requests" -Identity "Status" -Values @{DefaultValue ="Not Started"}
In the above script, provide the choice value that you want to set as default in place of “Not Started.”
Now, we’ll see how to update the Person or Group field in the SharePoint list.
Enable the SharePoint List Person or Group Field Properties Using PnP PowerShell
While working on the leave approval Power Automate flow, I was required to use PnP PowerShell to enable the Allow multiple selections property of the Person field in the SharePoint list.
By default, the allow multiple selections property of the Person or Group field in the SharePoint list is in off mode. We need to enable it if it is required.
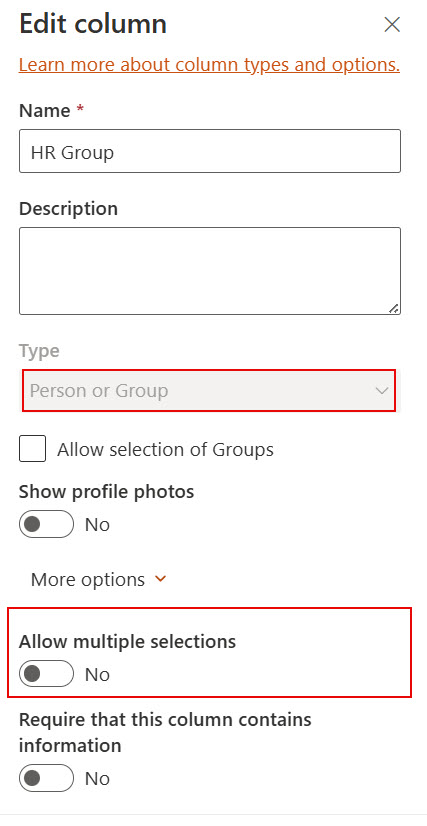
Look at the image below. After running the PnP PowerShell script, the property of the person field is turned on.
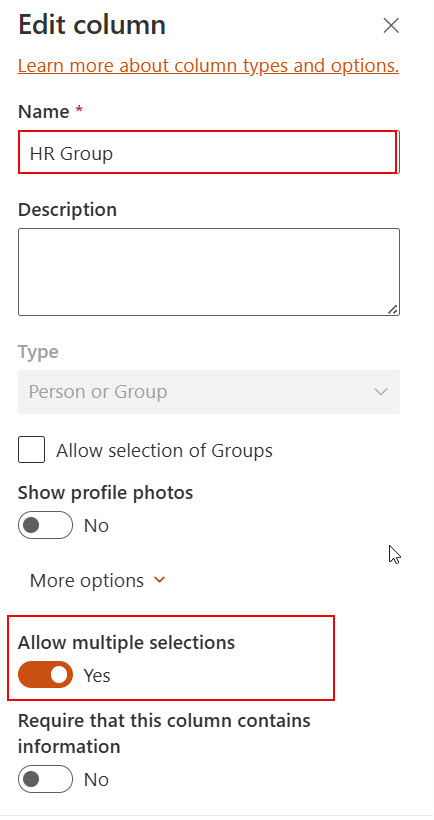
To do this run the below PnP PowerShell script. Then, you check your SharePoint list, and the property will be enabled in the person field.
# Connect to SharePoint site
Connect-PnPOnline -Url "https://<tenant name> .sharepoint.com/ sites/RetailManagement Site" -Interactive

# how to allow multiple selection in person or group column in sharepoint list
Set-PnPField -List "Approver Details" -Identity "HRGroup" -Values @{AllowMultipleValues=$True}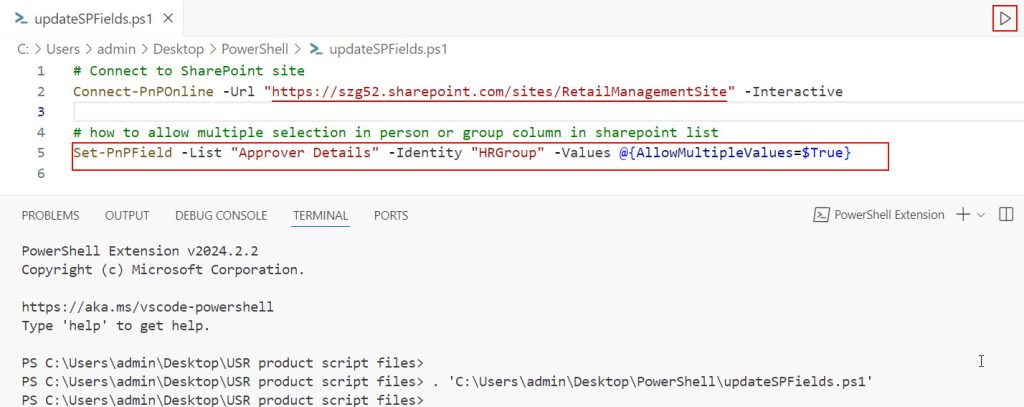
Let’s update the SharePoint list Number filed properties using PnP PowerShell. Such as,
- Remove the comma separator.
- Set zero as the default value.
Format SharePoint List Number Field Without Comma Separator Using PnP PowerShell
When I added the Number field to the SharePoint list using PnP PowerShell, its Use thousands separator property was enabled by default, as shown in the image below. However, according to my leave management application requirements, I do not need this property for the number field.
So, we’ll see how to disable this property through the PnP PowerShell script.
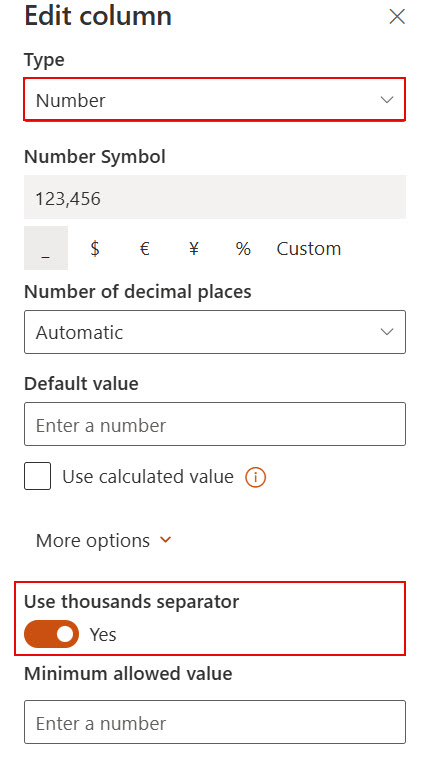
Here is the output image after running the PnP PowerShell script to turn off the use thousands separator property of the number field in the SharePoint list.
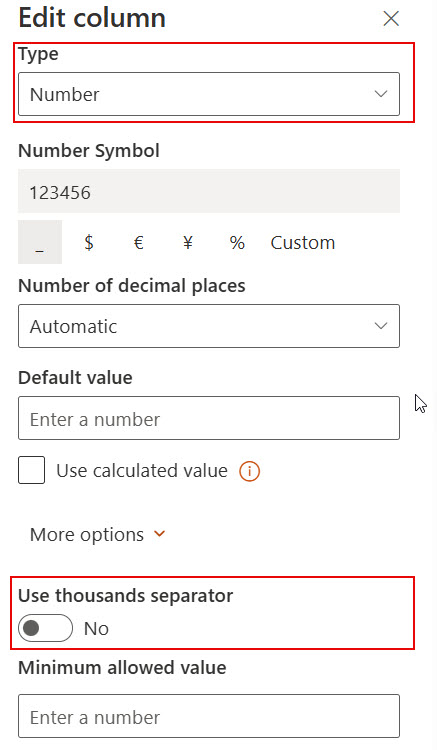
Run the below PnP PowerShell cmdlets to turn off the use thousands separator property of the SharePoint list number field.
# Connect to SharePoint site
Connect-PnPOnline -Url "https://<tenant name>.sharepoint.com/sites/RetailManagement Site" -Interactive

# disable the use thousand separator in number field
Set-PnPField -List "Employee Leave Requests"  -Identity "LeaveDays" -Values @{CommaSeparator=$false}
Provide your SharePoint list name and number filed internal name for List, Identity parameters in Set-PnPField cmd.
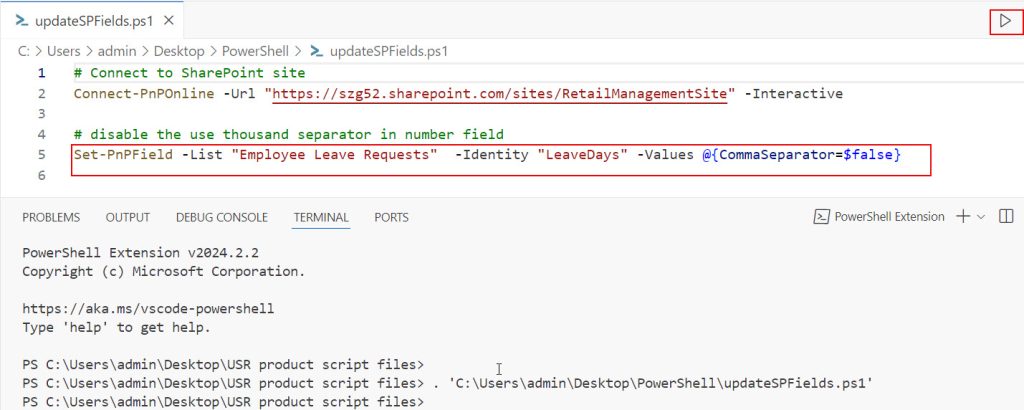
Once the script runs successfully, refresh the SharePoint list and check the number field properties. The use of thousands of separator property will be turned off.
Set SharePoint List Number Field Default Value to Zero Using PnP PowerShell
In my leave management application, I was required to calculate the total leaves, available leaves, and the number of used leaves for each leave type, such as sick leave, maternity leave, etc, using Power Automate flow.
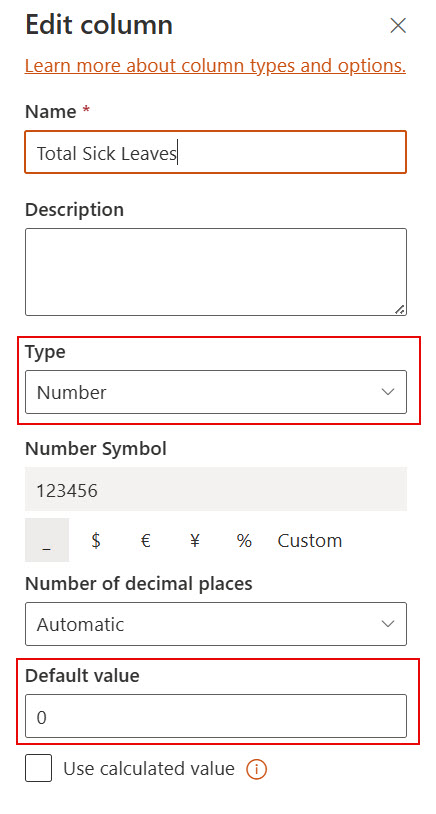
The number field in the SharePoint list must have a default value of zero to calculate the leave days I mentioned above. If not, the flow will consider it to have a null value as a default one. To avoid this, I was required to set the number field default value as zero using PnP PowerShell.
To achieve this, run the script below and then check the SharePoint list number field properties. It will set the default value as zero.
# Connect to SharePoint site
Connect-PnPOnline -Url "https://szg52.sharepoint.com/sites/RetailManagementSite" -Interactive

# set number field default value to 0
Set-PnPField -Identity "TotalSickLeaves" -List "Employee Leave Balance Details" -Values @{DefaultValue='0'}
Now, look at the output image; the number field default value is set to 0 in the SharePoint list.
Let’s see how to update the SharePoint list Multiple lines of text field properties using PnP PowerShell.
Enable “Append changes to existing text” On SharePoint List Multi-Line Text Field Using PnP PowerShell
In the leave request application, after approval or rejection, the approvers need to provide comments on the leave request. Here, multi-level approvals will be present, so each approver’s comments need to be displayed line by line.
To achieve this, we have a property called Append changes to existing text for Multiple lines of text fields in the SharePoint list.
Run the PnP PowerShell script below to enable this property in the SharePoint list.
# Connect to SharePoint site
Connect-PnPOnline -Url "https://<tenant name>.sharepoint.com/sites/RetailManagement Site" -Interactive

# how to allow append changes to existing text in multi line text column in sharepoint list

Set-PnPField -List "Employee Leave Requests" -Identity "Comments" -Values @{AppendOnly=$true}
Now, look at the image below. The append changes to the existing text property of SharePoint list multiple lines of the text field is enabled.
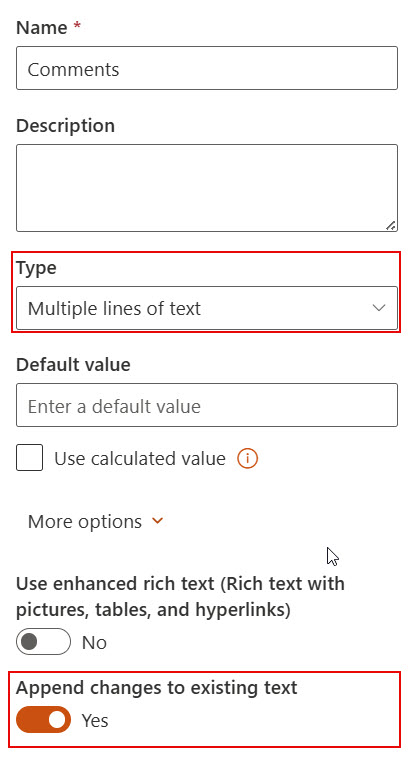
This way we can enable this append changes to existing text property in SharePoint list multiple lines of text field using PnP PowerShell.
Let’s see how to update the SharePoint list Number field properties using PnP PowerShell.
- Disable friendly format property
- Disable the include time property
Disable the “Friendly format” Property of SharePoint List Date Field Using PnP PowerShell
When I added a date field to a SharePoint list using PnP PowerShell, the Friendly format property of this field was enabled by default.
However, I want to display the date in standard format only. Let’s use PnP PowerShell to turn off this friendly format property of the SharePoint list date field.
To do this, run the below PnP PowerShell script. Then, check the SharePoint list date field properties; the friendly format will be turned off.
# Connect to SharePoint site
Connect-PnPOnline -Url "https://<tenant name>.sharepoint.com/sites/RetailManagement Site" -Interactive

# how to turn of the friendly format property of date column in sharepoint list
Set-PnPField -List "Employee Leave Requests" -Identity "StartDate" -Values @{FriendlyDisplayFormat = [Microsoft.SharePoint.Client.DateTimeFieldFriendlyFormatType]::Disabled}
Look at the output image below, the friendly format property was disabled in SharePoint list date field.
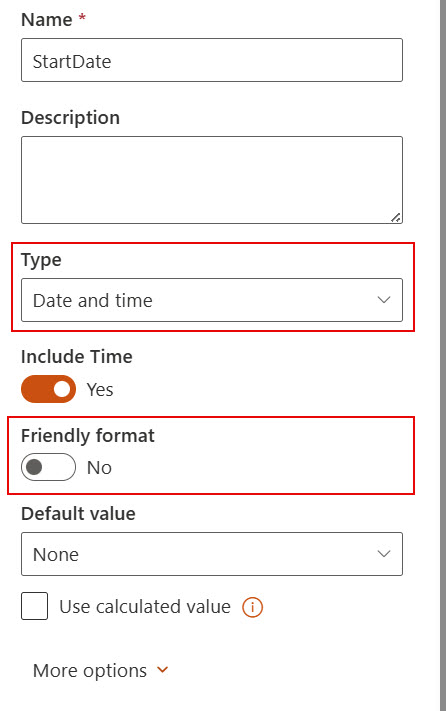
In the image above, you can observe the Include Time property is also enabled in the start date field in the SharePoint list. Let’s see how to turn off this property also using PnP PowerShell.
Exclude Time From SharePoint List Date and Time Field Using PnP PowerShell
As I said above, when adding a date and time field to a SharePoint list using PnP PowerShell, this Include Time property is also enabled by default. However, I was not required to display the time along with the date in the start and end date fields in the SharePoint list.
Now, to turn off the Include Time property of the SharePoint list date and time field, run the script below PnP PowerShell.
# Connect to SharePoint site
Connect-PnPOnline -Url "https://<tenant name>.sharepoint.com/sites/RetailManagement Site" -Interactive

# Set the format of the date field to DateOnly
Set-PnPField -List "Employee Leave Requests" -Identity "StartDate" -Values @{DisplayFormat = [Microsoft.SharePoint.Client.DateTimeFieldFormatType]::DateOnly}
Once the script runs successfully, check the SharePoint list date and time field. The Include Time property will be turned off, as shown in the image below.
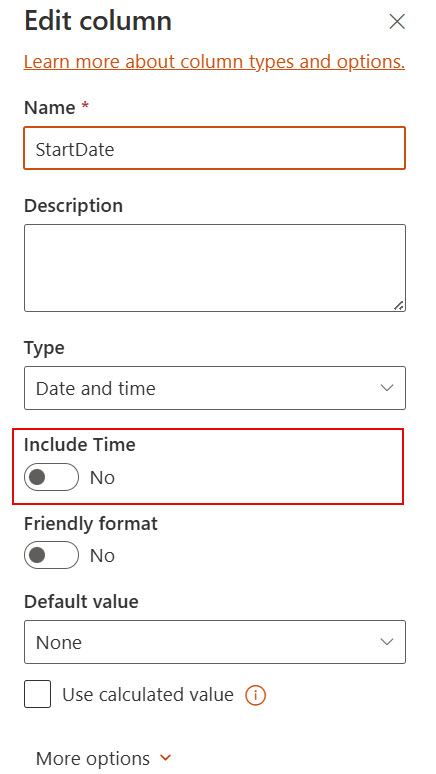
This way, we update the SharePoint list field properties using PnP PowerShell.
I hope you found this article useful. Here, I have explained 10 different examples of how we can update SharePoint list field properties programmatically by using the PnP PowerShell script.
You can follow this article while you’re trying to update any of the SharePoint list field properties through PnP PowerShell commands.
Also, you may like:
- How to check if the date is older than 30 using PnP PowerShell
- PowerShell naming conventions best practices
- PowerShell functions complete guide
- PowerShell functions with parameters
- PowerShell reference variables
I am Bijay a Microsoft MVP (10 times – My MVP Profile) in SharePoint and have more than 17 years of expertise in SharePoint Online Office 365, SharePoint subscription edition, and SharePoint 2019/2016/2013. Currently working in my own venture TSInfo Technologies a SharePoint development, consulting, and training company. I also run the popular SharePoint website EnjoySharePoint.com