A few days before, I developed a travel management application in Power Apps. Employees can see their previously submitted travel requests in full detail, including manager approvals.
Here, I was required to provide a way for employees to print their approved travel request details, which I achieved using the print function in Power Apps.
In this article, I will explain what is Power Apps print function, its syntax, and how to use it in the canvas app. Additionally, we will discuss how to print a form in Power Apps with an example.
Power Apps Print Function
The Print function in Power Apps allows users to print content present on the screen to printers in their network or save to PDF through the browser.
We can use this function on buttons or icons on the “OnSelect” property. This will print only the screen where we gave it this print function. It can’t print multiple pages and won’t work on mobile devices and SharePoint forms.
Syntax:
Print()How to Print a Form in Power Apps
Let’s see an example of printing the content present in the Power Apps screen.
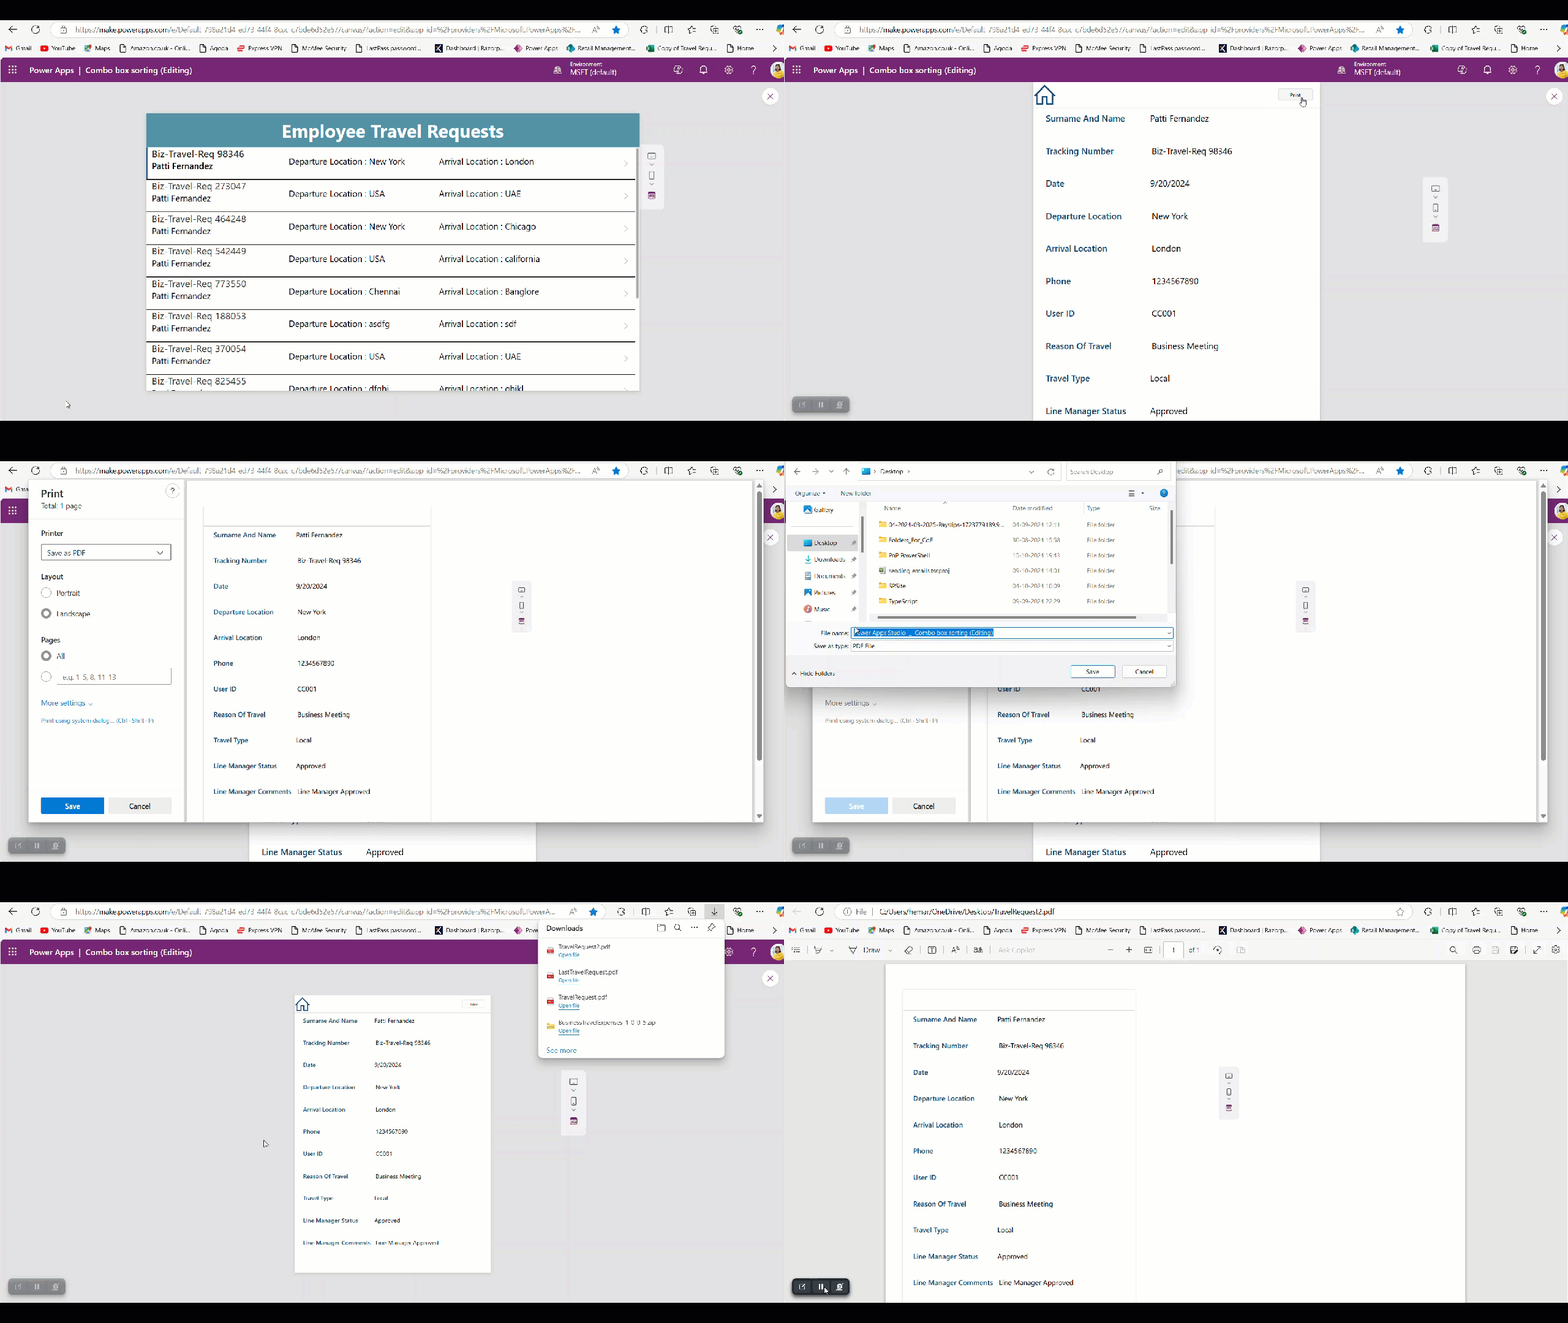
In the Power Apps application, I have a gallery control that displays current users’ employee travel requests; when the user selects any request, it navigates to another screen. After clicking the print button, a default print browser pops up and allows us to choose from the available options to print or save it as a PDF file.
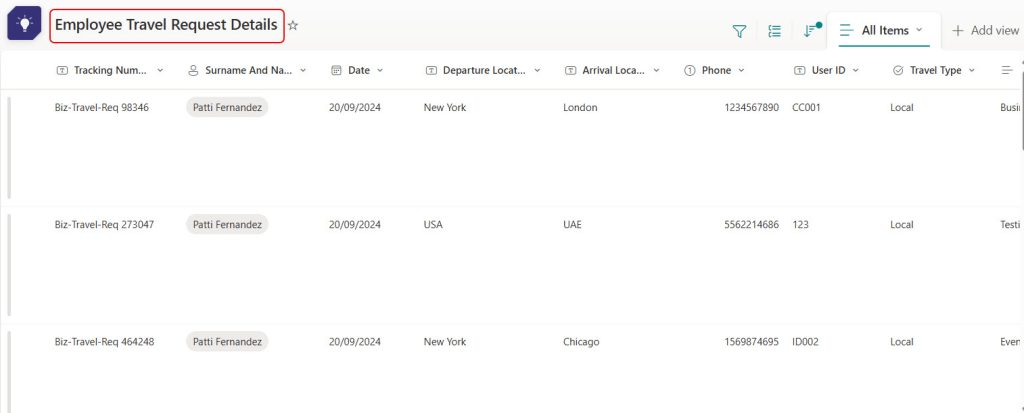
Here is the SharePoint list that contains details of employee travel requests.
Follow the steps below to achieve this!
1. Open the Power Apps application and add a verticle gallery control, then add the formula below to its Items property.
Filter('Employee Travel Request Details','Surname And Name' .DisplayName =User( ) .Full Na me)It filters only current users’ travel requests in the gallery.

2. Provide the formula below in the OnSelect property of the gallery control to navigate to another screen when we select an item.
Navigate(PrintRequests_Screen,ScreenTransition.CoverRight)- PrintRequests_Screen = screen name
- ScreenTransition.CoverRight = screen transition property

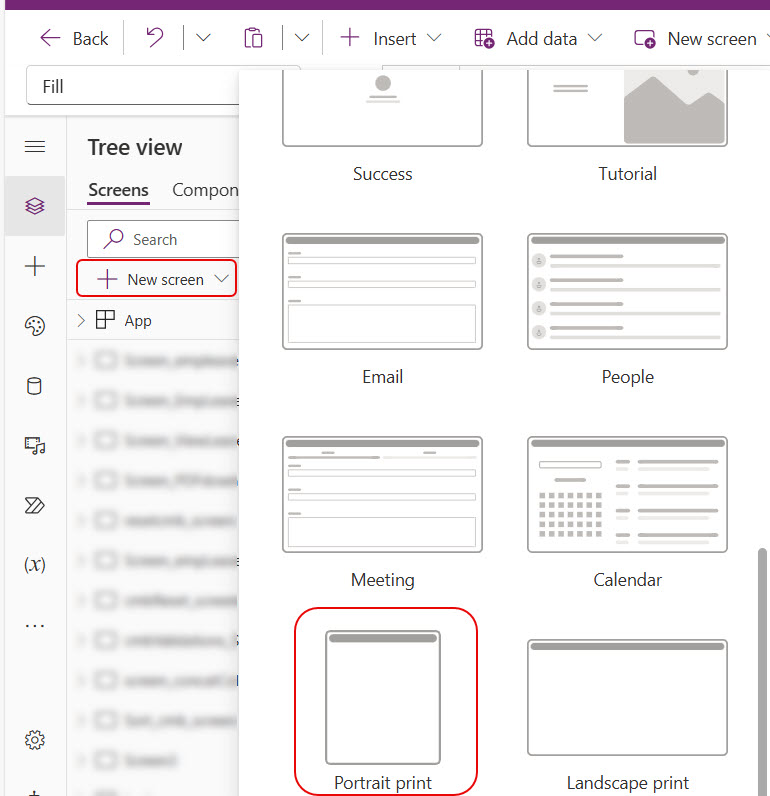
3. Click on +New Screen -> Select Portrait print screen from the menu. [You can also take the normal screen, but later adjust the width and height of the screen]
4. This screen will, by default, have a Horizontal container within that one button control also present. When we see the OnSelect property of the button control, it has the Print() function.
When you take a regular normal screen, add a button control and provide the formula below in its OnSelect property.
Print()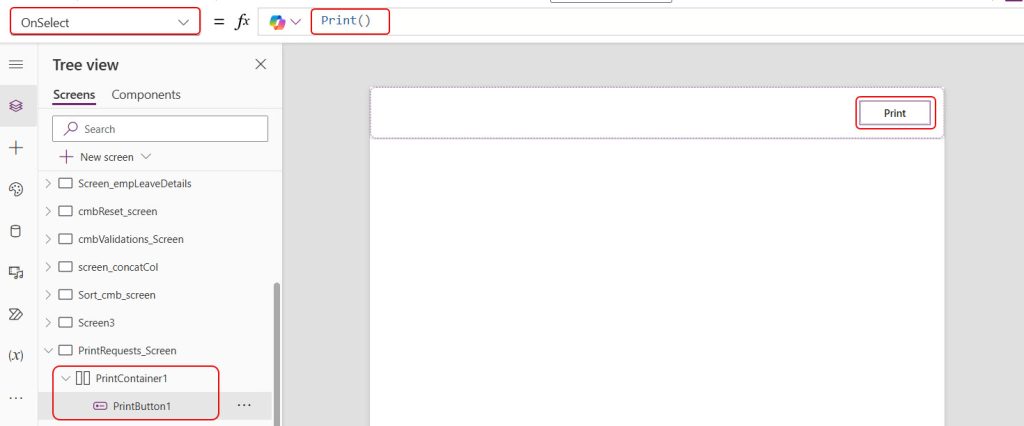
5. Add an Edit Form control and provide the below formulas for the given properties.
DefaultMode = FormMode.View
DataSource = 'Employee Travel Request Details'
Item = Gal_travelRequets.Selected
Columns = 1
Layout = Horizontal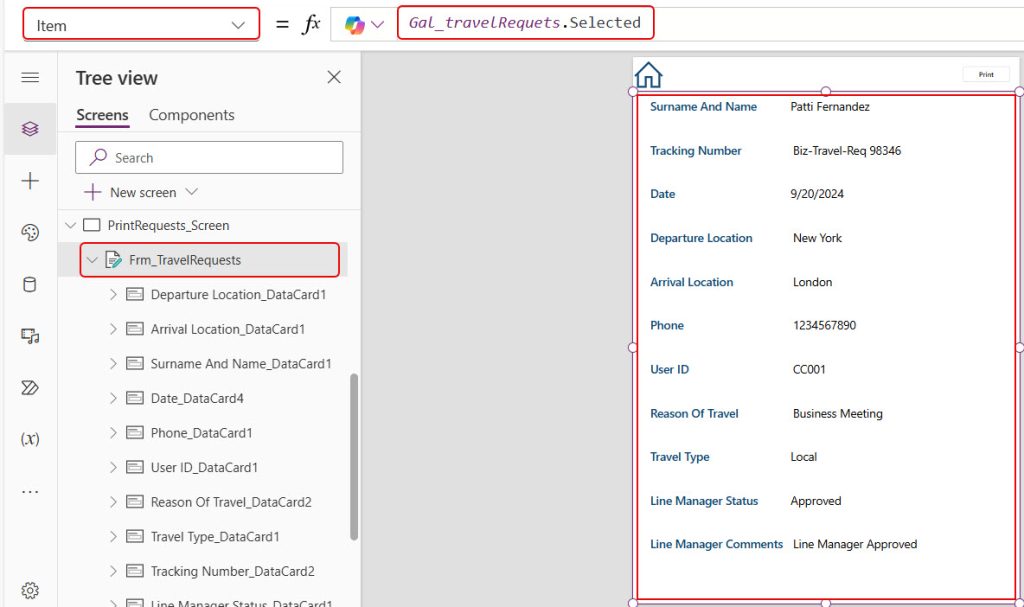
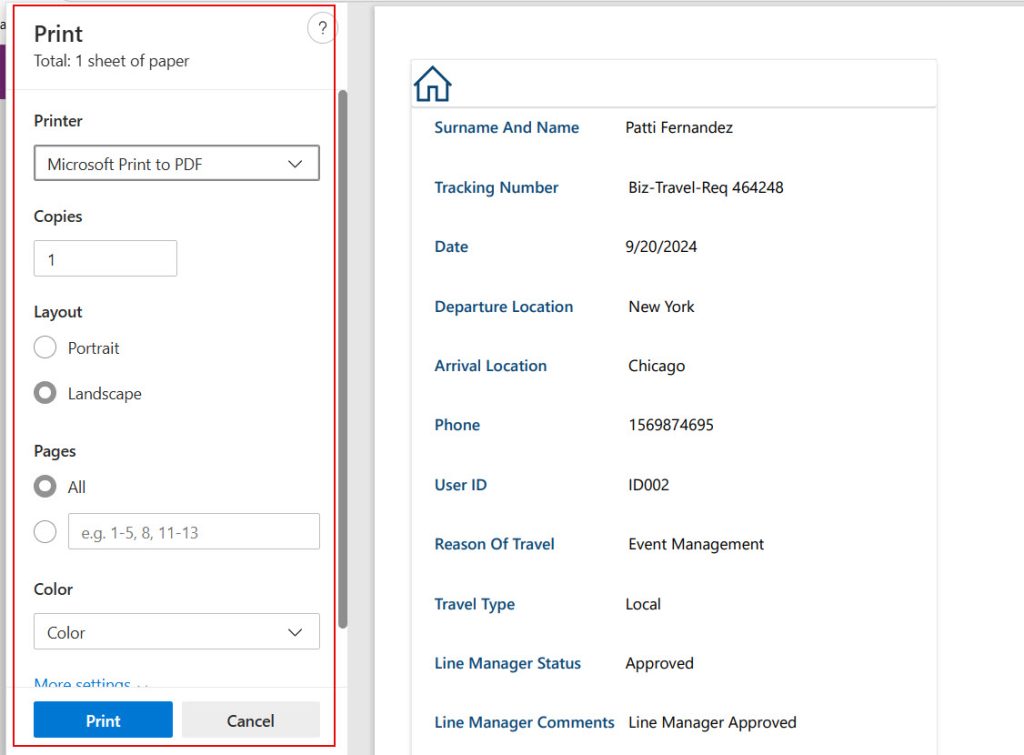
6. Preview the app once; you’ll get the below popup that allows us to choose from the available options to print or save it as a PDF file. Finally, click the Print button to print or save the pdf file.
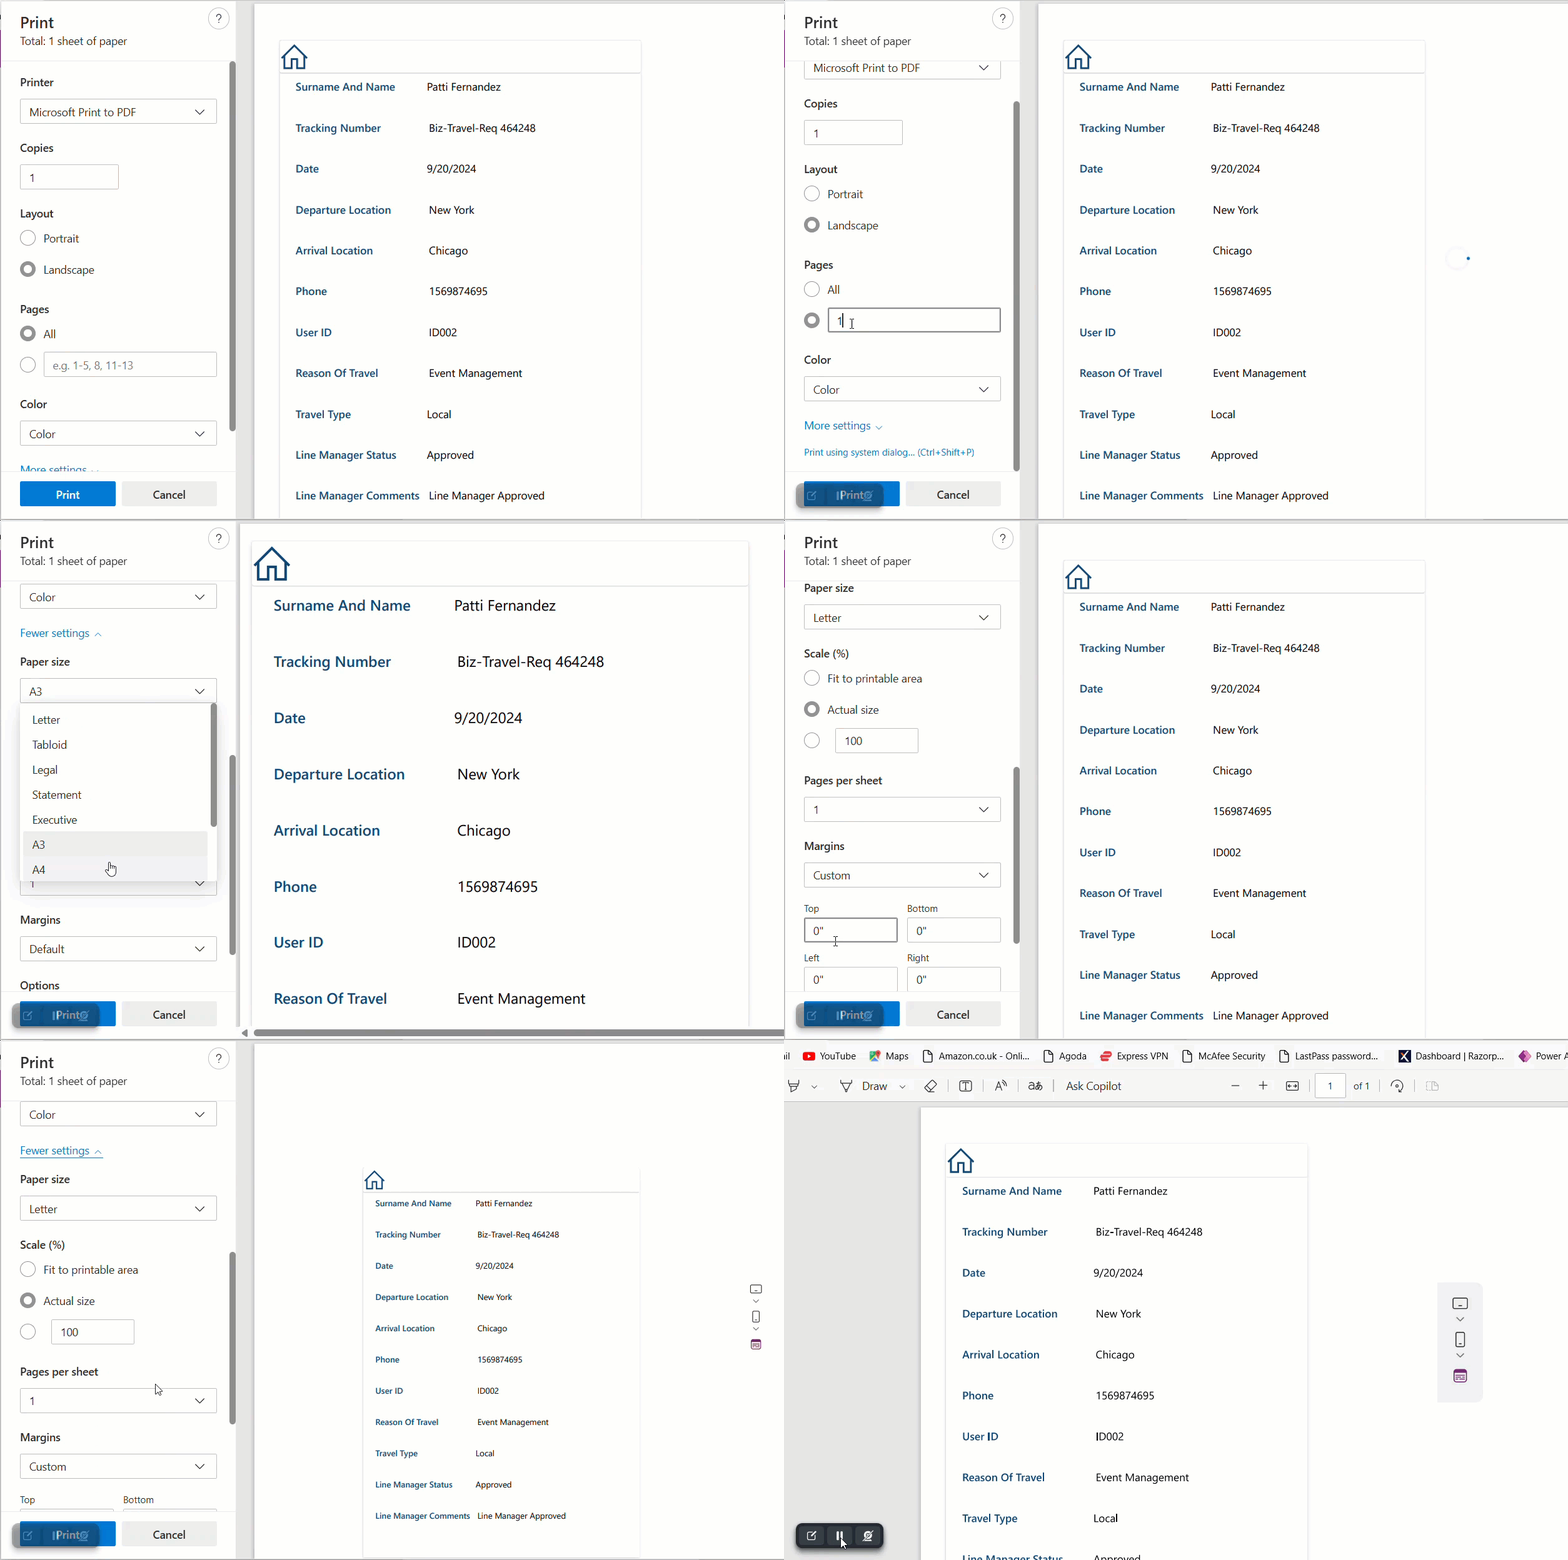
7. Follow the example below to provide values for the options in the pop-up message.
8. To navigate back to the employee travel request screen, I added the Home icon and provided the formula below on its OnSelect property for navigation.
Navigate(EmpTravelRequest_Screen,ScreenTransition.CoverRight)While printing to hide this icon, I used the formula below for its Visible property.
Not PrintRequests_Screen.Printing- PrintRequests_Screen is the current screen name.

9. I choose the Save as PDF for the Printer option while printing. After clicking the Save button, the content present in the form is saved as a PDF file; look at the image below.
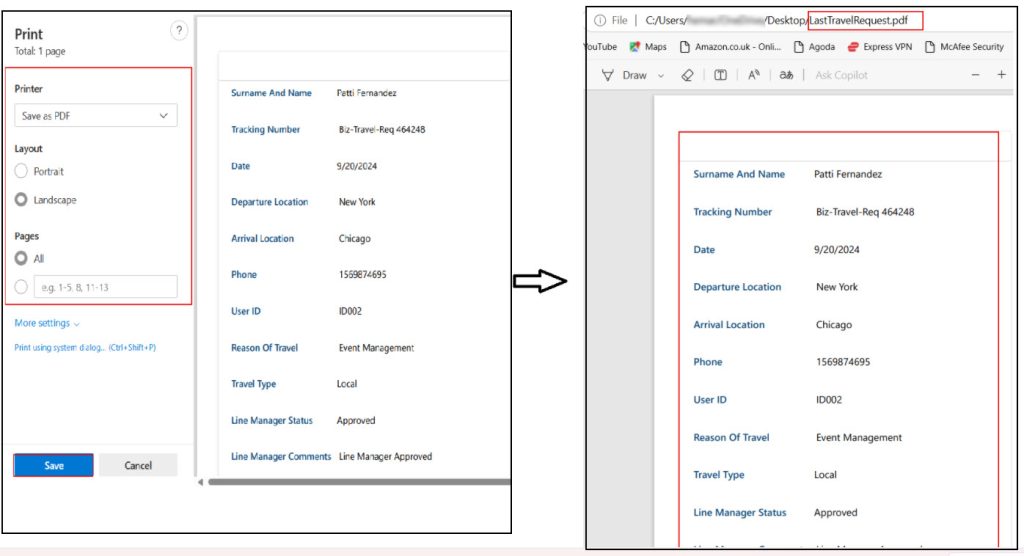
This way, we can save or print the Power Apps content on the screen as a PDF file.
I hope you understand the Power Apps print function and how to save the content present on the screen as a PDF file or print it. Follow this article whenever you’re trying to print Power Apps content or save it as a PDF file.
Also, you may like:
- Power Apps PDF view control
- Power Apps Split Function
- Power Apps Calendar Function
- How to generate and download pdf from Power Apps
- How to apply multiple filters on Power Apps gallery
- How to calculate business days in Power Apps
I am Bijay a Microsoft MVP (10 times – My MVP Profile) in SharePoint and have more than 17 years of expertise in SharePoint Online Office 365, SharePoint subscription edition, and SharePoint 2019/2016/2013. Currently working in my own venture TSInfo Technologies a SharePoint development, consulting, and training company. I also run the popular SharePoint website EnjoySharePoint.com