Recently, I developed a Power Apps Travel Expenses application. Each travel expense has a unique ID containing the first five numbers from the GUID string.
I had to split the string into individual characters to fetch only numbers from GUID. I achieved this with the Power Apps split function.
In this article, I will explain how to use the Power App split function with various examples. Such as:
- Split full name into first and last names in the Power Apps gallery
- Create a collection from a comma-separated string in Power Apps
- Power Apps split guid string by character and fetch only numbers from it
- Power Apps split string by a new line
- Split Email address in Power Apps
- Power Apps Split date and time with the Concat function
- Power Apps split a string into rows and columns
Power Apps Split Function
In Power Apps, the Split function is commonly used to divide a string into individual values using the delimiter (separator). The separator can be zero, one, or more characters. This function returns the entire string if the separator is not found in the string.
Look at the syntax of the Power Apps split function.
Split( Text, Separator )- Text = Required parameter. Text to split.
- Separator = Required parameter used to split the string. It can be zero, one, or more characters.
Let’s see the examples of the Power Apps split function.
Example 1: [Split full name into first and last names in Power Apps gallery]
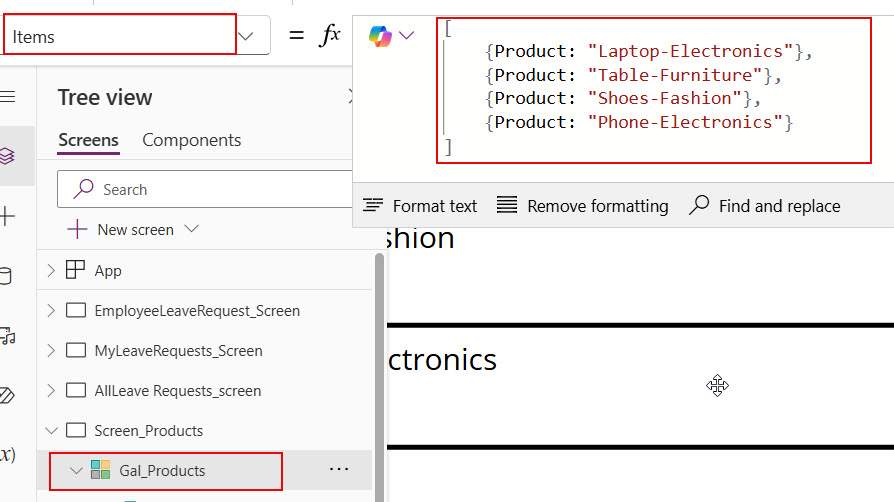
1. In Power Apps, add gallery control and provide the formula below in its Items property.
[
    {Product: "Laptop-Electronics"},
    {Product: "Table-Furniture"},
    {Product: "Shoes-Fashion"},
    {Product: "Phone-Electronics"}
]
2. Add a text label to the gallery control to display only the first name and provide the formula below in its Text property.
First(Split(ThisItem.Product, "-")).ValueHere,
- ThisItem.Product = The string to split.
- “-“ = Seperator.
- The First () function will fetch only the first word after splitting the string with the “-” separator.
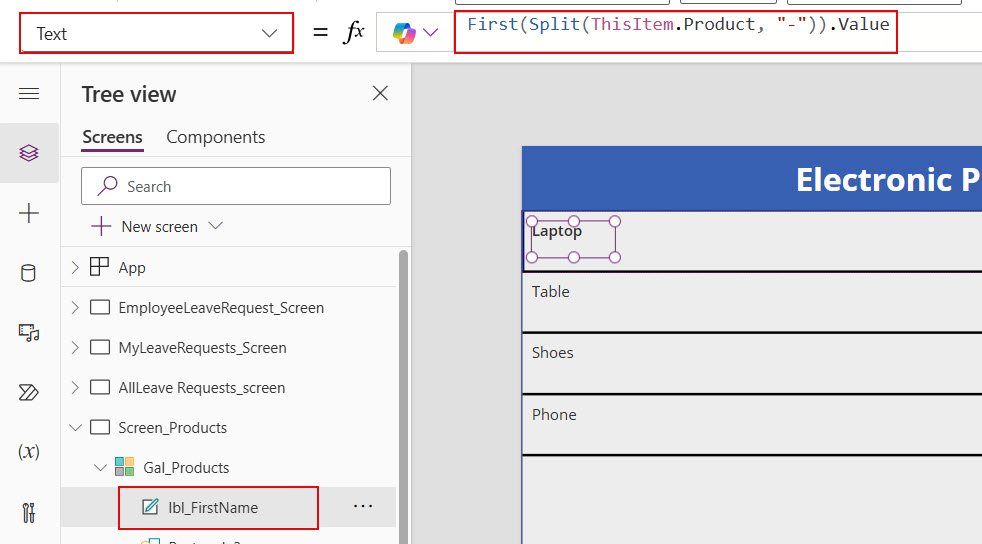
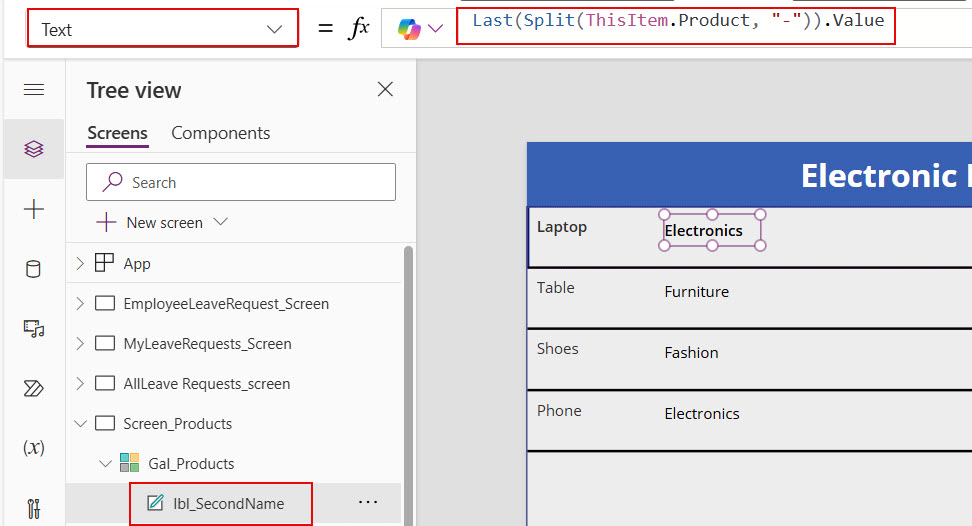
3. Add another text label to the gallery control to display the last name and provide the formula below in its Text property.
Last(Split(ThisItem.Product, "-")).ValueHere, the Last() function gets last from the split string.
Example 2: [Create a collection from a comma-separated string in Power Apps]
1. Add a button control in the Power Apps screen from the +Insert tab. Then, provide the formula below for its OnSelect property.
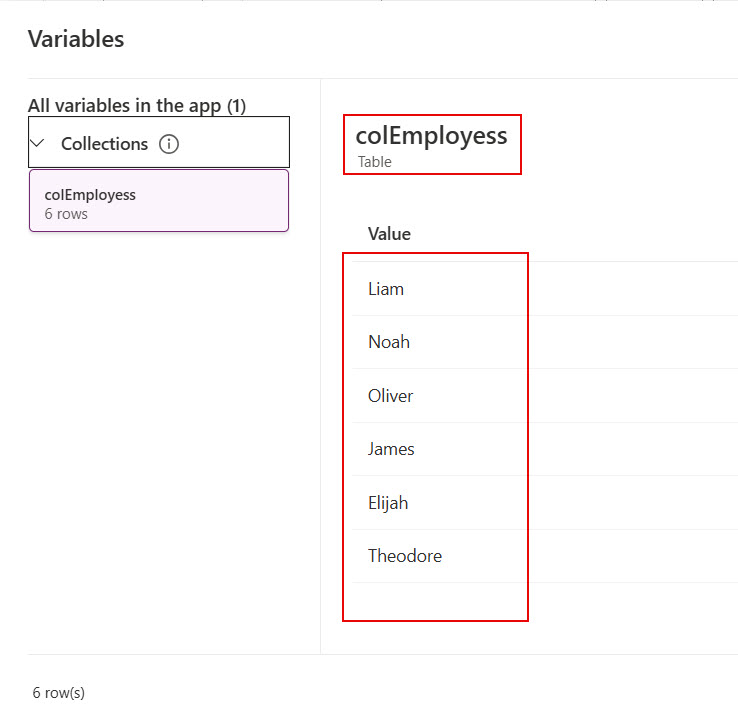
ClearCollect(colEmployess,Split("Liam,Noah,Oliver,James,Elijah,Theodore",","))Here,
- ClearCollect() function creates a collection.
- colEmployess = Collection name.
- “Liam,Noah,Oliver,James,Elijah,Theodore” = String that contains names.
- “,” = Separator.
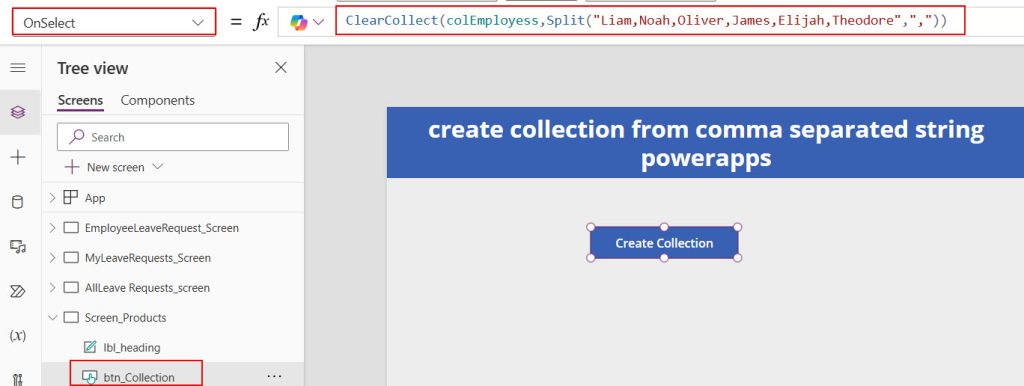
2. Save the changes and click the button control while previewing. Then, in the left navigation, click (x) Variables -> Under Collections ->Open the created collection. You’ll see the string provided on the button control split into individual names in the collection.
Example 3: [Power Apps split guid string by character and fetch only numbers from it]
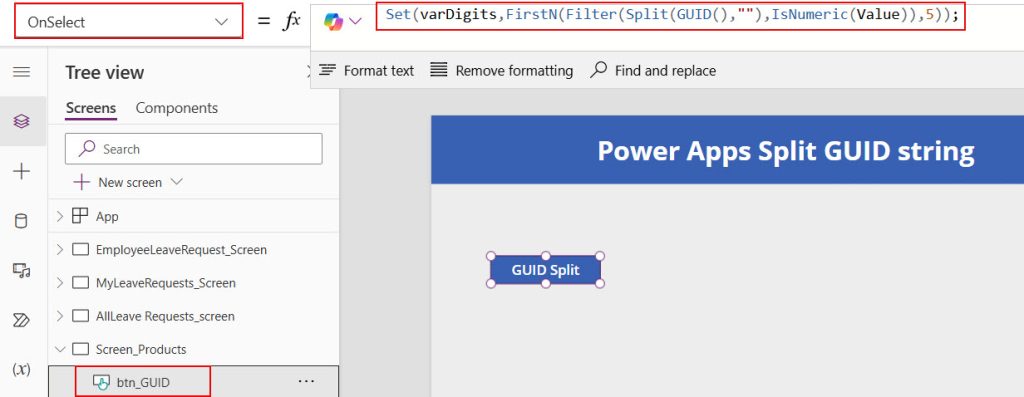
1. Add a button control to the Power Apps screen and provide the formula below in its OnSelect property.
Set(varDigits,FirstN(Filter(Split(GUID(),""),IsNumeric(Value)),5));Here, the split function will split each character in the guid string. The IsNumeric() function will check each character from the split string and whether it is a number.
The Filter function only fetches all numbers from the GUID string after splitting it into each character stored in table format. The FirstN() will fetch only five numbers from all the numbers.
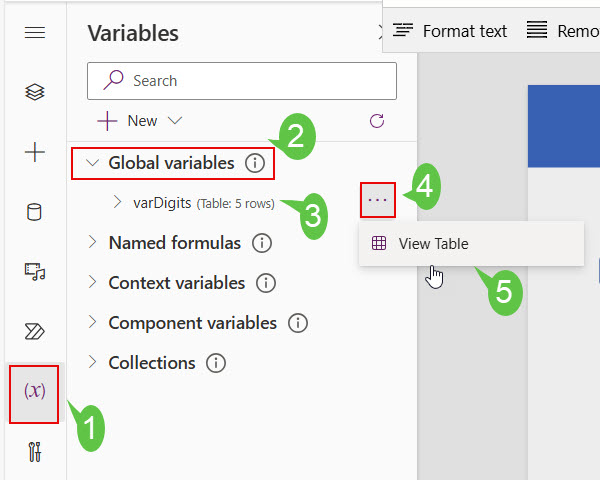
2. To see the created global variable, click on the (x) Variable on the left navigation -> Under Global variables -> click on ellipses(…) next to the variable -> click on View Table.
3. Look at the image below; it fetches only five digits from the guide string.

Example 4: [Power Apps split string by a new line]
1. Add a Data Table control to the Power Apps screen and add the formula below to its Items property.
Split("Power Apps is a Microsoft Product Allows to Develop Applications"," ")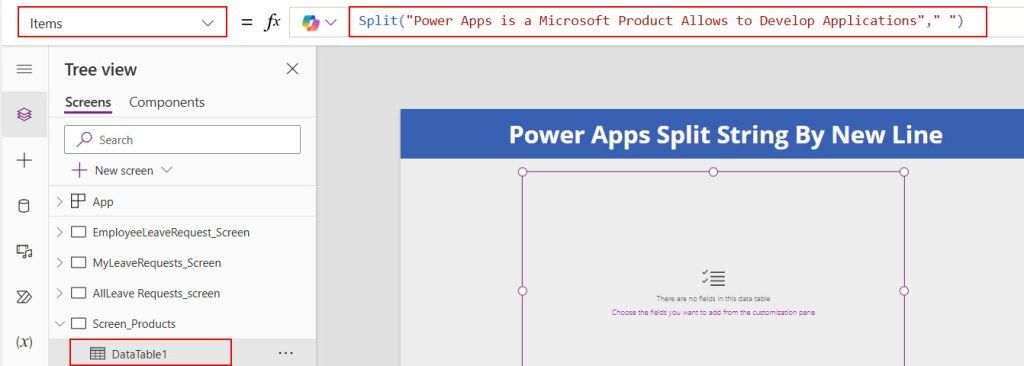
2. To add the column -> Open the Properties of the Data Table control -> Click on Fields -> +Add field -> Check Value -> Click Add button.
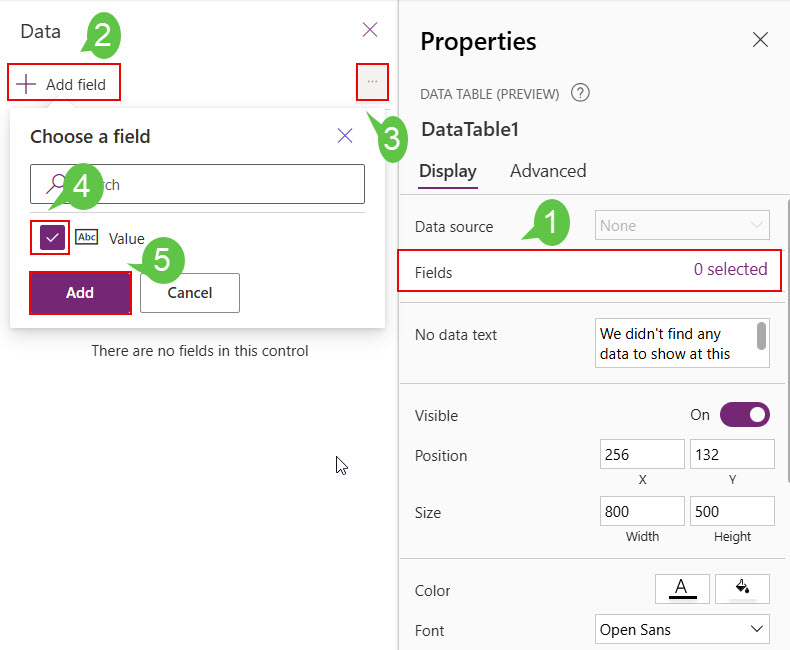
3. Now, look at the table; each word in the given sentence is placed in a new line in the Power Apps data table control.

Example 5: [Split Email Address in Power Apps]
1. Add the formula below in the Data Table control‘s Items property.
Split("Patti@szg65.onmicrosoft.com","@")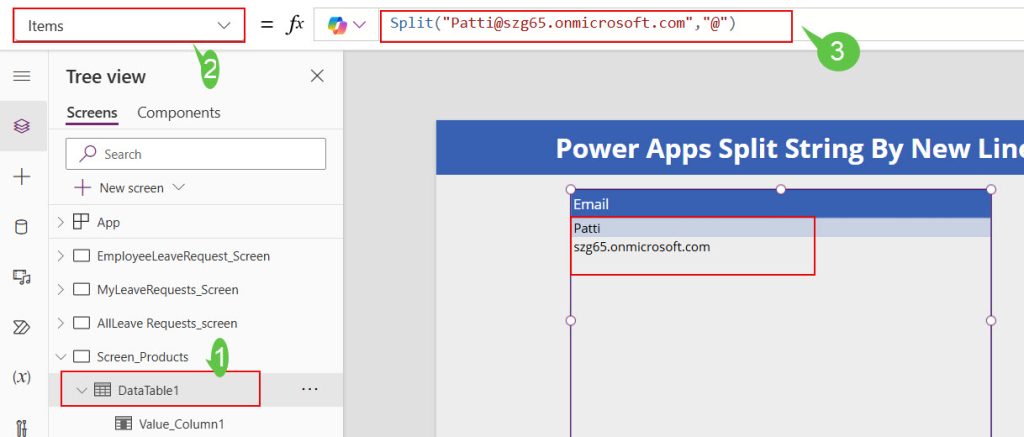
2. To split the email address with the dot(.) separator, place the formula below in the Items property of the data table control.
Split("Patti@szg65.onmicrosoft.com",".")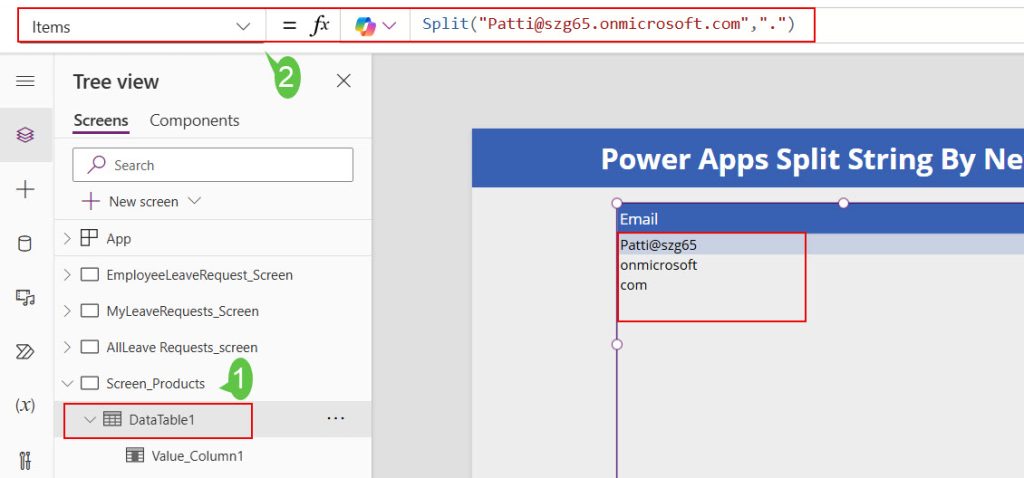
3. To split the email address by taking multiple characters as a separator, use the below formula.
Split("Patti@szg65.onmicrosoft.com","szg")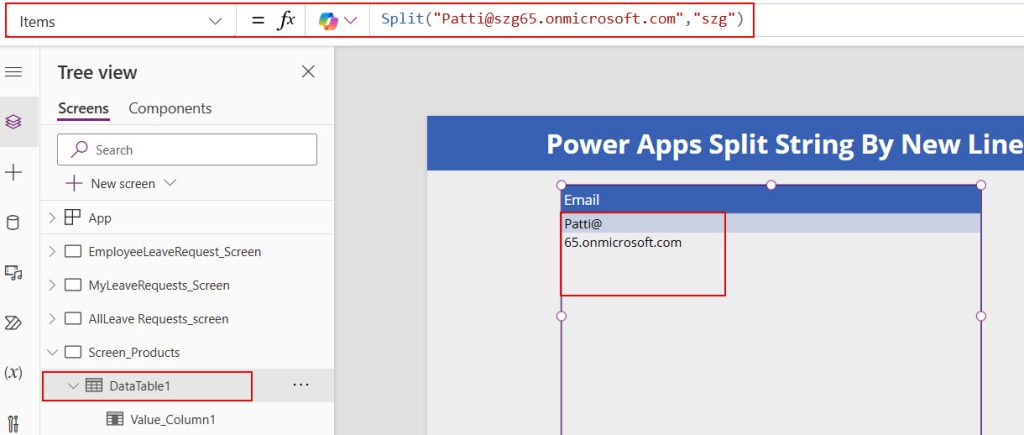
Example 6: [Power Apps Split date and time with Concat function]
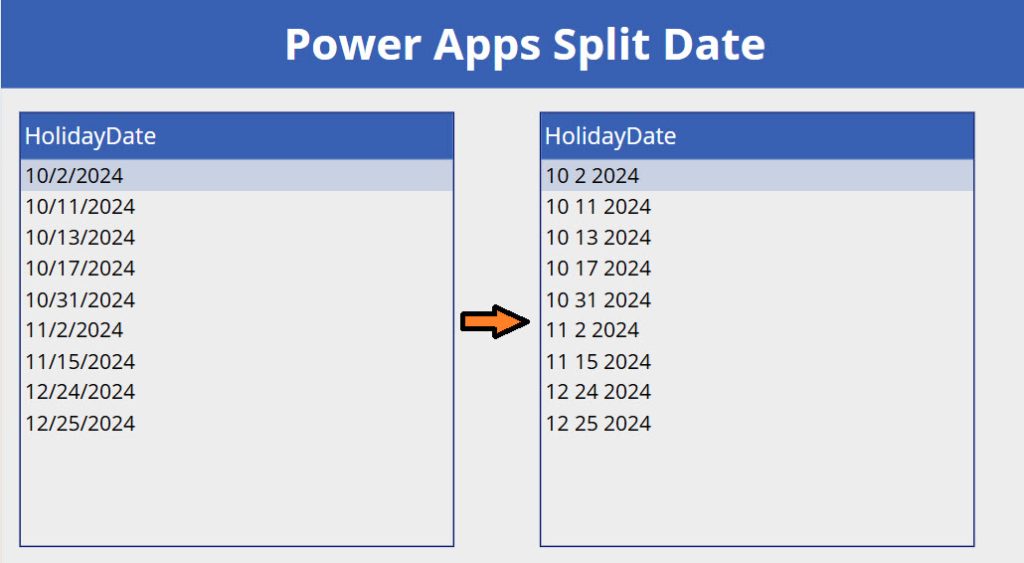
Follow the steps below to achieve this!
Here, I have a SharePoint list named “Public Holidays.” which stores all the holiday dates.
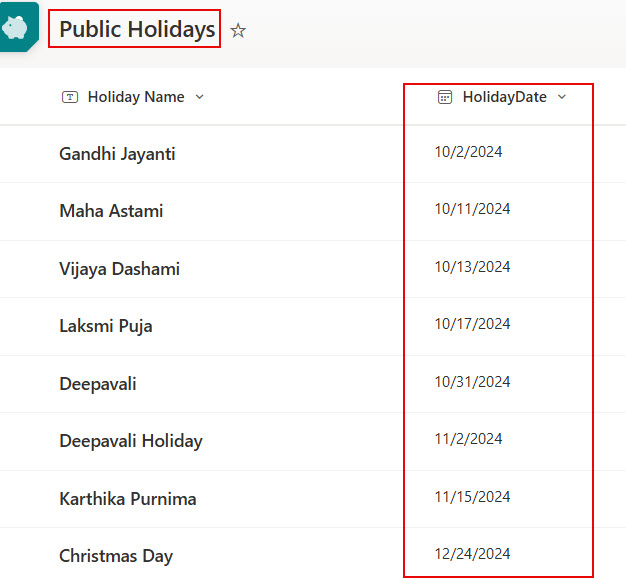
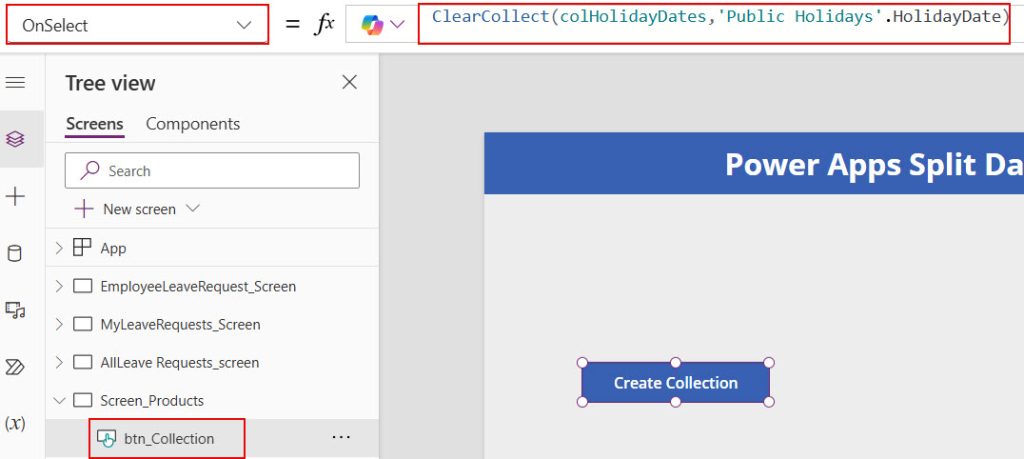
1. Add a button control in the Power Apps screen to create a collection that stores all the holiday dates from the SharePoint list.
2. Add a Data Table control and provide the below collect name in its Items property.
colHolidayDates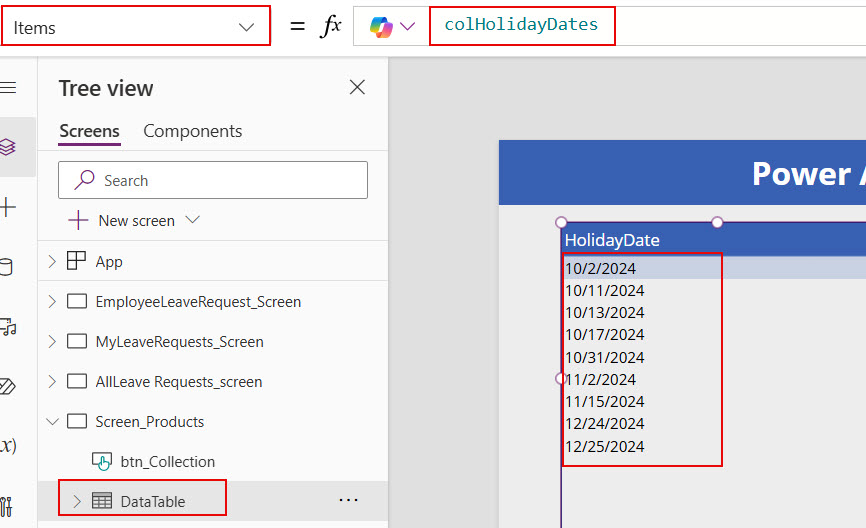
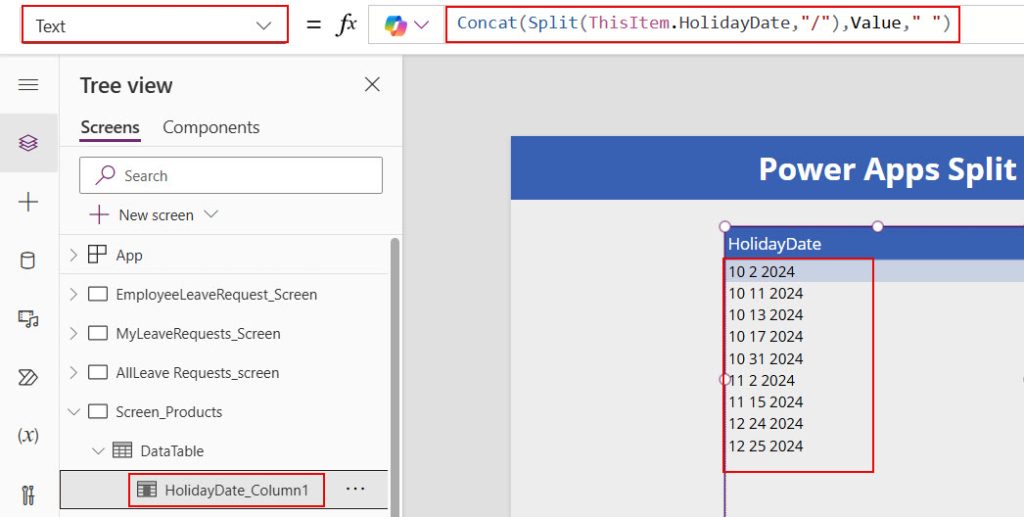
3. To split the dates, add the formula below to the Text property of the column in the data table control.
Concat(Split(ThisItem.HolidayDate,"/"),Value," ")Here, using space, the Concat function will concat the dates that are split by “/.”
Example 7: [Power Apps split a string into rows and columns]
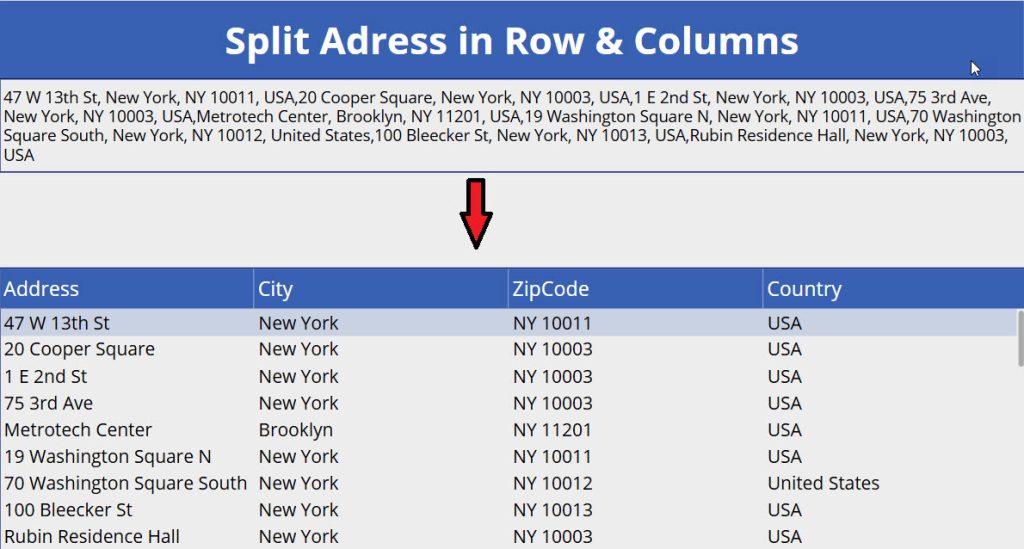
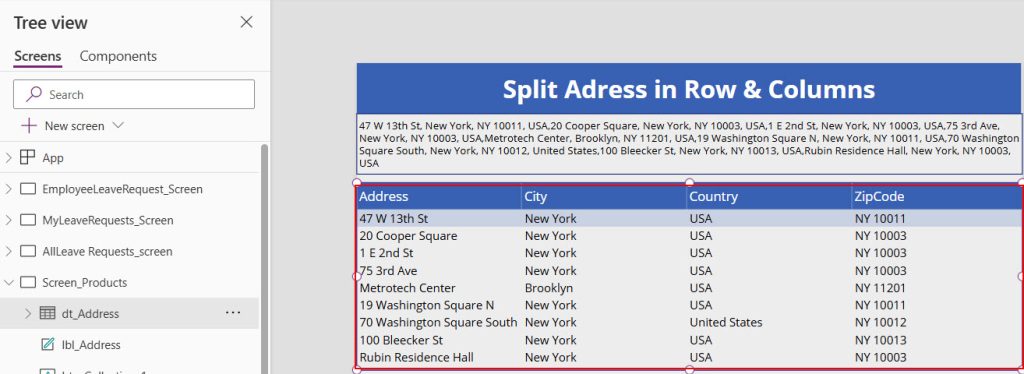
Look at the image below. In the text label, I have the addresses of some cities in the USA, which is in not an understandable format. After using the Power Apps split function, the addresses are split into rows and columns in the data table.
Follow the steps below to achieve this!
1. In Power Apps, add a Text label and provide the address collection in its Text property.
"47 W 13th St, New York, NY 10011, USA,20 Cooper Square, New York, NY 10003, USA,1 E 2nd St, New York, NY 10003, USA,75 3rd Ave, New York, NY 10003, USA,Metrotech Center, Brooklyn, NY 11201, USA,19 Washington Square N, New York, NY 10011, USA,70 Washington Square South, New York, NY 10012, United States,100 Bleecker St, New York, NY 10013, USA,Rubin Residence Hall, New York, NY 10003, USA"
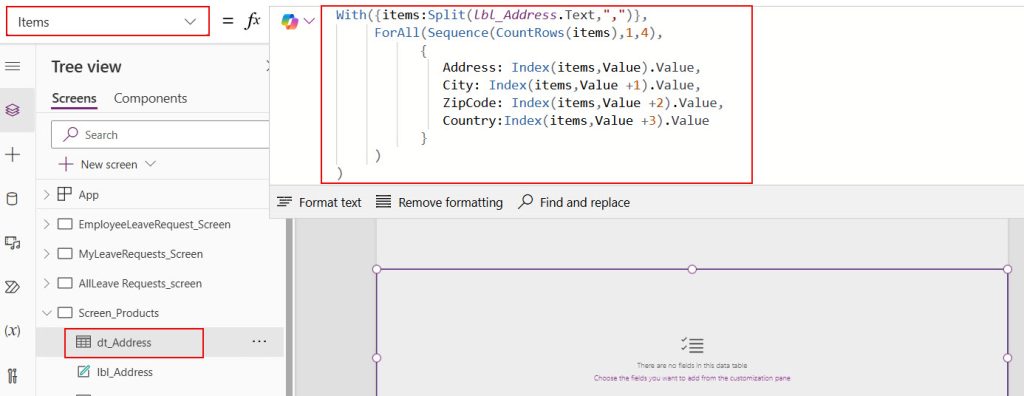
2. Add a data table control and provide the below formula in its Items property.
With({items:Split(lbl_Address.Text,",")},
     ForAll(Sequence(CountRows(items),1,4),
           {
              Address: Index(items,Value).Value,
              City: Index(items,Value +1).Value,
              ZipCode: Index(items,Value +2).Value,
              Country:Index(items,Value +3).Value
           }
     )
)
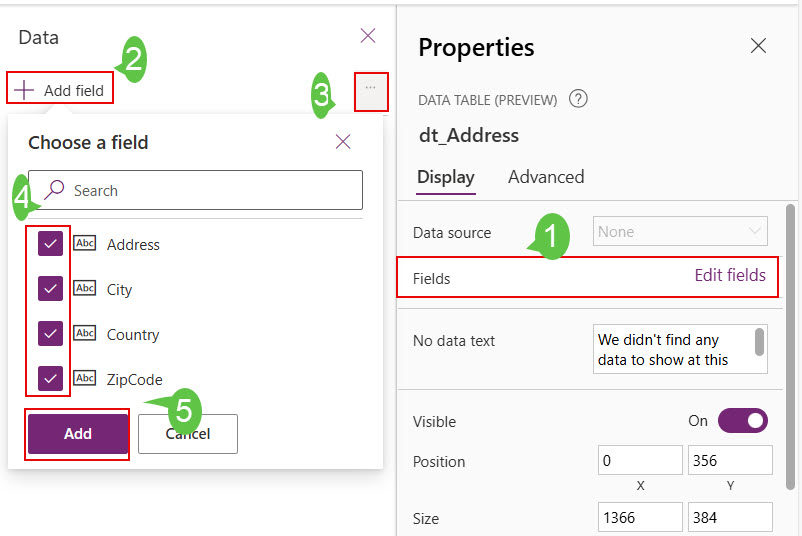
3. Add the columns to the data table by opening the Properties pane. There, click on Edit fields next to Fields -> Click on + Add field -> Check all the Column names -> Click on Add button.
4. Look at the image below; the addresses in the text label are split into rows and columns in the Power Apps data table control.
This way, we can use the Power Apps split function to split the string with the provided separator.
I hope you understand how to use the Power Apps split function. In this article, I have provided seven different examples related to its usage. Follow this article if you are new to Power Apps functions.
Also, you may like:
- Power Apps Print Function
- Power Apps search function
- Power Apps Copy Function
- Power Apps find function
- Power Apps for all function
- Power Apps startswith and ends with function
- Power Apps patch function
I am Bijay a Microsoft MVP (10 times – My MVP Profile) in SharePoint and have more than 17 years of expertise in SharePoint Online Office 365, SharePoint subscription edition, and SharePoint 2019/2016/2013. Currently working in my own venture TSInfo Technologies a SharePoint development, consulting, and training company. I also run the popular SharePoint website EnjoySharePoint.com