In this SPFx tutorial, we will discuss how to send email in SPFx using PnP. We will create an spfx send email utility using various react controls.
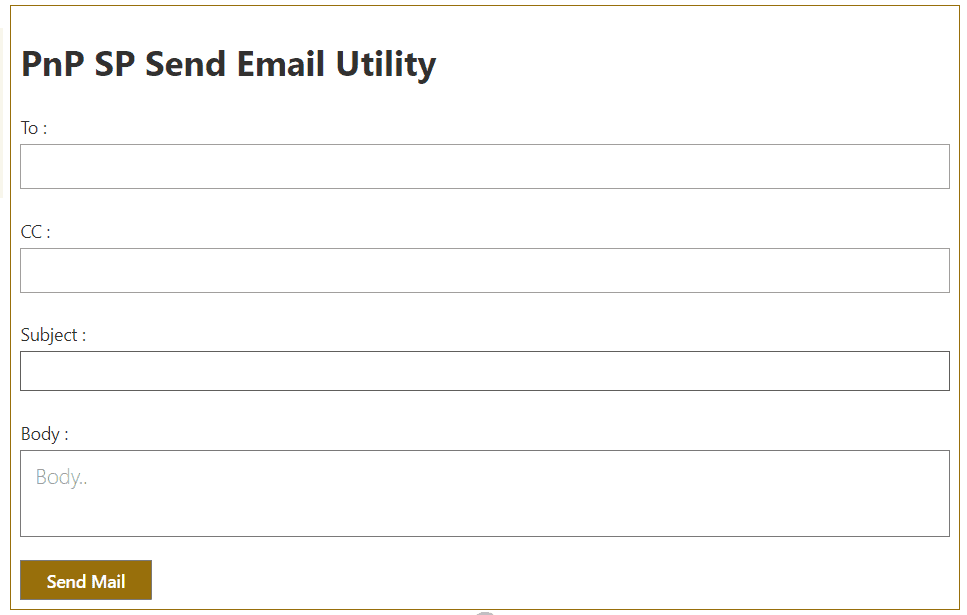
In this particular SPFx client-side web part example, we will create an interface like the below by using SPFx PnP react controls:

If you are new to SPFx development, then check out the below tutorials and create your first SPFx
- How to Set up SharePoint Framework development environment
- (SPFx) SharePoint framework client web part example
- SharePoint Framework CRUD Operations using React
SPFx send email using PnP
To start with first, create an SPFX client-side web part using react framework by following the above articles.
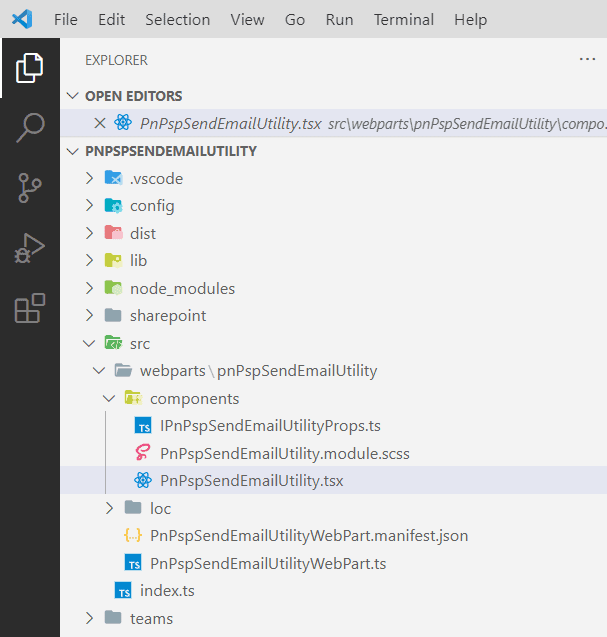
Once you have created the solution, the SPFx solution looks like below:

Here PnPspSendEmailUtility.tsx is the file, where we will write our code.
First, we need to write the below import statements. Here you can see, we are using some pnp react controls as a few office-ui-fabric-react controls for the email interface.
import * as React from 'react';
import styles from './PnPspSendEmailUtility.module.scss';
import { IPnPspSendEmailUtilityProps } from './IPnPspSendEmailUtilityProps';
import "@pnp/sp/webs";
import { sp } from "@pnp/sp";
import "@pnp/sp/sputilities";
import { TextField } from 'office-ui-fabric-react/lib/TextField';
import { PrimaryButton } from 'office-ui-fabric-react/lib/Button';
import { PeoplePicker, PrincipalType } from "@pnp/spfx-controls-react/lib/PeoplePicker";
import { RichText } from "@pnp/spfx-controls-react/lib/RichText";
import { Label } from 'office-ui-fabric-react/lib/Label';
Now, below is the render() method where we have designed the form.
Here we have added the below controls for the form:
- PeoplePicker (For Email To and CC)
- TextField (For Email Subject)
- RichText (For Email Body)
- PrimaryButton (Used to send the email to the user)
public render(): React.ReactElement<IPnPspSendEmailUtilityProps> {
    return (
      <div>
        <h1>PnP SP Send Email Utility</h1>
        <form>
          <Label>To : </Label>
          <PeoplePicker
            context={this.props.context}
            personSelectionLimit={10}
            isRequired={false}
            selectedItems={(Items) => this._getPeoplePickerItems(Items, "ToEmail")}
            showHiddenInUI={false}
            principalTypes={[PrincipalType.User]}
            resolveDelay={1000}
            ensureUser={true}
          />
          <br />
          <Label>CC : </Label>
          <PeoplePicker
            context={this.props.context}
            personSelectionLimit={10}
            isRequired={false}
            selectedItems={(Items) => this._getPeoplePickerItems(Items, "CcEmail")}
            showHiddenInUI={false}
            principalTypes={[PrincipalType.User]}
            resolveDelay={1000}
            ensureUser={true}
          />
          <br />
          <Label>Subject : </Label>
          <TextField
            value={this.state.EmailSubject}
            onChange={this._onChange1}
            //styles={{ fieldGroup: { width: 300 } }}
          />
          <br />
          <Label>Body : </Label>
          <RichText className={styles.BdyStyle} value={this.state.EmailBody} placeholder="Body.." onChange={(txt) => this.onTextChange(txt)} />
          <br />
          <PrimaryButton onClick={() => this.SendAnEmail()} text={"Send Mail"} />
        </form>
      </div>
    );
  }
}
In the button click, we are calling the SendAnEmail() method. In this method, we are sending the email. Once the email is sent successfully, it will display a successful alert message.
The code looks like below:
private SendAnEmil() {
    if (this.state.ToEmail) {
      sp.utility.sendEmail({
        //Body of Email
        Body: this.state.EmailBody,
        //Subject of Email
        Subject: this.state.EmailSubject,
        //Array of string for To of Email
        To: this.state.ToEmail,
        CC: this.state.CcEmail,
        AdditionalHeaders: {
          "content-type": "text/html"
        },
      }).then(() => {

        alert("Email Sent!");
      });
    }
    else {
      alert("Please Enter Valid Email ID");

    }
  }
There are a few other self-explanatory codes, that you can also go through.
The complete code looks like below:
import * as React from 'react';
import styles from './PnPspSendEmailUtility.module.scss';
import { IPnPspSendEmailUtilityProps } from './IPnPspSendEmailUtilityProps';
import "@pnp/sp/webs";
import { sp } from "@pnp/sp";
import "@pnp/sp/sputilities";
import { TextField } from 'office-ui-fabric-react/lib/TextField';
import { PrimaryButton } from 'office-ui-fabric-react/lib/Button';
import { PeoplePicker, PrincipalType } from "@pnp/spfx-controls-react/lib/PeoplePicker";
import { RichText } from "@pnp/spfx-controls-react/lib/RichText";
import { Label } from 'office-ui-fabric-react/lib/Label';

export interface IPnPspSendEmailUtilityStates {
  ToEmail: any;
  CcEmail: any;
  EmailSubject: any;
  EmailBody: any;
}
export default class PnPspSendEmailUtility extends React.Component<IPnPspSendEmailUtilityProps, IPnPspSendEmailUtilityStates> {
  constructor(props) {
    super(props);
    this.state = {
      ToEmail: [],
      CcEmail: [],
      EmailSubject: "",
      EmailBody: "",
    };

    sp.setup({
      spfxContext: this.props.spconect
    });
  }
  public _getPeoplePickerItems = async (items: any[], EmailToSend) => {
    console.log('Items:', items);
    if (EmailToSend == "ToEmail") {
      if (items.length > 0) {
        let assignedarrToEmail = [];
        for (var i = 0; i < items.length; i++) {
          assignedarrToEmail.push(items[i].secondaryText);
        }
        this.setState({ ToEmail: assignedarrToEmail });
      }
      else {
        this.setState({ ToEmail: [] });
      }
    }
    else if (EmailToSend == "CcEmail") {
      if (items.length > 0) {
        let assignedarrCcEmail = [];
        for (var i = 0; i < items.length; i++) {
          assignedarrCcEmail.push(items[i].secondaryText);
        }
        this.setState({ CcEmail: assignedarrCcEmail });
      }
      else {
        this.setState({ CcEmail: [] });
      }
    }
  }

  private onTextChange = (newText: string) => {
    this.setState({ EmailBody: newText });
    return newText;
  }
  private _onChange1 = (ev: React.FormEvent<HTMLInputElement>, newValue?: string) => {
    this.setState({ EmailSubject: newValue || '' });
  }
  private SendAnEmil() {
    if (this.state.ToEmail) {
      sp.utility.sendEmail({
        //Body of Email
        Body: this.state.EmailBody,
        //Subject of Email
        Subject: this.state.EmailSubject,
        //Array of string for To of Email
        To: this.state.ToEmail,
        CC: this.state.CcEmail,
        AdditionalHeaders: {
          "content-type": "text/html"
        },
      }).then(() => {

        alert("Email Sent!");
      });
    }
    else {
      alert("Please Enter Valid Email ID");

    }
  }
  public render(): React.ReactElement<IPnPspSendEmailUtilityProps> {
    return (
      <div>
        <h1>PnP SP Send Email Utility</h1>
        <form>
          <Label>To : </Label>
          <PeoplePicker
            context={this.props.context}
            personSelectionLimit={10}
            isRequired={false}
            selectedItems={(Items) => this._getPeoplePickerItems(Items, "ToEmail")}
            showHiddenInUI={false}
            principalTypes={[PrincipalType.User]}
            resolveDelay={1000}
            ensureUser={true}
          />
          <br />
          <Label>CC : </Label>
          <PeoplePicker
            context={this.props.context}
            personSelectionLimit={10}
            isRequired={false}
            selectedItems={(Items) => this._getPeoplePickerItems(Items, "CcEmail")}
            showHiddenInUI={false}
            principalTypes={[PrincipalType.User]}
            resolveDelay={1000}
            ensureUser={true}
          />
          <br />
          <Label>Subject : </Label>
          <TextField
            value={this.state.EmailSubject}
            onChange={this._onChange1}
            //styles={{ fieldGroup: { width: 300 } }}
          />
          <br />
          <Label>Body : </Label>
          <RichText className={styles.BdyStyle} value={this.state.EmailBody} placeholder="Body.." onChange={(txt) => this.onTextChange(txt)} />
          <br />
          <PrimaryButton onClick={() => this.SendAnEmil()} text={"Send Mail"} />
        </form>
      </div>
    );
  }
}
Now, our web part spfx send email using pnp is ready to test.
If you want to test the SPFx client-side web part, then run the below command which will open the local workbench.
gulp serveWhile the local workbench is running, open any SharePoint Online site workbench.
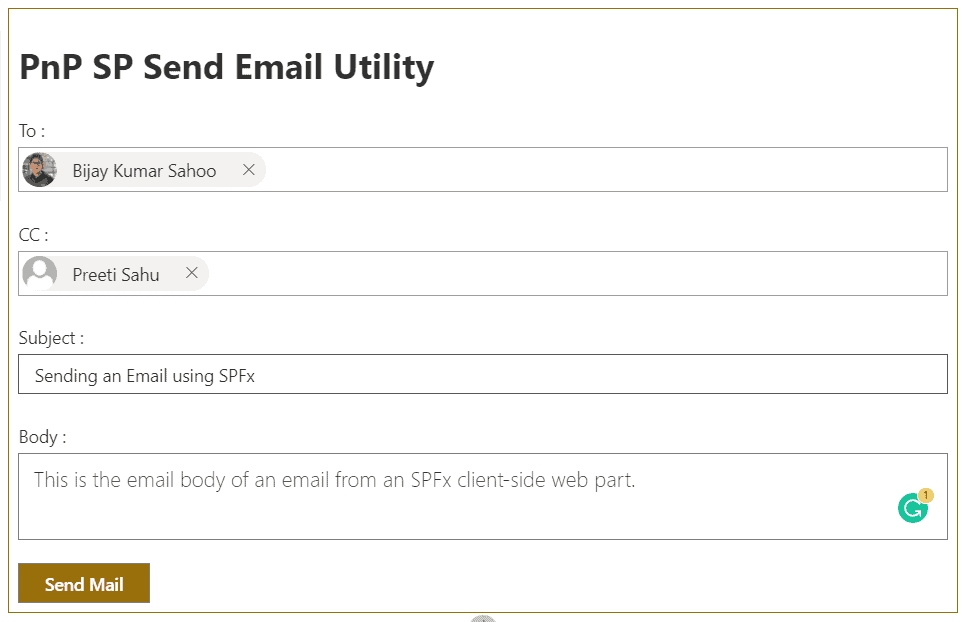
https://<tenantname>.sharepoint.com/sites/<SiteName>/_layouts/15/workbench.aspxOn this page, add the web part and you can see the output like this. Fill in the details like Email To, CC, Subject, and Body and click on the Send button.

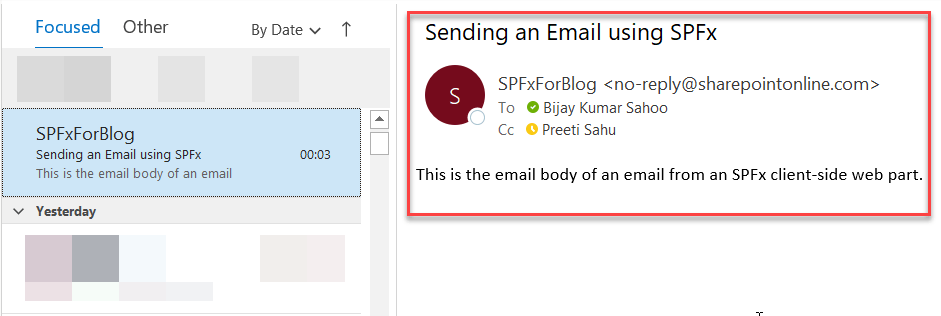
It will show a successful message. And if you check the email, it appears like:

Deploy SPFx send email webpart
Now it is time to deploy the client-side web part to SharePoint Online so that we can use it on the SharePoint site.
If you want to deploy the SPFx client-side web part to your SharePoint Online app catalog site or site collection app catalog, then run the below commands, that will create the .sppkg file under the SharePoint folder in the SPFx crud operations using react solution.
gulp bundle --ship

gulp package-solution --ship
Once the package got created, simply drag and drop the .sppkg file to the Apps for SharePoint folder in the App catalog site.
Download and use solution
If you want to download and use the solution, then first download the SPFx solution from the below link.
Download spfx send email solution
Then run the below command:
npm iThen you run the below command to test the solution.
gulp serveIf you want to create a .sppkg file then run the below commands:
gulp bundle --ship

gulp package-solution --ship
This is how to send email in a sharepoint framework client-side web part.
You may also like the following SPFx tutorials:
- Display SharePoint list items using SPFx
- SPFx Fluent UI Basic List Example
- SPFx fluent UI react dropdown example
- Create and deploy SharePoint Framework (SPFx) listview command set extension
- SPFx SwatchColorPicker Office UI Fabric React Control example
- How to add new webpart in spfx solution
- Create and Deploy SharePoint Framework (SPFx) extension field customizer
- SharePoint Framework (SPFx) Extensions Application Customizer Example
- SPFx Upload File to SharePoint Document Library With Metadata
I am Bijay a Microsoft MVP (10 times – My MVP Profile) in SharePoint and have more than 17 years of expertise in SharePoint Online Office 365, SharePoint subscription edition, and SharePoint 2019/2016/2013. Currently working in my own venture TSInfo Technologies a SharePoint development, consulting, and training company. I also run the popular SharePoint website EnjoySharePoint.com
after downloading the solution, i m not able to open.
and I m getting error on isRequired type…
Property ‘isRequired’ does not exist on type ‘IntrinsicAttributes & IntrinsicClassAttributes & Readonly & Readonly’. Did you mean ‘required’?ts
this._getPeoplePickerItems(Items, “CcEmail”)}
showHiddenInUI={false}
principalTypes={[PrincipalType.User]}
resolveDelay={1000}
ensureUser={true}
/>
this does not seem to work
Can we send emails to distribution lists by storing them in lists by any chance ?
Please let me know if it possible it will be greatly appreciated …