Do you want to calculate any numbers in Power Apps? To achieve this, you can go through the below complete tutorial. Here we will discuss how to create a simple calculator in PowerApps. Step by step we will build a calculator in Power Apps.
To do any kind of calculations (like Addition, Subtraction, Multiplication, Division), first of all, we need to create a calculator in PowerApps.
The second thing you may think is Can PowerApps do the Calculations? Yes, you can use some formulas not only to achieve the calculations and changes appearance but also to take action. For example, you can set the formula to the Button’s OnSelect property.
PowerApps Create Calculator
To create a calculator in the simple canvas app, follow the below steps:
Step – 1:
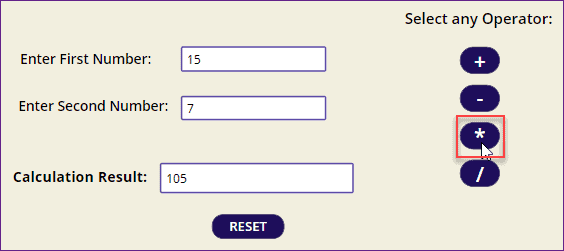
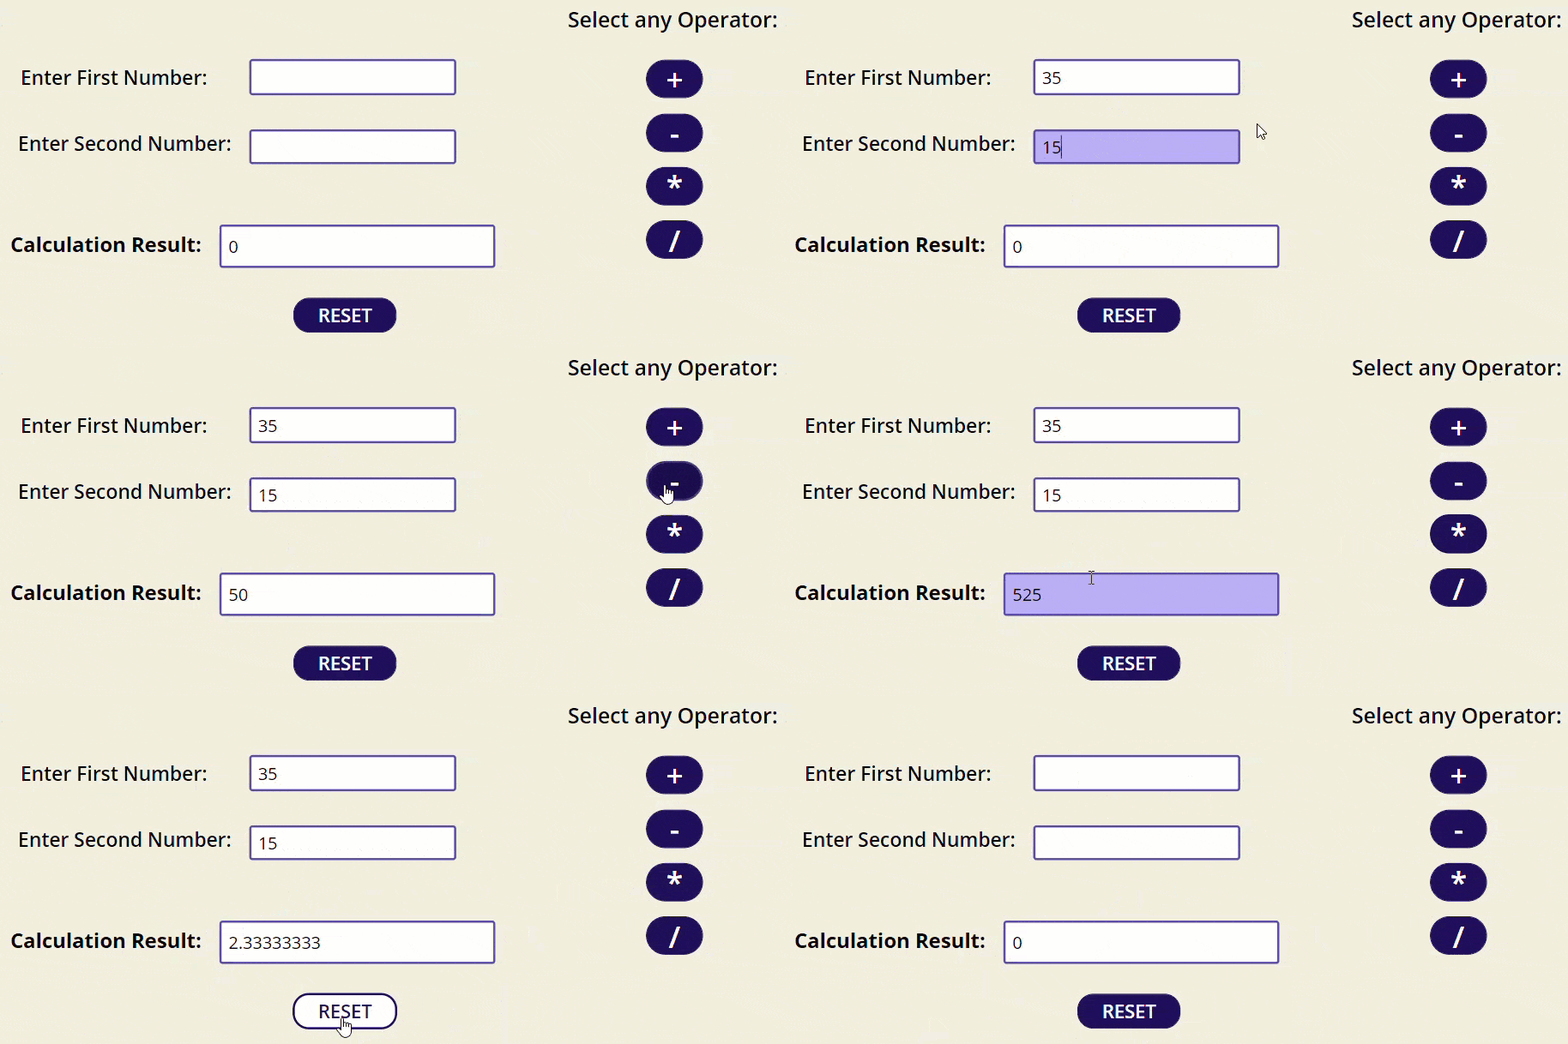
- The below screenshot represents a simple calculator that I have created in the PowerApps Canvas app. This PowerApps Calculator calculates any digit by using different types of operators like Addition (+), Subtraction (-), Multiplication (*), and Division (/).
- Here in this example, you need to enter any two digits within two text input control and then you will select one operator that you want to perform. The calculation result will display in another text box control.
- Similarly, if you want to reset the entered digits, then you can click on the RESET button as shown below.
Step – 2:
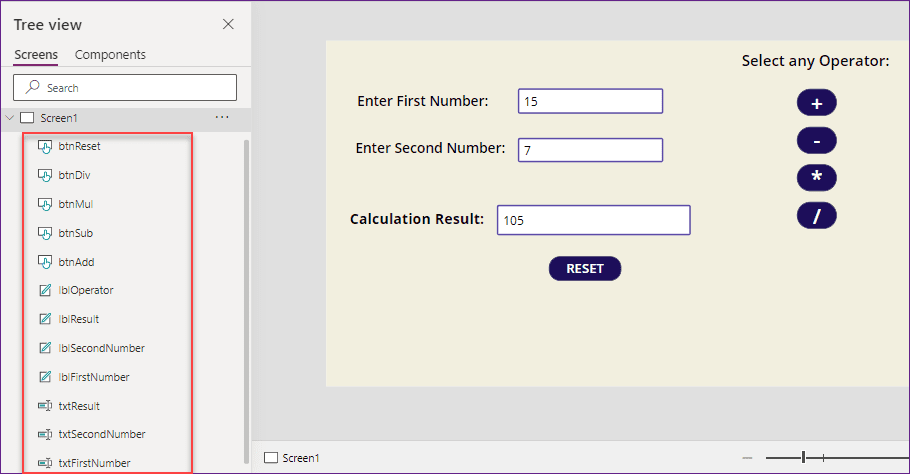
- To make this, you need to insert these below input controls and rename them as shown below.
- txtFirstNumber = This is the text input control where the user will enter the first digit to calculate.
- txtSecondNumber = It is also a text input control where the user will enter the second digit to calculate.
- txtResult = This is the text input control where it will display the calculation result of two digits.
- lbFirstNumber = This is a Label control that displays the string as Enter First Number (on its Text property).
- lblSecondNumber = This is a Label control that displays the string as Enter Second Number (on its Text property).
- lblResult = This is also a label control that displays the string as Calculation Result (on its Text property).
- lblOperator = This label shows the title (Select any Operator) to select any of the operators.
- btnAdd = This is a button control that helps to add any two-digit value when the user will click on it.
- btnSub = This button control helps to subtract any two-digit value when the user will click on it.
- btnMul = This button control helps to multiply any two-digit value when the user will click on it.
- btnDiv = This button control helps to divide any two-digit value when the user will click on it.
- btnReset = This button control helps to clear or reset all the text fields when the user will press on it.
Step – 3:
- Next, select the First Number Text input box and format the field value as Number (go to Properties -> Format -> Select Number).
- Similarly, select the Second Number Text input box and format the field value as a Number like the below screenshot.

Step – 4:
- Then you need to set a variable to both the text input fields (First Number and Second Number). For this, we will use the OnChange property of both the controls.
- Select the First Number Text input control and apply the below code on its OnChange property as:
OnChange = Set(InputNum1,txtFirstNumber)Where,
- InputNum1 = Specify a variable name
- txtFirstNumber = Text input control name where you will enter the first digit
- In the same way, select the Second Number Text input control and apply the below code on its OnChange property as:
OnChange = Set(InputNum2,txtSecondNumber)Where,
- InputNum2 = Specify a variable name
- txtSecondNumber = Text input control name where you will enter the second digit
Refer to the below screenshot.

Step – 5:
Now we will work on the various types of Button controls that I have used to perform any operations. Here, I have used four buttons to perform four operations as:
- Addition (+):
Select the Addition button (+) and set the below formula on its OnSelect property as:
OnSelect = UpdateContext({ResultValue: InputNum1 + InputNum2})Where,
- ResultValue = Context variable name
- InputNum1, InputNum2 = These are the variable names that you have specified on the text input’s OnChange property

2. Subtraction (-):
Select the Subtraction button (-) and set the below formula on its OnSelect property as:
OnSelect = UpdateContext({ResultValue: InputNum1 - InputNum2})
3. Multiplication (*):
Select the Multiply button (*) and set the below formula on its OnSelect property as:
OnSelect = UpdateContext({ResultValue: InputNum1 * InputNum2})
4. Division (/):
Select the Division button (/) and set the below formula on its OnSelect property as:
OnSelect = UpdateContext({ResultValue: InputNum1/InputNum2})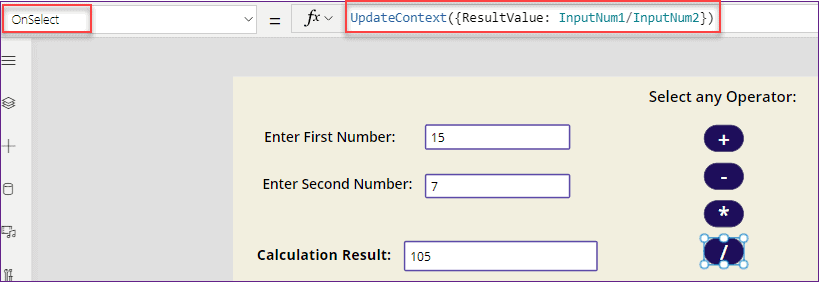
That’s we have put all the formulas on all the buttons.
Step – 6:
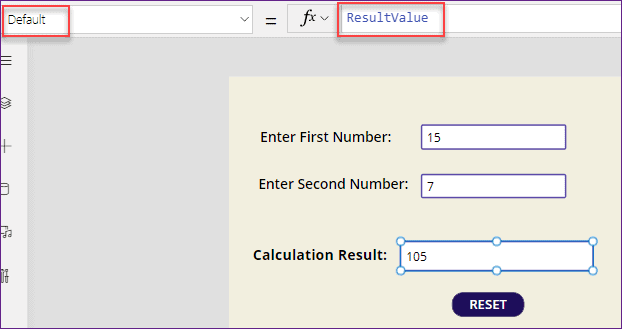
After all, to view the calculation result in the Result box, we need to set the created context variable to it’s Default property as:
Default = ResultValueIn the Calculation Result box, the user can view the output of two digits.
Step – 7:
At last, to clear the input fields, We will apply the below formula on the RESET button’s OnSelect property as:
OnSelect = UpdateContext({ResultValue: 0});
Reset(txtFirstNumber);
Reset(txtSecondNumber);
Reset(txtResult)
Where,
txtFirstNumber, txtSecondNumber, txtResult = Text input control names

Step – 8:
- Now save and preview the app. Enter any digit in the first number and second number text boxes, and select any operator to calculate. The calculate result will display in the result text box as shown in below.
- Once you will click on the Reset button, then all the fields will get clear.
Also, you may like these below PowerApps Tutorials:
- Power Apps Rating Control – How to use
- Power Apps Slider Control
- Power Apps Gallery Pagination
- Power Apps Data Table – Complete tutorial
- Migrate PowerApps from one tenant to another
- Power Apps Export Import Control – How to use
- Power Apps PDF Viewer – Complete tutorial
- How to use date time picker in PowerApps
- Power Apps Gallery Control – Helpful tutorial
- PowerApps Dropdown Gallery + Examples
- Power Apps Display SharePoint List Items – 5 Ways
- PowerApps Filter SharePoint List (21 Examples)
- Power Apps Dropdown Control – How to use
- Power Apps List Box Control – Complete tutorial
- PowerApps Container Control – Complete tutorial
- PowerApps Weather
In this PowerApps Tutorial, We discussed how to create a simple calculator in the PowerApps Canvas app.
I am Bijay a Microsoft MVP (10 times – My MVP Profile) in SharePoint and have more than 17 years of expertise in SharePoint Online Office 365, SharePoint subscription edition, and SharePoint 2019/2016/2013. Currently working in my own venture TSInfo Technologies a SharePoint development, consulting, and training company. I also run the popular SharePoint website EnjoySharePoint.com
Very well explained. All the articles are useful. must read and follow.